
Do you find yourself endlessly flipping through hair scrunchie designs, but you don’t know how to sew? Here are DIY no sew hair scrunchies to make without sewing.
From scrunchies with DIY scarf style to bow tie design for a classic ponytail this step-by-step tutorial has you covered. I’ve included photos and detailed description of each step for you to easily follow along.
Whether you use old scarf, a spare fat quarter or use leftover fabric scraps from a previous project, be creative and have fun with this easy no sew project!
You will love making these DIY no sew hair scrunchies because…
- With one scarf, you will make 3 different scrunchies!
- Learn how to make scrunchies without using hot glue or regular fabric glue.
- Master using iron on tape to close the seams a give a clean finish.
- Perfect beginner level DIY project that takes less than 10 minutes.
- No sewing pattern required!
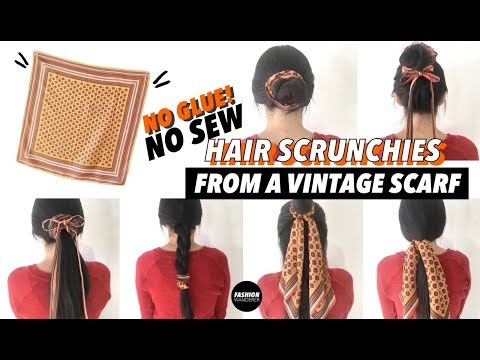
The scarf that I used for this tutorial is vintage style with subtle geometric patterns mixed with a stripe print border design. I had fun using every corner to make this collection of unique scrunchies.
Follow the simple instructions and learn how to refashion any fabric into DIY scrunchies today.
If you enjoy this no sew projects, then consider trying these no sew t-shirt refashion projects. They are straight forward beginner project ideas that are fairly easy to execute.
Have fun upcycling your clothing collection without sewing and learn to master no sew techniques that quickly transform old clothes into wearable style and current trends.
Why upcycle a vintage scarf into a DIY no sew scrunchie?
Retail stores are filled with hair scrunchies made using a variety of fabrics and materials like velvet, sequins, cotton and silk. The hair accessory fashion trend is not going away anytime soon.
From flea markets to local thrift stores, you will find affordable materials that are super fun to play with. Vintage scarves are easy to work with because they feature fun and unique print patterns with a variety of bold colors.
The flare provided by an exciting vintage fabric will lead you to create endless upcycled clothing opportunities. Upcycle vintage fabrics also reduces waste by using secondhand materials as your refashion base.
Feel the excitement and accomplishment when you turn a vintage fabric into a new wearable accessory. Grab your favorite fabric and let’s get started with this no sew project for beginners!
DIY No Sew Hair Scrunchies Materials:
- Vintage Scarf
- 1/4” Elastic Band
- 1/4” Fusible Bonding Tape
- Clear Nail Polish
- Fabric Chalk
- Iron
- Measuring Tape
- Ruler
- Scissors
- Pins
DIY Hair Scrunchies No Sew Tips:
Scrunchies have recently been coming back into the fashion trend, especially the DIY scarf scrunchie within the last year or two. Learn no sew tips to make DIY vintage hair scrunchies so that you are able to create multiple scarf scrunchie styles that you are excited about wearing.
- Cutting: This hair accessory tutorial includes 3 different scrunchies made without a pattern. I recommend using sharp fabric scissors when cutting each piece, and then layout the design to start assembling the parts together. By doing so, you won’t have problem trying to squeeze out any missing pieces later on.
- Hemming: Since this project is no sew, we are going to use clear nail polish to clean finish the edges of the fabric and prevent any fray when you cut the silk or polyester. Test on a scrap before you get started in order to make sure the method works for your fabric.
- Fusible Bonding Tape: Always use dry heat from an iron instead of steaming. Also, make sure the two sides of the fabric cover the tape. As a result, it won’t get stuck on surrounding piece or glued onto the iron when the tape melts.
- Elastic Band: When joining the elastic band, make a strong knot and clean up any extra pieces that are sticking out at the ends. You will have a clean result when covering the elastic band with fabric.
- Pins: Always use pins to gather pieces together when you are dealing with multiple layers of fabric. You won’t need pins while ironing, however it’s a good practice and habit to keep the patterns together.
It’s intimidating to learn sewing without proper tools and experience. These no sew techniques give you fun ways to create 3 different scrunchie designs using1 piece of fabric. Enjoy making each style to pair with your outfit collection, or even share one or two scrunchies with your best friends.
What can I use instead of fabric glue?
Fabric glue is designed for use on textile materials. The purpose is to bond materials together, while still being pliable, durable and washable.
Here are no sew hacks that were executed entirely using fabric glue.
Instead of fabric glue, another alternative is to use fabric tape. With the help of a hot iron, you easily activate the adhesive and quickly attach the fabrics together.
The tape cools and dries in just a few minutes.Afterwards, the garment is wearable, washable and long lasting. If the adhesive loses its strength and begins to peel off, simply cut a small piece of bonding tape to insert in between the layers, and then reattach by applying heat with a hot iron.
What is fabric tape used for?
Fabric tape is made from cotton and contains adhesive properties. Bonding tape is sold as a roll, and is really easy to cut, heat and attach fabric together.
Fabric bonding tape is useful in many craft projects like no sew, gift-wrapping, card making and home décor. In addition, fabric tape is used in these no sew diy vintage hair scrunchies.
How do you use fabric tape adhesive?
Fabric tape adhesive can be used on a variety of fabrics including cotton, leather and denim. The vintage scarf used in this tutorial is silk, but I recommend exercising caution when using delicate fabrics like lace and silk.
Simply measure, cut, peel and stick. The application of adhesive tape is quick and easy. In addition, there is no need to iron or sew.
How do you apply fabric bonding tape?
Fabric bonding tape requires heat to trigger the bonding. Although a hot blow dryer will work, an iron works best to apply a direct heat source.As the material cools, the attachment becomes secure.
If the connection weakens or becomes undone, simply cut a small piece of fabric tape and reapply high-heat to attach.
Can fabric tape be washed?
Fabric tape will withstand washing, drying and won’t leave a residue or damage your clothes. Keep the heat level to a minimum to preserve the integrity of the bond.
However, it’s important to note that the bond is not as permanent as with sewing. Therefore, the seam tends to weaken with persistent washing. Simply cut a small piece for bonding tape and reattach with high heat.
How To Wear DIY No Sew Hair Scrunchie Hairstyles
There are so many fun ways to wear no sew vintage hair scrunchies. From short to medium and long-length hair, choose your favorite casual outfit and let’s pick a matching hairstyle.
These no sew DIY vintage hair scrunchies will look fabulous with your wardrobe collection. Follow this step-by-step hair scrunchie tutorial, you will also add your own personal touch and easily refashion a vintage scarf.
Why not make your own one-of-a-kind no sew DIY vintage hair scrunchies from a vintage scarf. This no sew DIY scrunchie tutorial shows you step-by-step how to upcycle a vintage scarf without using glue.
You will need a few hairstyles after you have completed the 3 different no sew DIY vintage hair scrunchies styles from one vintage scarf! Follow the pictures and examples below so that you can easily recreate these scrunchie hairstyles you must know.
Now lets discuss how to wear the no sew DIY vintage hair scrunchies that you just created. These are the scrunchie hairstyles you must know.
Half-up, Half-down


The half-up, half-down hairstyle you must know and is perfect for medium-length hair. Pull up the top half of your hair just behind the ear and then tie with your no sew DIY scarf scrunchies.
Classic Ponytail


The classic ponytail is excellent for medium and longer-length hair. This classic ponytail is a chic and sleek hairstyle you must know to easily wear with your scrunchie. Use a comb to brush or fingers to pull your hair back tight and fasten with a scrunchie into a classic ponytail.
Topknot


Either tucked into a messy bun or a clean topknot, this is an easy scrunchie hairstyle you must know. To make the topknot work well, you will definitely need longer hair length to gather on top of your head.
Loose Pony


If you have longer-length or thick hair, the loose pony scrunchie hairstyle is for you. Simply pull your hair back behind your neck and loosely fasten your hair with the DIY scarf scrunchie.
Braid


Use a scrunchie to secure your French braid or even a variety of other braid styles. A DIY vintage bow scrunchie makes a hair braid look so unique and feminine. Have fun braiding your hair and be creative with your scrunchie choice.
Low Bun


The low bun is a hairstyle you must know, and definitely works well with medium and long-length hair. Simply brush your hair and loop the hair into a knot. Gently push it back against your head to create the bun shape. Secure it with bobby pins and place any of your no sew DIY vintage hair scrunchies over the bun to finish the hairstyle.


How To Make No Sew Hair Scrunchies
This no sew project for beginners will cover the step-by-step basics for how to make no sew DIY vintage hair scrunchies. The no sew tutorial is easy to follow and the pictures will easily guide you through the process.
Check out the 3 separate diy vintage hair scrunchie project ideas that came from just 1 vintage scarf. By cutting the scarf following the guidelines in this tutorial, you will be able to maximize the material and get enough fabric to make 3 different hair scrunchies.
Materials
- Vintage Scarf
- ¼" Elastic Band
- ¼" Fusible Bonding Tape
- Clear Nail Polish
Tools
- Fabric Chalk
- Iron
- Measuring Tape
- Ruler
- Scissors
- Straight Pins
Instructions
- To get accurate DIY scrunchie measurements, iron the vintage scarf, fold it in half and then pin along all the edges.
- Measure 4” away from the folded line and make a chalk mark. Pin along the 4” mark and then cut the chalk mark line.
- Pin along the cut line and then measure 2½” away from the cut line. Chalk mark another line and pin to secure. Cut along the new chalk line.
Helpful hint: This cut results in two separate pieces. In addition, cut one of the pieces in half. - Cut 2 pieces from the stripe pattern that are 2½” x 6 1/2”.
- Cut 2 pieces from the stripe pattern that are 2½” x 13”.
- Cut 2 pieces from the stripe pattern that are 2½” x 25”.
How To Make DIY No Sew Hair Scrunchie
- The no sew DIY hair scrunchie measurements include 2 pieces of stripe pattern and 2 pieces of dotted pattern that are 2½” x 6½”.
- Cut 2 pieces of iron-on tape that are 6½” long and lay on the right side of each piece.
- Lay the right side of the matching pattern piece on top of the tape and iron for 10-15 seconds.
- Open up the seam and press flat with the iron.
- Take a piece of iron-on tape that is 5” long and lay it along the right side of one piece.
- Lay the right side of the other piece on top of the tape and iron 10-15 seconds.
- Open up the seam and press flat with the iron.
- Take a piece of iron-on tape that is 13” long and lay on the right side of the strap.
- Fold the fabric in half and lightly iron the strap to secure.
- Use a loop turner to flip the strap inside out and iron it flat.
- Grab a 6” piece of elastic band and use a safety pin to go through the strap tunnel.
Pro tip: Don’t forget to hold on to the other end of the elastic band. - Tie a knot with the ends of the elastic band.
- Overlap the ends of the scrunchie and place a small piece of iron-on tape to attach both ends of fabric. Secure it by ironing to complete your no sew DIY scrunchie.
How To Make DIY No Sew Hair Bow Scrunchie
- The no sew DIY bow scrunchie measurements include 2 pieces of the stripe pattern that are 2½” x 13”. The bow straps use 2 pieces of the stripe pattern that are 2½” of 25”.
- For the DIY bow scrunchie straps, lightly fold ¼” at the ends of each bow strap, and iron to make a crease.
- Take a piece of iron-on tape that is 25” long and lay on the right side of the strap.
- Fold the fabric in half lengthwise, and iron the top of the strap.
- Use a loop turner to flip the strap inside out and then iron it flat.
- Overlap one end of both straps and place a small piece of iron-on tape in between. Secure it by ironing.
- For the DIY bow scrunchie, cut a piece of iron-on tape that is 2½” long and lay it on the right side of the bow scrunchie piece. Place the right side of the matching piece on top and iron to secure.
- Next, cut a piece of iron-on tape that is 26” long and lay on the right side of the piece. Fold the piece over lengthwise and iron to secure.
- Use a loop turner to flip the strap inside out, and iron it flat.
- Grab a 9” piece of elastic band and use a safety pin to go through the strap tunnel.
Helpful hint: Don’t forget to hold onto the other end of the elastic band. - Tie a knot with the ends of the elastic band.
- Overlap the ends of the scrunchie and place a small piece of iron-on tape to attach both ends of fabric. Secure it by ironing.
- Tie a bow with the long strap to complete your DIY bow scrunchie.
How To Make DIY No Sew Hair Scarf Scrunchie
- The no sew DIY vintage scarf scrunchie measurements include a piece of polka dot pattern that is 2½” x 13”. The scarf strap uses the center cut polka dot piece that is 8” x 31”.
- Cut a piece of iron-on tape that is 13” long and lay on the right side of the scrunchie piece.
- Fold the fabric in half lengthwise, and iron the top of the strap.
- Use a loop turner to flip the strap inside out, and iron it flat.
- Grab a 6” piece of elastic band and use a safety pin to go through the strap tunnel.
Pro tip: Be sure to hold onto one end of the elastic band. - Tie a knot with the ends of the elastic band.
- Overlap the ends of the scrunchie and place a small piece of iron-on tape to attach both ends of fabric. Secure it by ironing.
- Tie a knot with the scarf tie to complete your DIY vintage scarf scrunchie.
Notes
To prevent the fabric from fraying, use clear fast dry nail polish and lightly brush it along all of the cut edges. Let it dry completely before you continuing.
Recommended Products
As an Amazon Associate and member of other affiliate programs, I earn from qualifying purchases.


What’s your favorite way to upcycle a vintage scarf?
Share your no sew vintage hair scrunchies with me!
#FashionWanderer
Trendy, Affordable Sewing Patterns for All Sizes


Tie Shoulder Jumpsuit Pattern


Palazzo Pants Sewing Pattern


Pocket Overall Romper Pattern


Wrap Maxi Skirt Sewing Pattern


Tie Back Top Sewing Pattern
Stella
Tuesday 31st of March 2020
Cool thanks
Soon Joo Uh
Saturday 11th of April 2020
Thanks Stella!