
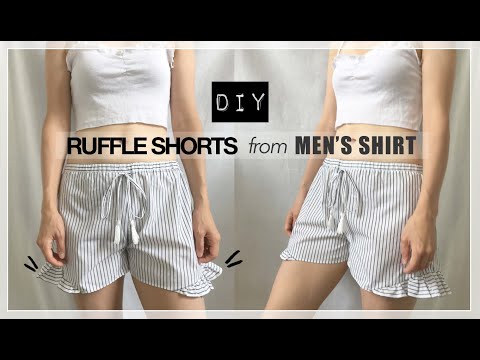
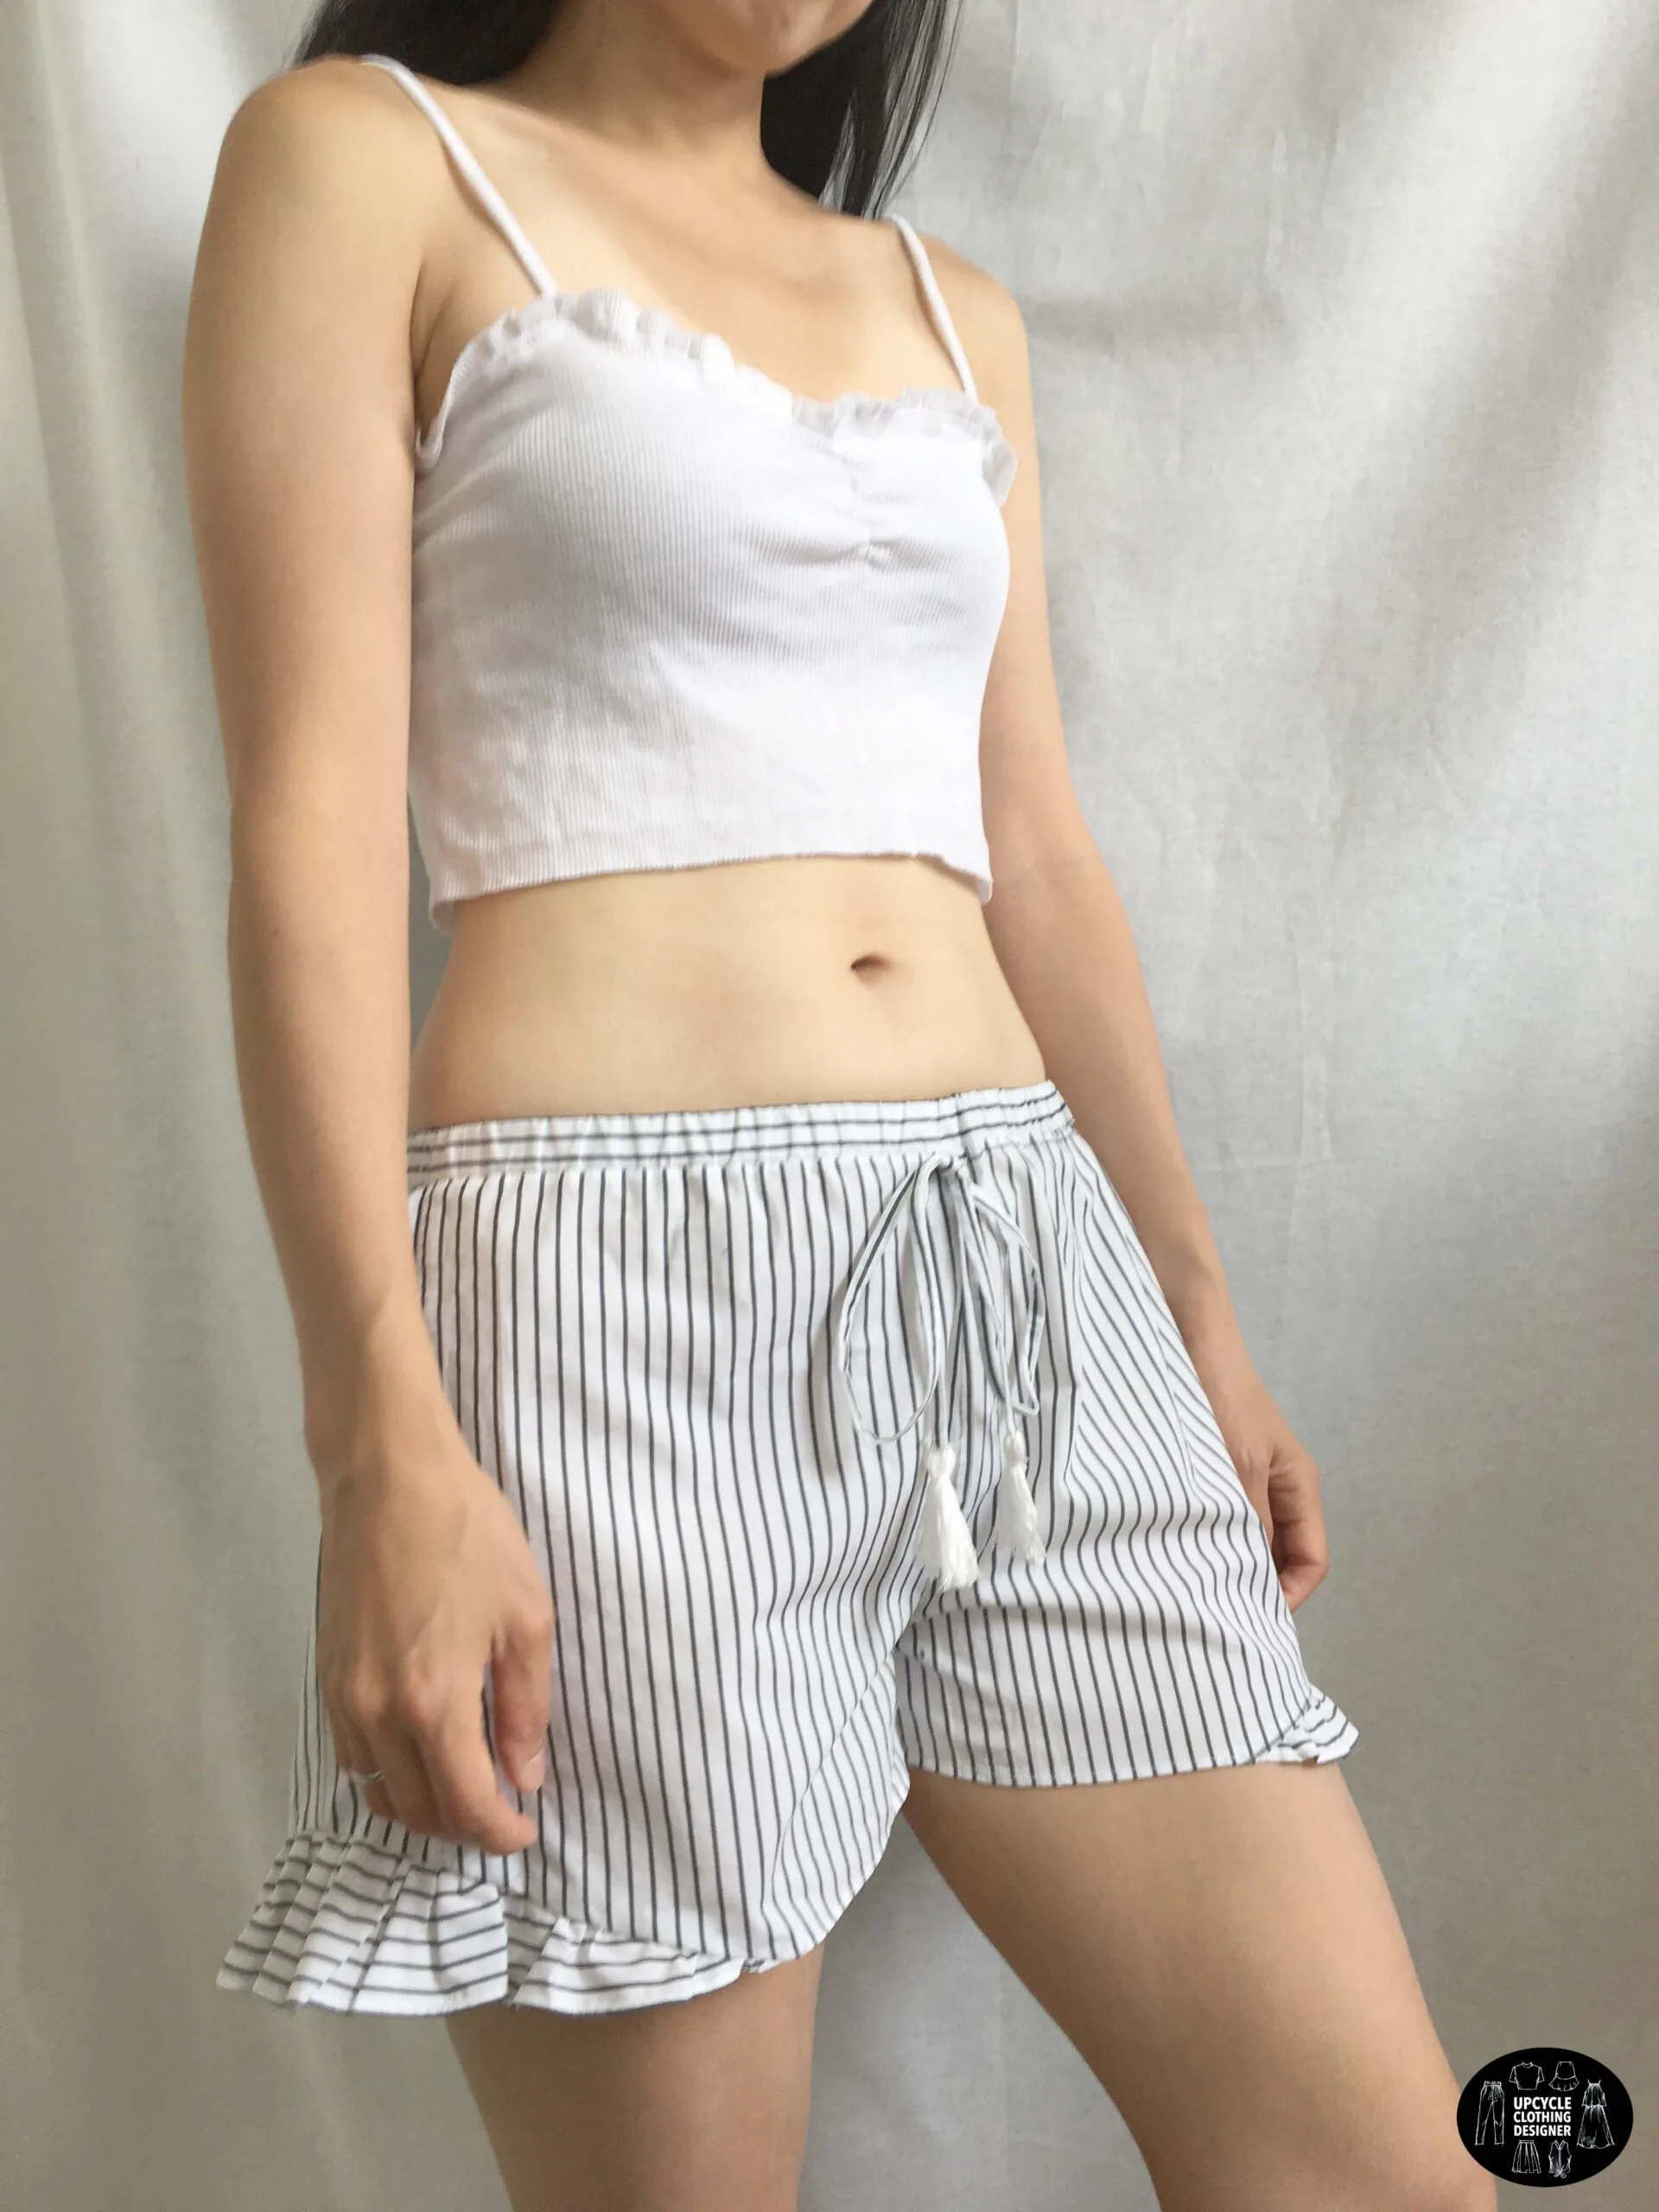
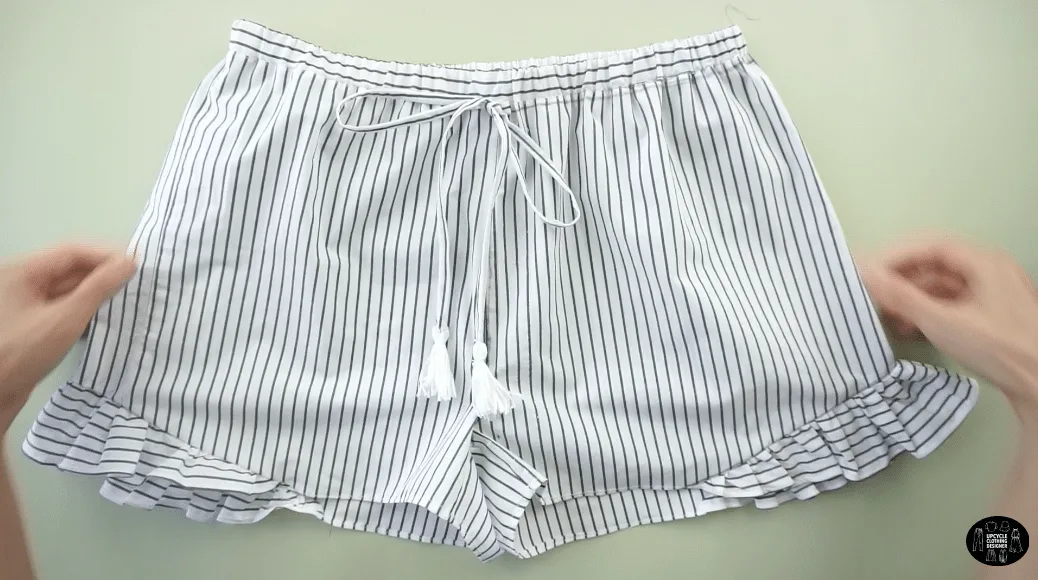
Make your own cute ruffle shorts from men’s dress shirt to prepare for the warmer days during the summer season. The side ruffle insert and drawstring tassel detail gives a casual look to the comfortable DIY shorts.
If you have any debate over what to make and need some creative direction, the men’s dress shirt upcycle ideas include step-by-step tutorials for you to explore. Pick and choose based on which design work best with the color and pattern on the fabrication.
You will love this ruffle shorts from men’s dress shirt because…
- No sewing pattern is needed to make the DIY shorts.
- Learn how to create shorts that fit you perfectly.
- Practice manually distributing shirring evenly throughout the ruffle.
- Create thread tassel at the end of both drawstrings.
- Easy sewing project for beginner level to accomplish.


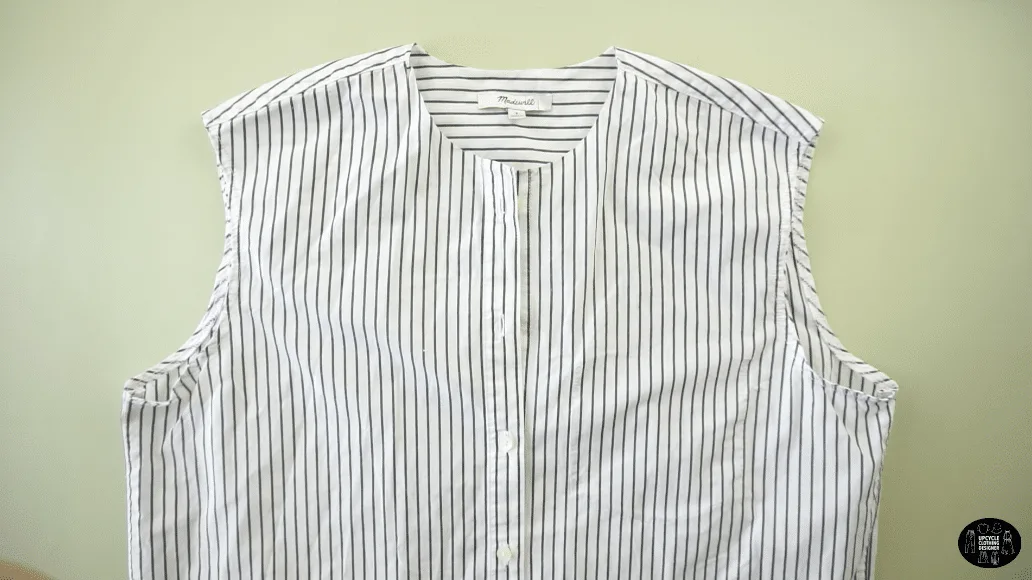
For this project, I used 100% cotton poplin material with navy and white bold pinstripe pattern.
If you have white background stripe shirt to work, don’t be afraid of it being too sheer. The the elastic bunching around the waistline will give enough shirring around the front and back hip area so that you don’t need to add lining inside.
The crisp and rigid surface gives a nice relax structure to the garment. Because the material is non-stretchy fabric, you will instantly notice how easy it is to sew side seams and hemming without experiencing a puckering problem.
A bold pinstripe pattern button down shirt is easy to work with for this upcycle tutorial. Make sure to layout the lines in a vertical formation for the shorts body, as a result it makes it easier to match the stripes along the side seams.
Follow the detailed instructions and step-by-step video to help guide you through the journey of making cute DIY shorts.
How to make ruffle shorts from shirt?
Make sure to wash and dry the men’s dress shirt before proceeding to make DIY ruffle shorts. I recommend ironing every corner before deconstructing the shirt so that the seams and cutlines will be flattened for consistent measurements.
Review the measurement that I put together and adjust according to your size. First of all, you want to see if you have enough fabric in the original shirt to be able to make the ruffle short.
In addition, it’s important to take body measurements and convert the sizing in the tutorial. You want to the DIY ruffle shorts to fit you properly.
The upcycle dress shirt project requires a sewing kit with basic tools and a few sewing skills that will be covered along the way. Grab the button down shirt you pick for this shorts conversion and let’s get started!
DIY Ruffle Shorts From Men’s Dress Shirt Materials:


- Men’s Dress Shirt
- White Embroidery Thread
- Sewing Machine
- Fabric Chalk
- Measuring Tape
- Ruler
- Loop Turner
- Straight Pins
- Scissors
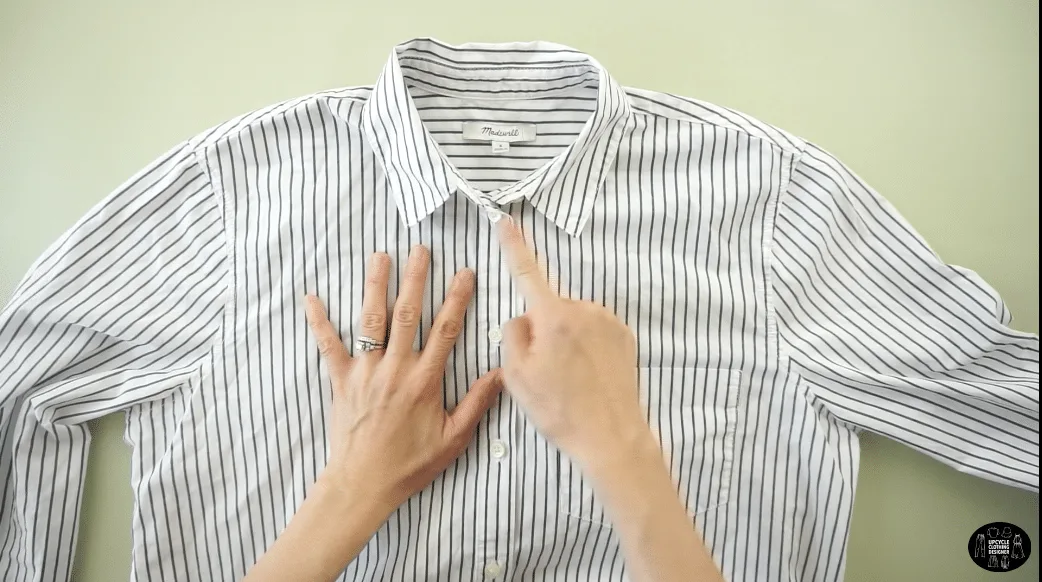
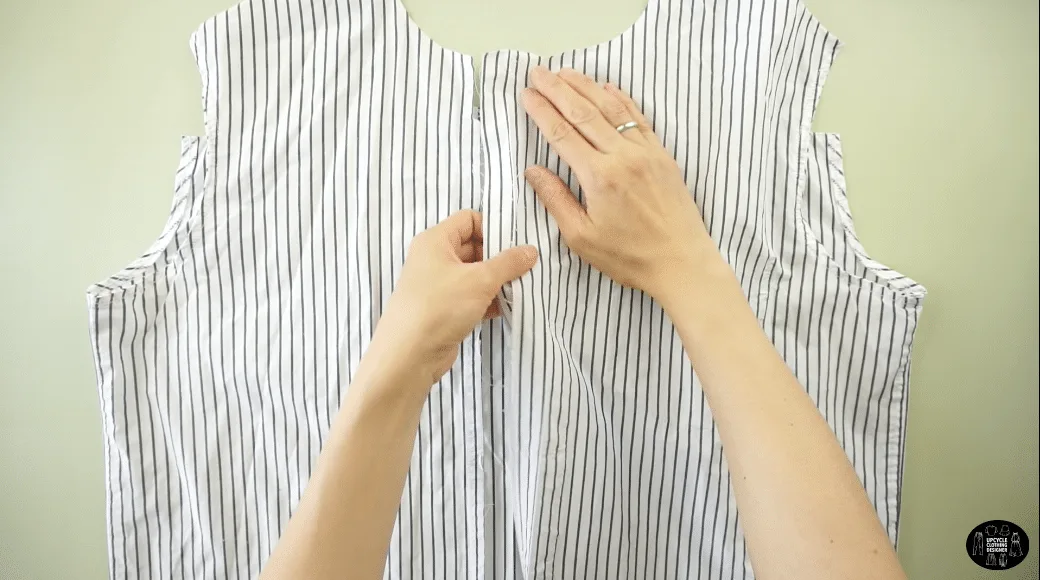
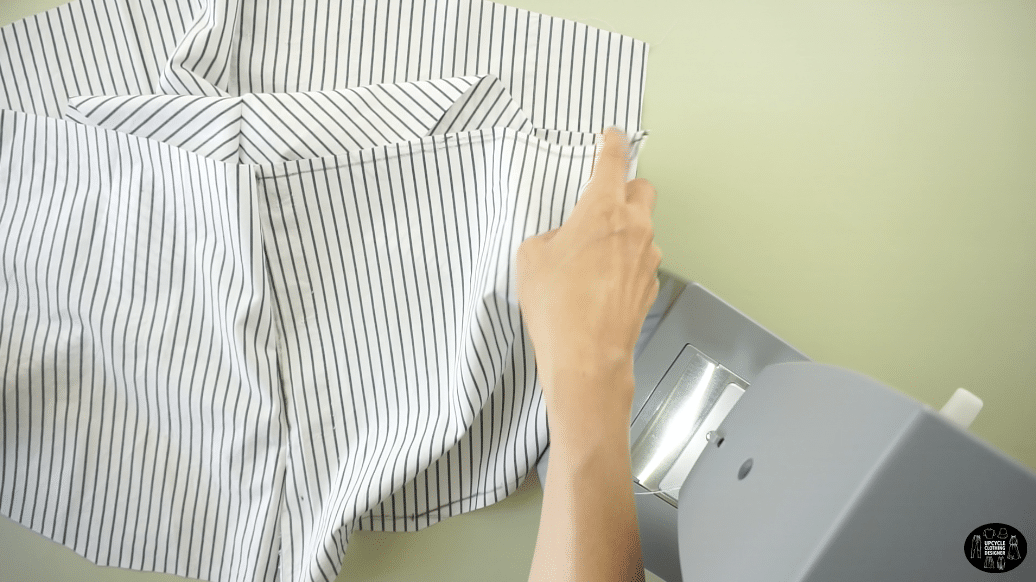
To make ruffle shorts from a men’s dress shirt, detach both sleeves, cut off the collar and remove the pocket square.
Cut both side seams, shoulder seams and across the back yoke.
Remove the buttons and also use a seam ripper to open up the button placket.
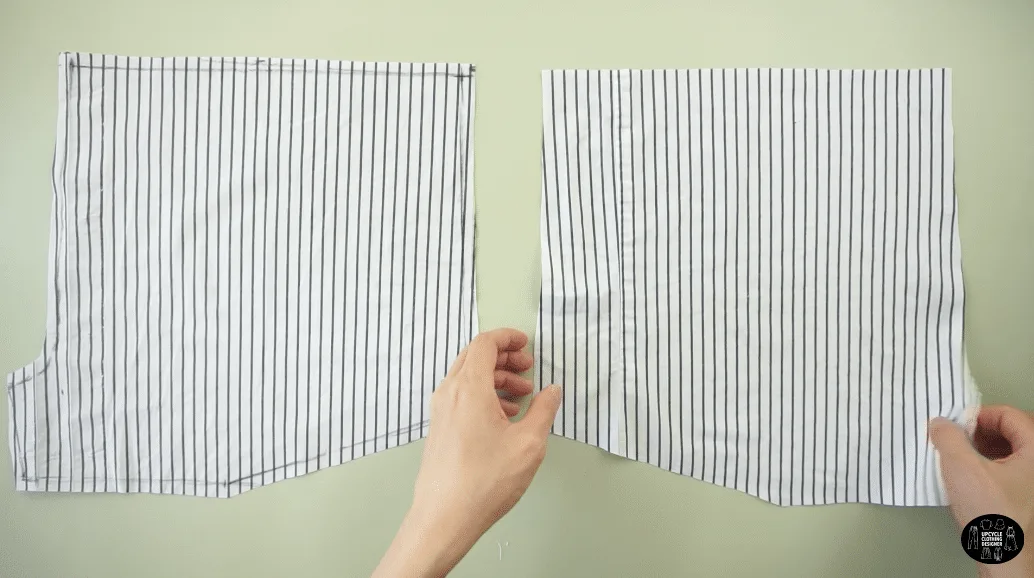
Use the front piece of the original dress shirt to make the front piece of the shorts.
Following the measurements to make the front waistline and front crotch.
Include the placement for the ruffle piece so that you can add ruffles to the leg opening.
To make the other side of the front shorts pattern, copy the front piece onto the other front piece of the original dress shirt.
Use the back piece of the original dress shirt to make the back piece of the shorts.
Following the measurements to make the back waistline and back crotch.
Include the placement for the ruffle piece so that you can add ruffles to the leg opening.
To make the other side of the front shorts pattern, copy the back piece onto the back piece of the original dress shirt.
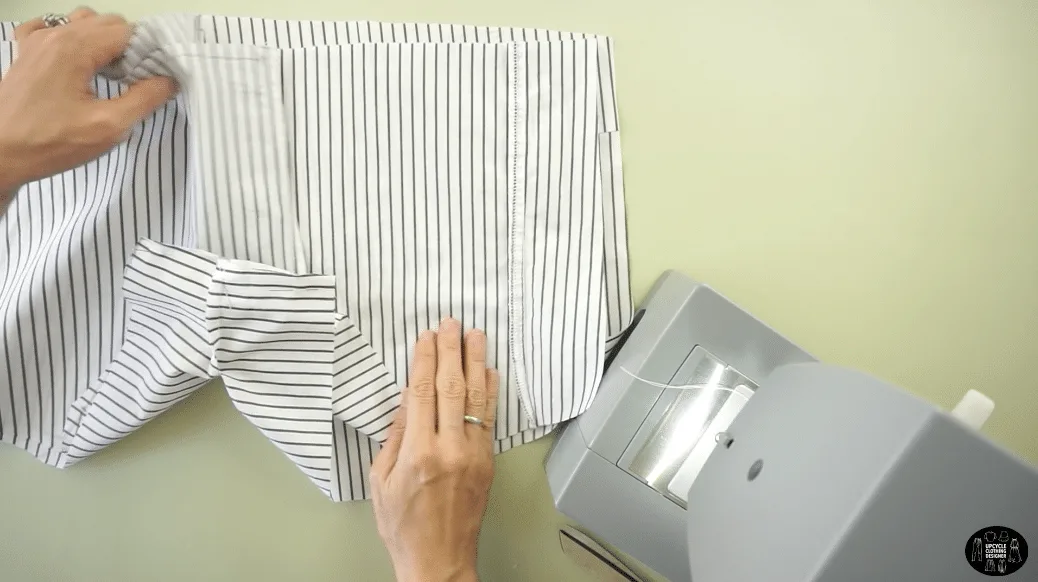
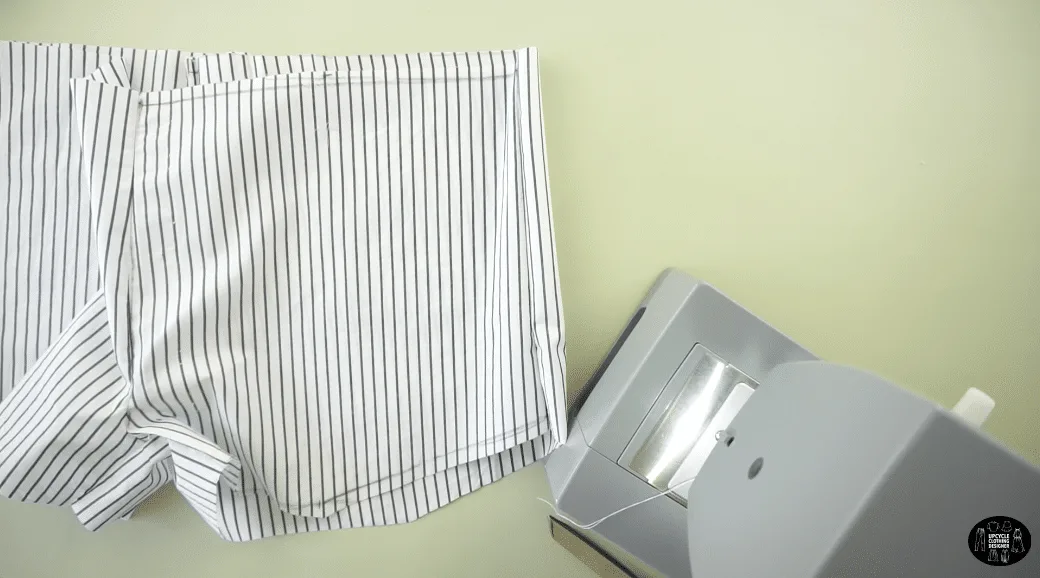
Join the front shorts pieces by sewing the center line with the right sides facing together.
Join the back shorts pieces by sewing the center line with the right sides facing together.
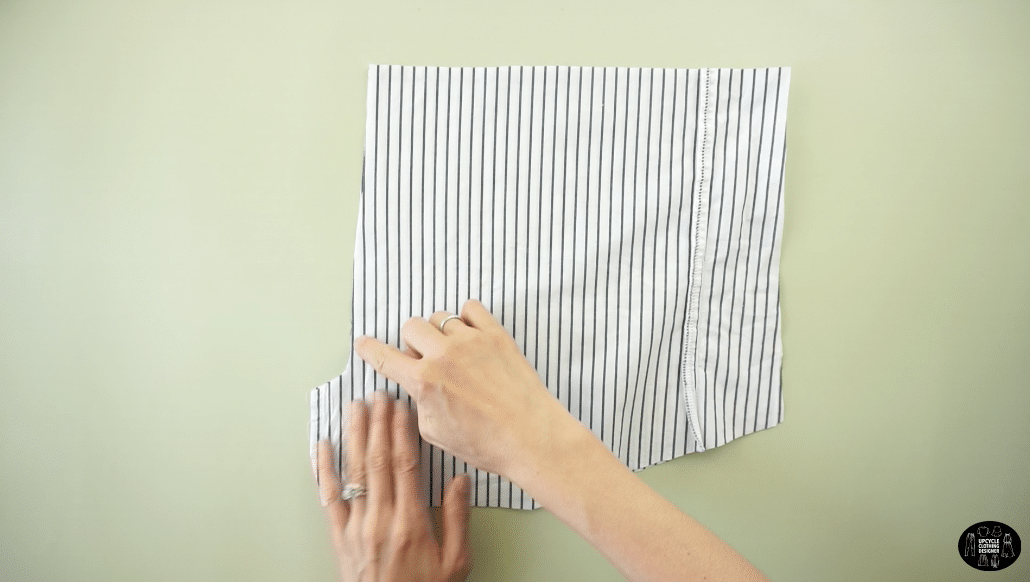
Join the front and back of the shorts by sewing the crotch seam and both side seams with the right side facing together.
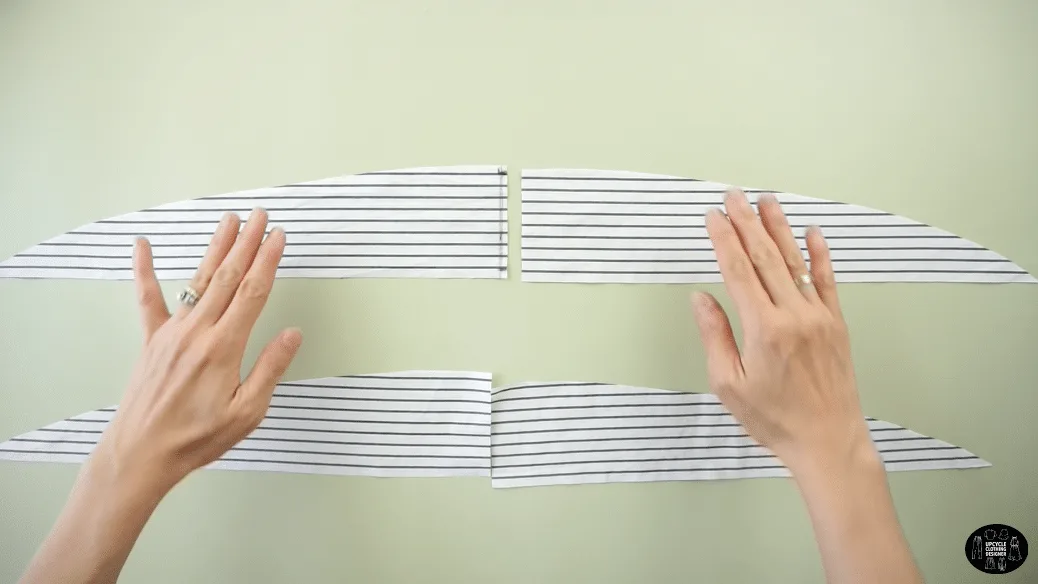
Use the original sleeves from the men’s shirt to make four ruffle pieces.
Join two ruffle pieces by sewing the center line with the right sides facing together.
Use a wide stitch width and topstitch along the curved edge of the ruffle pieces.
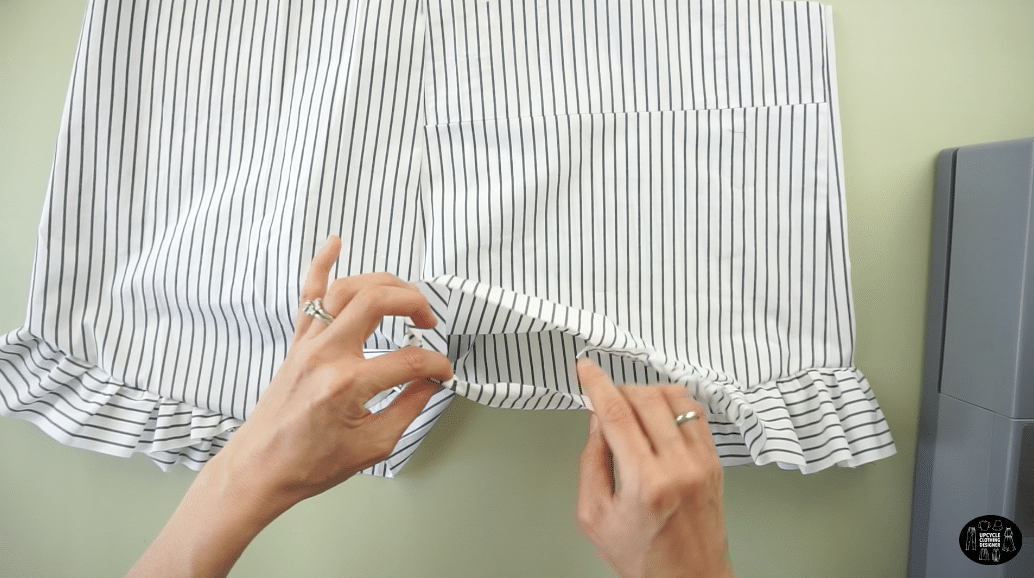
Pull on the back thread to bunch the fabric and make shirring on both ruffle pieces.
Pin the ruffles to the ruffle placement on the leg opening of the shorts, and then sew the ruffles in position.
Double fold ¼” and hem the bottom of the ruffles and leg opening.
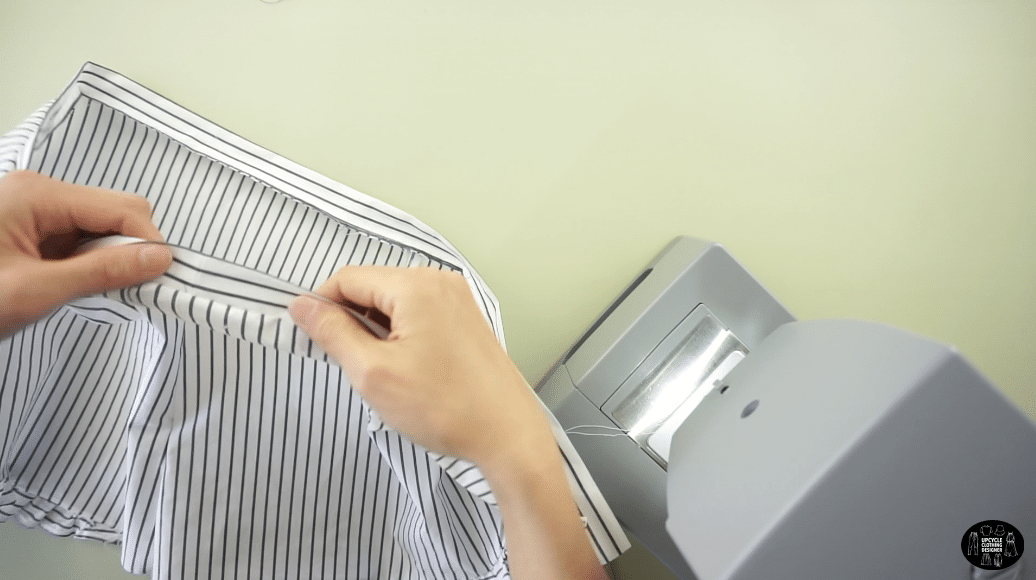
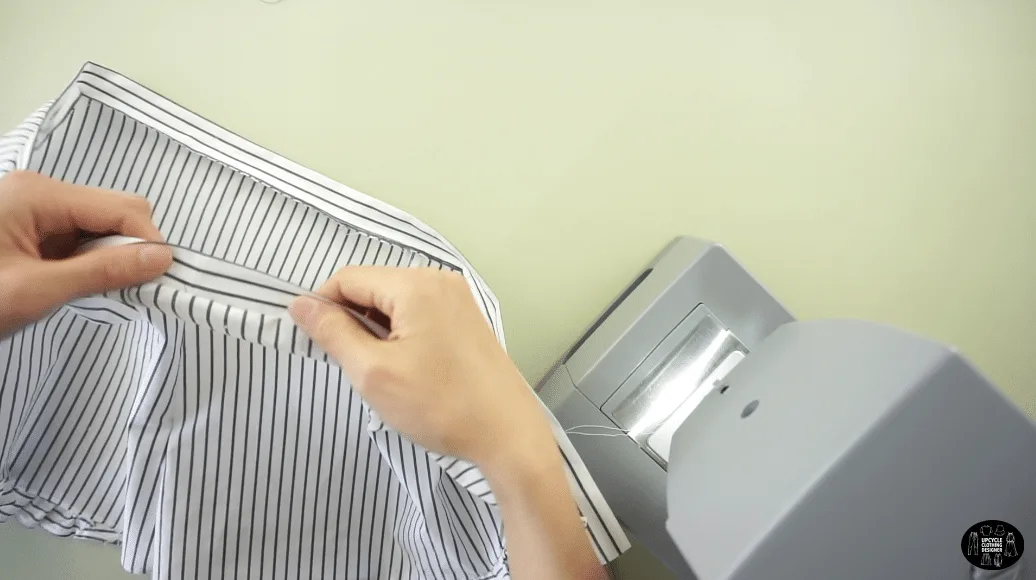
Topstitch the waistband to the waistline of the shorts and slide a piece of ½” elastic band through the tunnel.
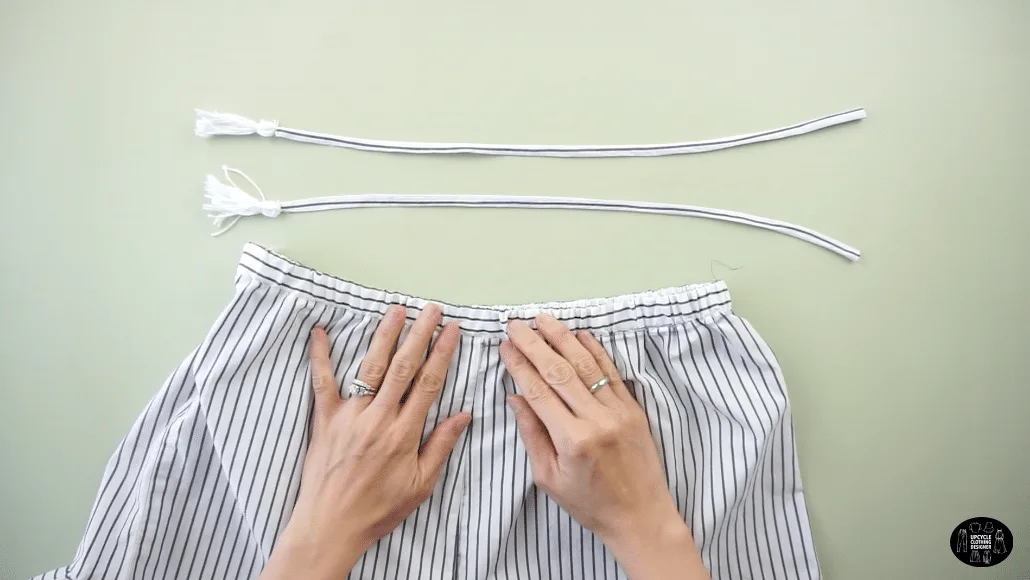
Use the remaining scraps to make the front bow tie straps.
Make the tassel trim embellishments with a string of embroidery floss.
Use a needle to attach each tassel trim to the ends of the front bow tie straps.
Attach the straps to the front center waistband of the shorts to complete the ruffle shorts from men’s dress shirt tutorial.


DIY Ruffle Shorts Sewing Tips


Upcycled clothing requires specific assembling steps and different sewing tips to accomplish brand new clothes from old clothes. In order to make process of making a dress shirt into short smooth and easy to accomplish, I’ve put together sewing tips that will help you to avoid any unnecessary mishaps.
Check each sewing tip before you get started making the DIY ruffle shorts:
- Sewing tips: When sewing shorts, keep a ½” side seam allowance to help you widen or narrowing the hip area while fitting. For the curved waistline, make a ¼” width seam allowance.
- Stitches: In this shorts making tutorial, I used regular 3-3.5 length straight stitch and overlock/zigzag stitch for a clean finish along the inside side seam. Always test your stitch tension and stitch length on a scrap to see if the settings work well on the fabric.
- Thread: The shirt that I’m working with is 100% cotton, so I used 100% cotton all-purpose thread. Double check the shirt content on the care label inside of the shirt. If you have cotton/polyester blend thread, you can also use that for this project.
- Elastic: The easiest way to sew elastic on the waistband of shorts is by making a casing or waistband. Then, slide the elastic through the tunnel. Slide the elastic band around the waist, overlap about ¼” and zigzag stitch to join the waistband. Lastly, close the waistband tunnel for a clean finish.
- Functional drawstring: If you want the drawstring to be functional, simply attach the side seam of drawstring inside the waistband. Create a small buttonhole in front center waistband to release the string outside to make adjustments.
- Thread tassel: I add a cute thread tassel to the ends of drawstring to give a boho look to the DIY ruffle shorts. Wrap embroidery thread around two fingers about 15 to 20 times. Slide the fingers out and tie the ends of the tassel with additional thread. Tighten and make a knot, then cut the other ends of the loop and evenly trim the ends of the tassels.
More clothes to make from men’s dress shirt sewing project for your next DIY fashion:

How To Make Ruffle Shorts From Men’s Dress Shirt
Deconstruct and re-assembling an old button-down shirt into cute DIY ruffle shorts. The entire process is mesmerizing and rewarding when you see the complete a garment that looks totally different than the original.
Explore your creativity and add a personal touch by incorporating buttons or adjusting the ruffles. Take time while sewing the ruffle shorts from men’s dress shirt and enjoy every stitch you make!
Materials
- Men’s Dress Shirt
- White Embroidery Thread
Tools
- Sewing Machine
- Fabric Chalk
- Measuring Tape
- Ruler
- Loop Turner
- Straight Pins
- Scissors
Instructions
- For this ruffle shorts from men’s dress shirt tutorial, start by deconstructing the original button down shirt.

Detach both sleeves, cut off the collar and remove the pocket square.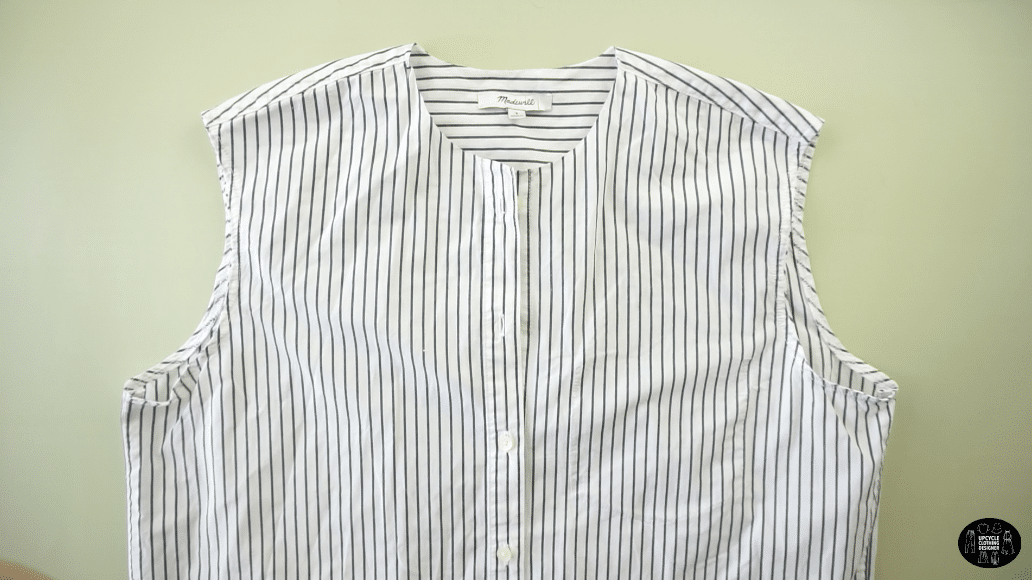
Then, cut along both shoulder seams, side seams and also across the back yoke.
Use a seam ripper to remove the buttons and open up the button placket.
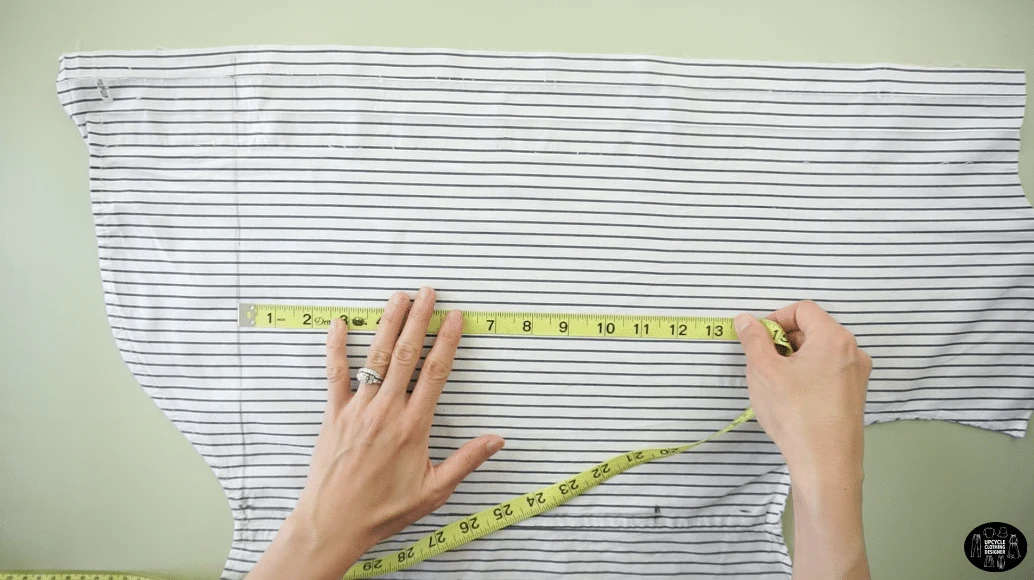
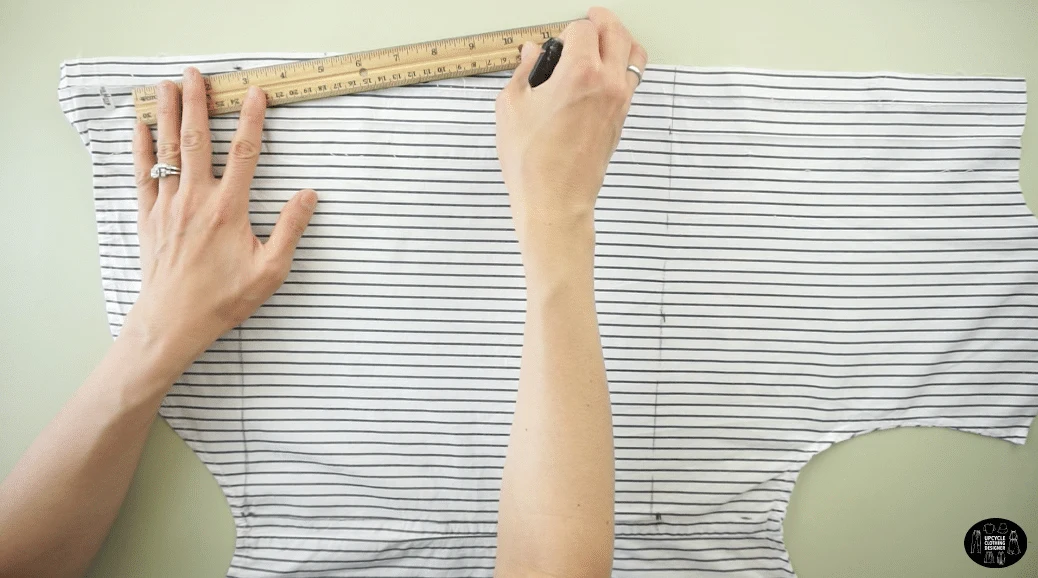
- To make the front piece of the shorts, use the front piece of the original dress shirt.
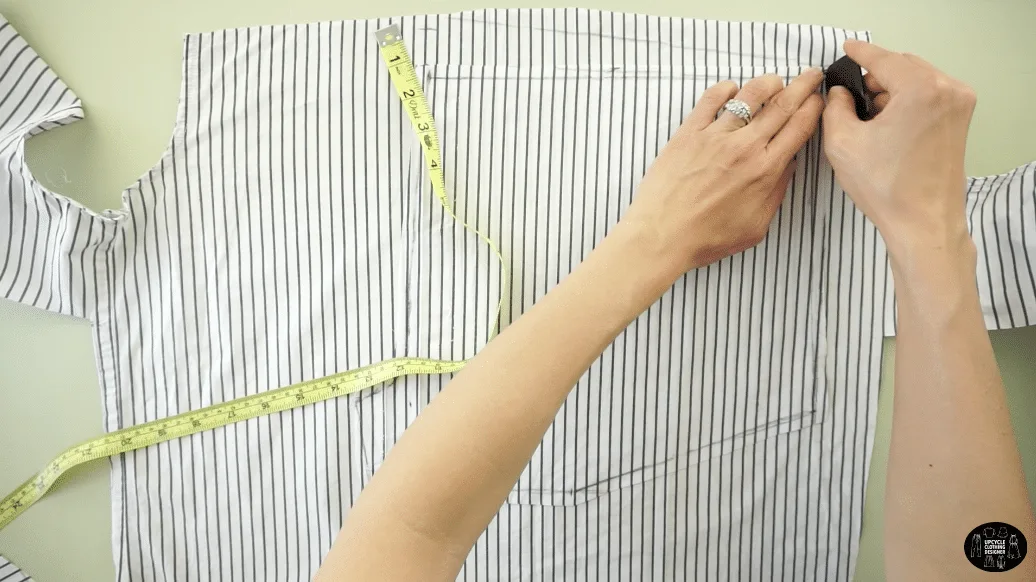
Measure 12½” away from the center line and square off the bottom edge by drawing a straight line across. - To make the waistline, measure 11½” up from the bottom edge;
draw a straight line across.
- To make the front crotch, measure 2¼” away from the bottom edge along the center line.
Draw a straight line with a slight ½” angle.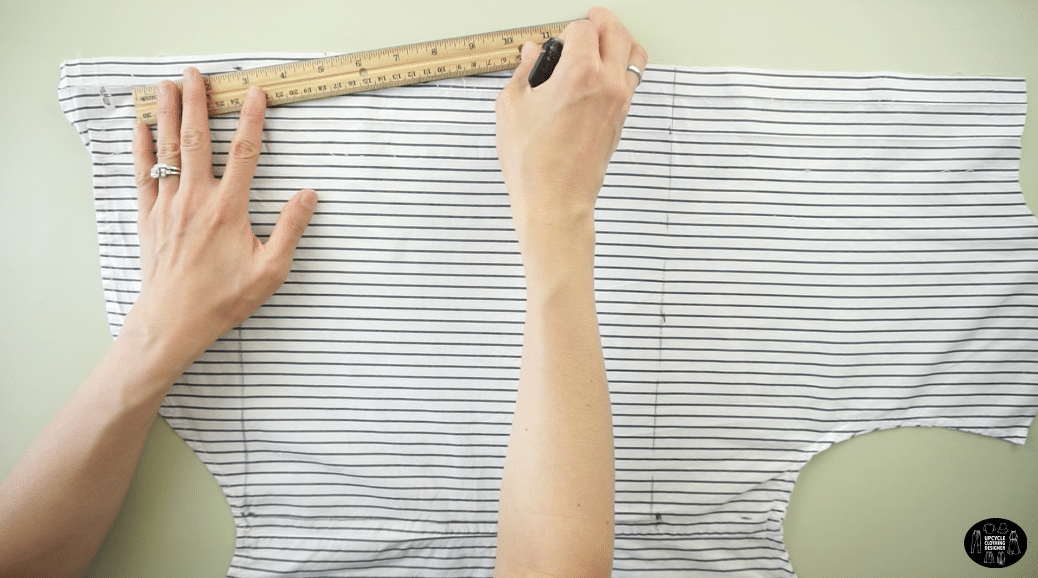
Measure 1½” away from the top of the front crotch;

and then 3” up from the mark.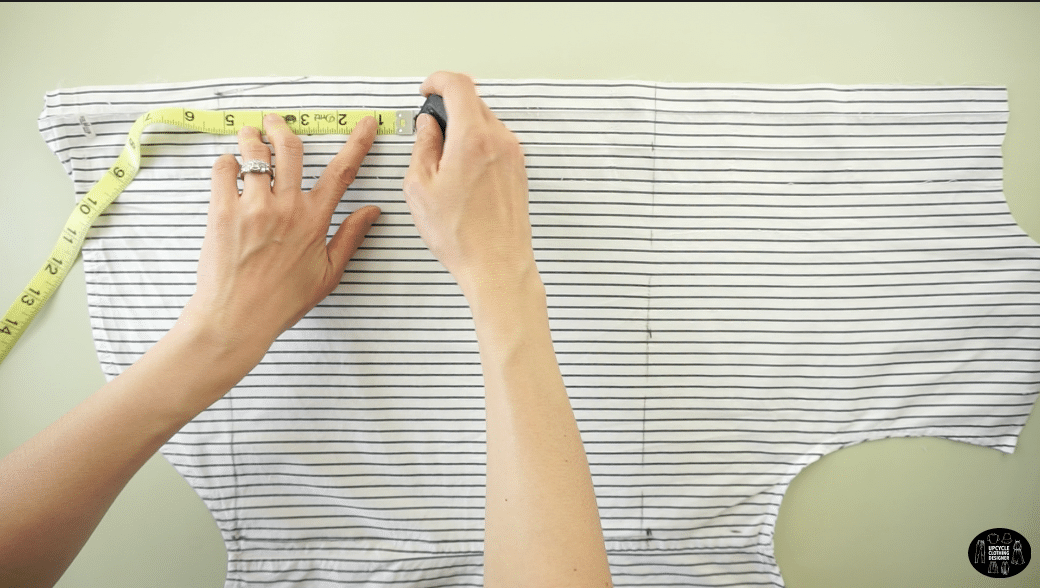

Measure 2” away from the center line along the waistline;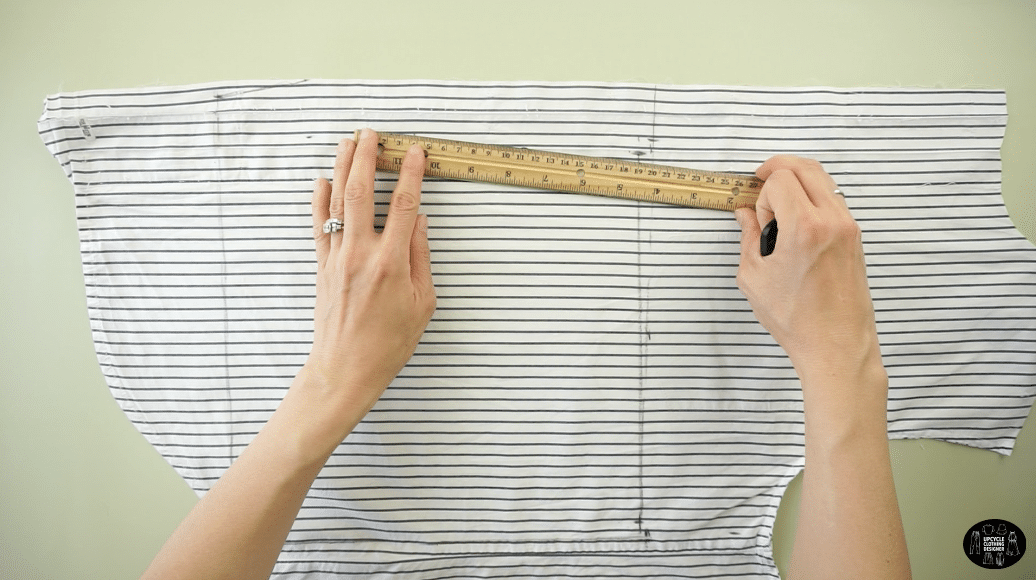
then draw a line connecting the points for the front crotch.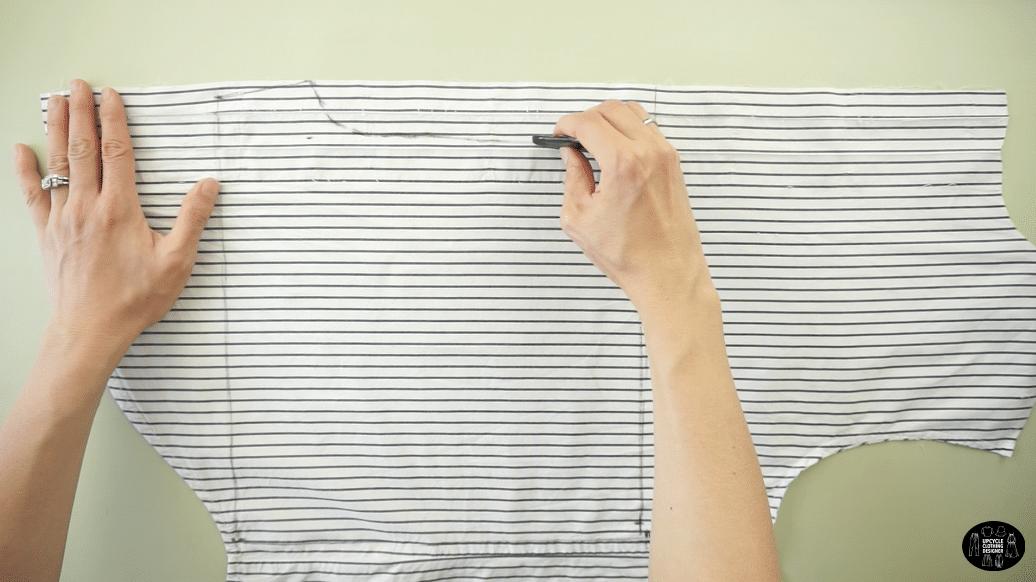
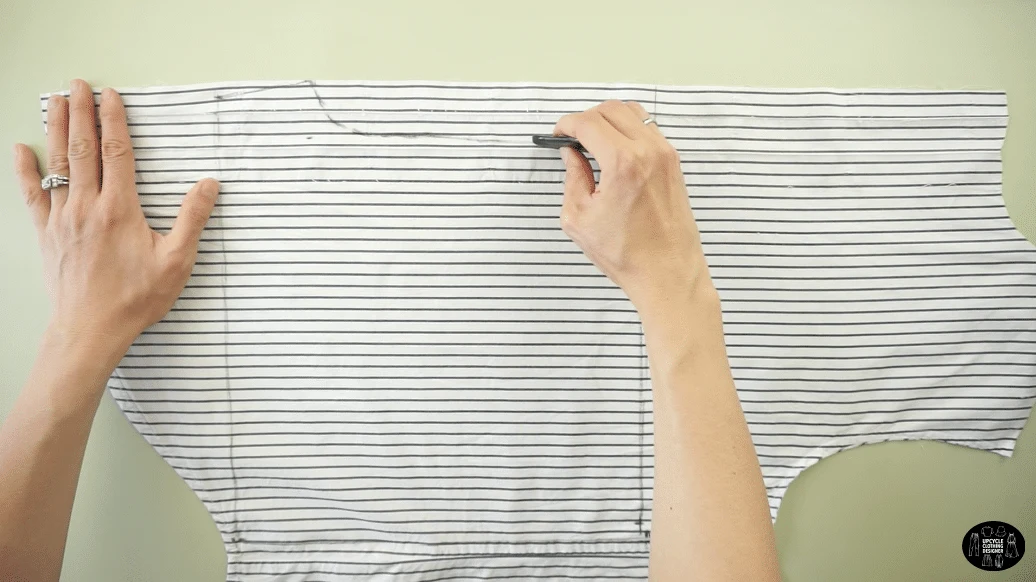
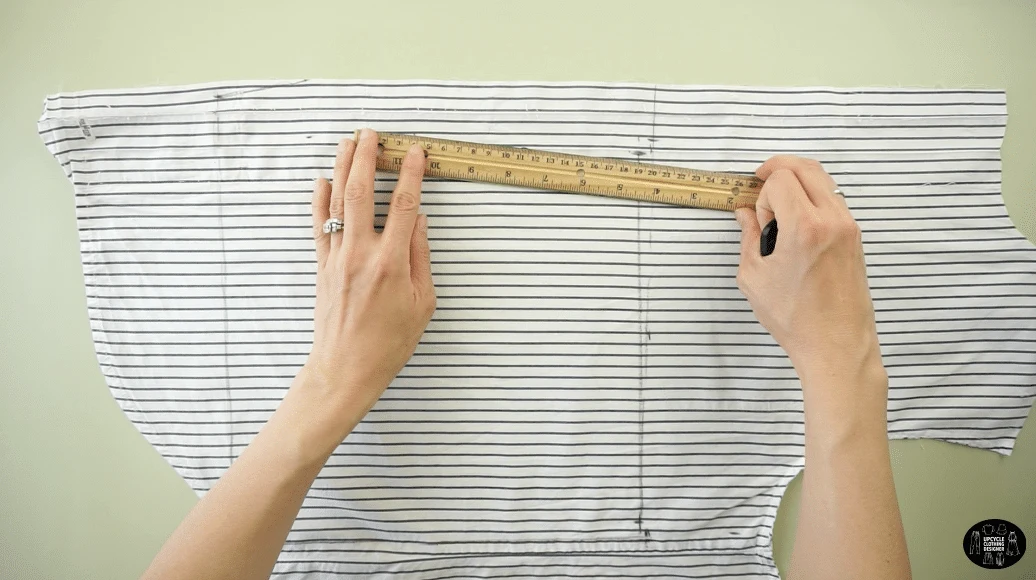
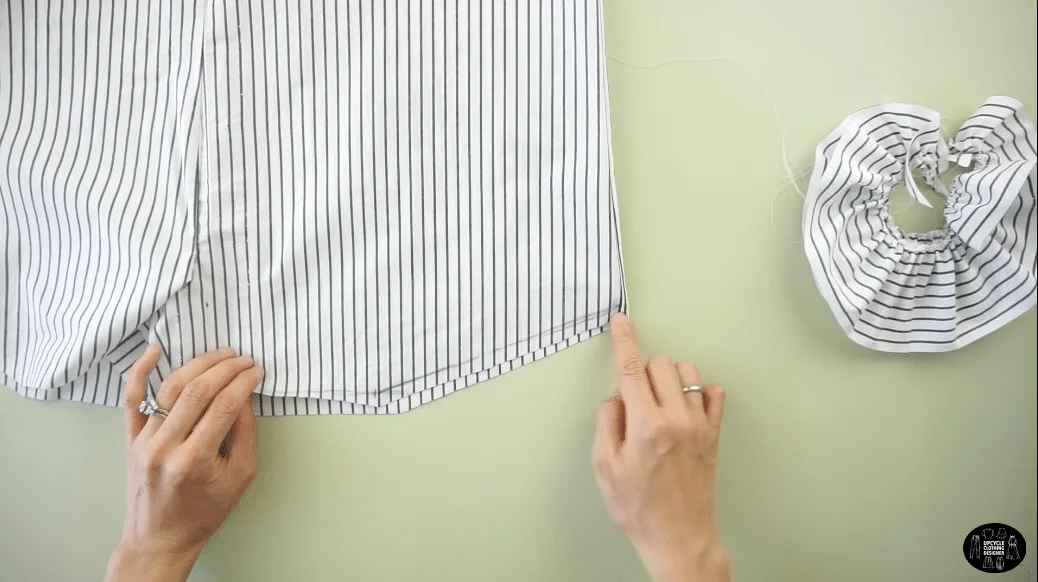
- To make the front ruffle placement, measure 2¼” away from the bottom edge along the side seam;
and measure 6½” away from the side seam along the bottom edge.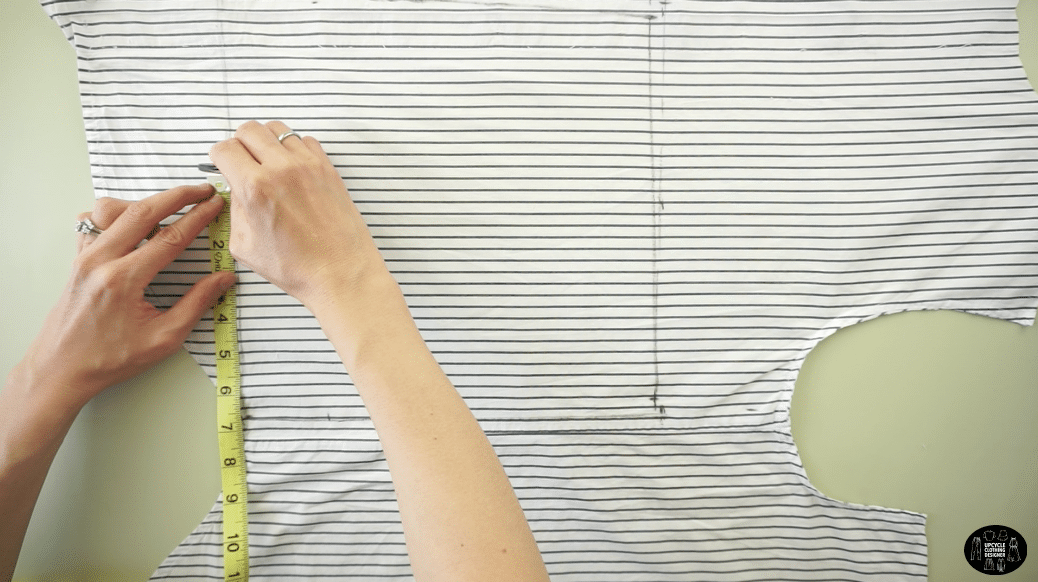
Draw a straight line to make the position for the ruffle piece.

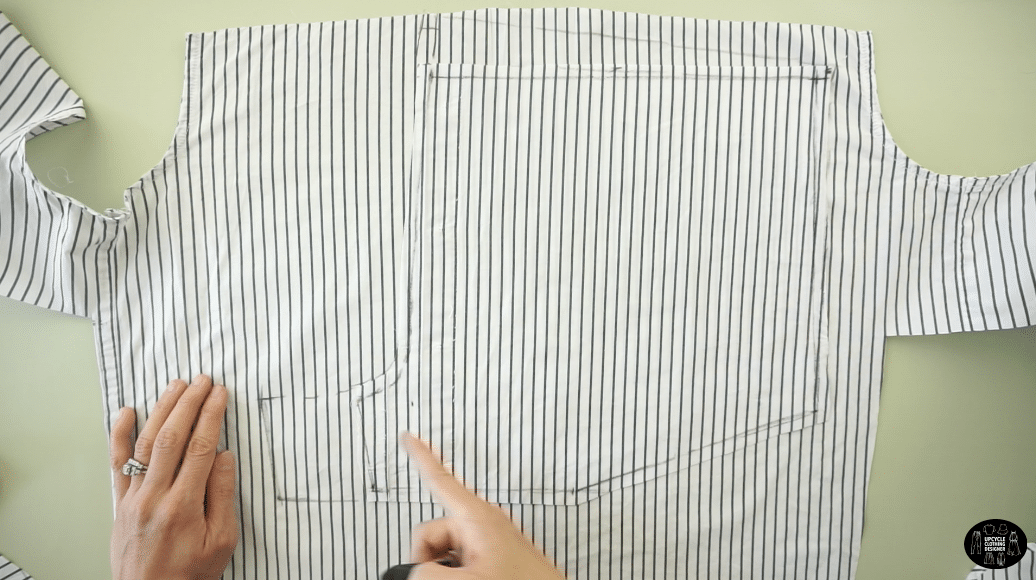
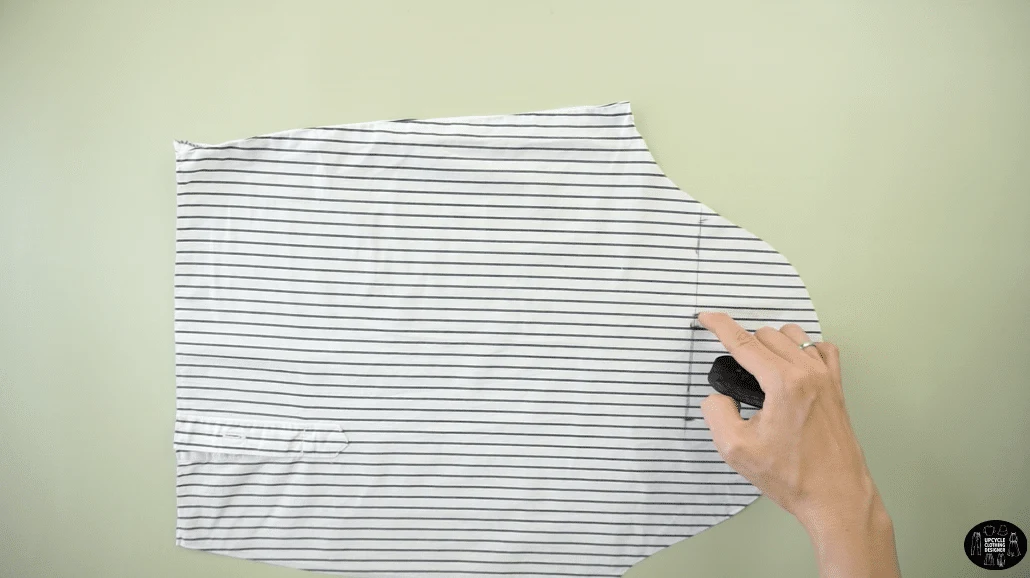
- Cut along the lines to make the front piece of the shorts.
Copy the front piece onto the other front piece of the original dress shirt.

Pin to secure, and trace the front piece pattern.
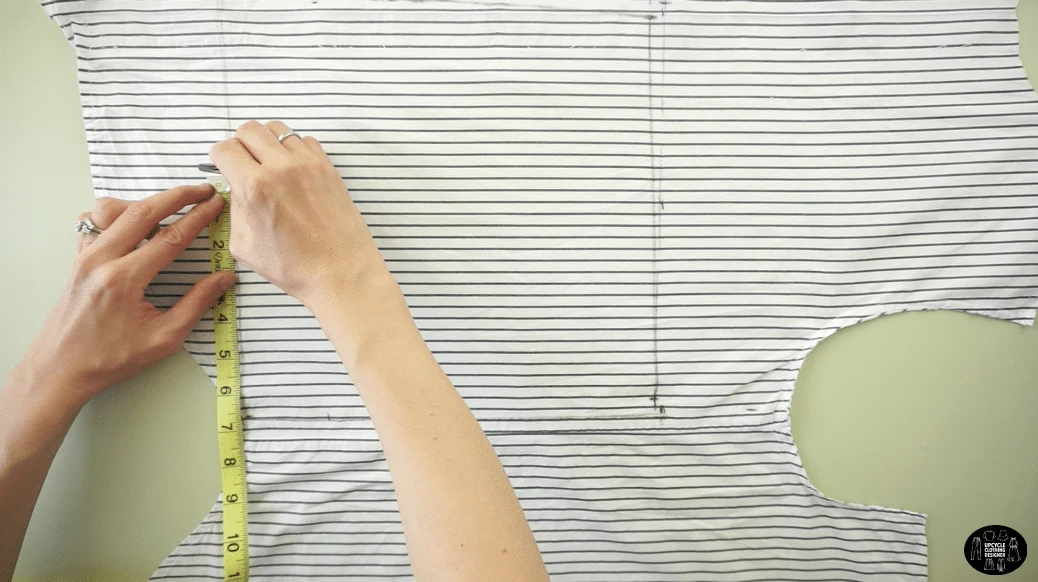
- To make the back piece of the shorts, use the back piece of the original dress shirt.
- To make the backside waistline, add 1” to the center line.
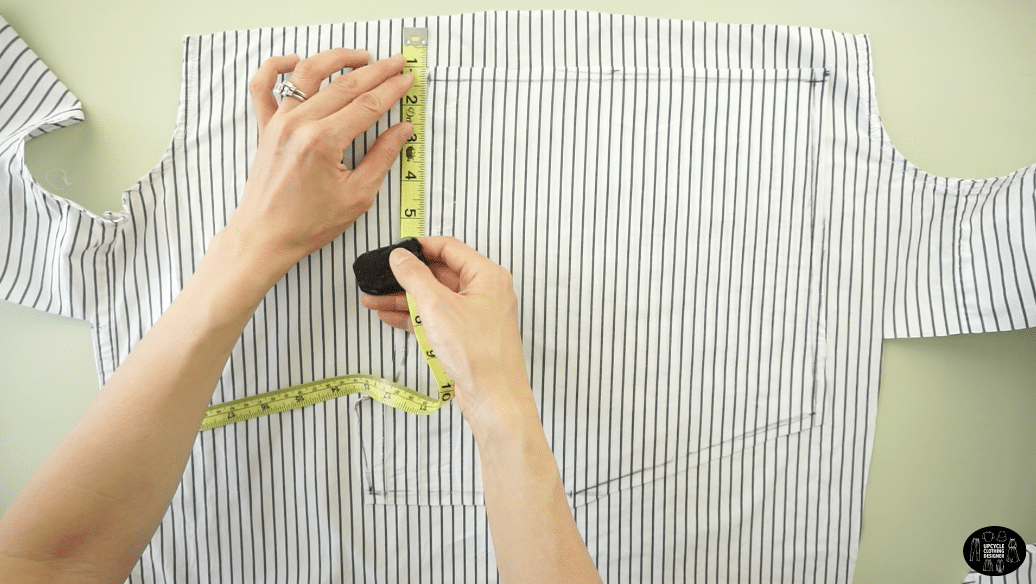
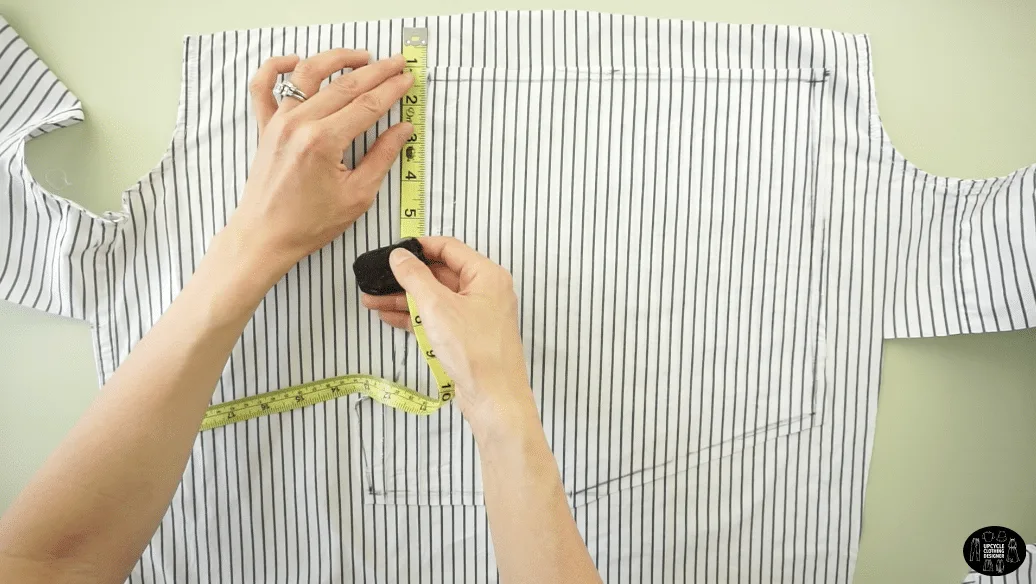
Draw a straight line to the side seam.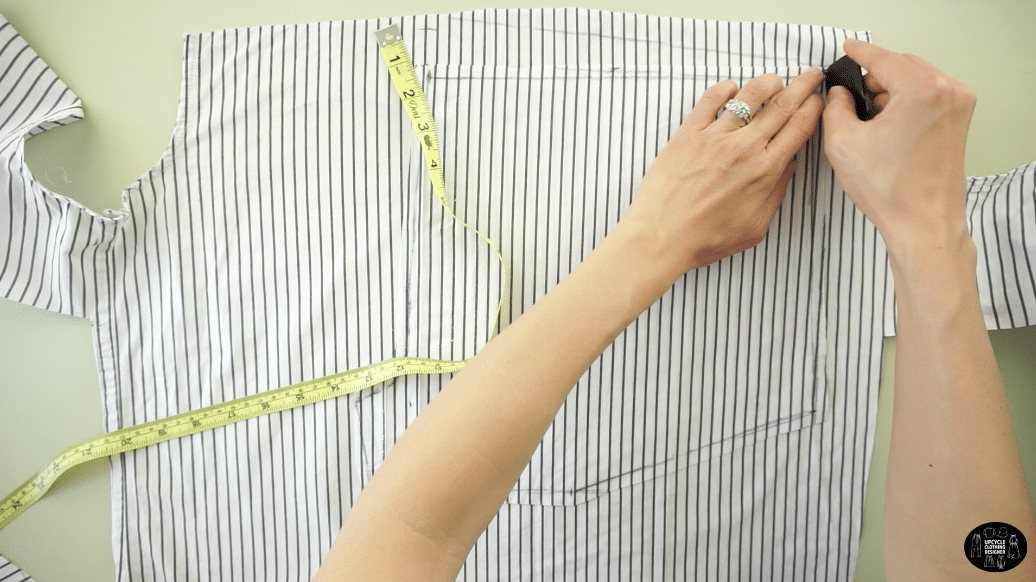
- To make the back crotch, add 2½” to the measurements of the front crotch.

- Cut along the lines to make the back piece of the shorts.
Copy the back piece onto the back piece of the original dress shirt.
Pin to secure, and trace the back piece pattern.
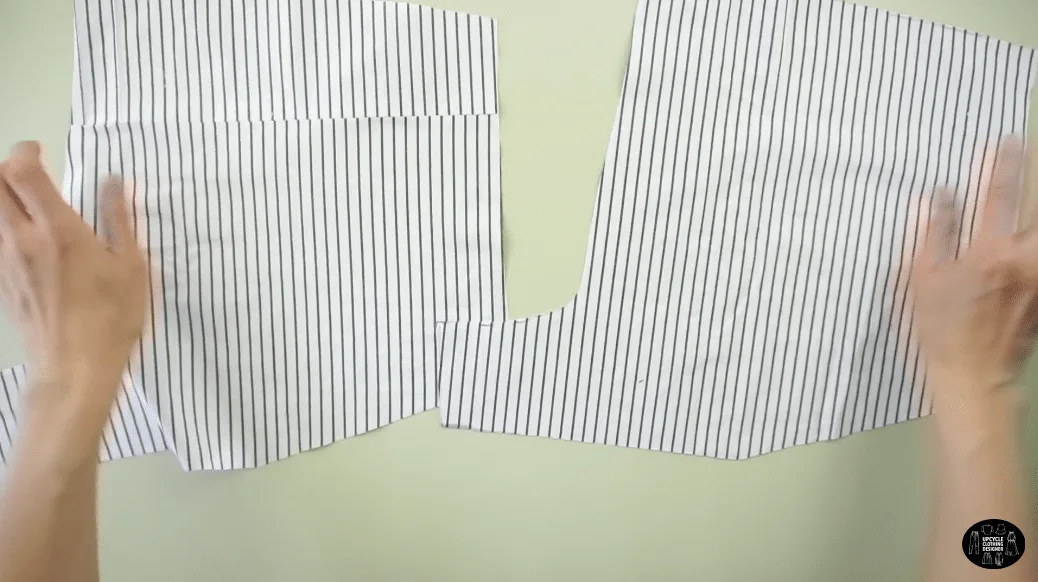
Pro tip: I didn’t have enough seamless fabric to make the other back piece, so I had to lineup the stripe pattern and join two pieces together. - To complete the front of the shorts, sew along the center line with the right side facing together to join the front shorts pieces.

- To complete the back of the shorts, sew along the center line with the right side facing together to join the back shorts pieces.

- To join the front and back of the shorts, sew along the crotch seam;
and also both side seams with the right side facing together.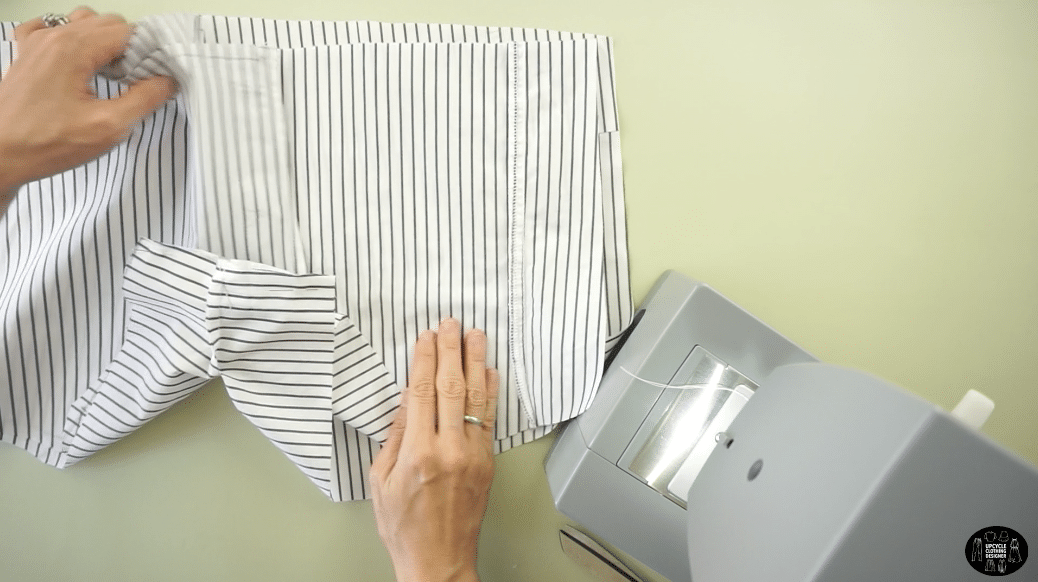
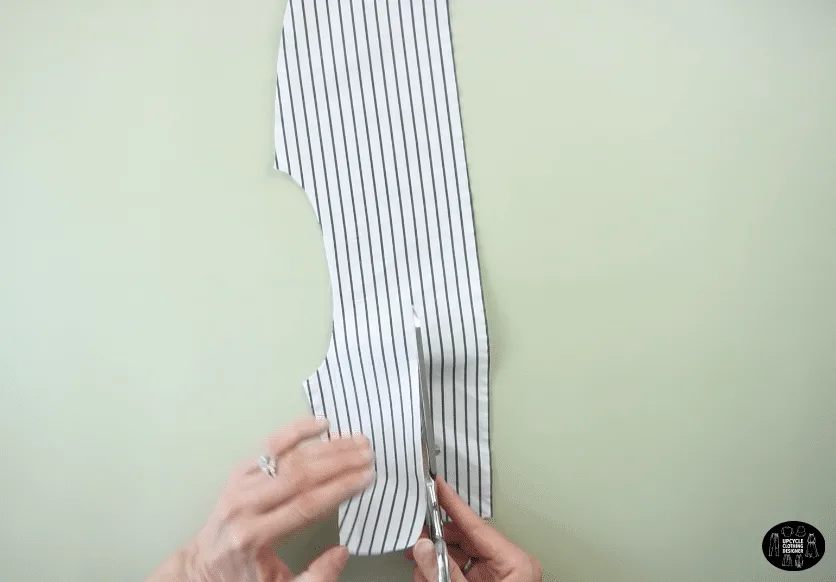
- To make the ruffle pieces, use the original sleeves from the men’s shirt.
Measure 14” away from the edge and draw a 6” parallel line across.
Measure the center of the line, and cut a straight line perpendicular to the edge.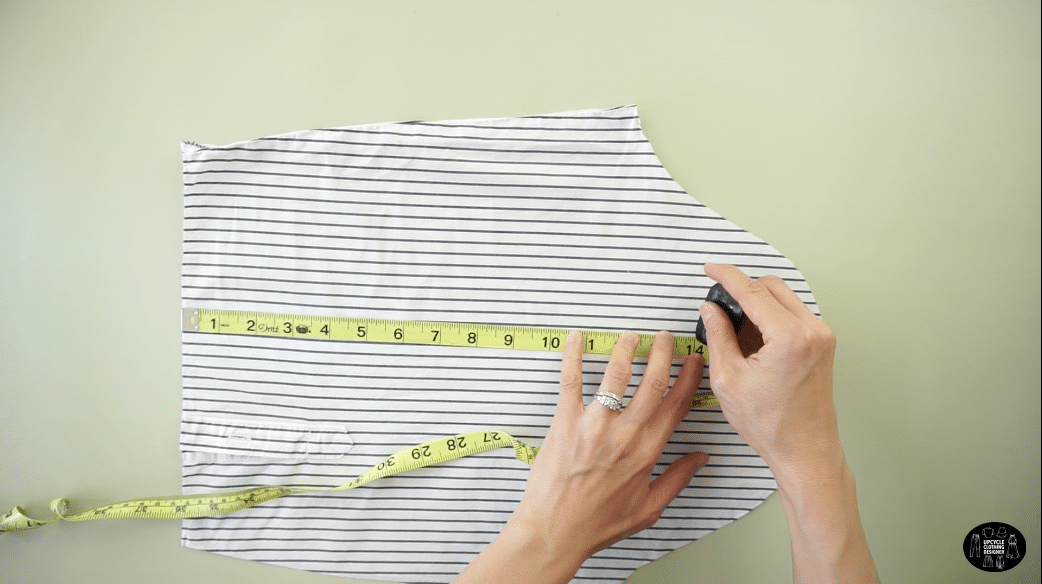

Draw a smooth curved line from the end of the line to the corner on the cut edge.
Cut along the line make two ruffle pieces from each sleeve.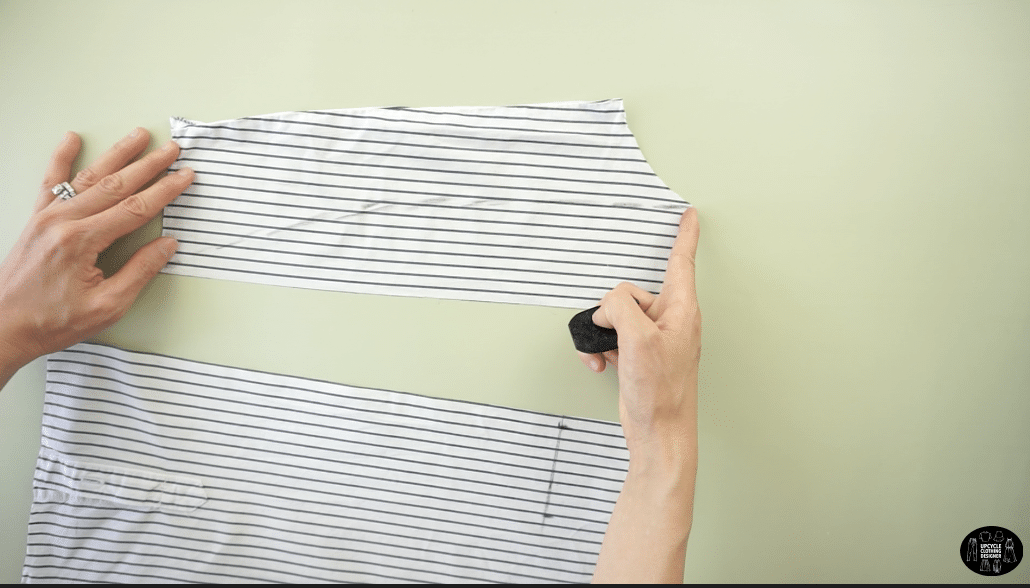

Copy the ruffle pattern onto the other sleeve of the men’s shirt to make two more ruffle pieces.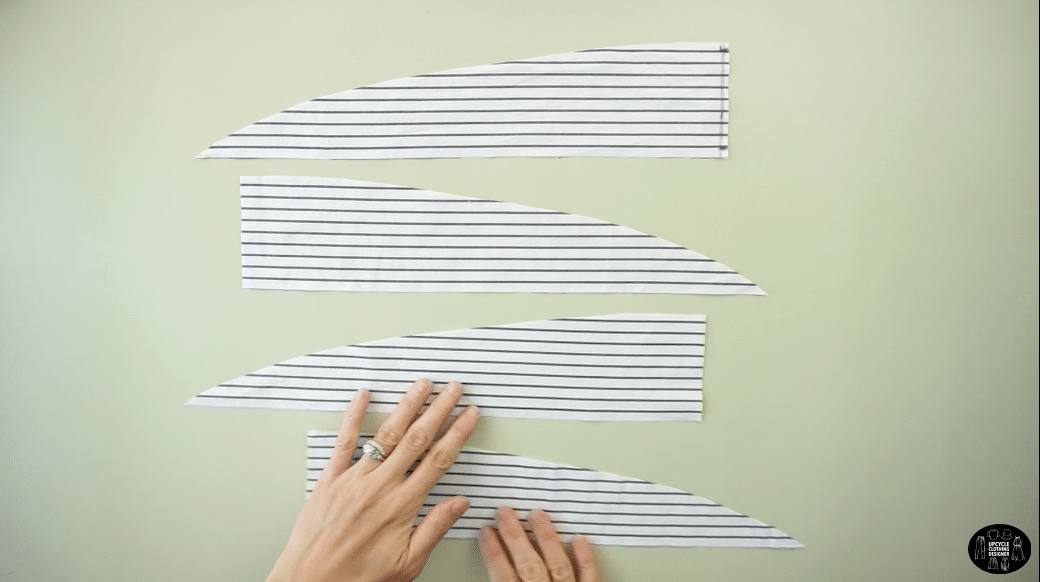

- To finish the ruffles, sew the center line with the right sides facing together to join two ruffle pieces.

Use a wide stitch width and topstitch along the curved edge of the ruffle pieces.
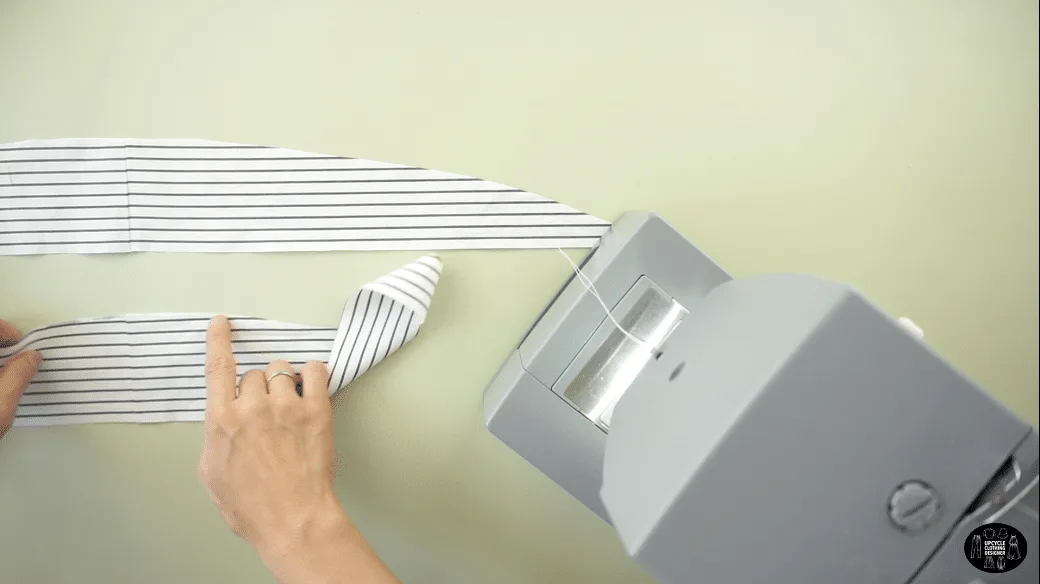
Pull on the back thread to gather the fabric with bunching.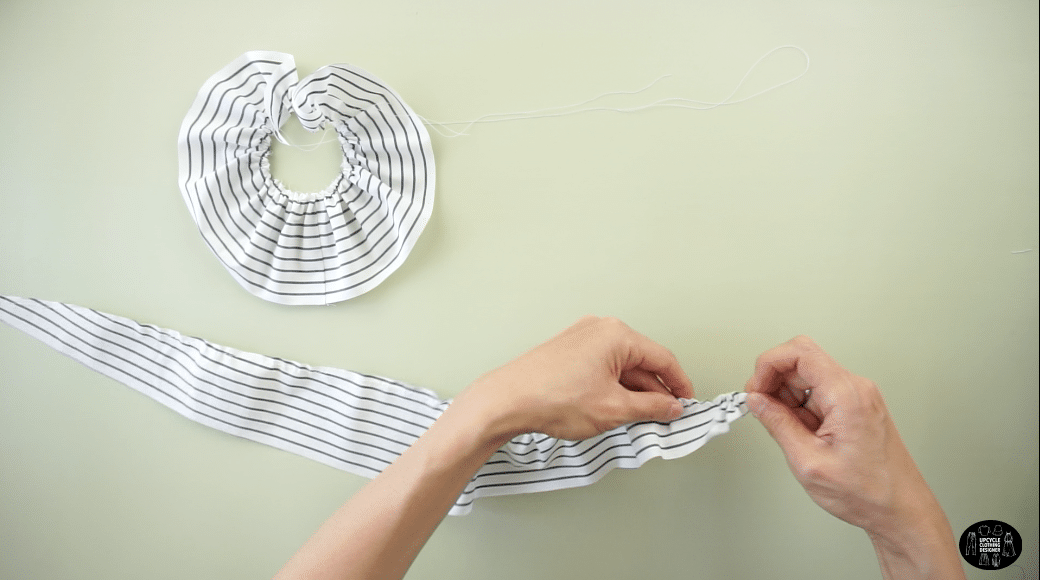

Match the length of the ruffles to the ruffle placement on the bottom of the shorts.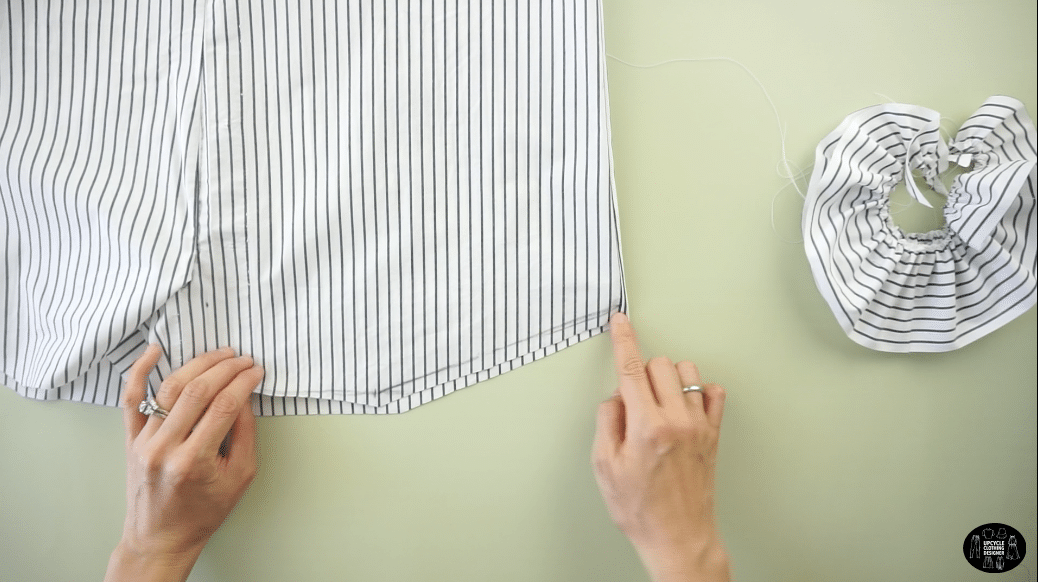
Pin the center line on the ruffles to the side seam,
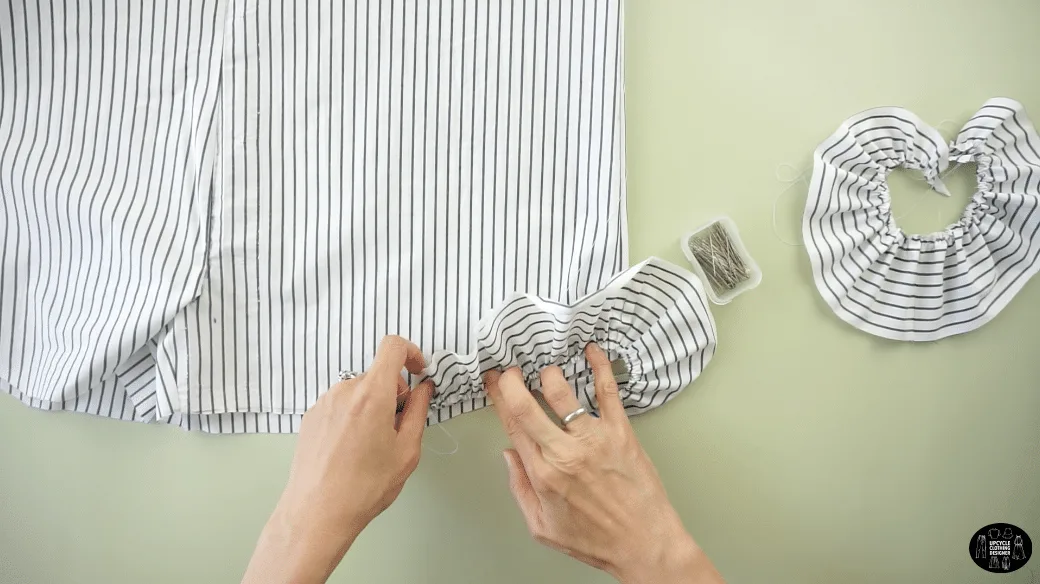
then sew the ruffles on the leg opening.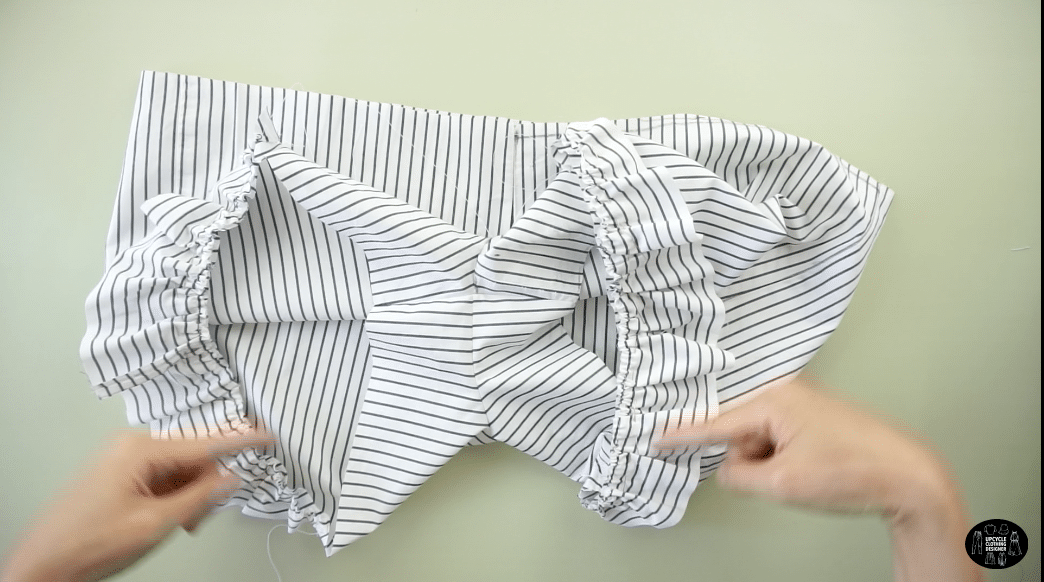
- To finish the leg opening, double fold ¼” and hem the bottom of the ruffles and shorts.

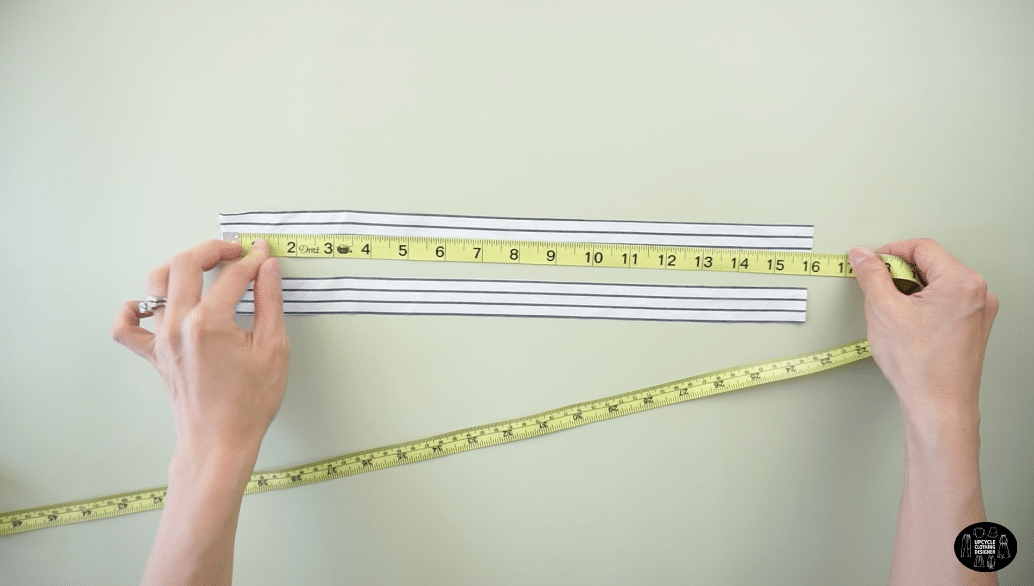
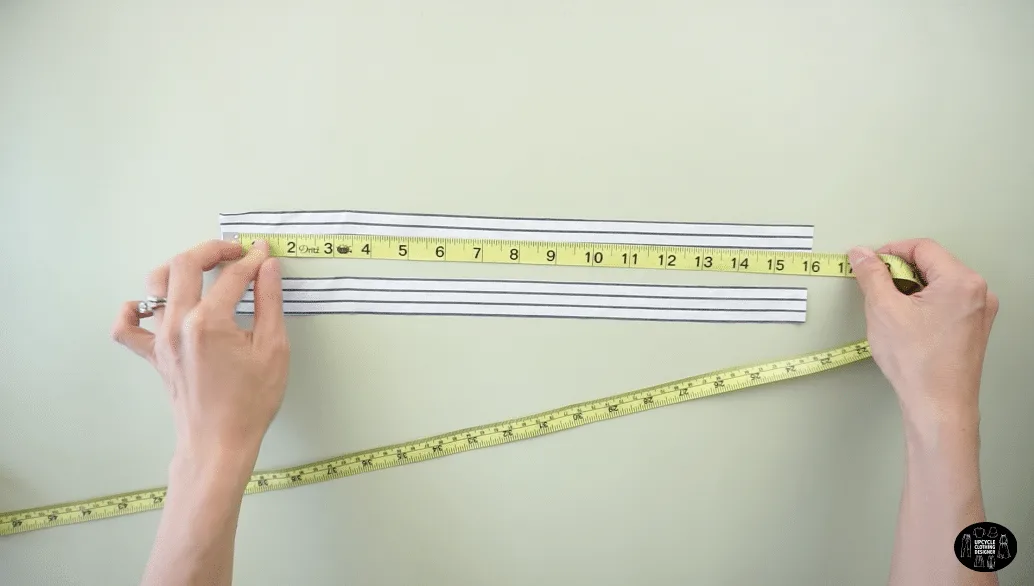
- To make the waistband, use the original yoke piece.
Separate the layers of the yoke piece with a seam ripper.
Cut four separate 2” x 10½” straps.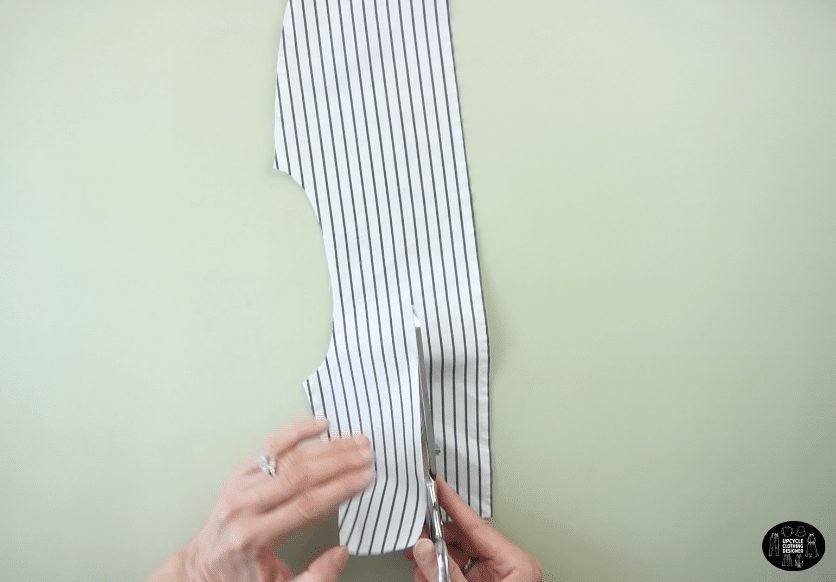
Join the straps with the right sides facing together.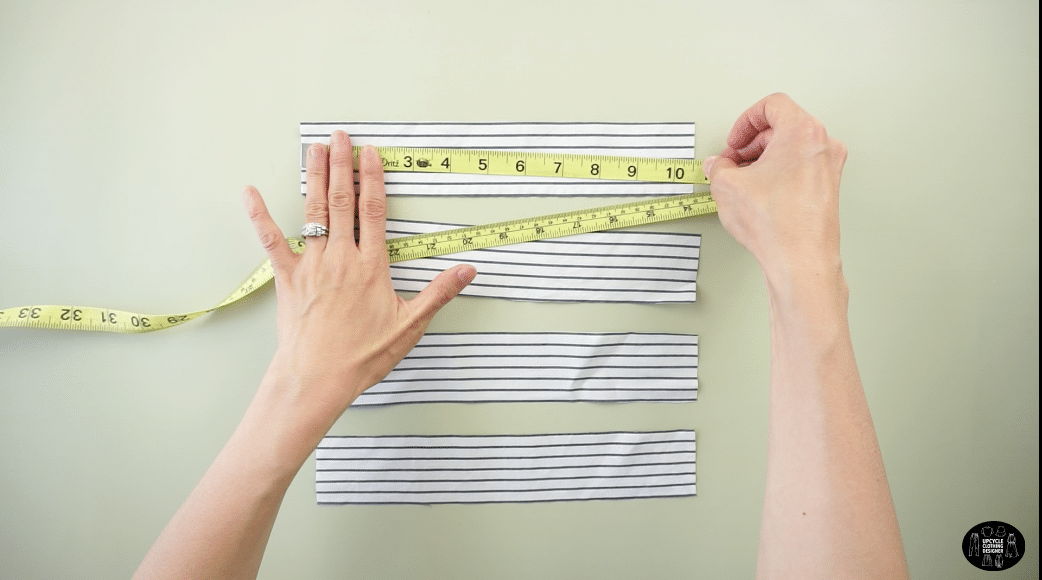

Fold the waistband strap in half lengthwise,
and iron to flatten.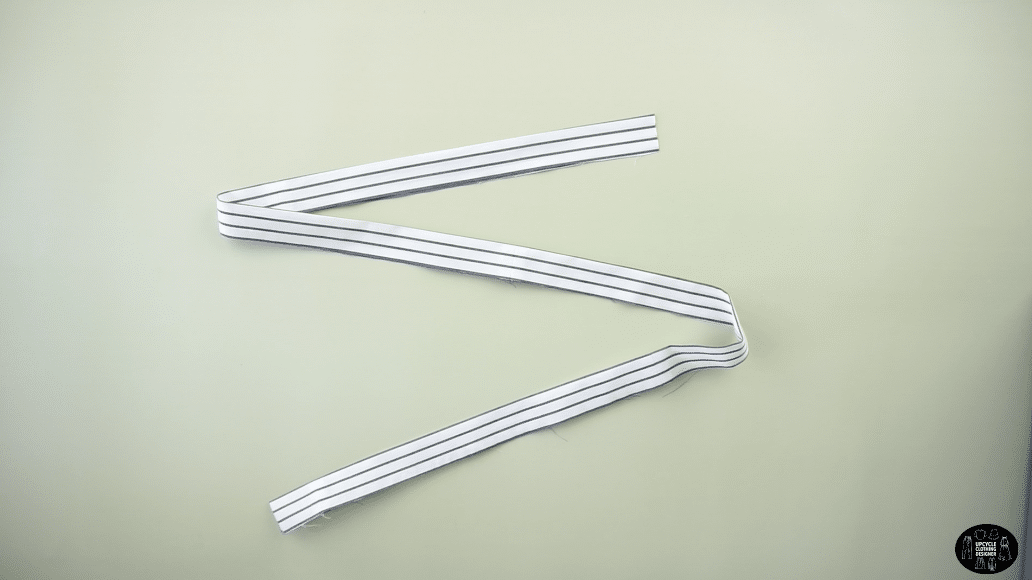

- To finish the waistband, topstitch the waistband to the waistline of the shorts.
Cut a 30” long piece of ½” elastic band.
Use a safety pin to slide the elastic band through the waistband tunnel.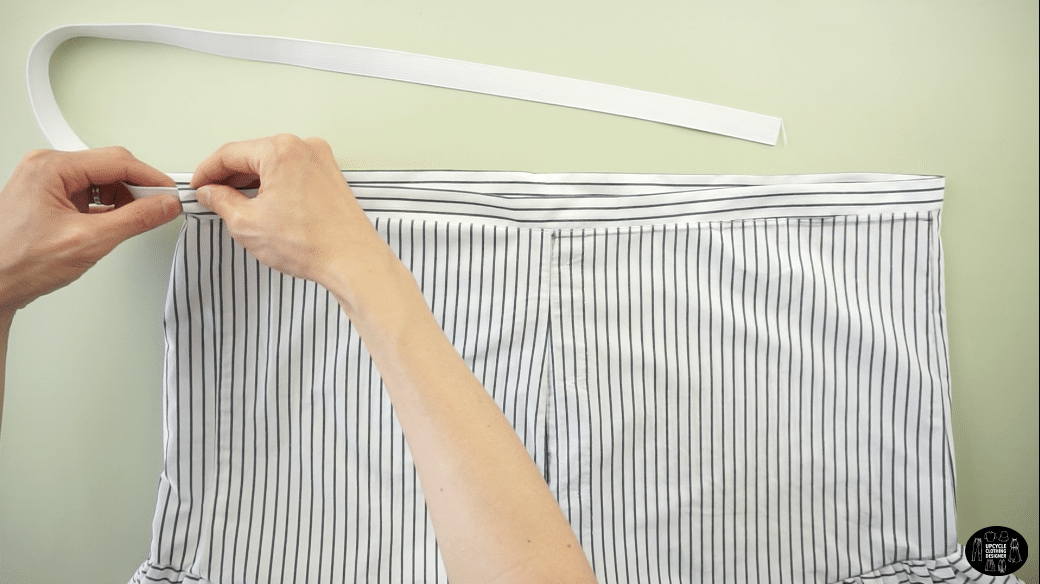
Zigzag stitch to join both ends of the elastic band to complete the waistband.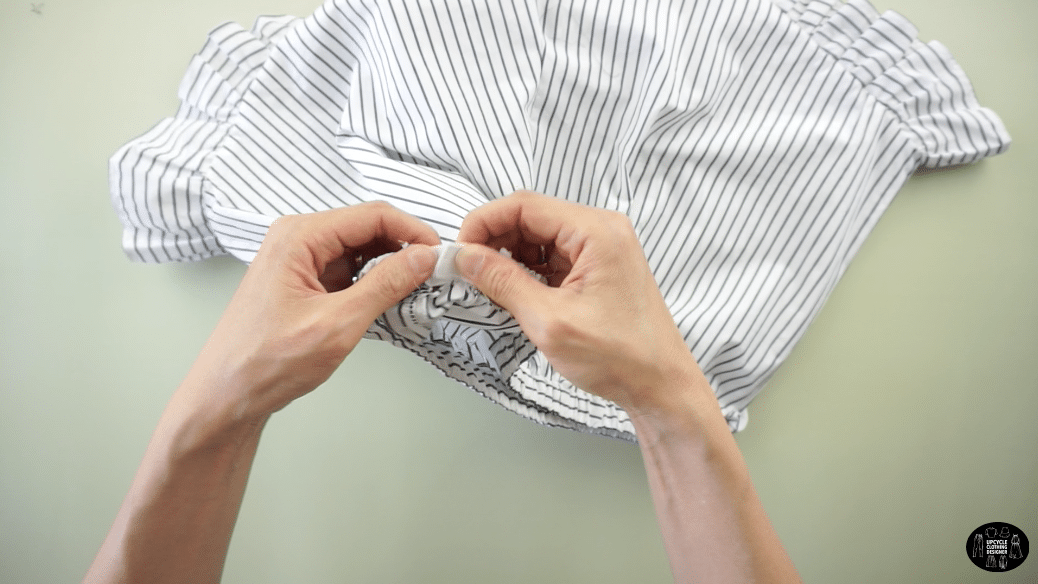

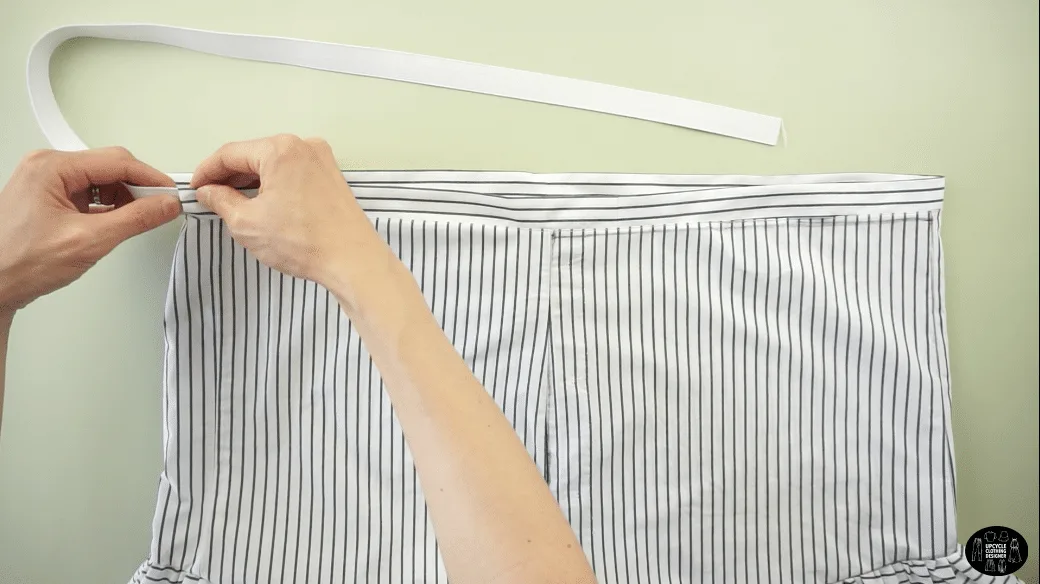
- To make the front bow tie, use the remaining scraps from the yoke to cut two 1” x 16” straps.
Fold the strap in half lengthwise and sew the edge.
Use a loop turner to flip the strap inside out.
To make the tassel trim, wrap a string of embroidery floss around your fingers ten times.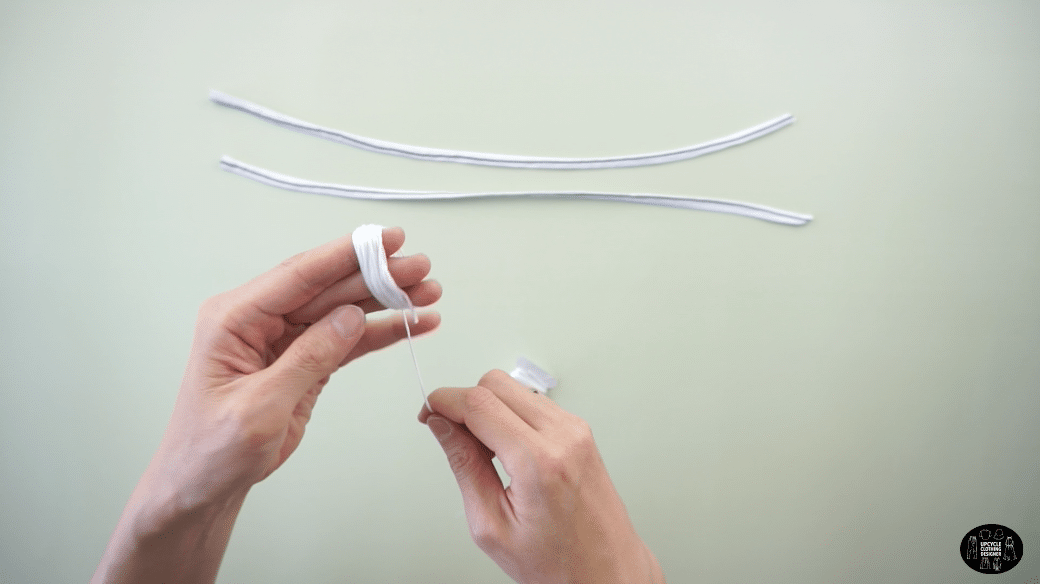
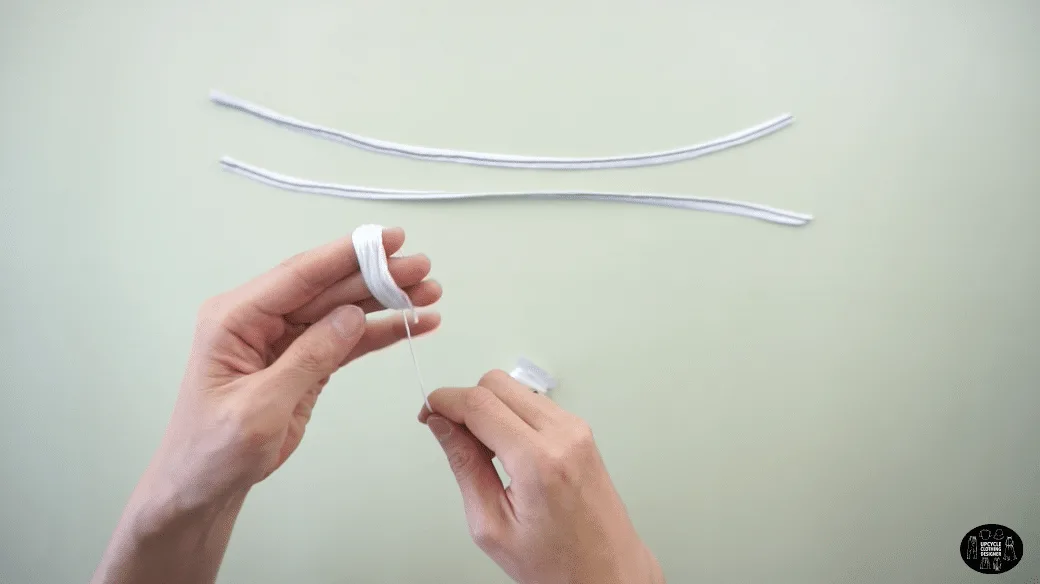
Cut a short piece of string and tie it around one side to secure the tassel.
Cut the opposite end of the tassel and trim the ends for a clean finish.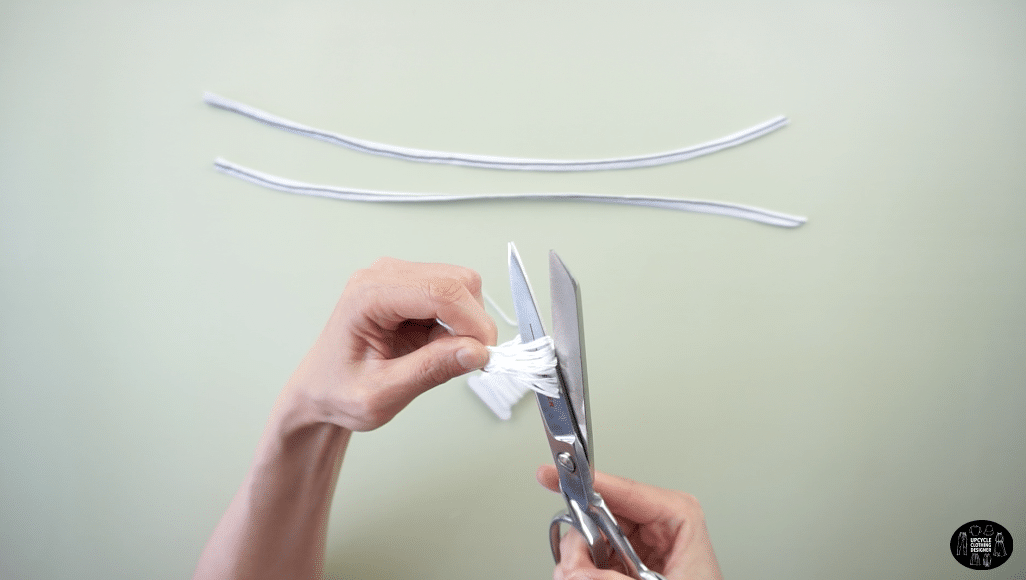
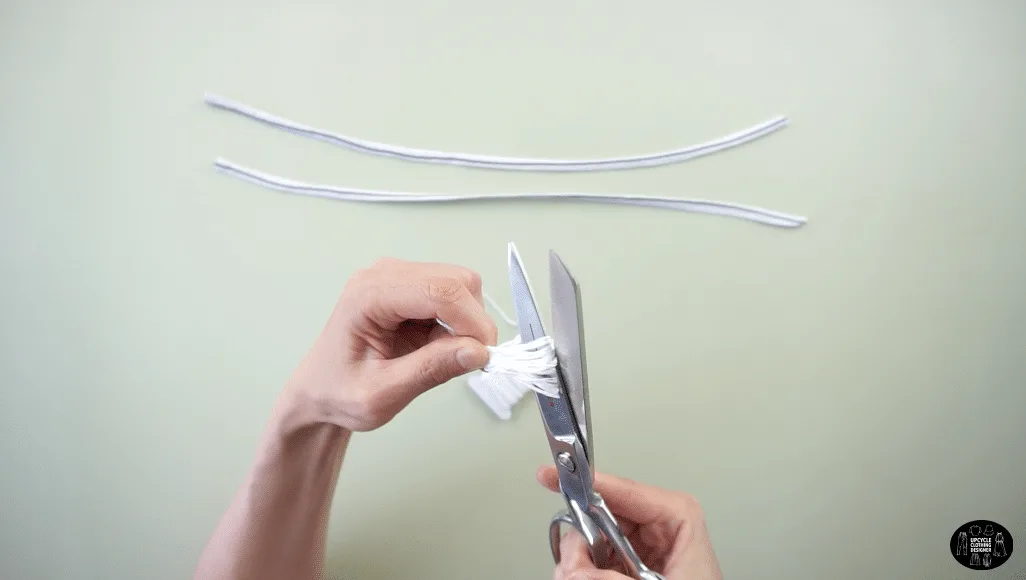
Make two tassels for the bow tie straps. - To finish the tie front tassels, use a needle to attach each tassel to the ends of the front bow tie straps.
Attach the straps to the front center waistband of the shorts.
Tie a cute bow with the straps to complete the ruffle shorts from men’s dress shirt tutorial.
Recommended Products
As an Amazon Associate and member of other affiliate programs, I earn from qualifying purchases.


Trendy, Affordable Sewing Patterns for All Sizes


Tie Shoulder Jumpsuit Pattern


Palazzo Pants Sewing Pattern


Pocket Overall Romper Pattern


Wrap Maxi Skirt Sewing Pattern


Tie Back Top Sewing Pattern