
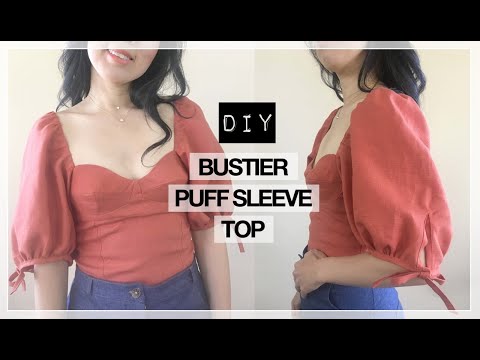
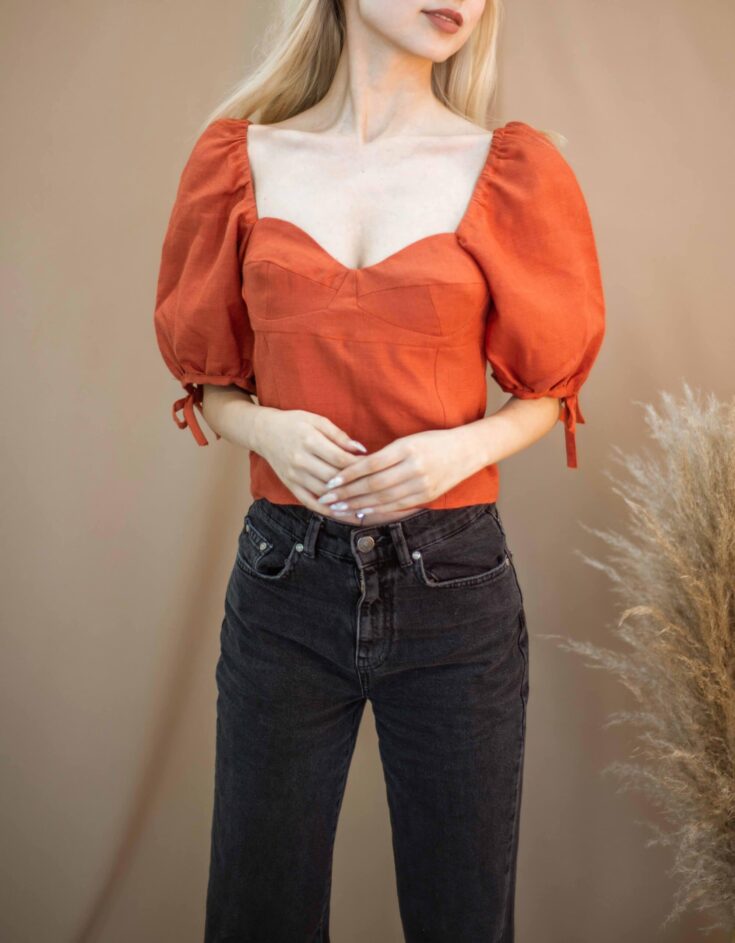
Do you know how to make a bustier top from scratch? The Lola top includes a fitted corset inspired bustier with a nice adjustable strap puff sleeve.
To get the perfect fit, following a sewing pattern definitely helps you save time on correcting the measurement issues.
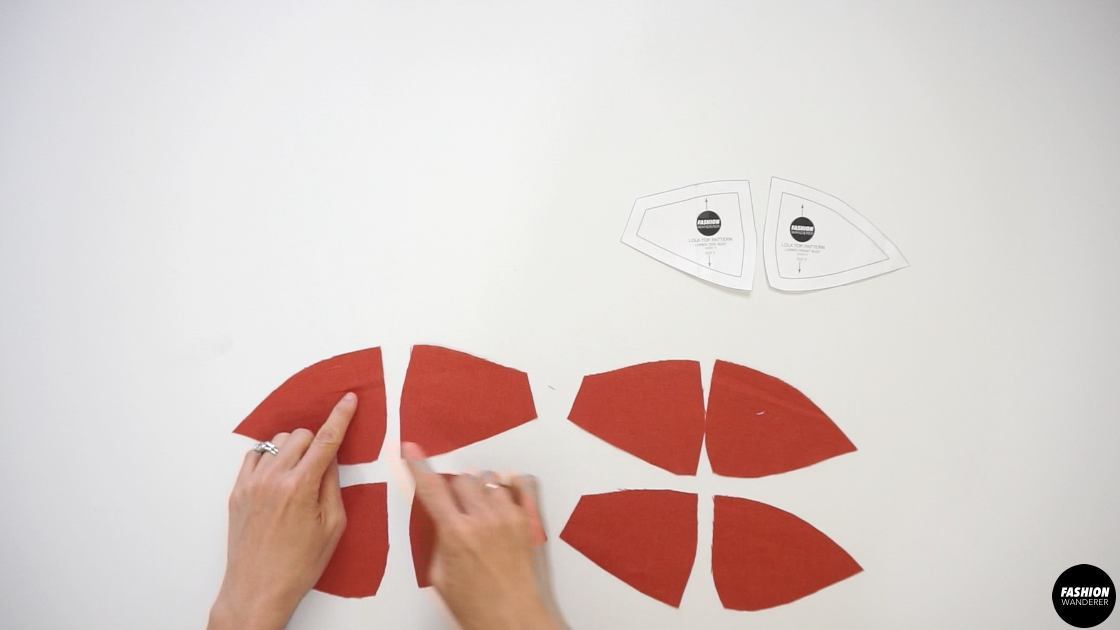
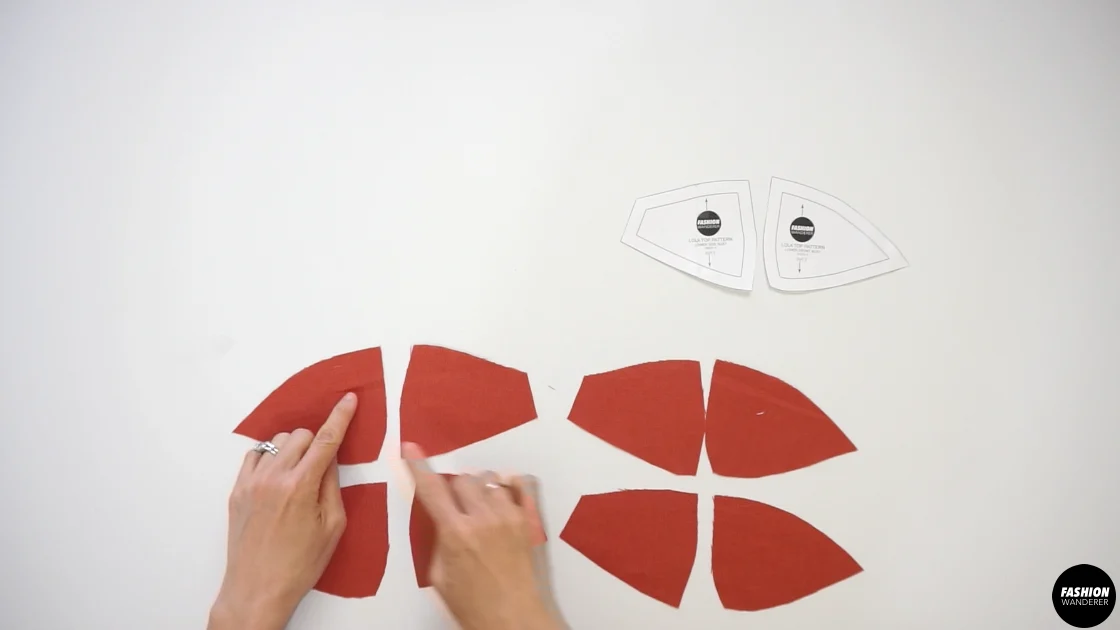
How to make a bustier corset top with puff sleeve? Remove any wrinkles on the linen fabric and place the Lola top sewing pattern along the salvage of the fabric and grain line on the pattern. Follow the sewing tutorial to assemble the bustier top part and puff sleeve to complete the Lola top.
This cute top features fitted silhouette corset with simple seams along the princess line. The stretchy puff sleeve along the shoulder creates beautiful neckline and waistline silhouette.


Lola Top Sewing Pattern


You will love this DIY bustier puff sleeve top because…
- The Lola top sewing pattern covers all sizes from 2 to 12.
- Use correct techniques to press seams and finish seams along the princess seam.
- Add lining along the cup with clean finish to the edges.
- Learn how to sew elastic along the shoulder of the puff sleeve.
- Perfect sewing project for intermediate level or to challenge beginners to increase the sewing skill to the next level.
This trendy top is perfect to dress up or down with high waisted jeans or skirt of your choice. Use this DIY bustier corset puff sleeve top tutorial and sewing pattern to lengthen the top and sleeve as desired.


How to make bustier puff sleeve top
Grab this Lola bustier top sewing pattern and follow the instructions to assemble Fashion Wanderer sewing pattern to get the project started correctly. Choose non-stretchy woven, such as linen, to give nice structure on the bust and puff sleeve silhouette.
Whether you choose linen or any other printed poly fabric, always test the tension and both the stitch width and length so that you are able to avoid any problems.
DIY Bustier Puff Sleeve Top Tutorial Material:
- Lola Top Sewing Pattern
- Linen Fabric ¾ yards for 60” width or 1 yards for 45” width
- 9” Open-End Lightweight Zipper
- ¼” Width Elastic Band
- Measuring Tape
- Disappearing Fabric Pen
- Ruler
- Pins
Thread your machine and bobbins correctly with closely matched color as similar to the fabric as possible. It will help you create professional store-bought quality garment.
If you are new to sewing structured bustier, and understandably a bit intimidated by all the seams, this DIY bustier puff sleeve top tutorial will boost your sewing skills to the next level.
Prepare the fabric by washing, drying and ironing.
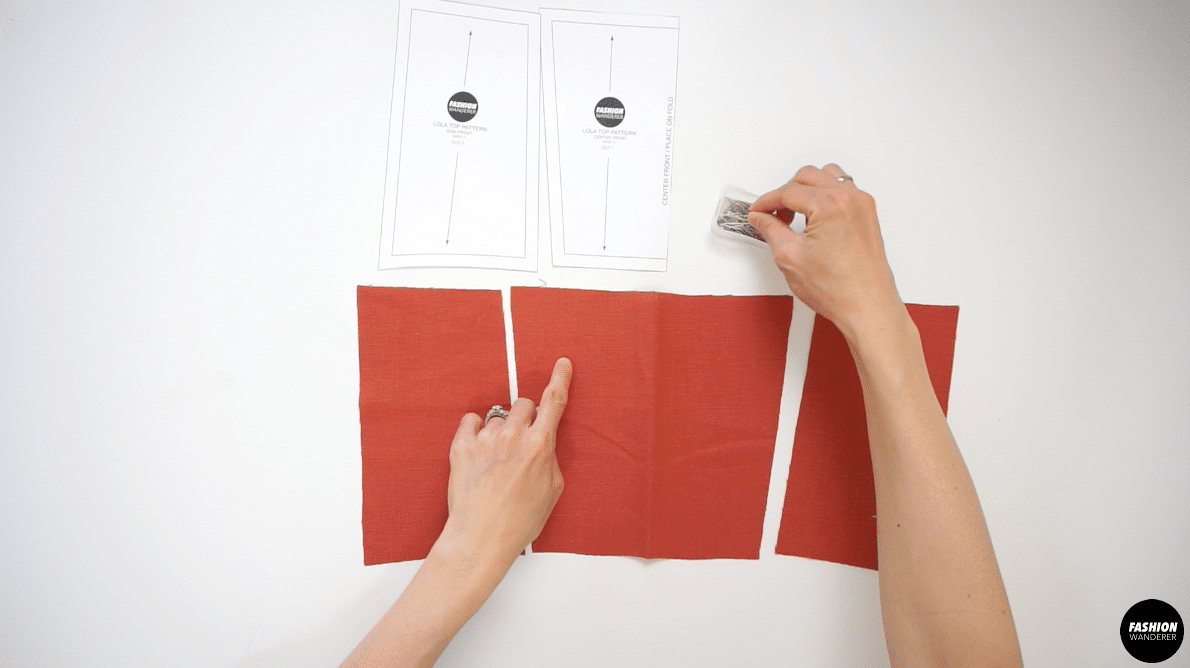
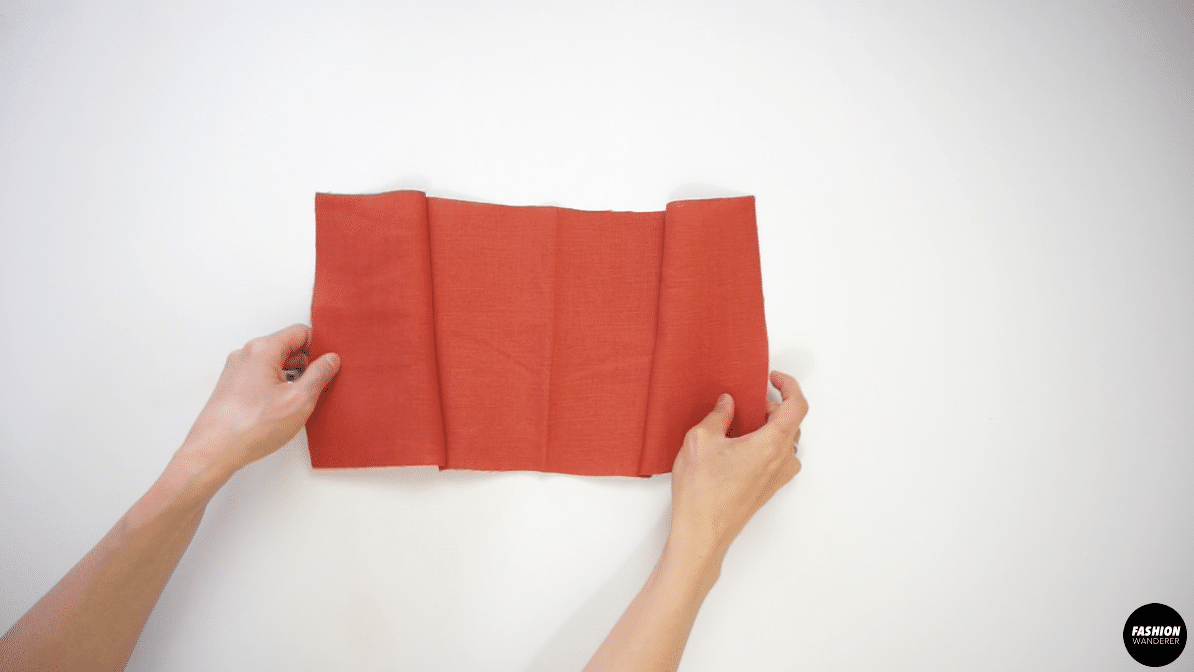
Assemble the sewing pattern and cut out the pieces.


Make the outer cup, bust and lining for the bustier top.
Join the bustier bodice pieces to the bust pieces.


Sew a tunnel along the notched side of the puff sleeve.
Use a loop turner to pull elastic band through the puff sleeve tunnel.
Attach bow tie straps to the sleeve opening of the puff sleeve.
Join the puff sleeves to the bustier top.
Attach a zipper to the center back opening to complete this DIY bustier puff sleeve top.


DIY Bustier Puff Sleeve Top Sewing Tips


Making a bustier corset top that fits your bust and waist perfectly is challenging, especially without a sewing pattern to find the correct fit is nightmare. Review the size guide to compare your body measurements to create a cute bustier top with puff sleeves that fit you like a glove.
Other than sewing sturdy seams and pressing in the proper direction on all the princess seams, you do need to learn how to sew open-ended zipper the right way.
Finding the exact length of zipper is not quite easy. In that case, I’ll show you in this tutorial how I shorten the zipper without damaging the zipper before attaching to the garment.
If you already grabbed this Lola top sewing pattern and reviewing the step by step instruction, read these sewing tips and tricks thoroughly to help you easily accomplish the dreamy top without making unnecessary mistakes.
- Sewing Needle: The best needle size to sew linen is 70/10 or 80/12 for any medium-weight linen. Whether you are using regular sewing machine or serger to finish the inside seams, ensure to select the correct sewing machine needle for both.
- Thread: Use cotton thread to sew linen as it is much stronger. If you need more durable seams for heavier linen fabric, select cotton covered polyester thread. When sewing linen, adjust the tension on the sewing machine to 4 or 5 with longer stitch, and use lower tension setting for lighter linen.
- Stitches: After changing the needle and thread on the sewing machine, set the stitch length as 2.7 to 2.9 for standard straight stitches and overlock stitches. Start with 2.5 stitch length and increase depending on the thickness and weight of the linen fabric.
- Zipper: If you need to shorten a separating zipper, remove each coil using small pliers to reduce the length of the zipper so it matches with the garment. Use zipper foot to sew each side on the center back opening close to the zipper teeth.
- Elastic: There are multiple ways to sew elastic on the sleeve including casing, separate band, or direct sewing method. In this tutorial, we are going to create a tunnel to insert the elastic around the shoulder of the puff sleeve. Follow the measurements on the sewing pattern for each sizes to give a correct fit.

How to make Lola bustier puff sleeve top step by step
This Lola top requires sewing elastic, separating zipper and to clean finish and press the seams in the right direction. In this step by step sewing tutorial, you will learn sewing tips and techniques to accomplish the top.
Download the Lola bustier puff sleeve top sewing pattern and review the steps before getting started. Always test on fabric scraps to get comfortable sewing and confirm the right stitch length and tension for best results.
Materials
- Lola Top Sewing Pattern
- Linen Fabric ¾ yards for 60” width or 1 yards for 45” width
- 9” Open-End Lightweight Zipper
- ¼” Width Elastic Band
Tools
- Tools
- Sewing Machine
- Serger
- Straight Pins
- Erasable Pen
- Fabric Scissors
- Measuring Tape
Instructions
For this Lola bustier top tutorial, start by assembling the pattern pieces:
4 pieces of Upper Bust
4 pieces of Lower Side Bust
4 pieces of Lower Front Bust
2 pieces of Top Front
1 piece of Center Front
2 pieces of Side Front
2 pieces of Center Back
2 pieces of Side Back
2 pieces of Sleeve Piece
4 pieces of Sleeve Strap
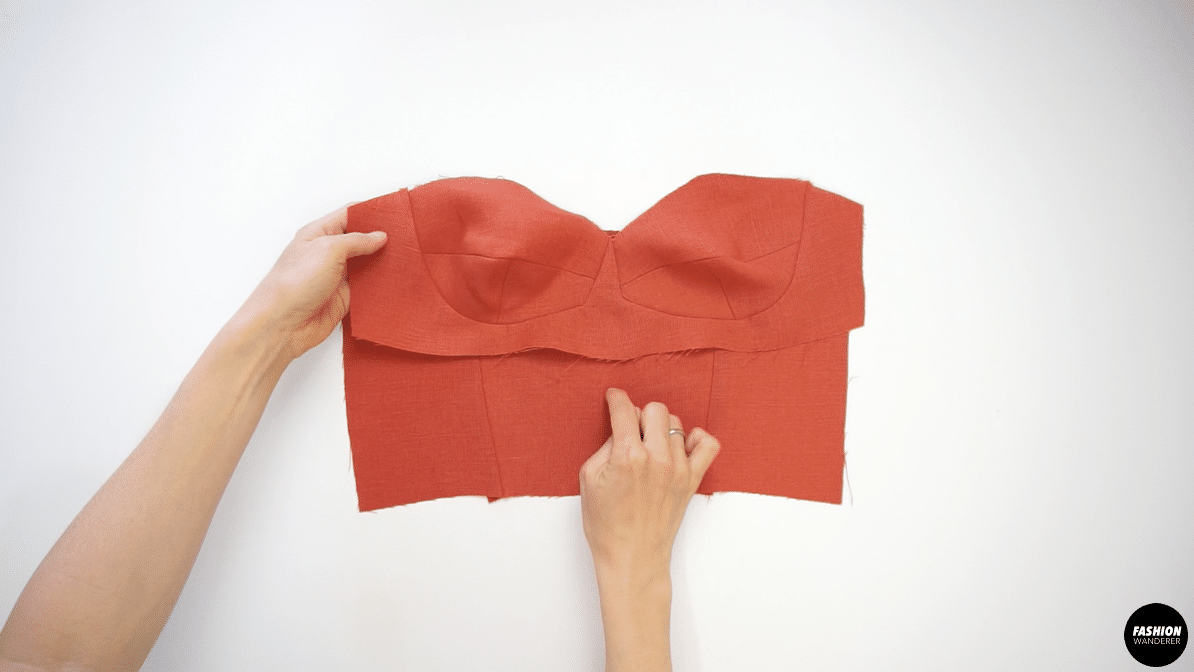
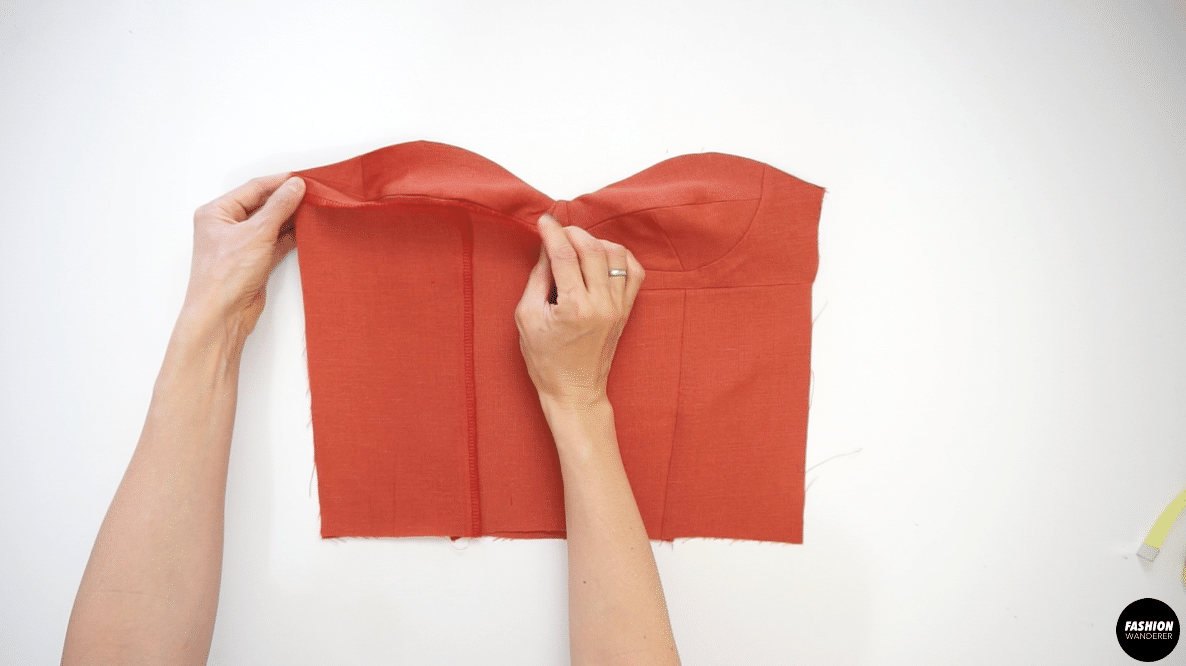
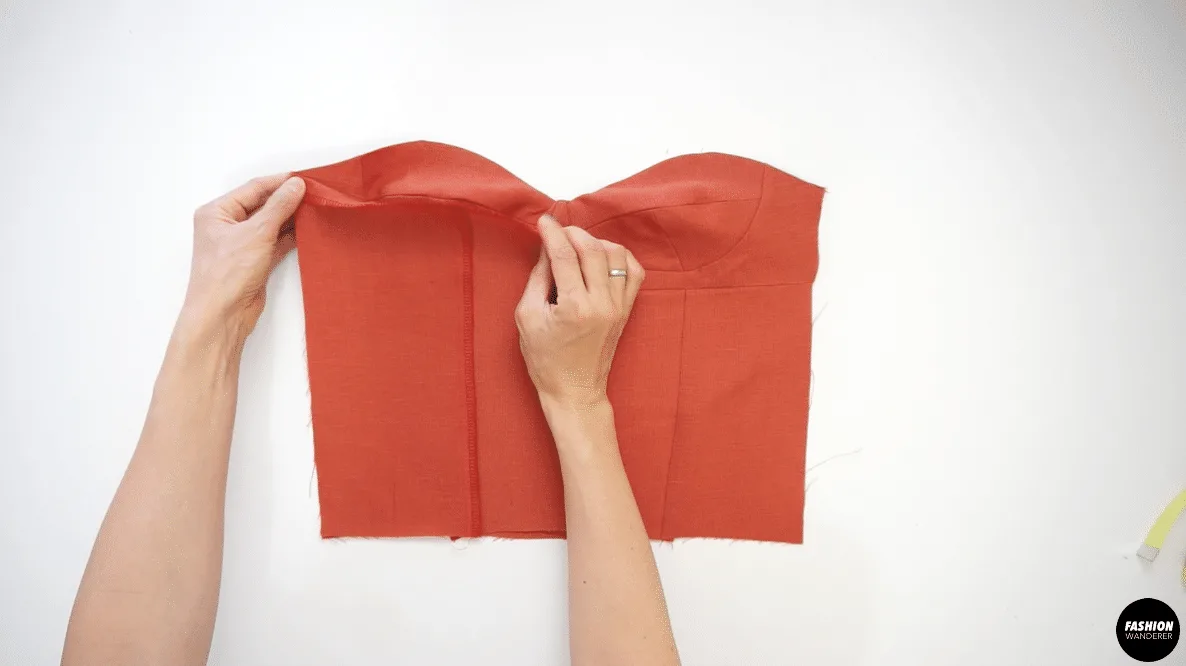
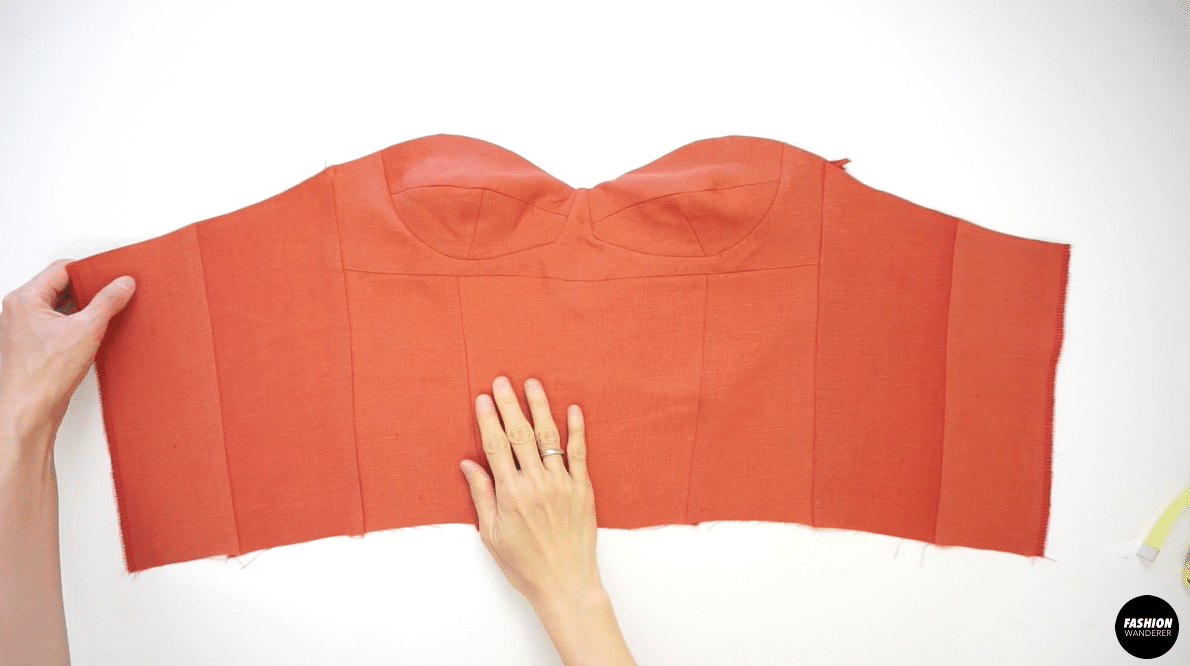
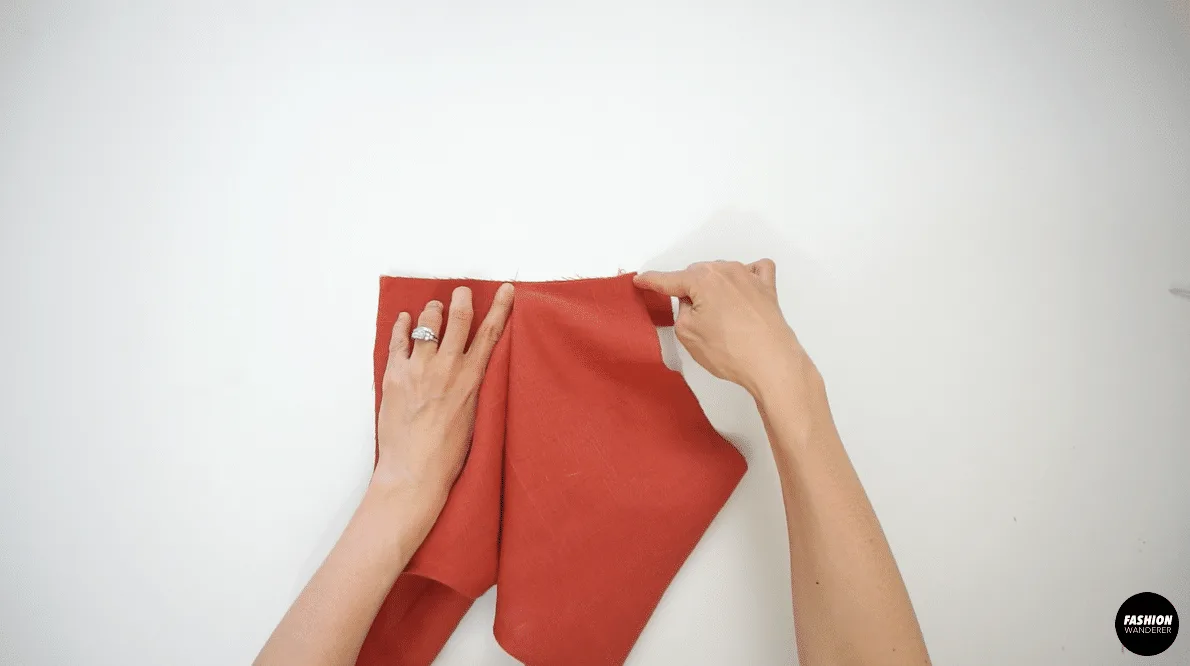
How To Make Bustier Cup Shape
- Place the right side of Lower Side Bust and Lower Front Bust pieces facing each other, and ⅜” stitch along the seam allowance.
- Trim the seam allowance into ¼” width.
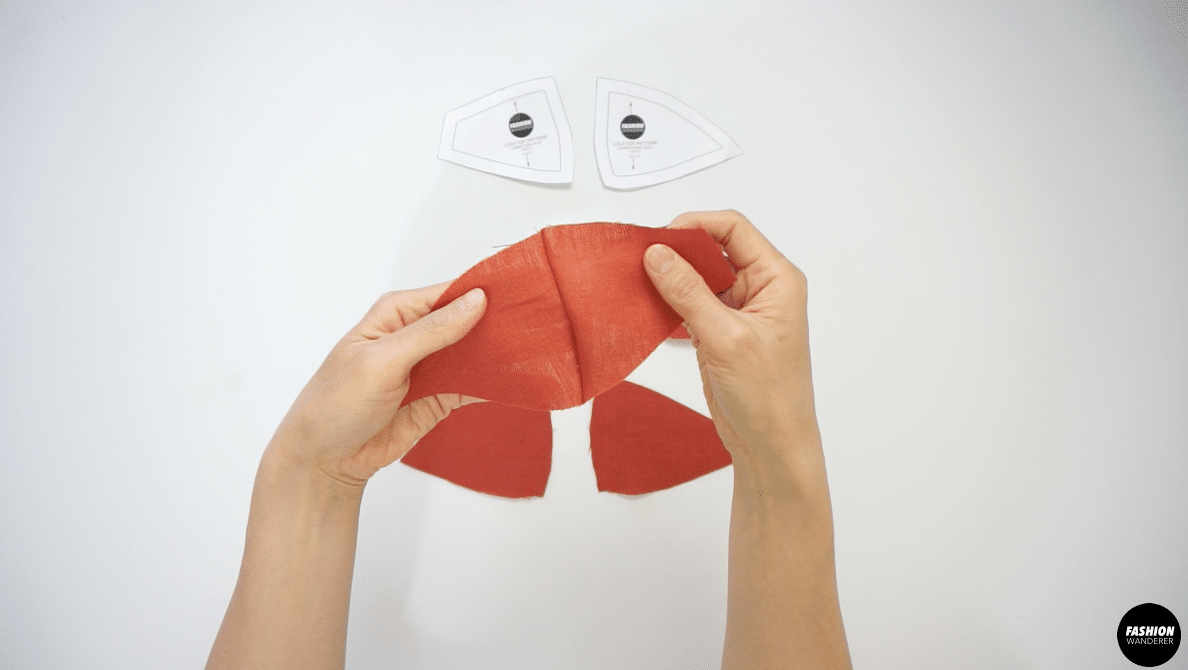
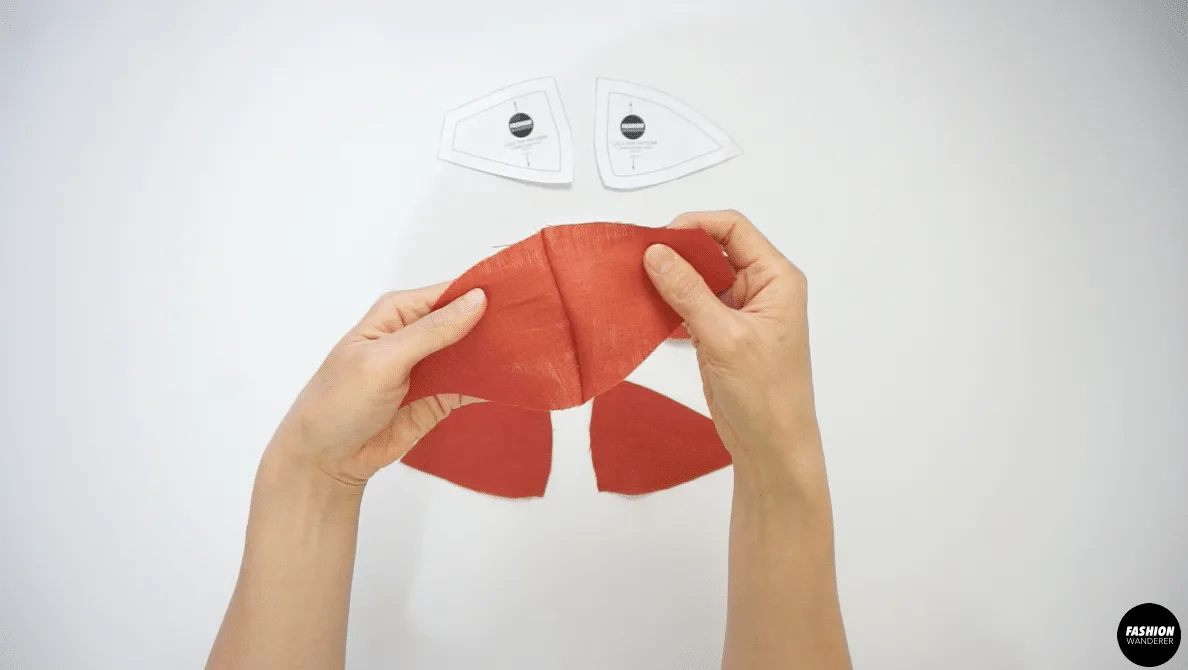
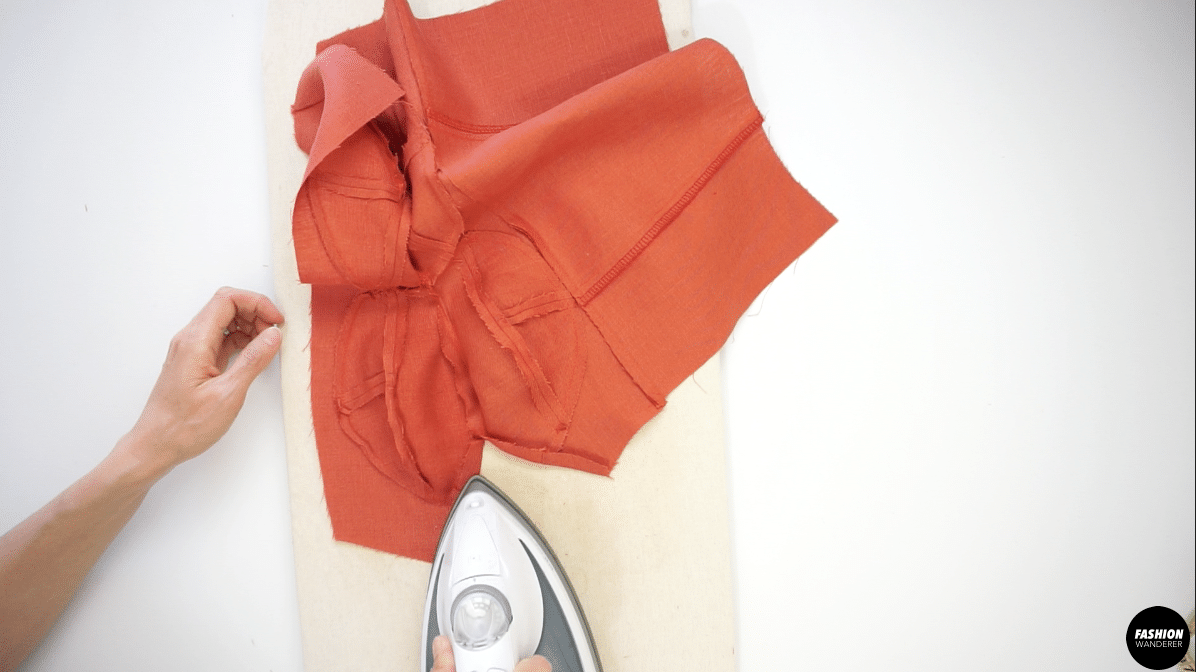
- Press the seam open with iron. Do the same for the rest of the pieces.

- Next, place right side of upper bust on the joint Lower Bust pieces and ⅜” stitch along the curved line.
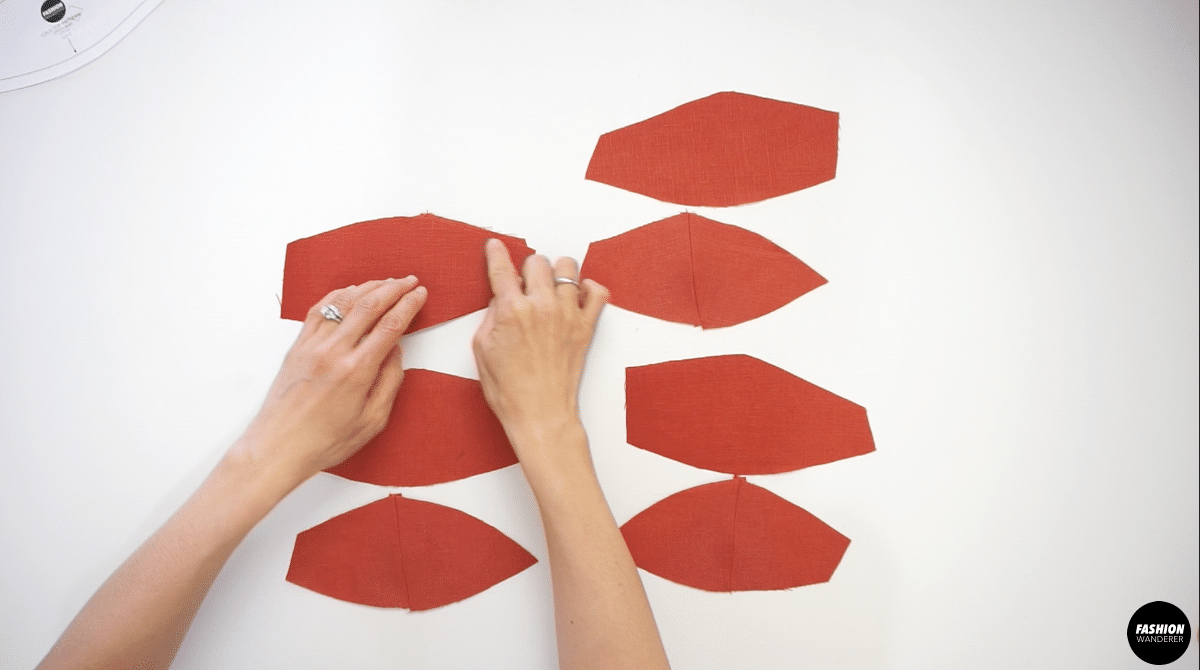

- Trim the seam allowance into ¼” width and press the seam open. Apply these steps to the remaining cup pieces.
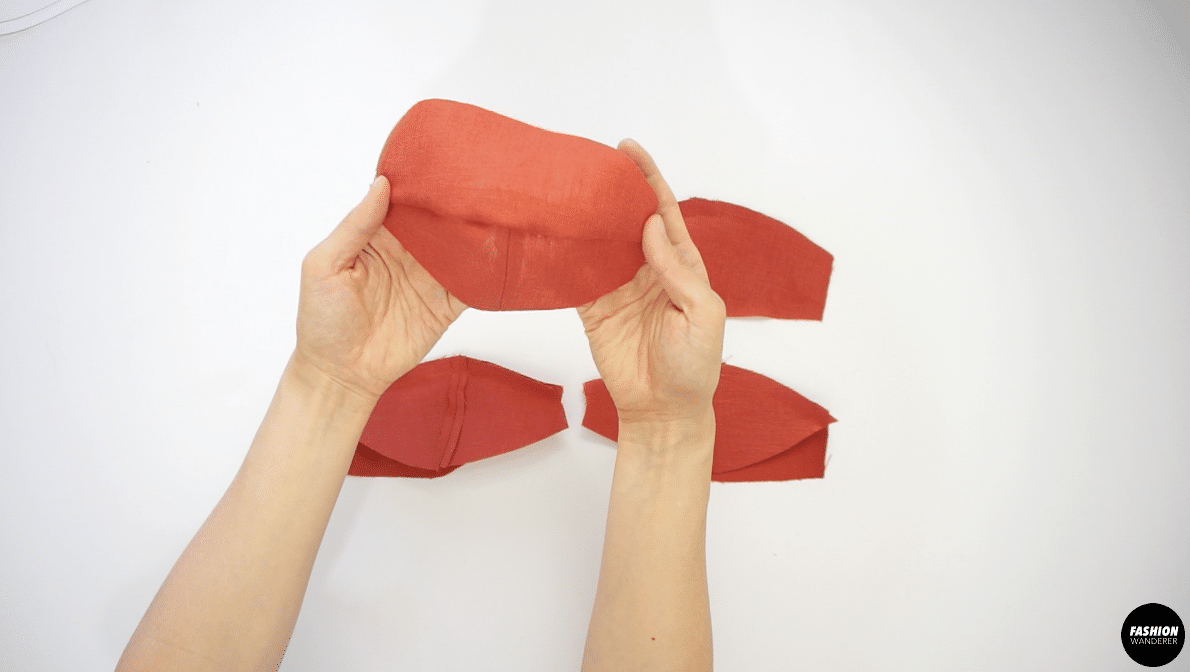

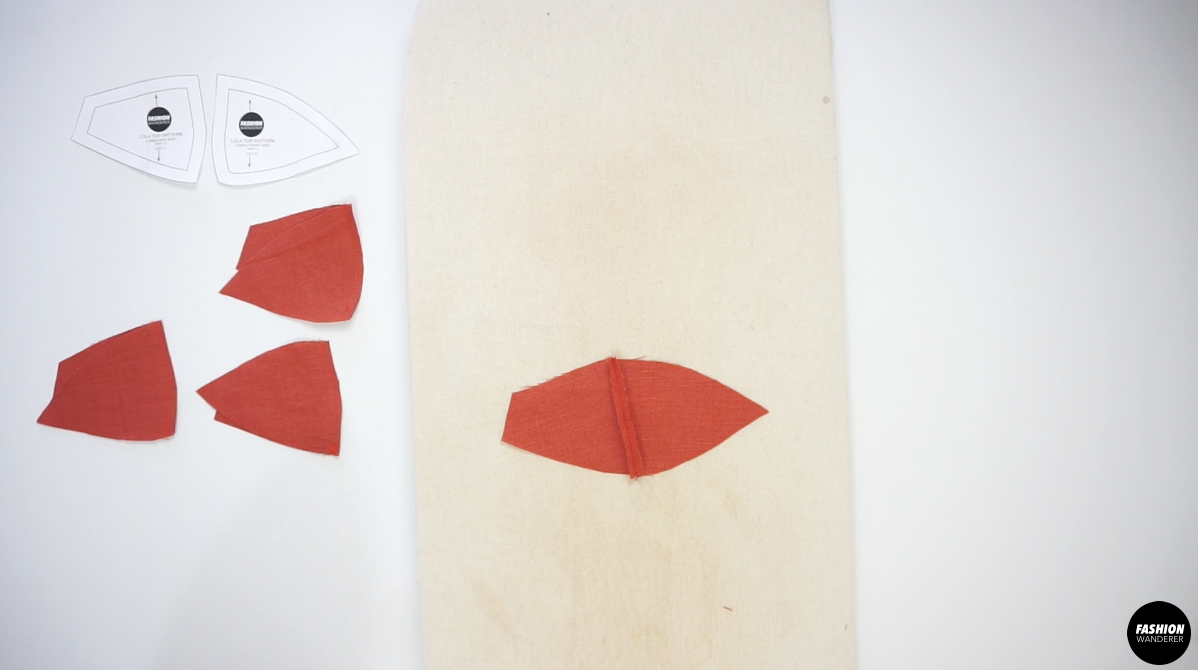
- Lastly, lay the Top Front piece and sew the cup into the bodice with ⅜” width stitching. Press to meld the seam and do the same to make the lining pieces for the cup.


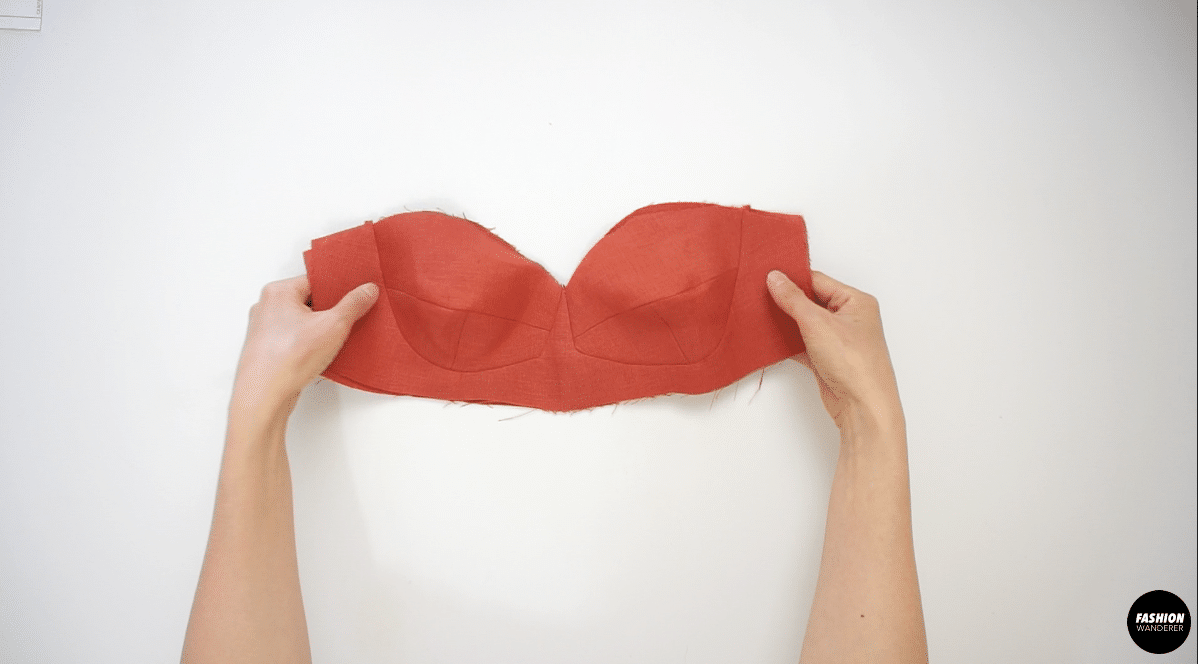
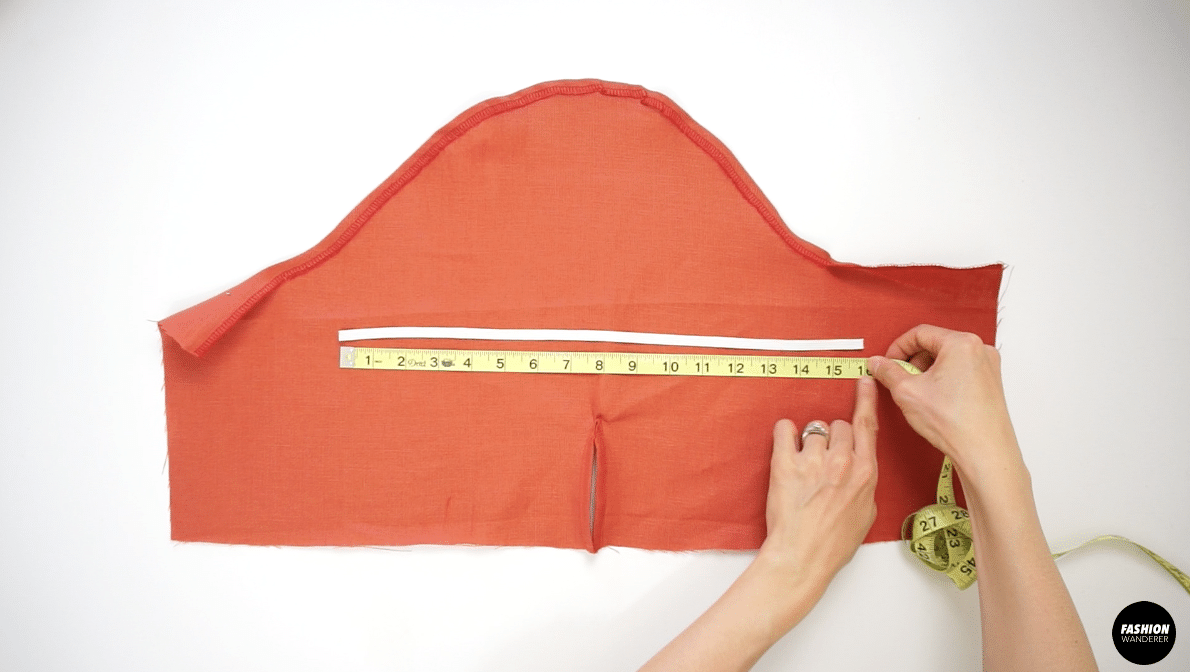
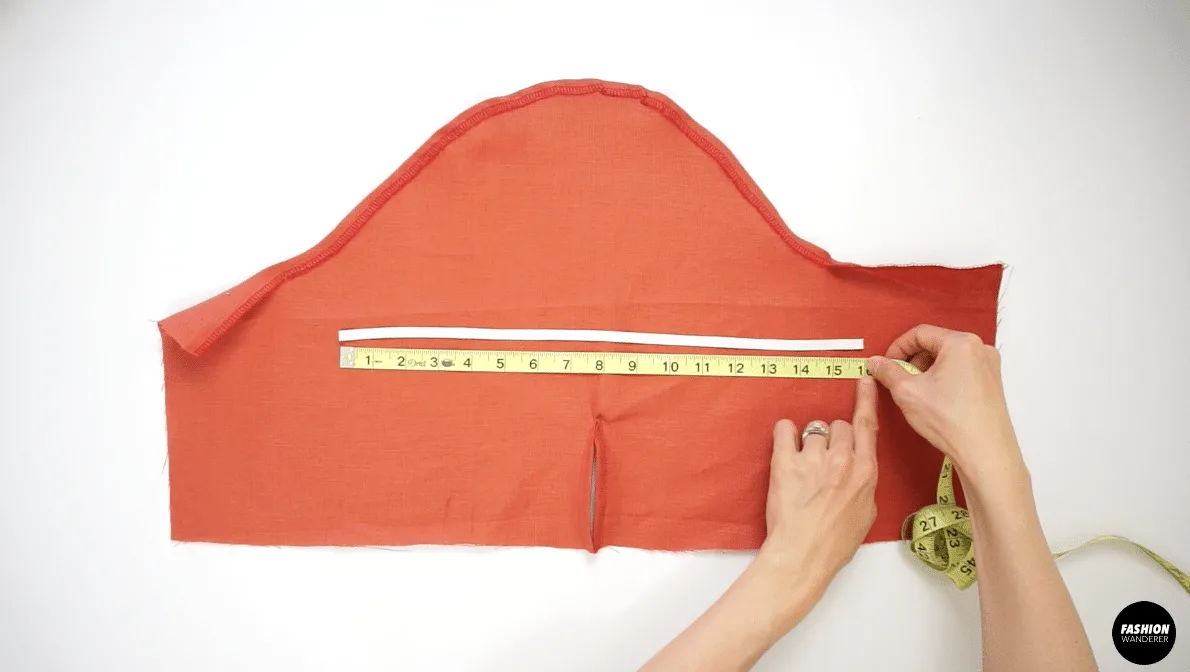
How To Sew Bustier Bodice
- Lay the Center Front piece facing up and place the Side Front piece facing each other to stitch ⅜” width; finish with zigzag stitch on both princess seams.

- Press the joined seams away from the center front.

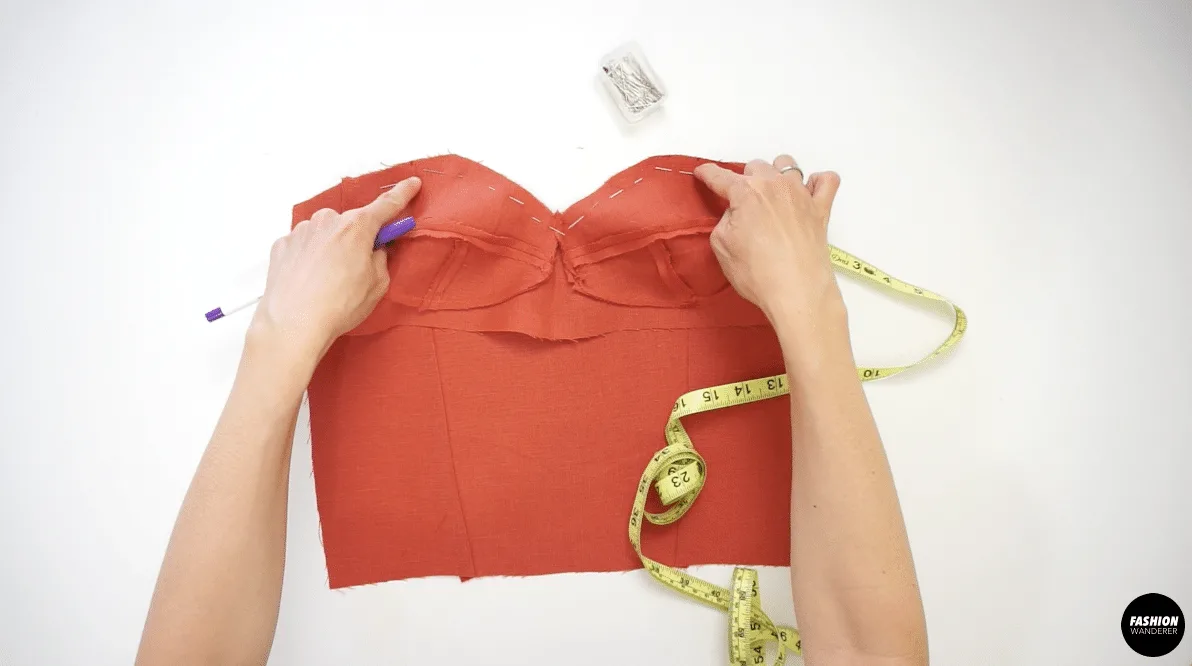
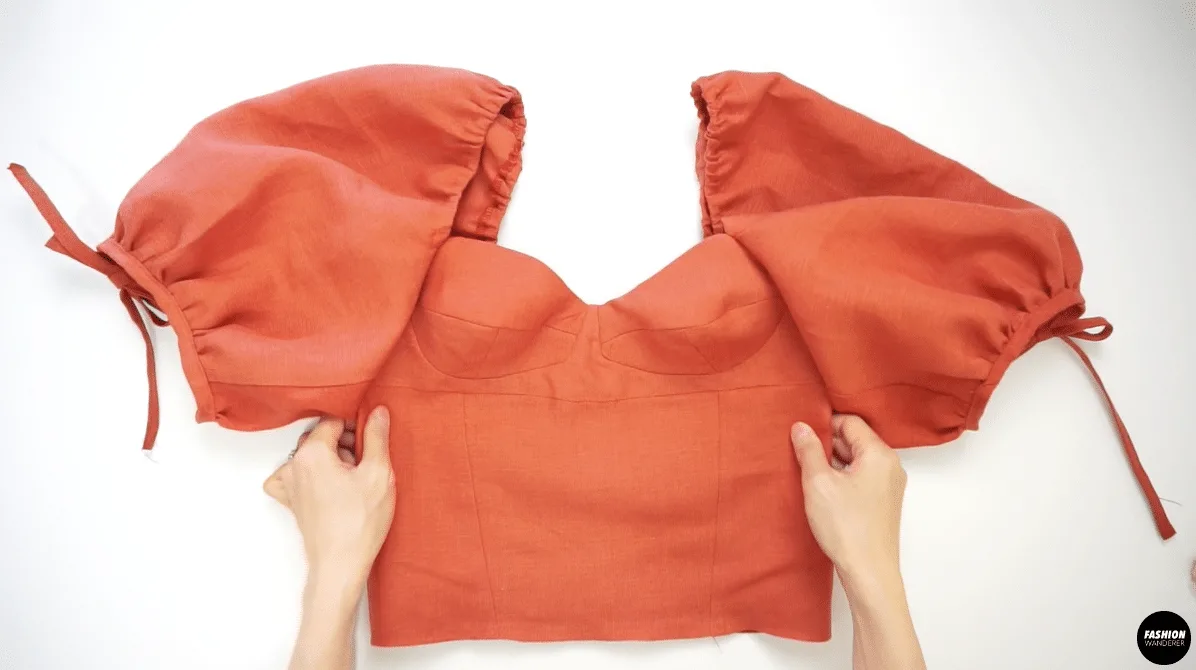
- Place the right side of the completed Bustier Cup on top of the Front Bustier Bodice and stitch ⅜” width to join.
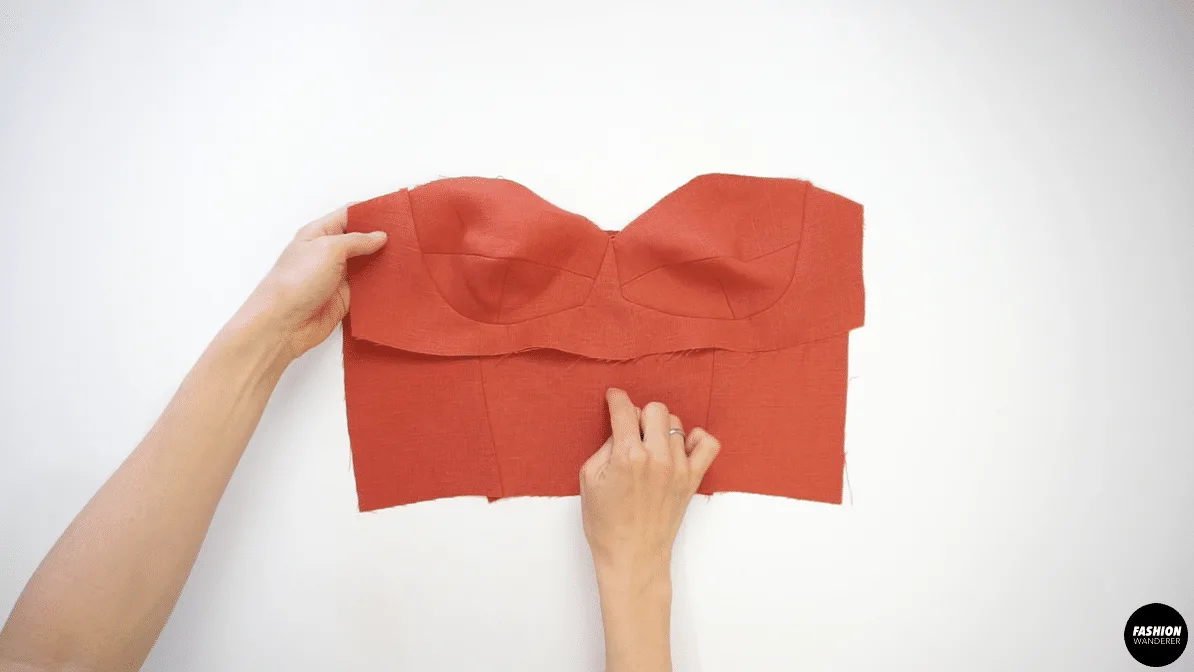
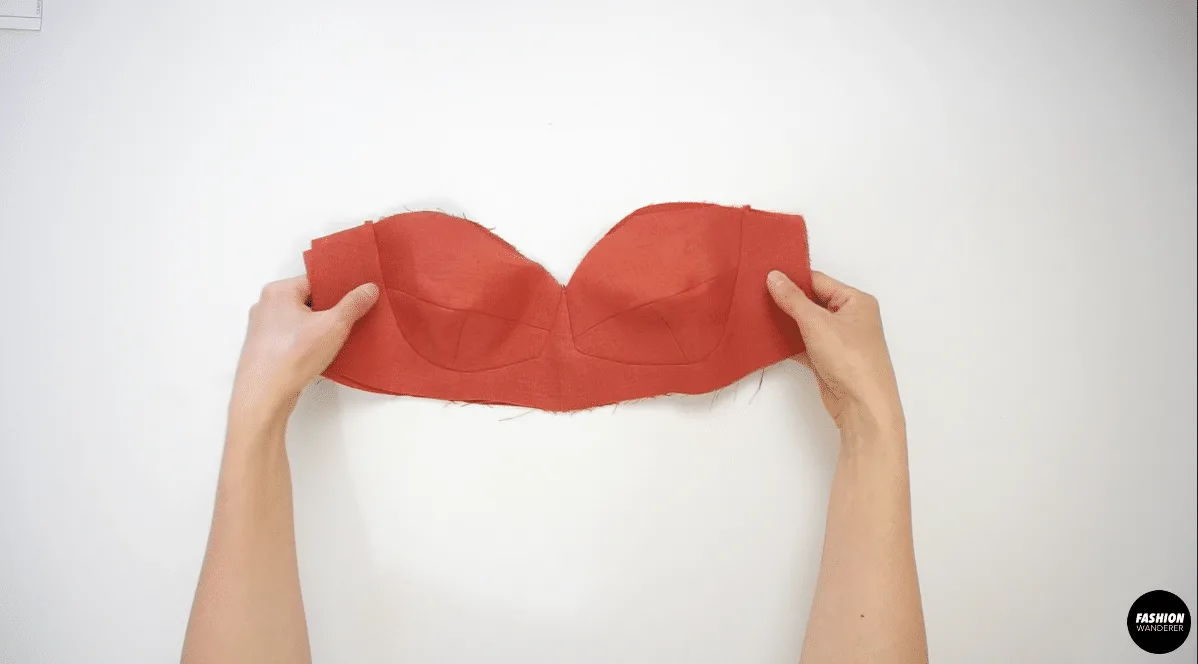
- Next, lay the right side of the Lining Cup and right side of Outer Cup facing each other.
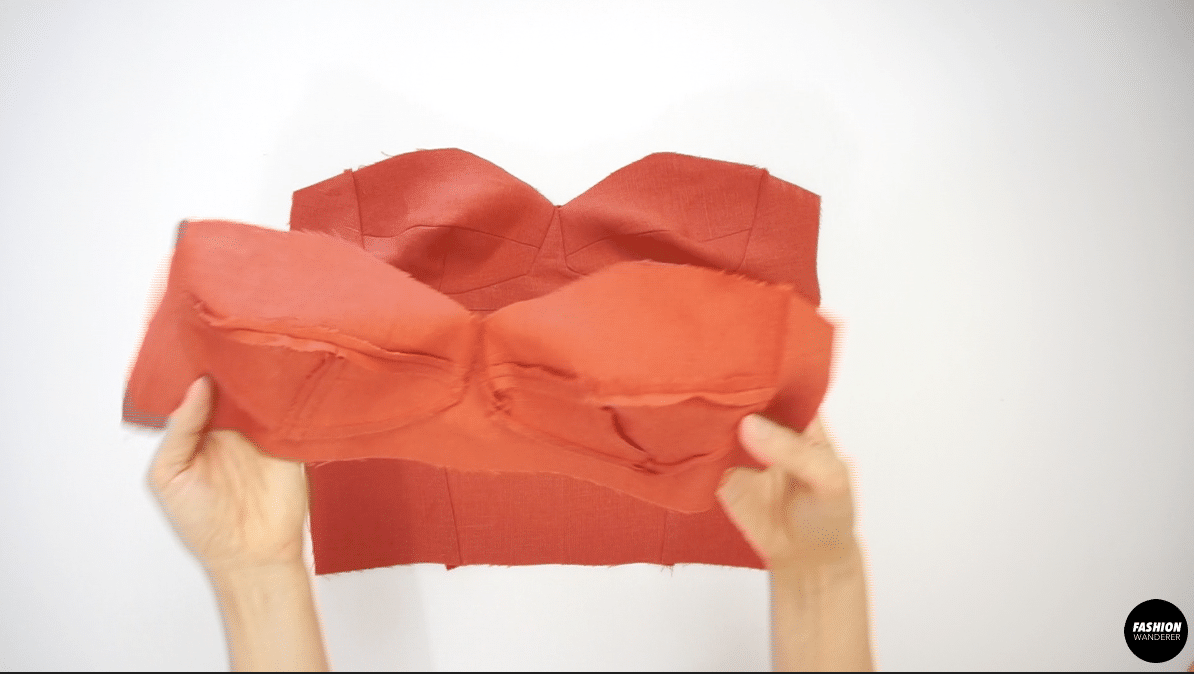

- Measure 3½“ away from the side and start pinning. This is where you will stitch to join with ⅜” topstitch.

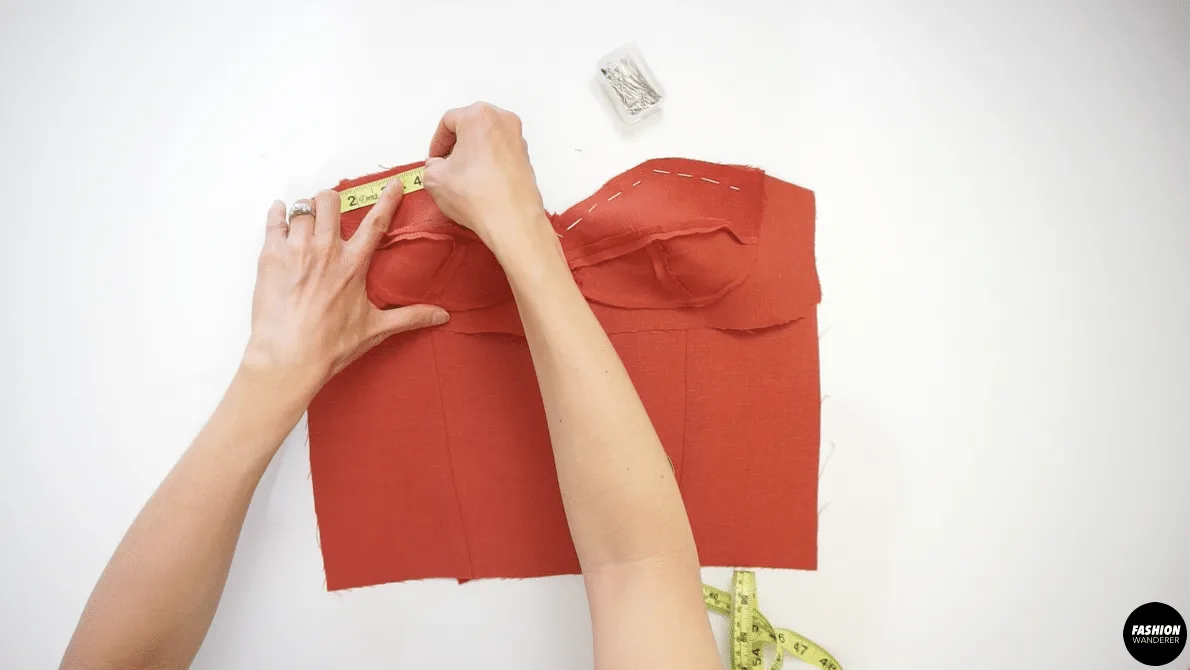

- Iron to open up the seam and edge topstitch along the Lining Cup.

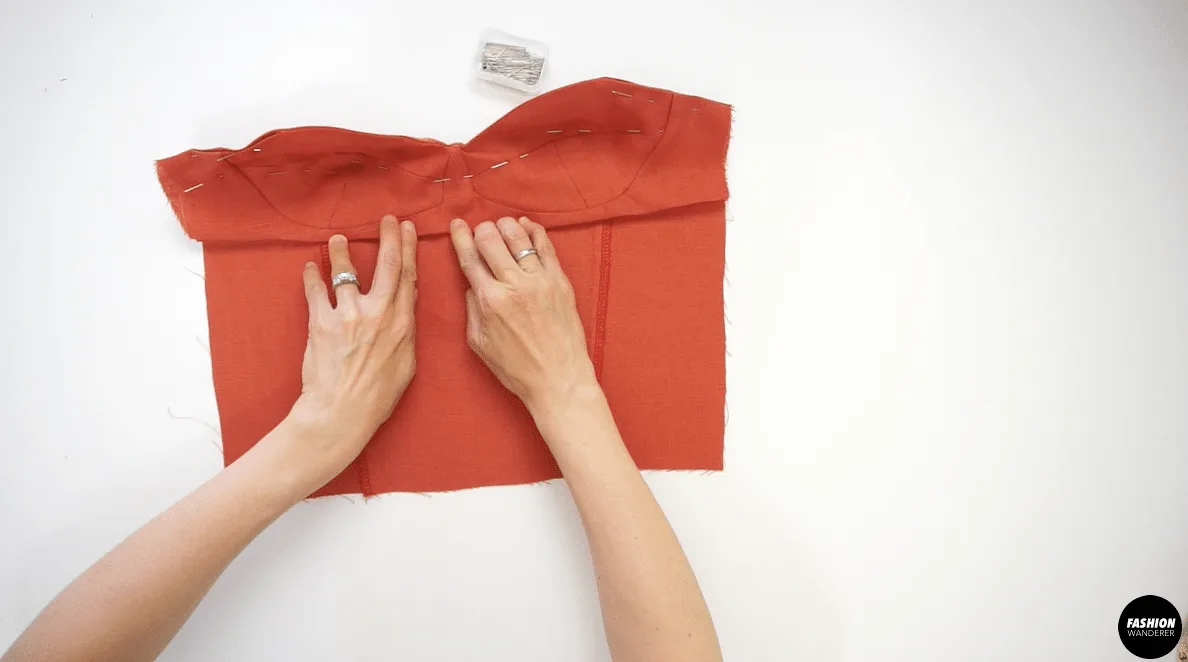
- Flip the Lining Cup inside, fold the under bust seam ⅜” inside and stitch in the ditch on the Outer Cup seam.

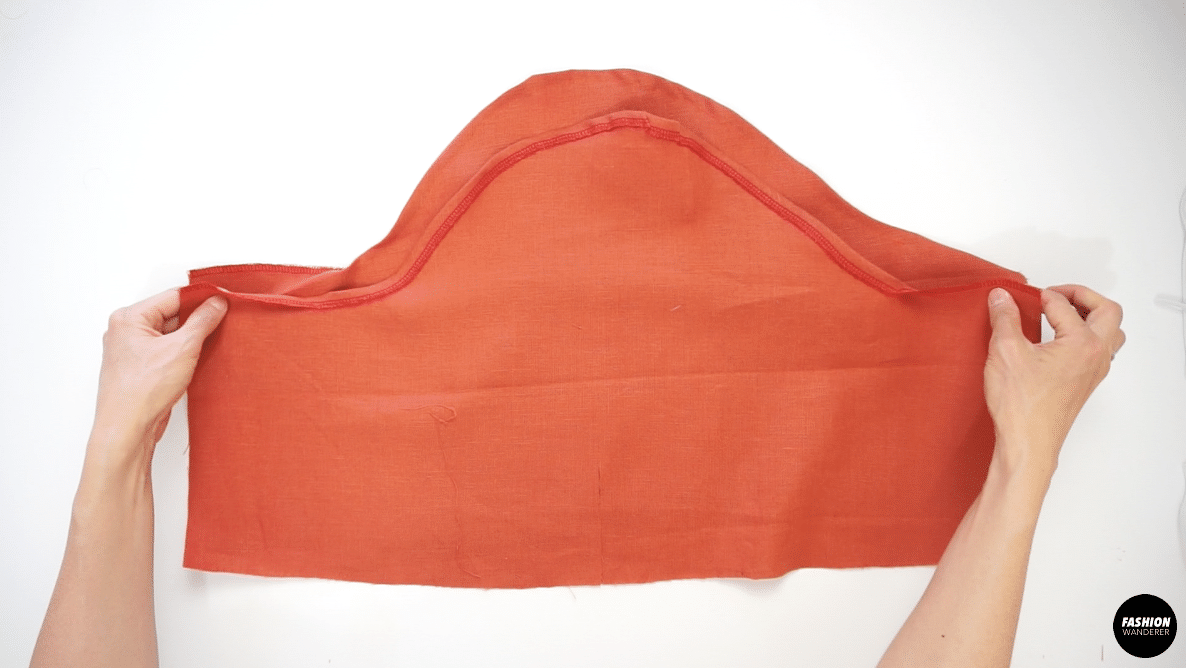
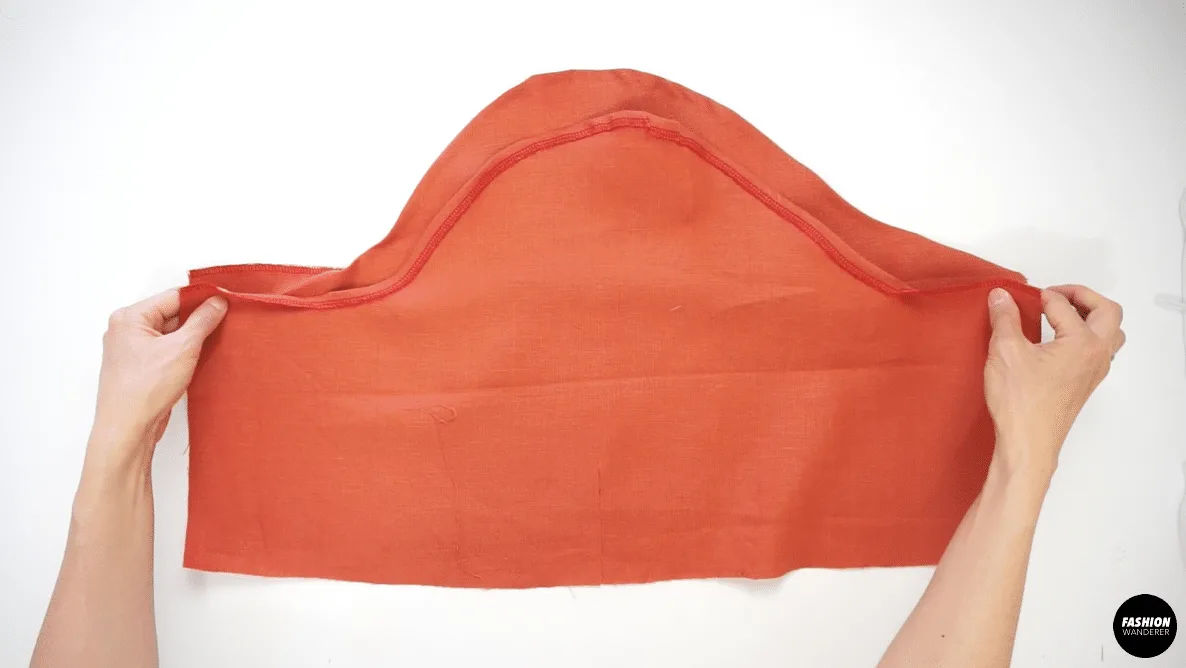
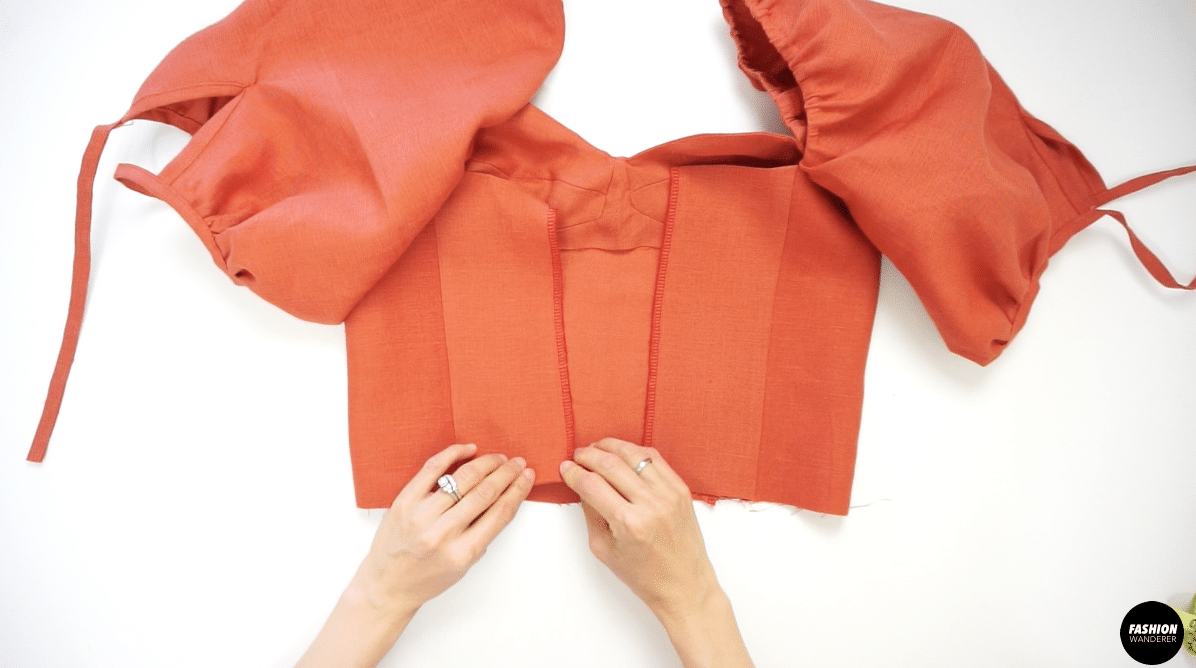
- Place Center Back and Side Back together with right sides facing each other to stitch ⅜” seam allowance and finish with zigzag stitch.


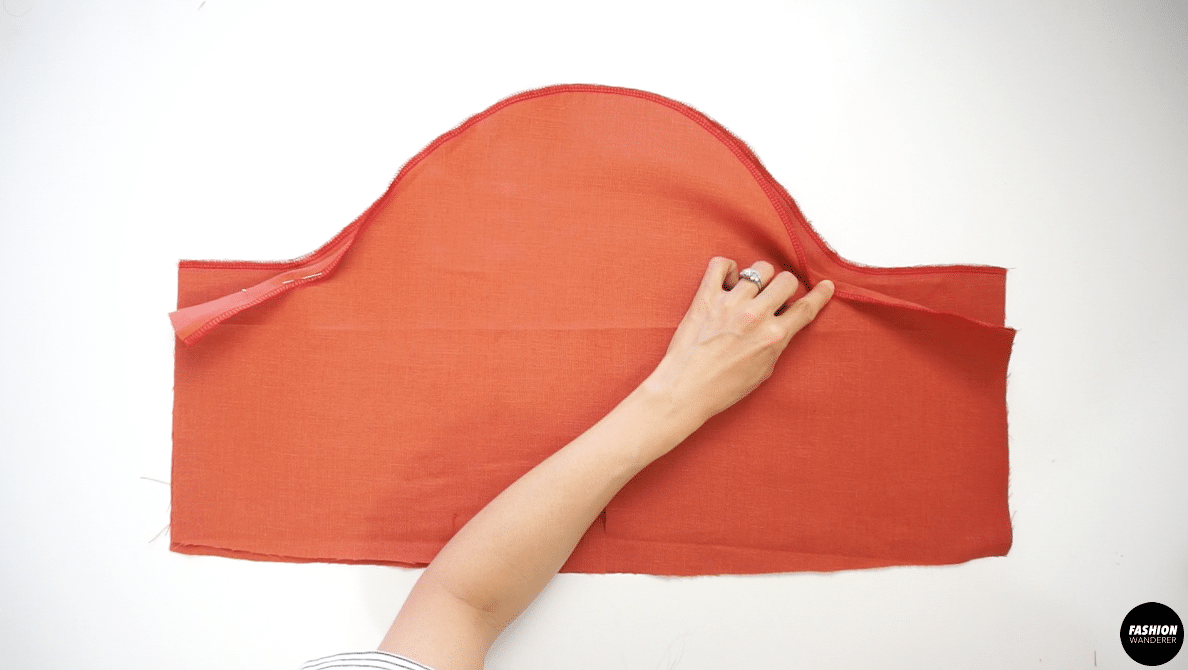
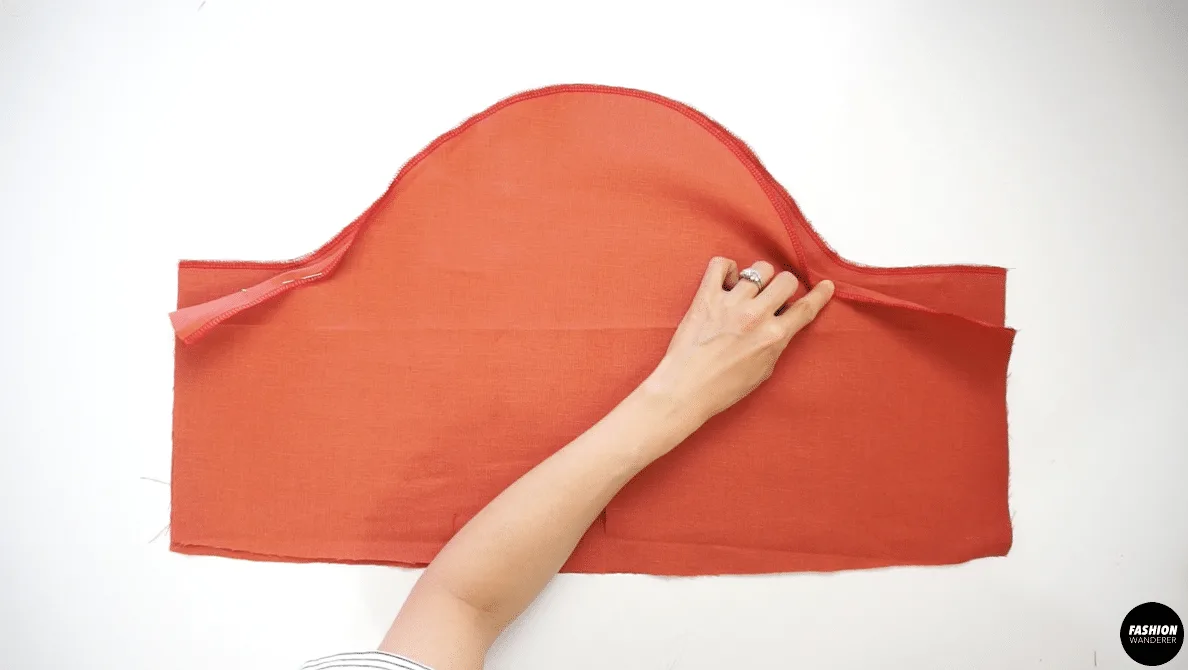
- Lay the right side of Front Bustier Bodice and right side of Back Bustier Bodice facing each other and join the seam with ⅜” width; then finish with zigzag stitch.
- Press the seam towards the back.

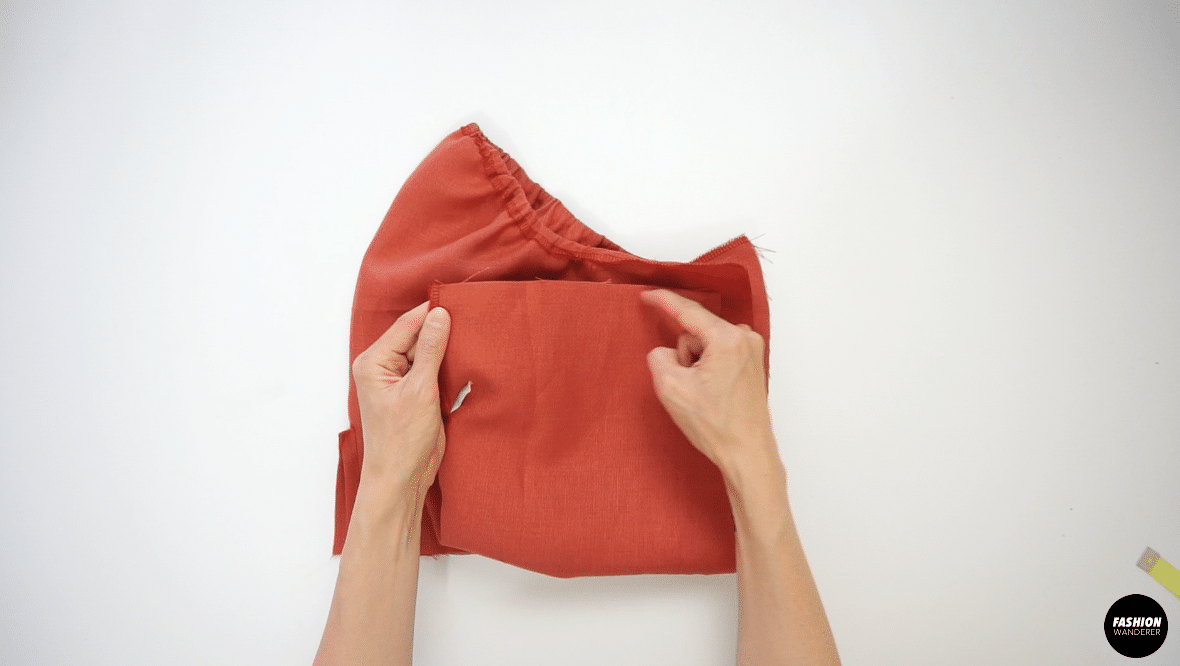
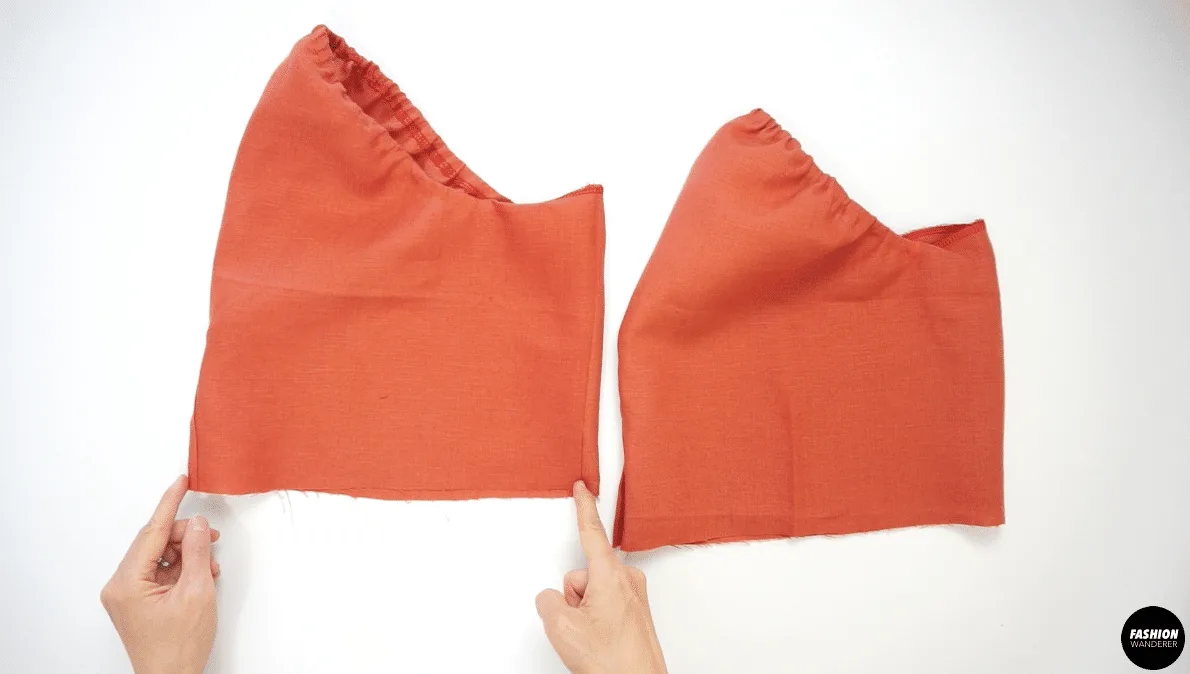
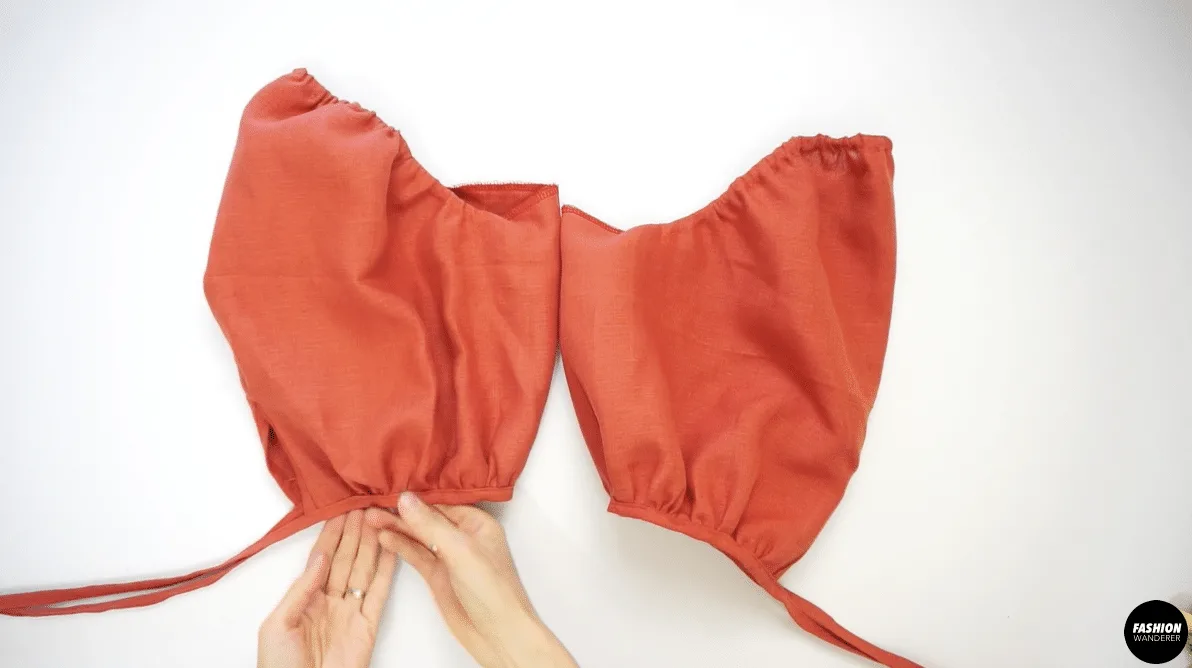
How To Sew Puff Sleeve
- Zigzag stitch both sleeves along the curved sleeve pieces.
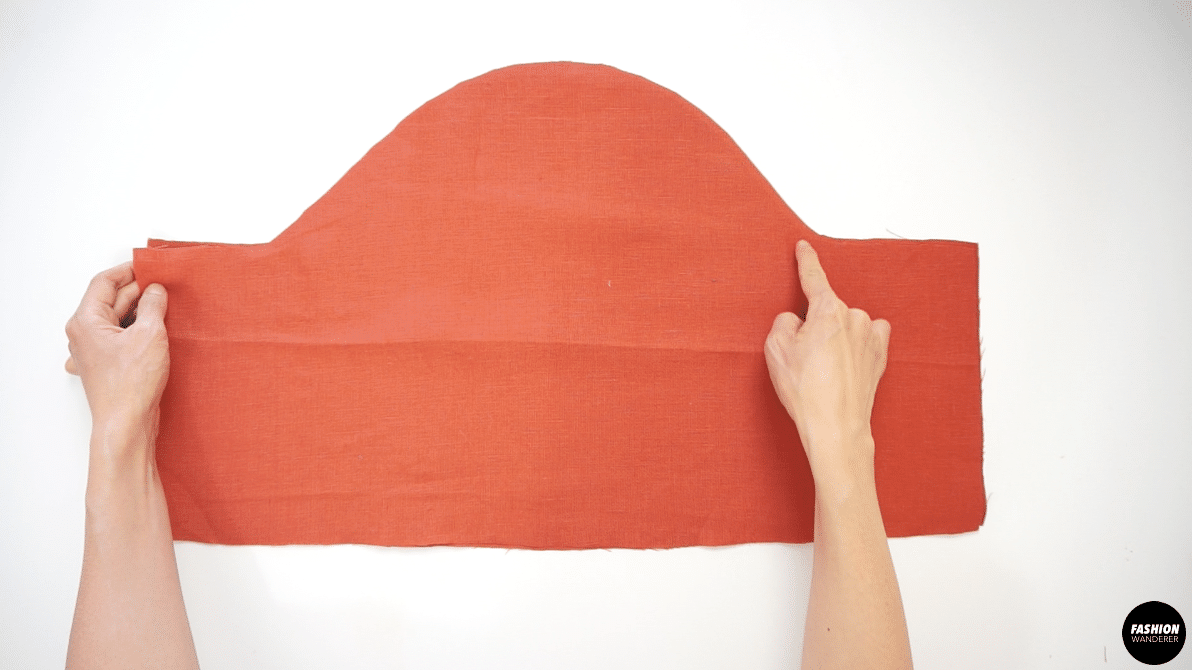

- From the one notched side to the other notched side, fold ⅜” along the curved line and edge topstitch to create a tunnel.
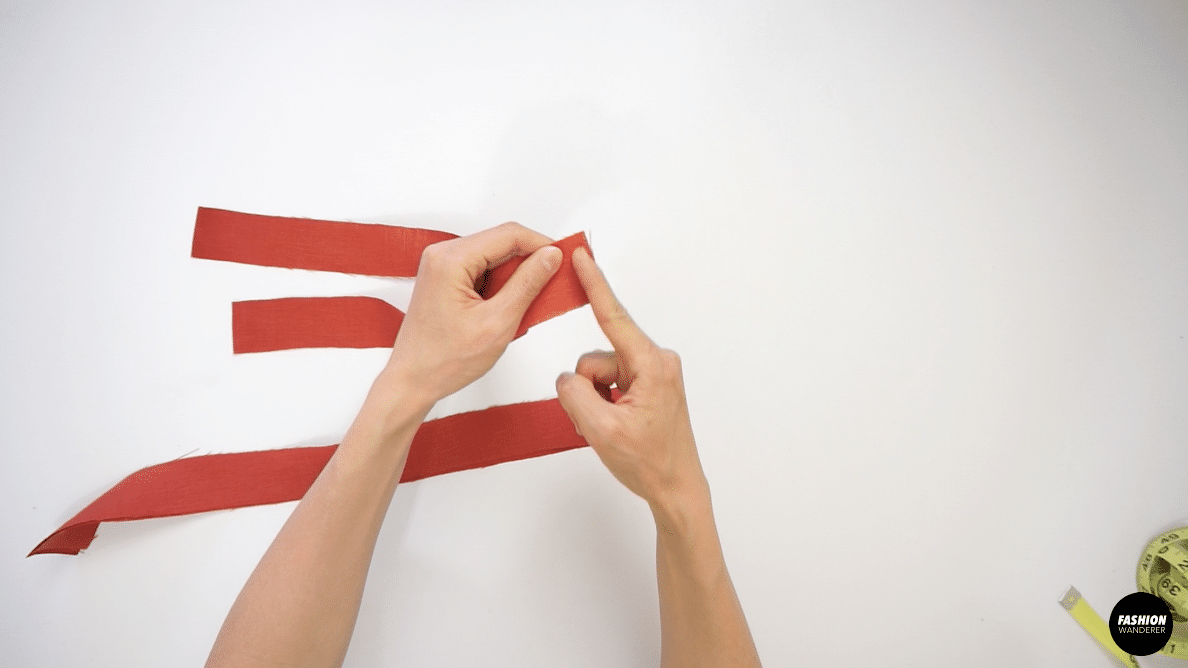
- Take a piece of strap that is 1” by 7” long, open the slit of the sleeve so it creates a straight line and stitch ¼” to join the two pieces together on the right side.

- Flip the strap to the right side of the sleeve, then double fold, pin and edge topstitch to finish.


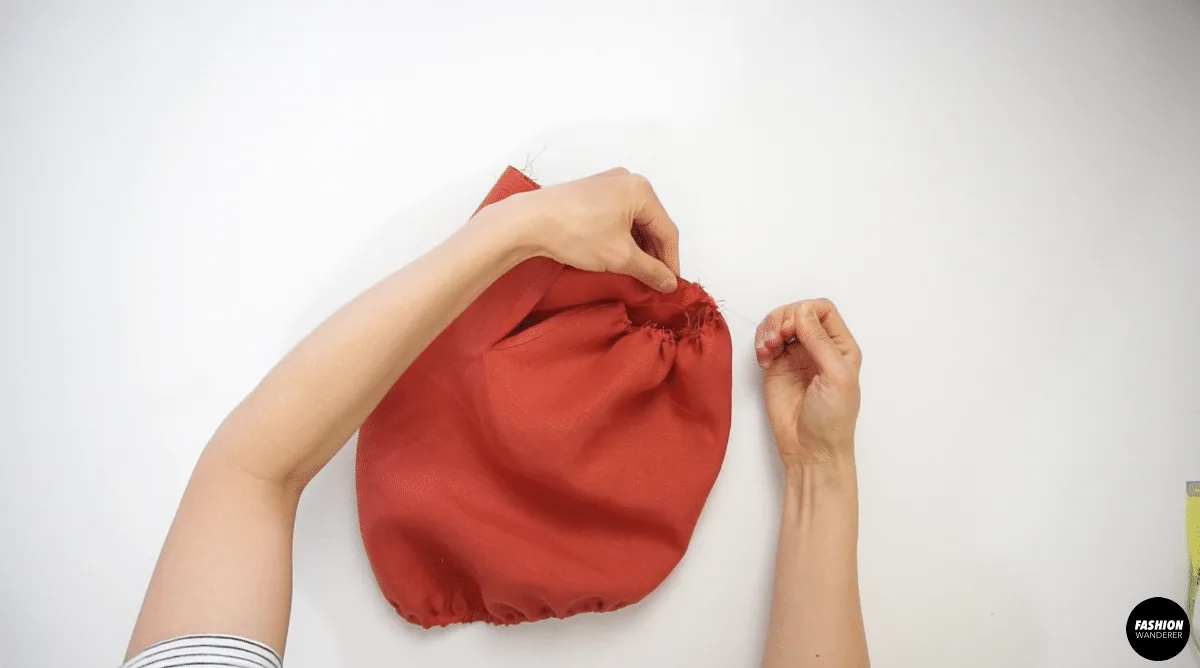
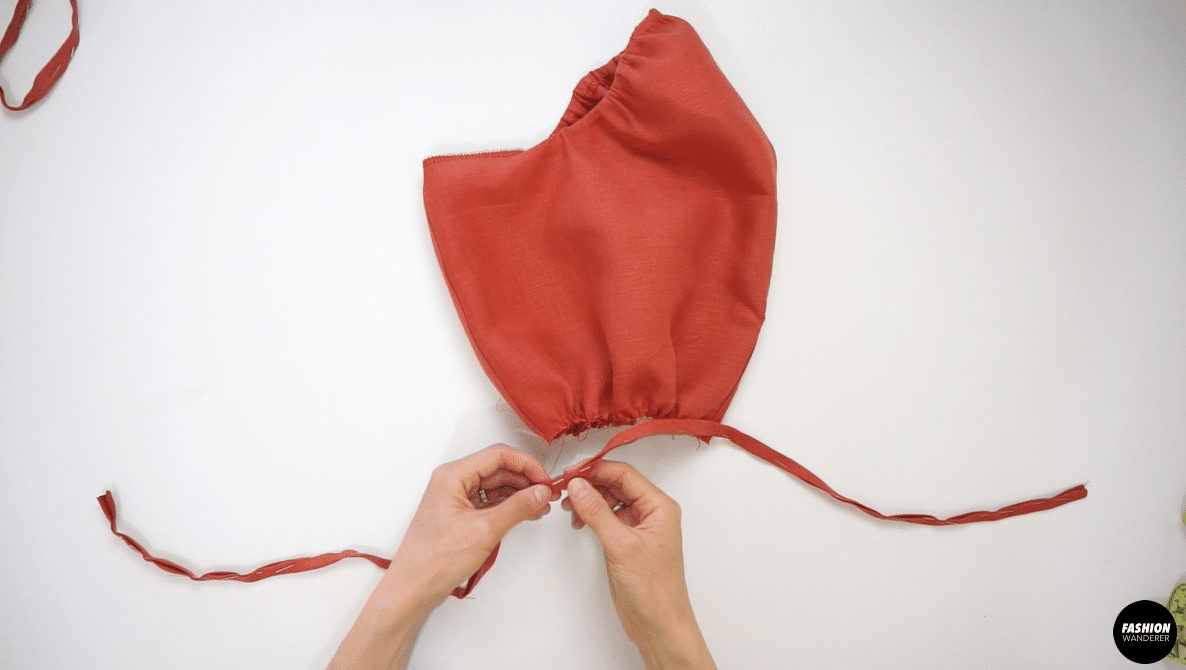
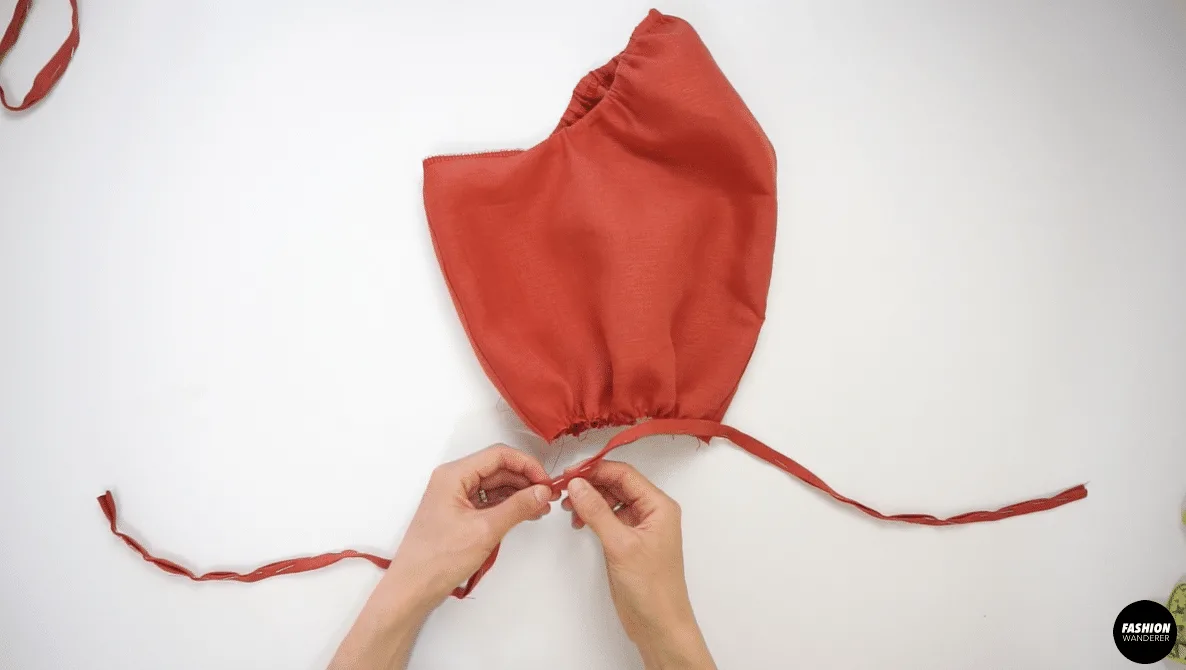
- Measure 2 pieces of ¼” width elastic that are 16” long.
- Use loop turner to slide the elastic through the tunnels; catch the elastic to pull through and stitch to secure the elastic on both ends.
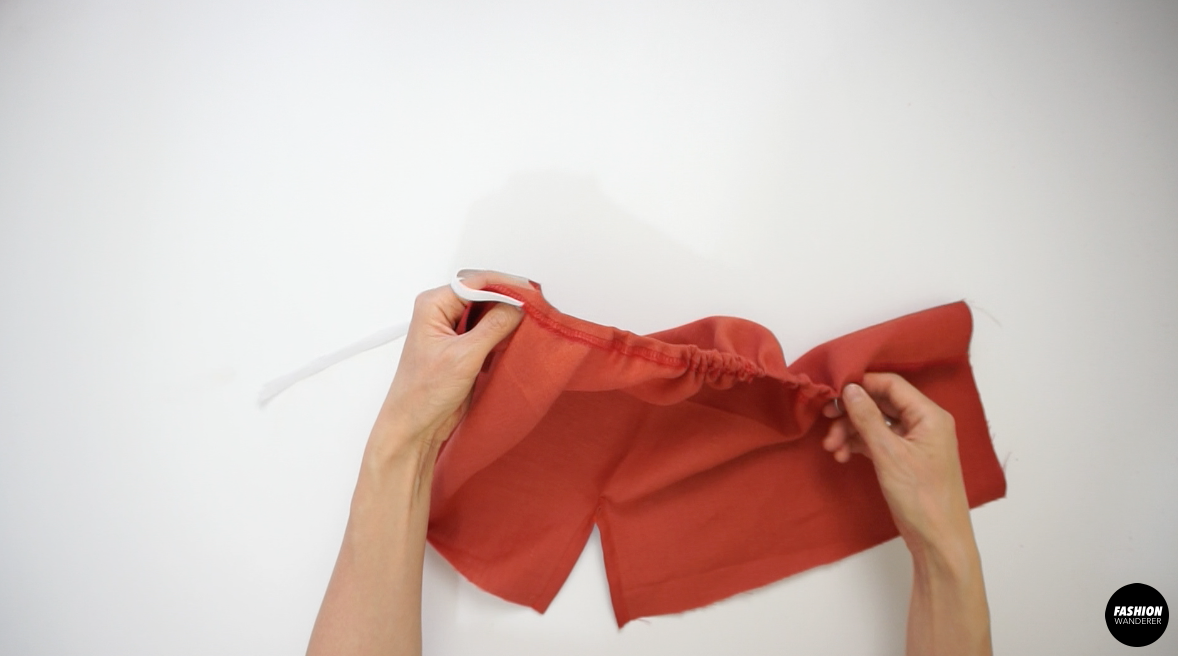

- Adjust the sewing machine to 3.5 or 4 width and stitch ¼” along the sleeve opening.

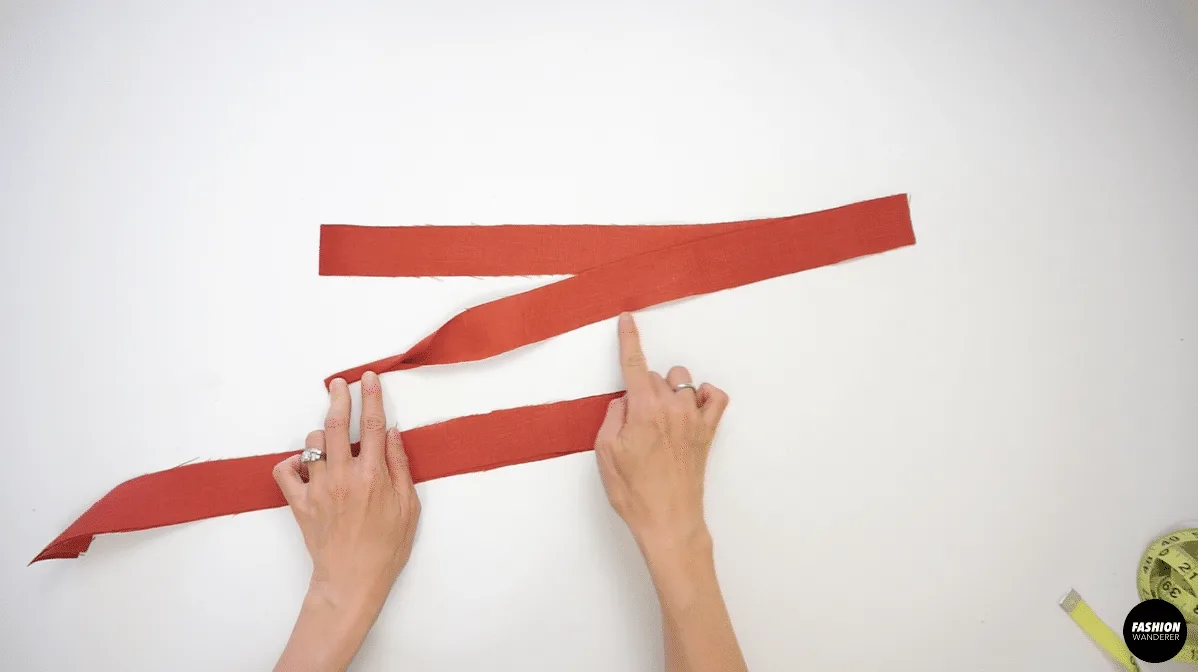
- Join the Sleeve Strap pieces facing each other with ¼” stitch and press seam open.

- Next, fold the strap lengthwise ¼” on both sides and fold again to create binding; give a nice press and pin to secure.

- Join the side seam of the Sleeve piece with ⅜” seam allowance and zigzag finish.
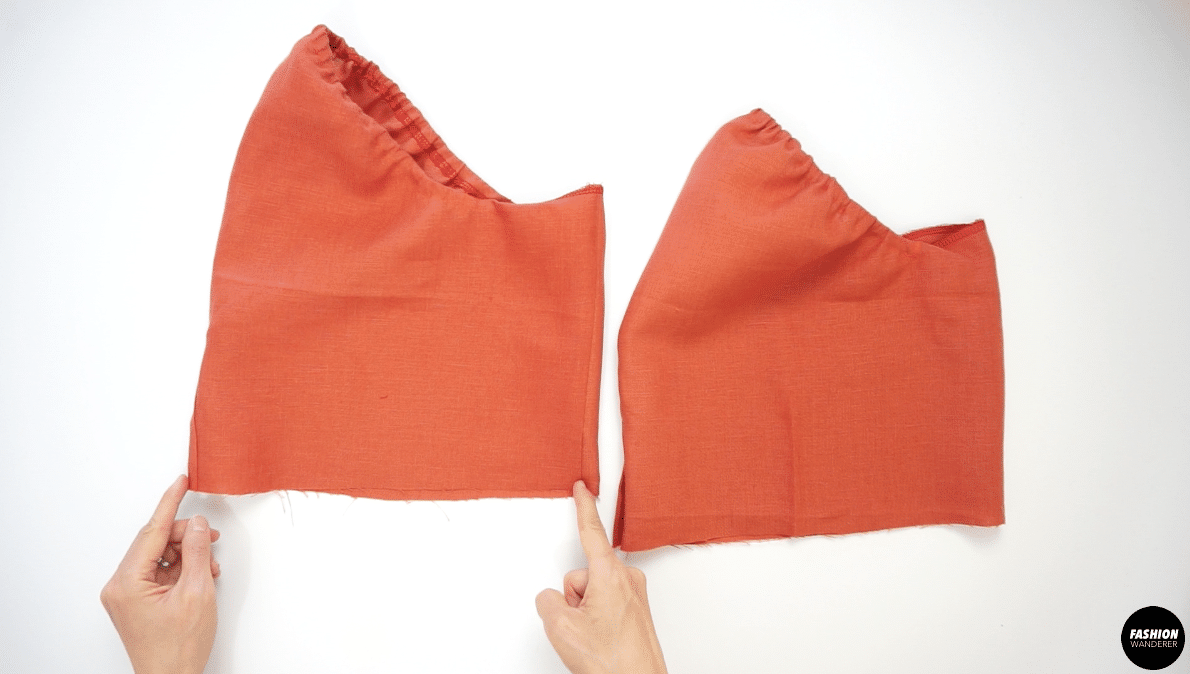
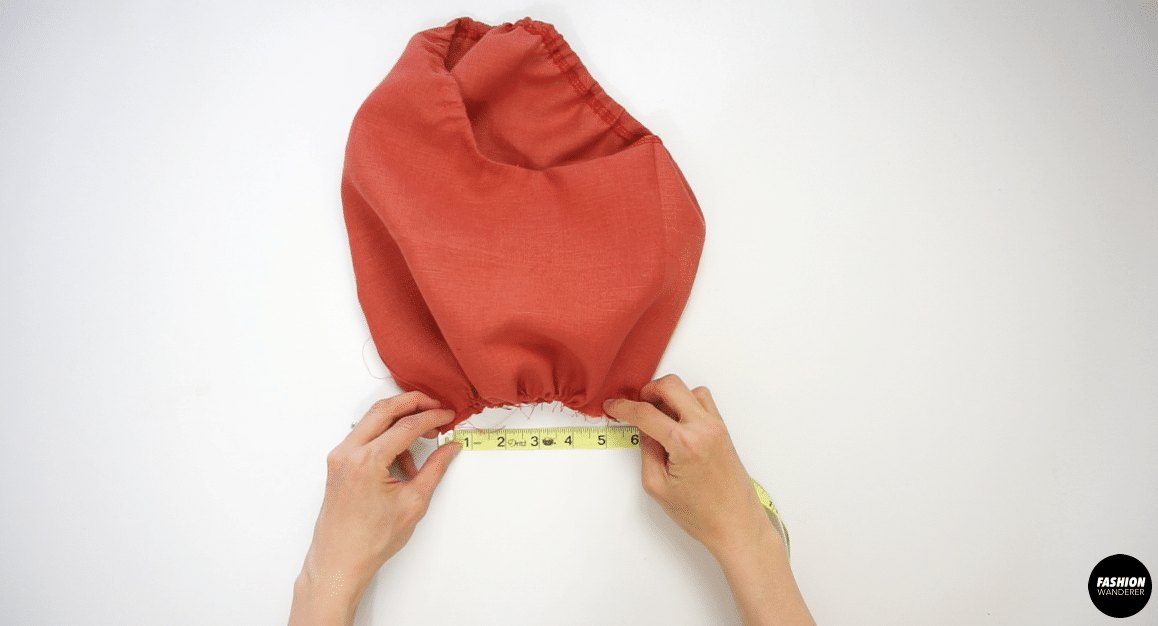
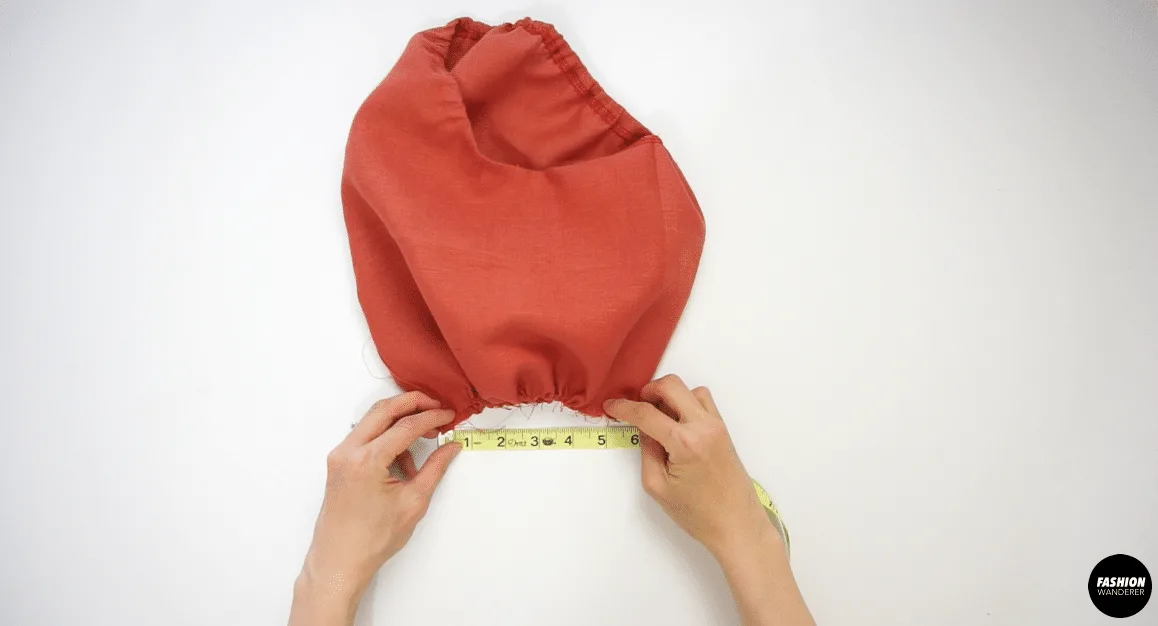
- Pull the back thread gently to distribute the gathering equally along the sleeve opening. Make sure the sleeve opening is 10” total or 5” when laid flat.

- Match the side seam of the Sleeve and side seam of the Sleeve Strap, slide through in-between the folds and pin.
- Edge topstitch the binding to join the sleeve and strap together on both sides.

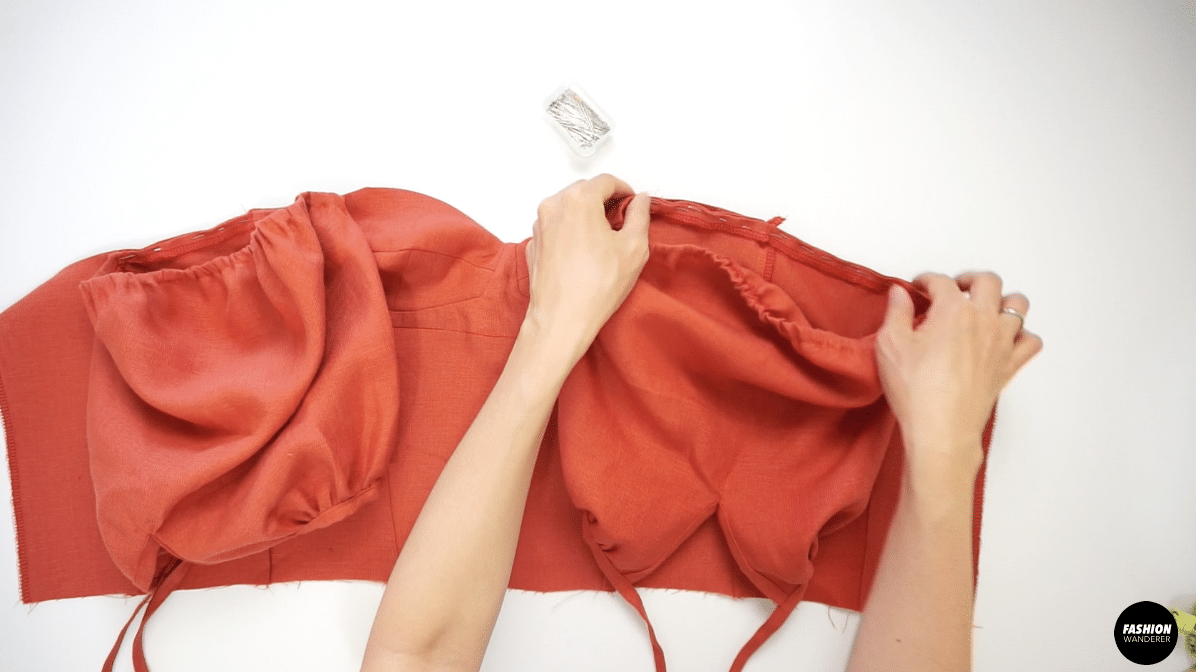
How to Assemble Bustier Puff Sleeve Bodice
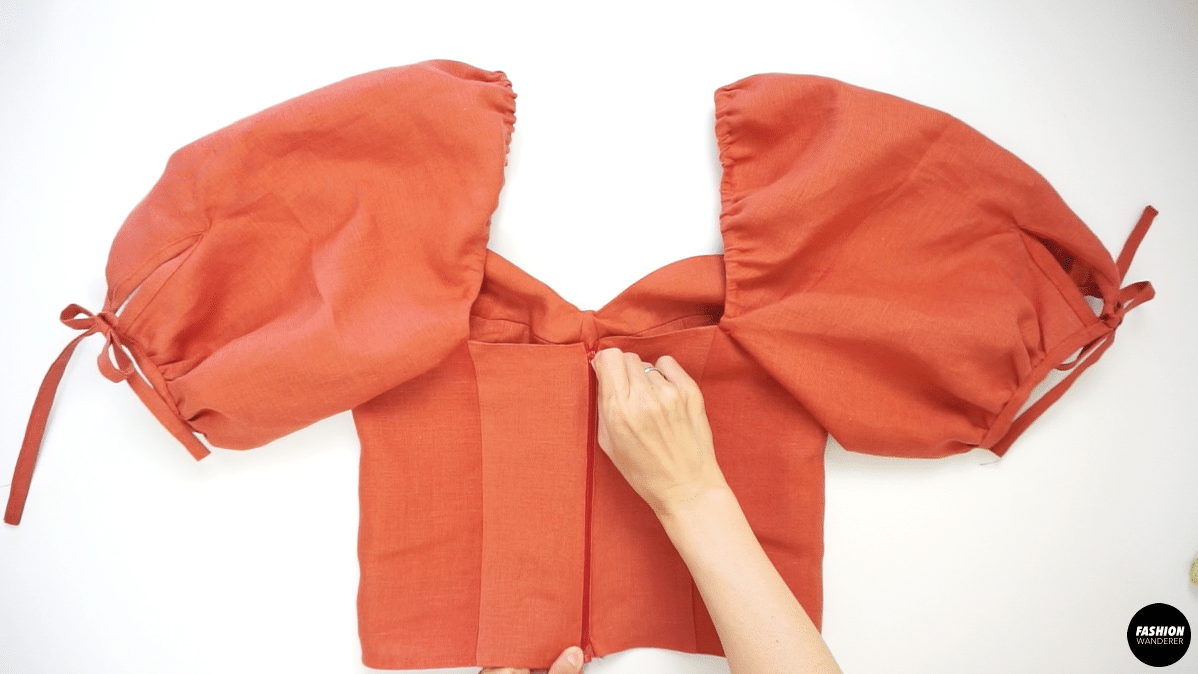
- Place the right side of the Sleeve and right side of the Bodice facing each other; fold both pieces ⅜” inside and edge topstitch ¼” width from front to back.

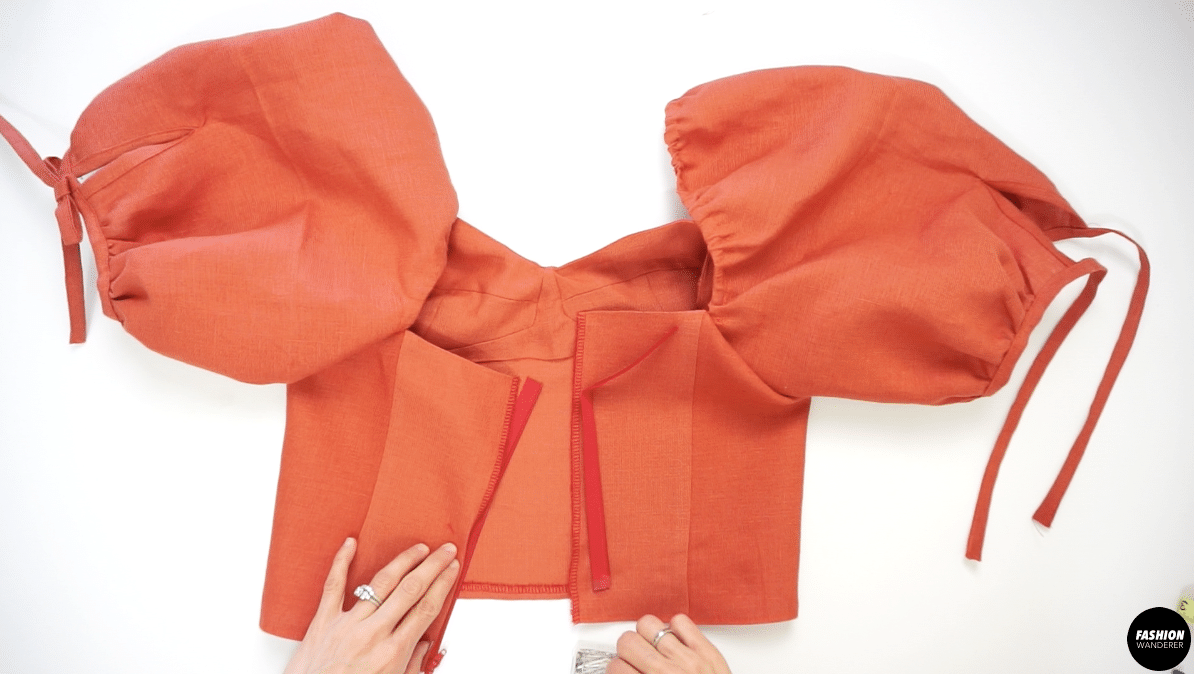
- Zigzag stitch the Center Back opening, double fold the hem and edge topstitch ⅛” width.

- Unzip the separating zipper. Place both zipper tapes by folding ⅜” width and edge topstitch with zipper foot to finish the bustier puff sleeve top.


Recommended Products
As an Amazon Associate and member of other affiliate programs, I earn from qualifying purchases.


Trendy, Affordable Sewing Patterns for All Sizes


Tie Shoulder Jumpsuit Pattern


Palazzo Pants Sewing Pattern


Pocket Overall Romper Pattern


Wrap Maxi Skirt Sewing Pattern


Tie Back Top Sewing Pattern