
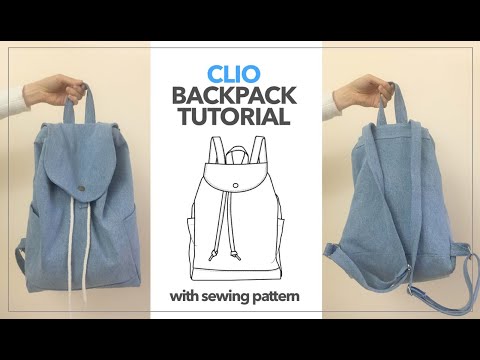
Whether you have oversized baggy or skin tight old jeans, follow the step by step sewing tutorial to make a backpack from old jeans. This DIY backpack sewing pattern is easy to follow and can be made from scratch using denim or canvas fabric as well.
How to make backpack from old jeans? Prepare the fabric by washing and air drying prior to deconstruct the old jeans. It will help you shrink the fabric to give accurate cutting and sewing measurements.
Use sewing patterns to cut out the pattern pieces from each side of the material. Follow the sewing instructions and add hardware to give a professional finish and secure closers to the DIY backpack.
Are you looking for sewing project ideas to upcycle old jeans? From mini dress to crescent purse, there are fun ways to transform your pair of jeans.
This tutorial includes everything you need to know to make a backpack from scratch. The backpack sewing pattern includes measurements for all pieces and the sewing tips give you detailed instructions to complete the bag making project.


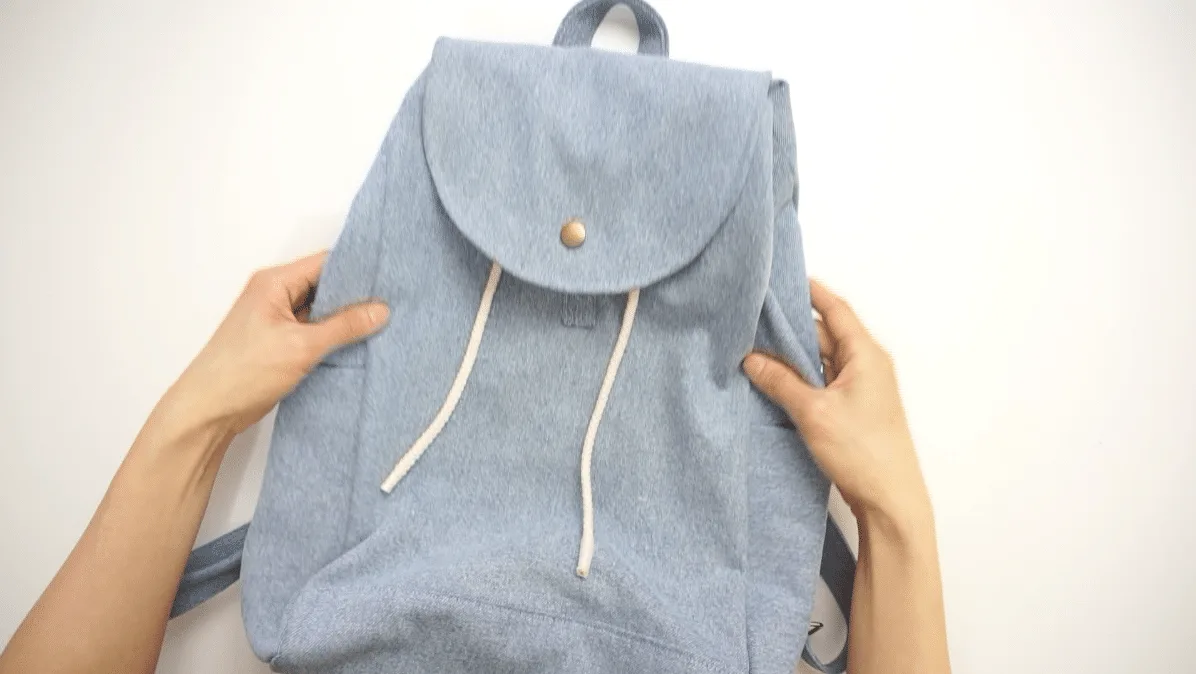
DIY Backpack Sewing Pattern


You will love this DIY denim backpack because…
- This backpack tutorial comes with accurate sewing pattern measurements for you to follow.
- Learn how to sew denim by using correct sewing needle and thread.
- Finish the inside seams with overlock stitch to prevent edges from unraveling.
- Perfect sewing project for beginner and intermediate skill level.
- Properly apply hardware including buckles, snap buttons and grommets.
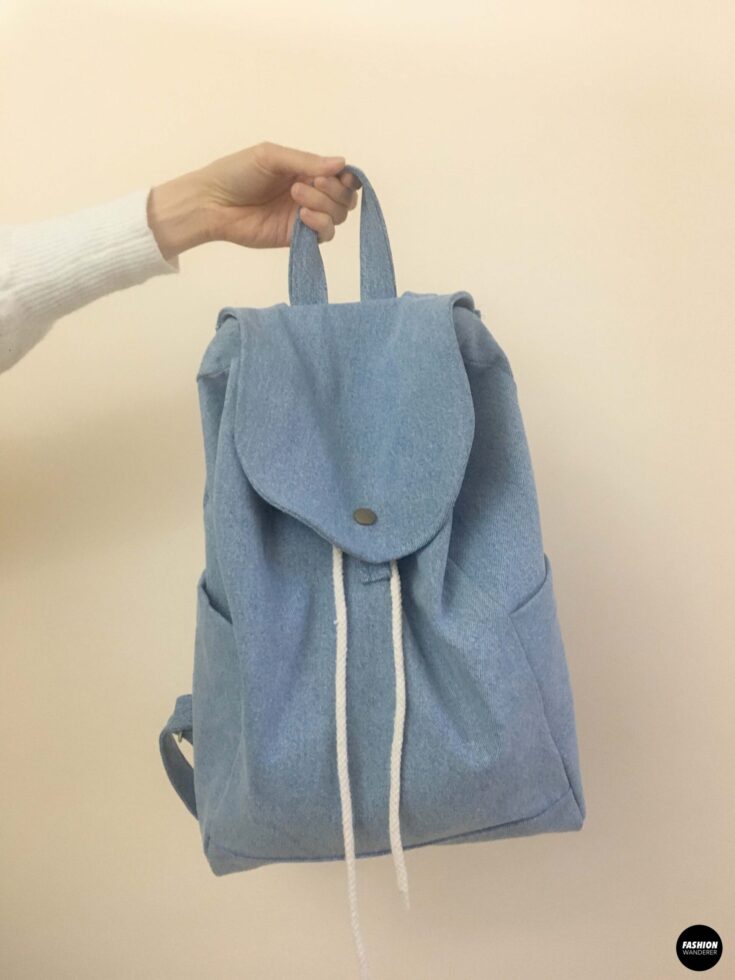
From outside pocket to adjustable drawstring opening, this backpack provides functional and spacious room to carry a laptop and any other everyday essentials. Use this DIY backpack tutorial and sewing pattern to customize the bag with the fabric of your choice including features like inner pocket, flat bottom, handles, and shoulder strap.


How To Make A DIY Backpack From Old Jeans
With the easy to follow backpack sewing pattern, you can use old denim jeans or even a medium to heavy weight cotton canvas material. Ensure that you select the correct needle and thread to create strong seams on this DIY denim bag.
DIY Denim Backpack Tutorial Material:
- Clio Backpack Sewing Pattern
- Old Jeans or 1 yard of Medium to Heavyweight Cotton Canvas Fabric
- 1 piece Size 22 Snap Button
- 8 pieces Size 10 Grommets
- 40” Long Braided Cord
- Heavy Duty Cotton Thread
- Adjustable Slide Buckles
- Rectangle Rings
- Snap Button Pliers
- Measuring Tape
- (Optional) Double Sided Sewing Tape
- Heavy Duty Sewing Machine
- Disappearing Fabric Pen
- Ruler
- Pins
How do you make a Clio denim backpack?
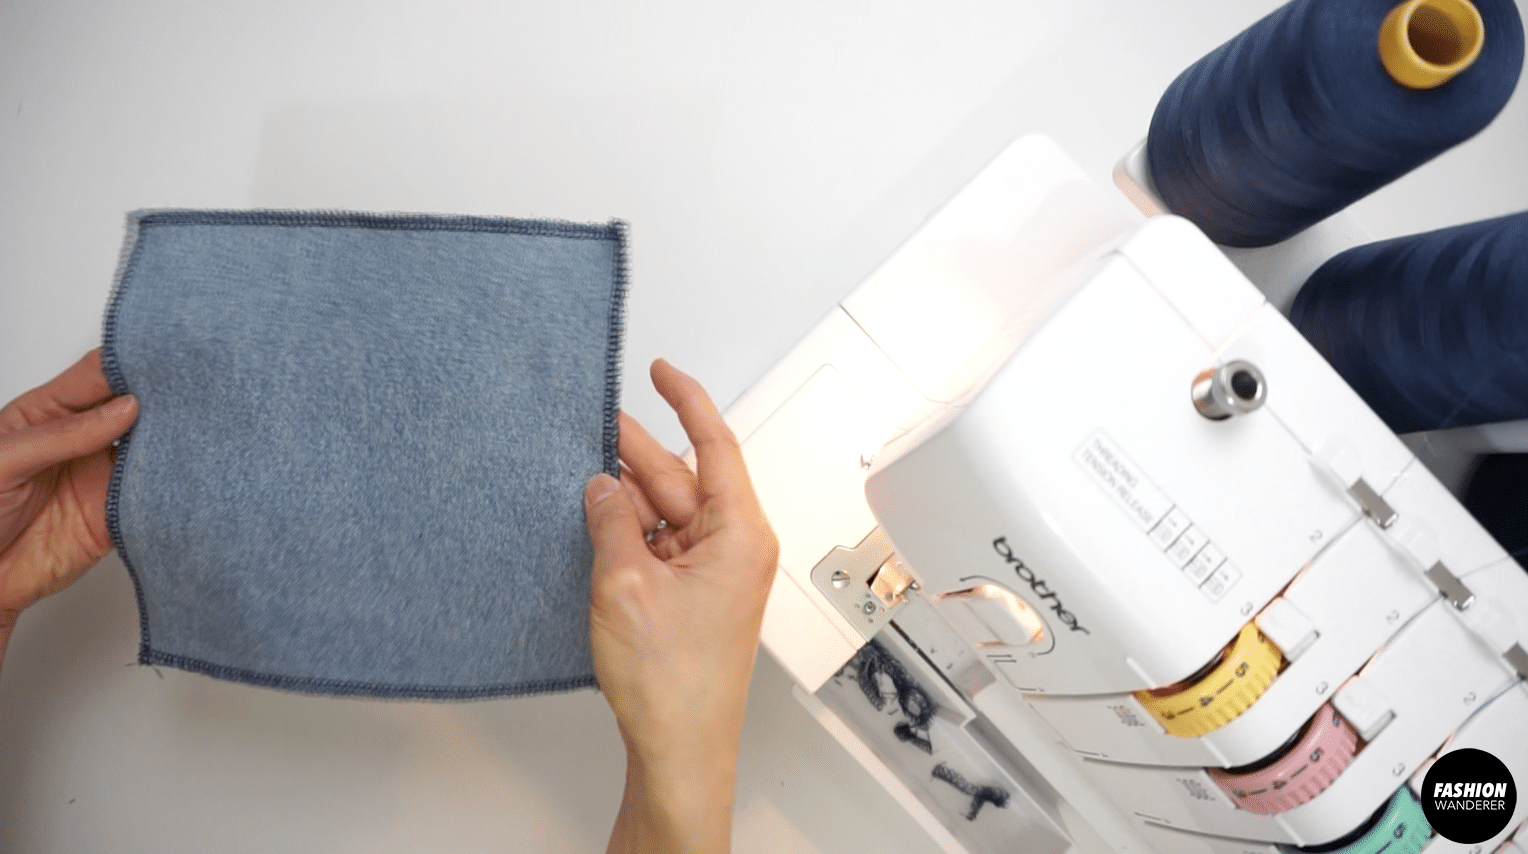
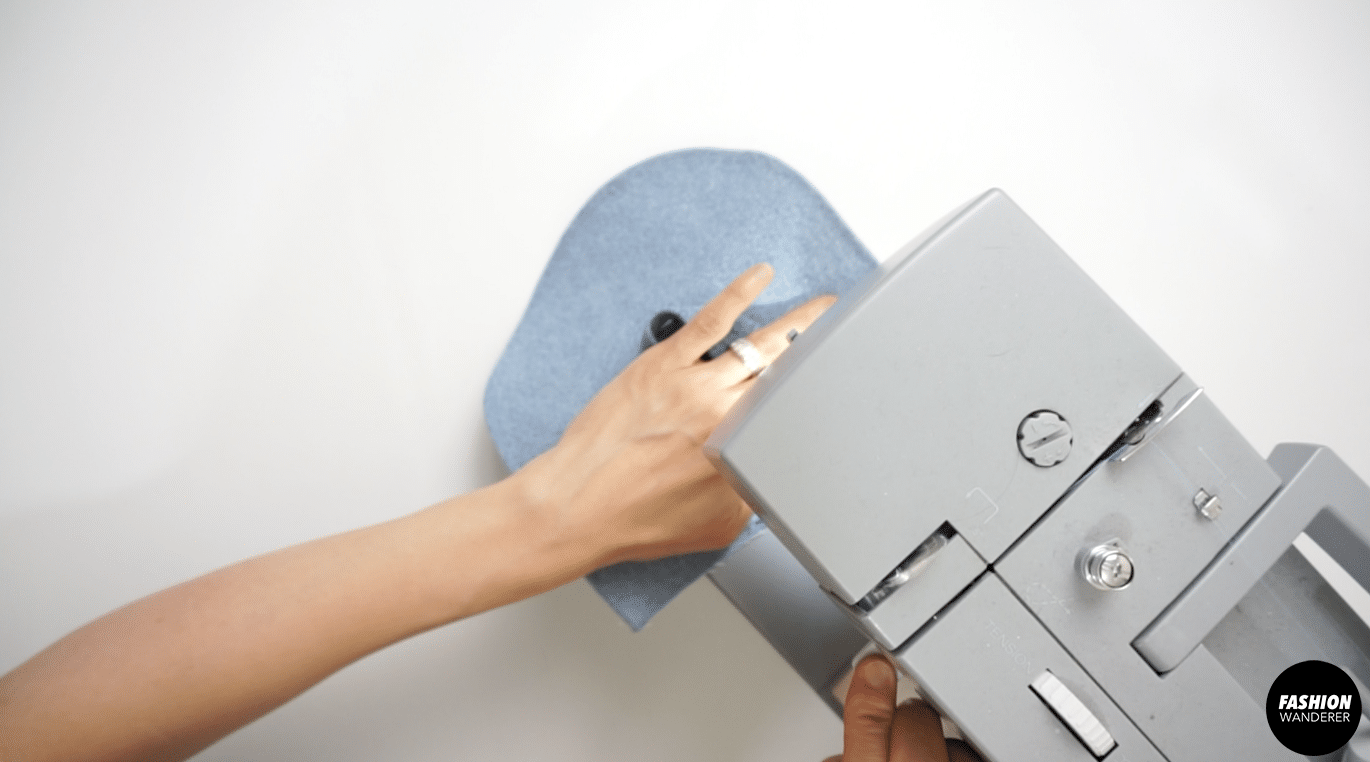
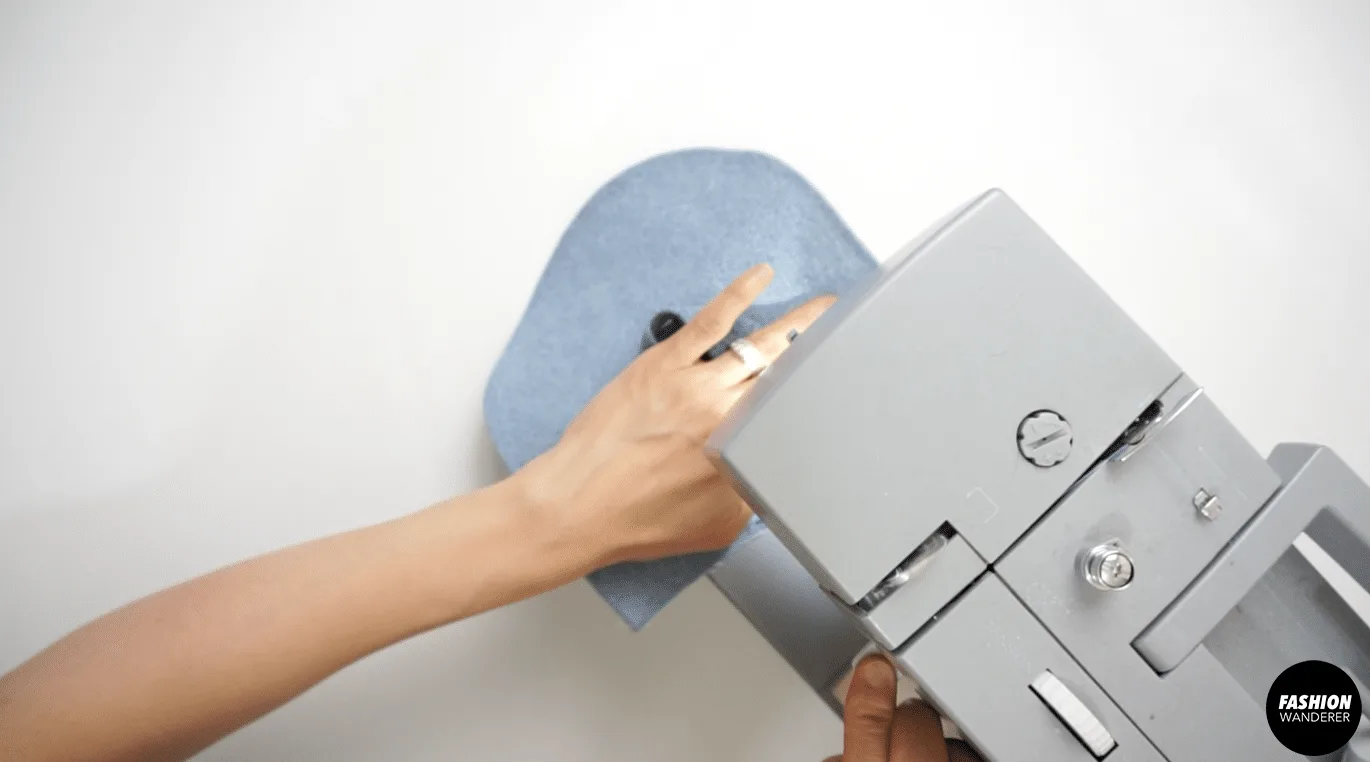
With so many pattern pieces and additional feature, it may look advanced and difficult to make a backpack from old jeans. Always test your sewing machine on a scrap of denim to find the correct the tension and stitch length for best result.
Simply review the sewing instructions and use the sewing pattern to upcycle your old jeans into this cute functional bag with shoulder straps to make you feel good.
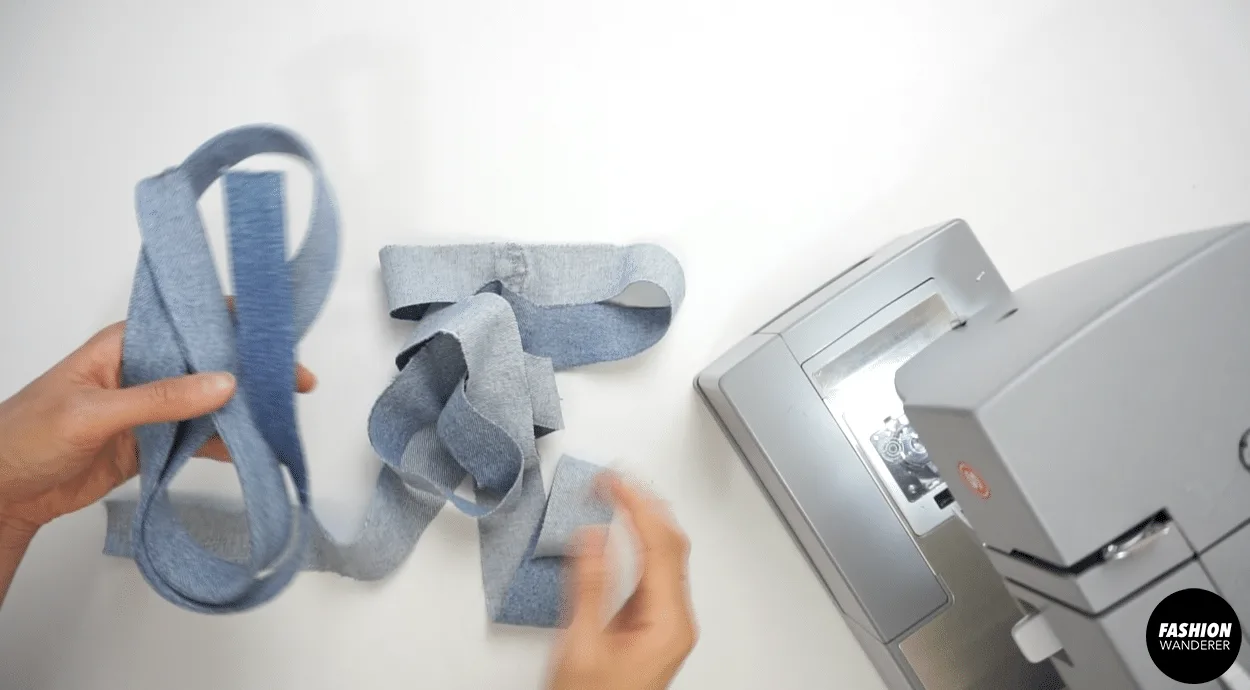
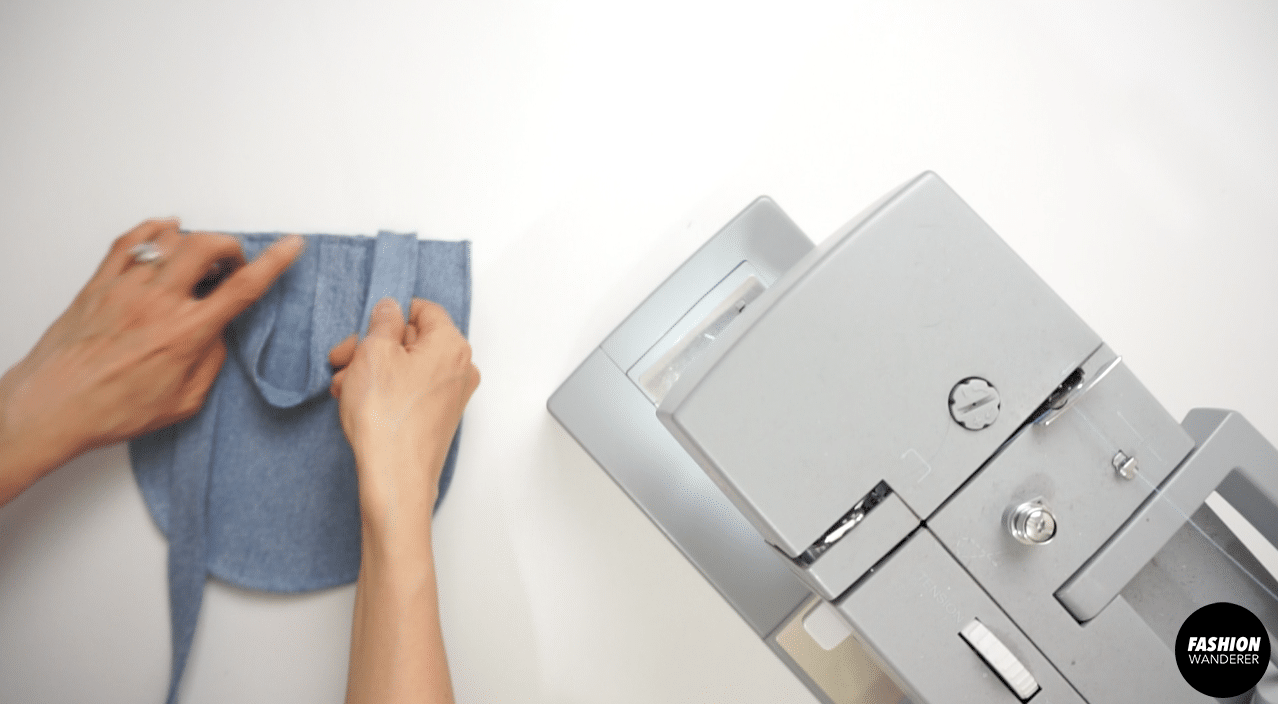
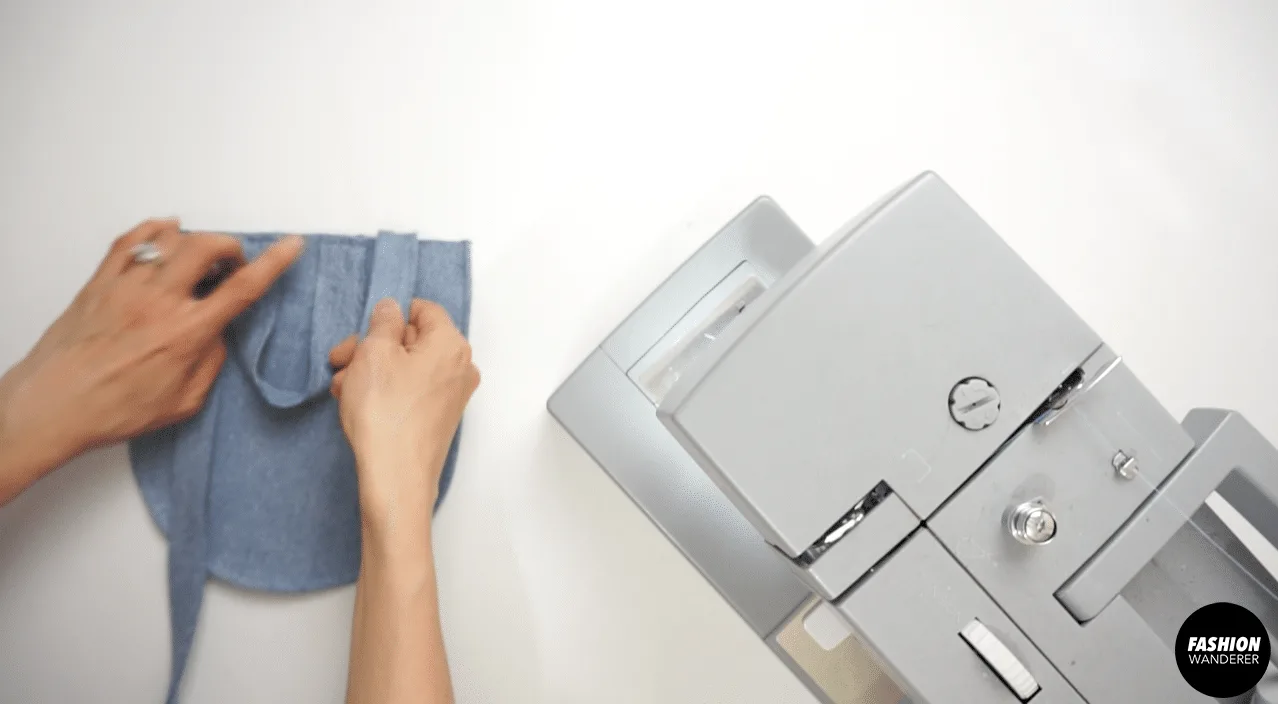
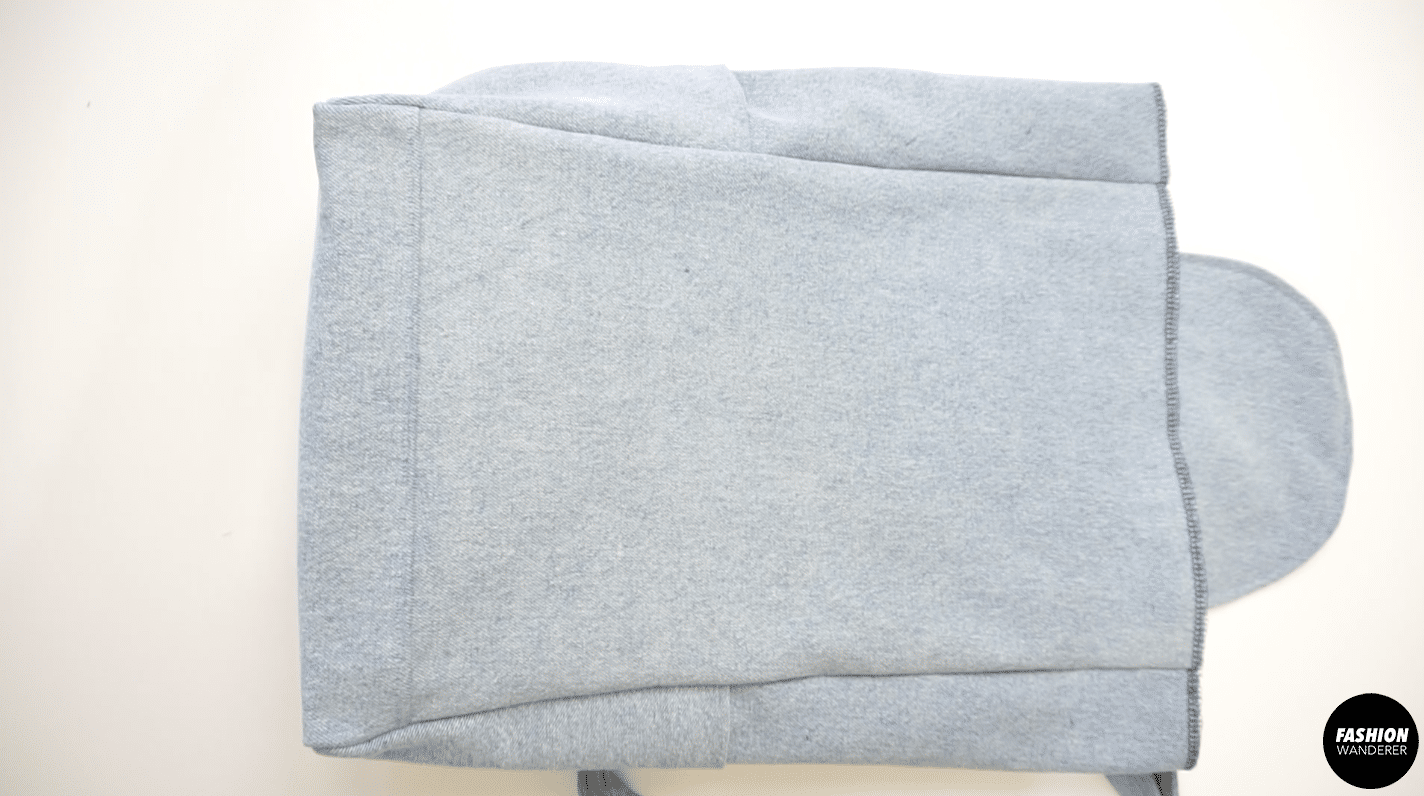
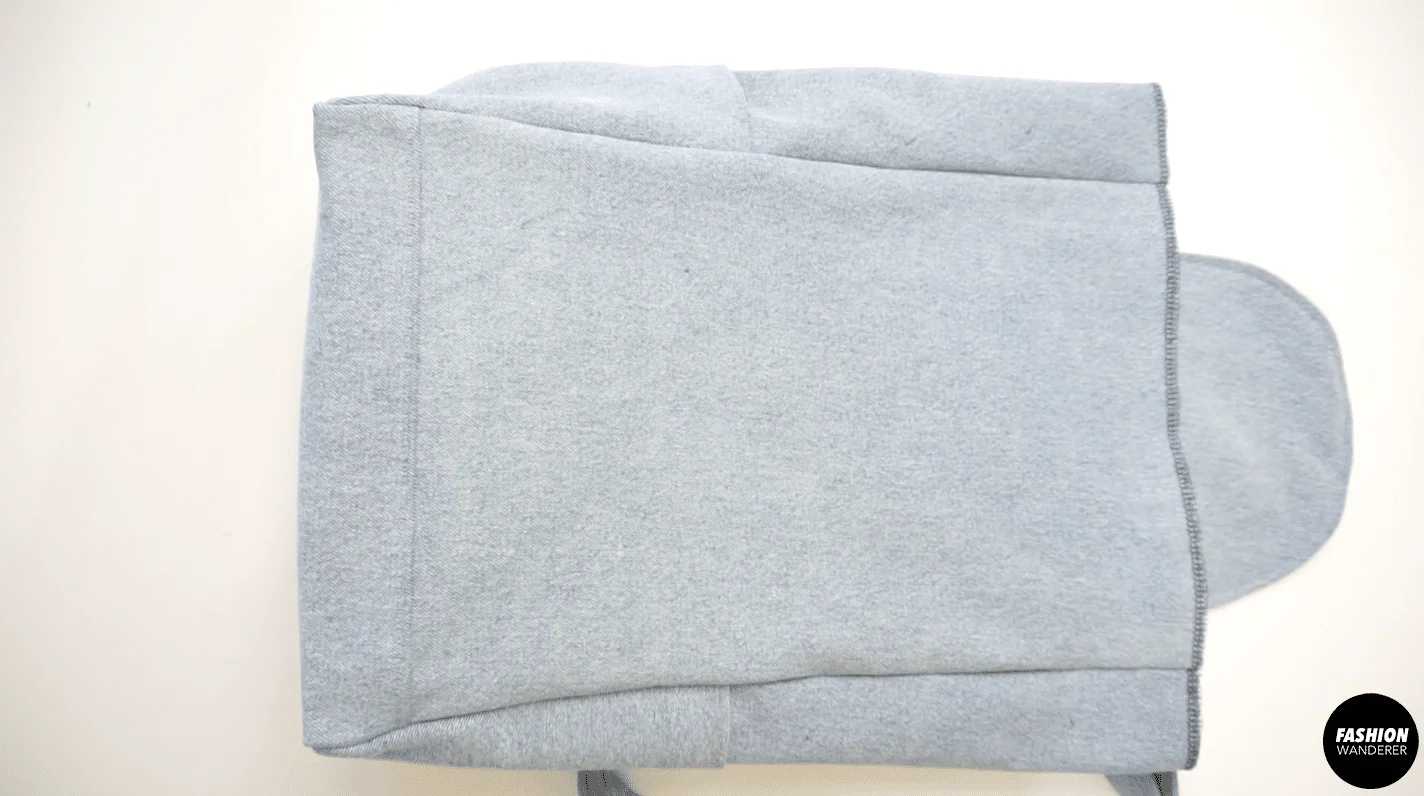
To make a DIY denim backpack, start by cutting out the pattern pieces.


Zigzag stitch around the inner and side pocket and side backpack pieces.
Attach the side pocket to the side backpack pieces.
Sew pocket flap and flip inside out.
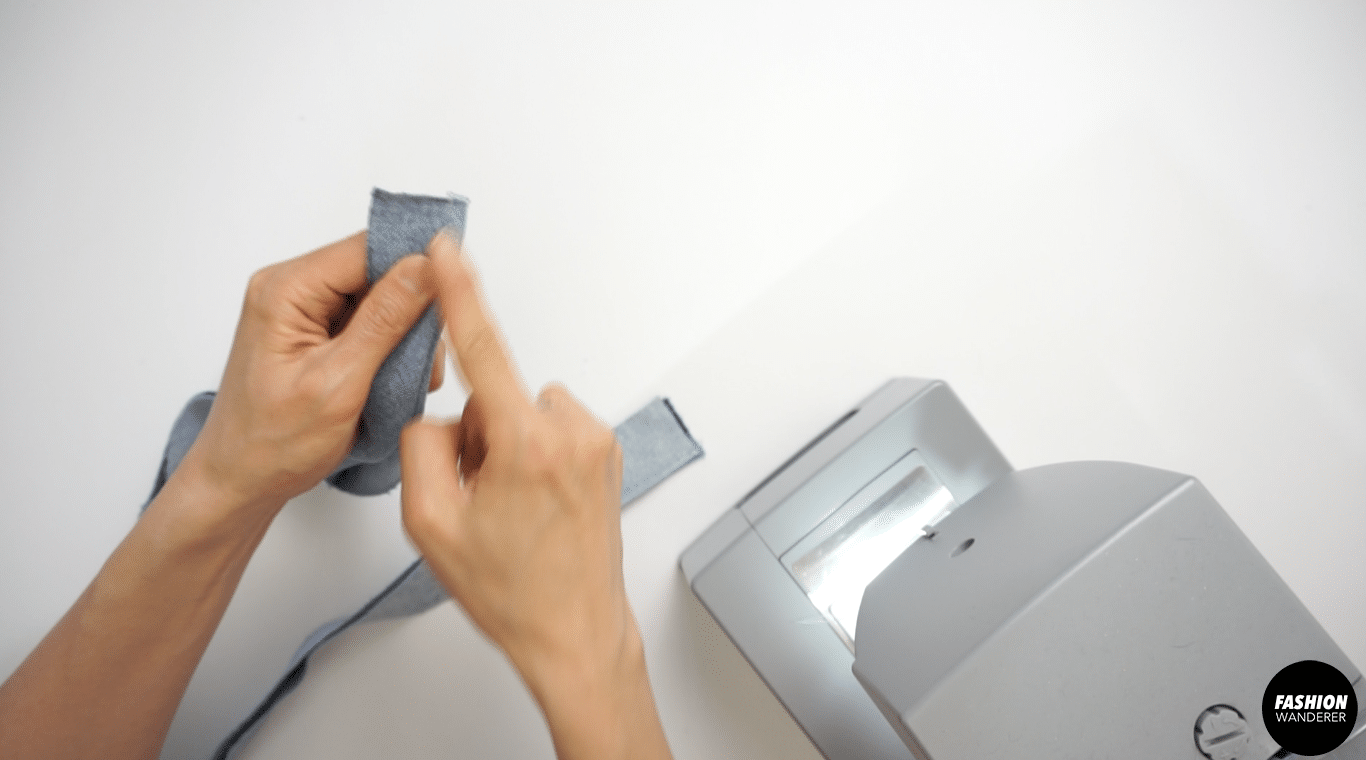
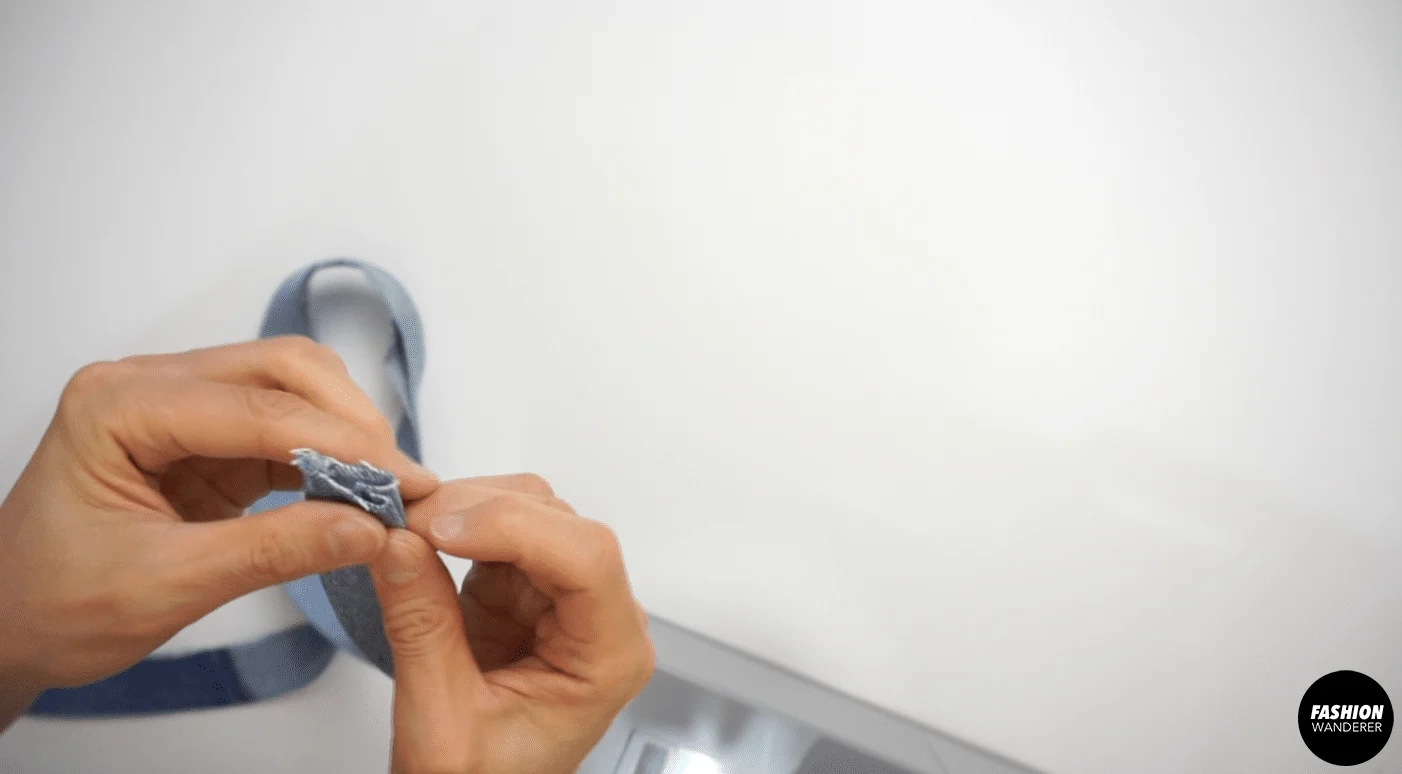
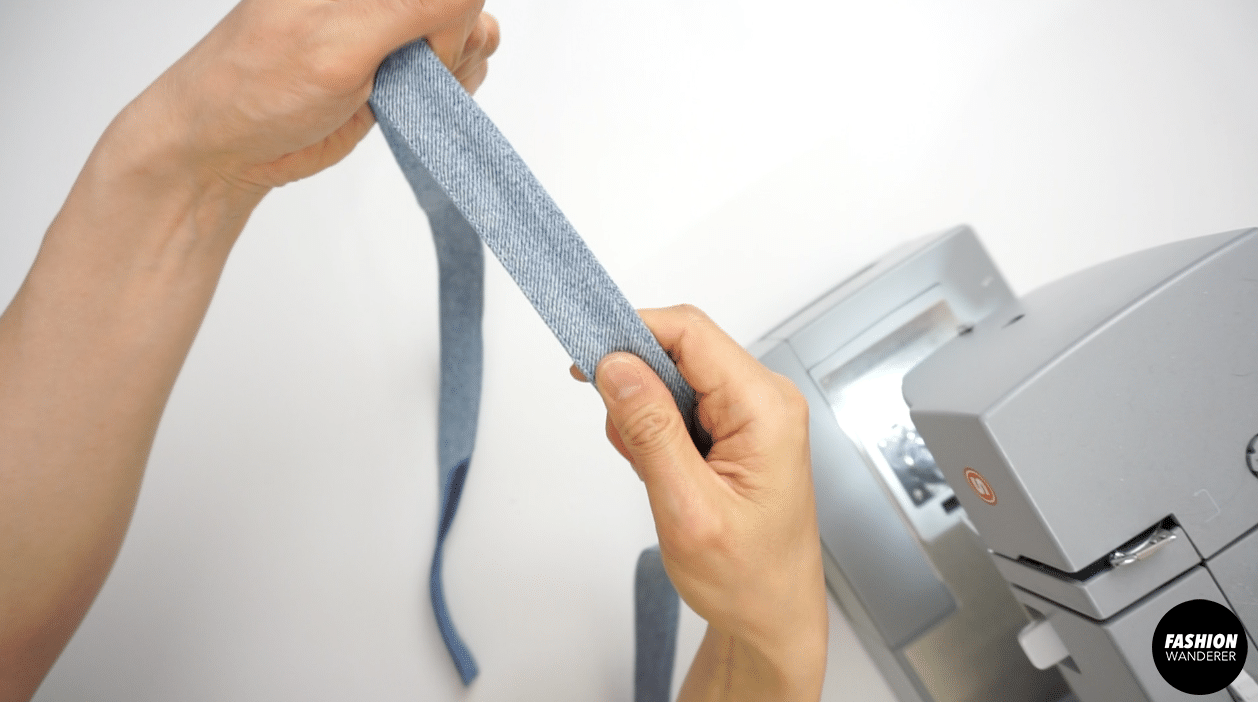
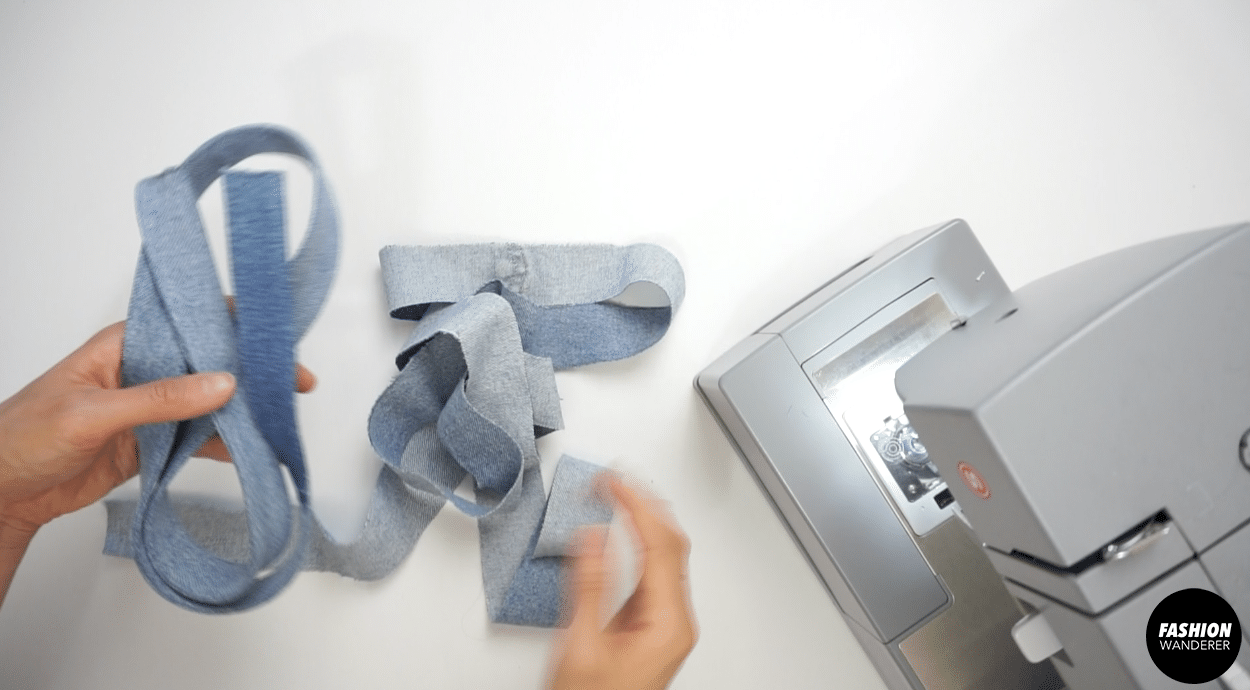
Fold the buckle loop, drawstring tunnel, handle and shoulder strap ¼” inside and edge topstitch both edges.
Attach handle and shoulder straps to the pocket flap,
Next add the back side to the pocket flap.
Sew the pocket flap to the back piece.
Place the inner pocket to the inside of the back of the backpack.
Sew the bottom to the back and front of the bag.
Zigzag stitch front, back, and bottom of the backpack.


Join the sides to the front, side, and back pieces with ¼” topstitch.
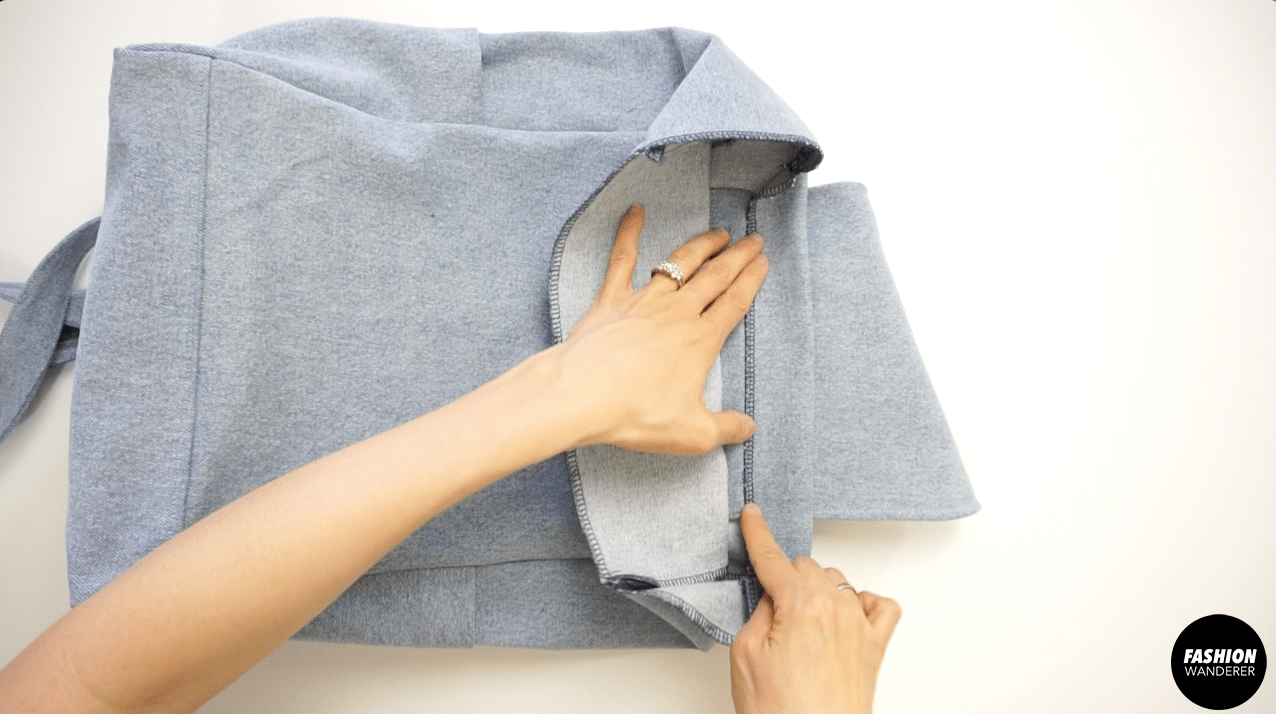
Flip the bag inside out and fold 1½” and topstitch the opening.
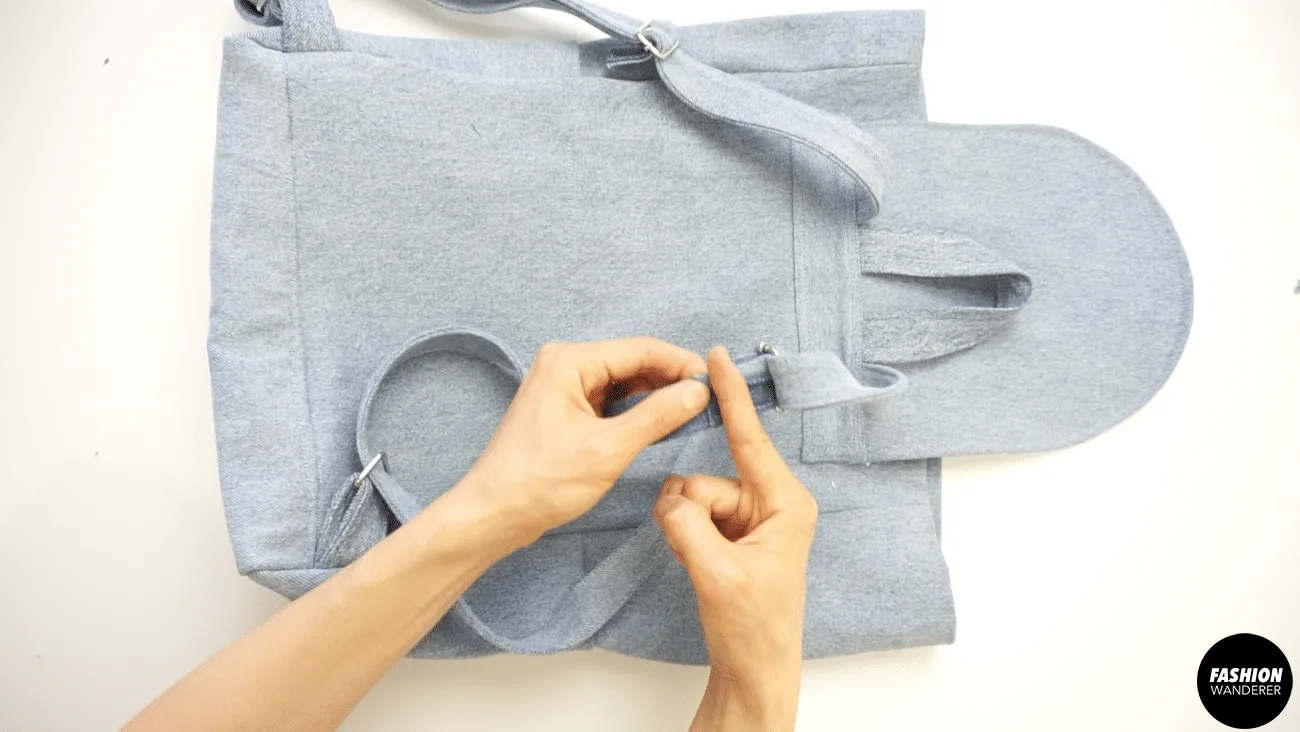
Insert the rectangular ring and buckle loop to the shoulder strap.
Add snap button on pocket flap and snap button patch piece.
Attach the grommets around the backpack opening.
Slide the cordage through the eyelet and drawstring tunnel to finish the denim DIY backpack.


DIY Denim Backpack Sewing Tips


From laptop to notepad, owning a durable and spacious backpack is great idea. It is an essential fashion item that you can easily add to your DIY wardrobe.
Adding snap buttons, buckles or grommets can intimidate the beginner, however, when it comes to sewing, all you need is to learn to straight stitch and use overlock machine to finish seams. Review these sewing techniques to guide you towards making a professional looking bag.
Prepare these supplies and select the of fabric or use your old jeans to create this cute backpack sewing pattern. If you are new to sewing denim fabric, I’ve put together sewing tips including finish seams and sewing pockets to execute this DIY denim backpack on your own.
- Sewing Needle: Depending on the thickness and weight of the denim fabric, if it is light or medium weight, switch to 90/14 size needle and for heavyweight denim use 100/16 size sewing needle. When sewing denim, use a heavy duty sewing needle and avoid using universal sewing needle that can cause to break or harm the sewing machine.
- Thread: When using a thin and light weight thread, you may break the thread easily while you sew denim. Since denim is considered a sturdy fabric, it requires heavy duty thread. For more support, use heavier weight thread for topstitching or upholstery thread. When topstitching, use topstitch thread in your top needle and regular thread in your bobbin.
- Stitch: Use a longer stitch length when sewing denim and set the length as 3.5 or 4 on the sewing machine. In addition, loosen the tension to 4 or 5. Avoid backstitching the topstitch thread, instead reduce the stitch length to 1 or 1.5 to secure the ends of the stitch.
- Hardware: In this bag, you will be using adjustable buckles, snap buttons and grommets to secure and close the backpack bag. The easiest way to attach hardware to the denim fabric is to use fabric marking tool to position the pieces with correct measurements. And then use pliers or grommet kit to fasten the hardware in place on the fabric.
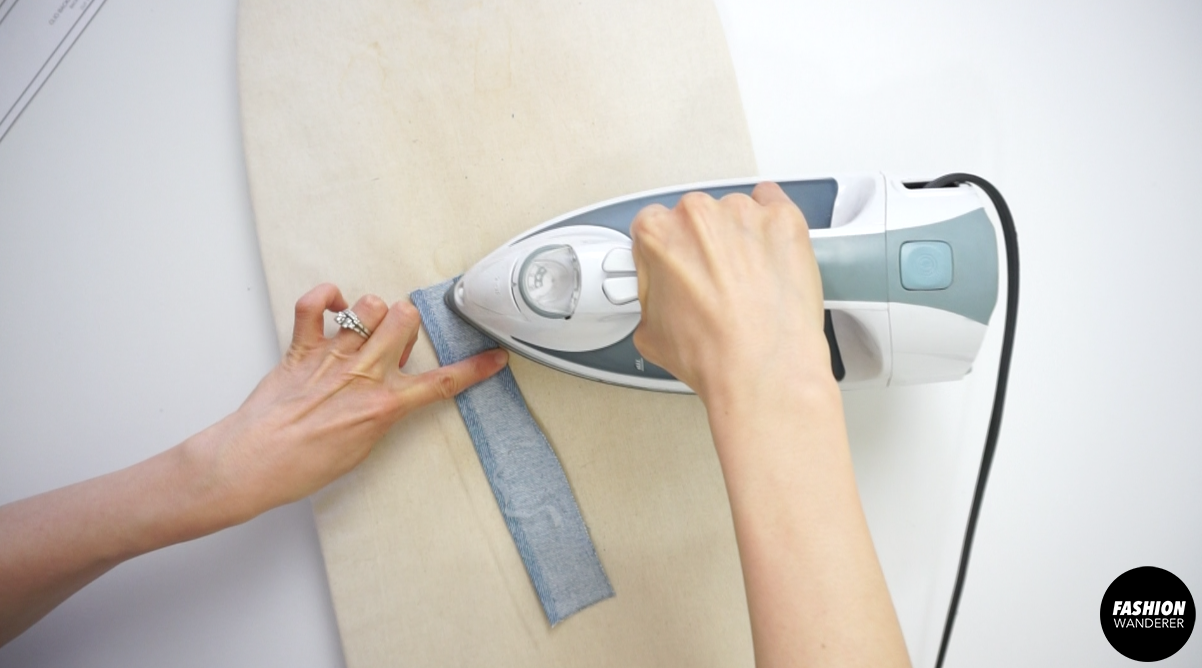
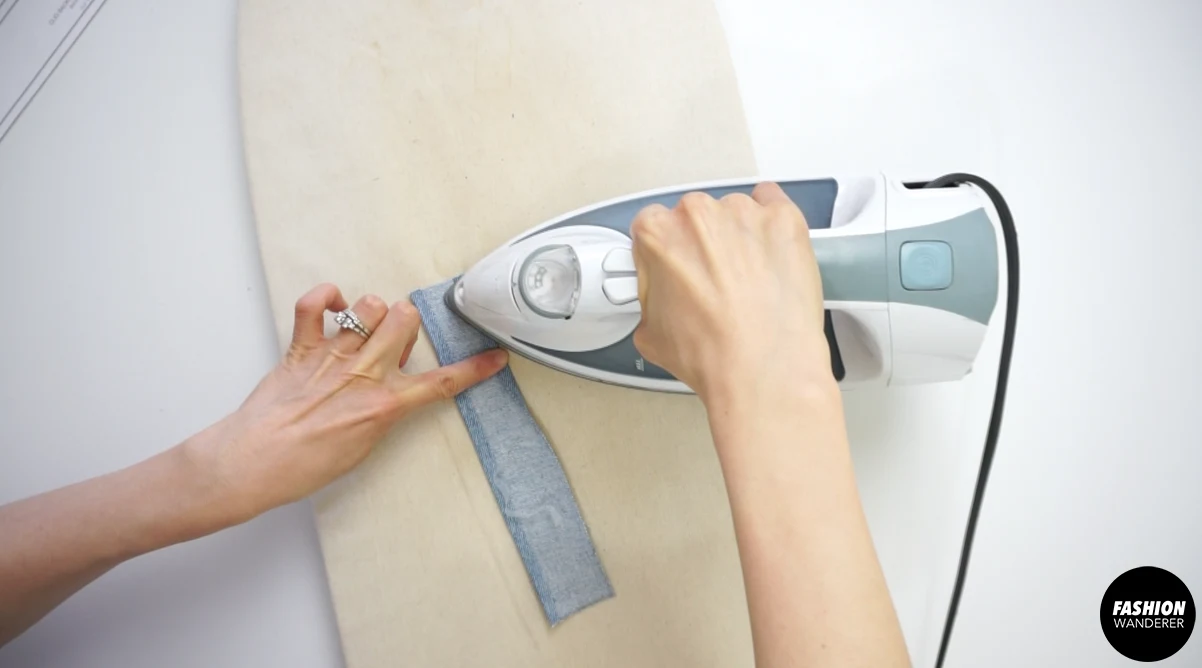
- Double Sided Sewing Tape: Sewing thick double or triple layers of denim fabric can be very difficult work with. In order to expedite the sewing process to give clean straight stitches, first overlock the hem on the pattern piece and use a dry iron to fold the edges by using double sided sewing tape to give clean edges.

How to make a Clio backpack with sewing pattern
Are you looking to make a backpack from old jeans? If it is your first time sewing a backpack from scratch, you will find this sewing pattern and detailed instructions very useful.
The Clio backpack has plenty of pockets and room to carry everything including wallet, phone, laptop, and more. Complete your cute backpack by following the step by step video and picture tutorial to accomplish your own DIY backpack.
Materials
- Clio Backpack Sewing Pattern
- Old Jeans, or 1 yard of Denim or Canvas Fabric
- 8 pieces of Size 10 Silver Grommets
- 1 piece of Size 22 Silver Snap Button
- 2 pieces of Silver Adjustable Slide Buckles
- 2 pieces of Silver Rectangle Rings
Tools
- Sewing Machine
- Serger
- Straight Pins
- Erasable Pen
- Fabric Scissors
- ¼” Iron-On Tape
Instructions
For this Clio backpack tutorial, start by assembling the pattern pieces.
- 2 pieces of Front and Back Body
- 2 pieces of Side Body
- 2 pieces of Bottom Body
- 1 piece of Inner Pocket
- 2 pieces of Side Pocket
- 2 pieces of Pocket Flap
- 1 piece of Handle
- 1 piece of Back Side
- 4 pieces of Shoulder Strap
- 2 pieces of Buckle Loop
- 1 piece of Snap Button Patch
- 1 piece of Drawstring Tunnel
How to Sew Inside Pocket
- Zigzag stitch all four sides of the inner pocket pattern.
- Face wrong side up and fold the top part in 1”.
- Pin to secure and topstitch ¼” away from the zigzag stitch.


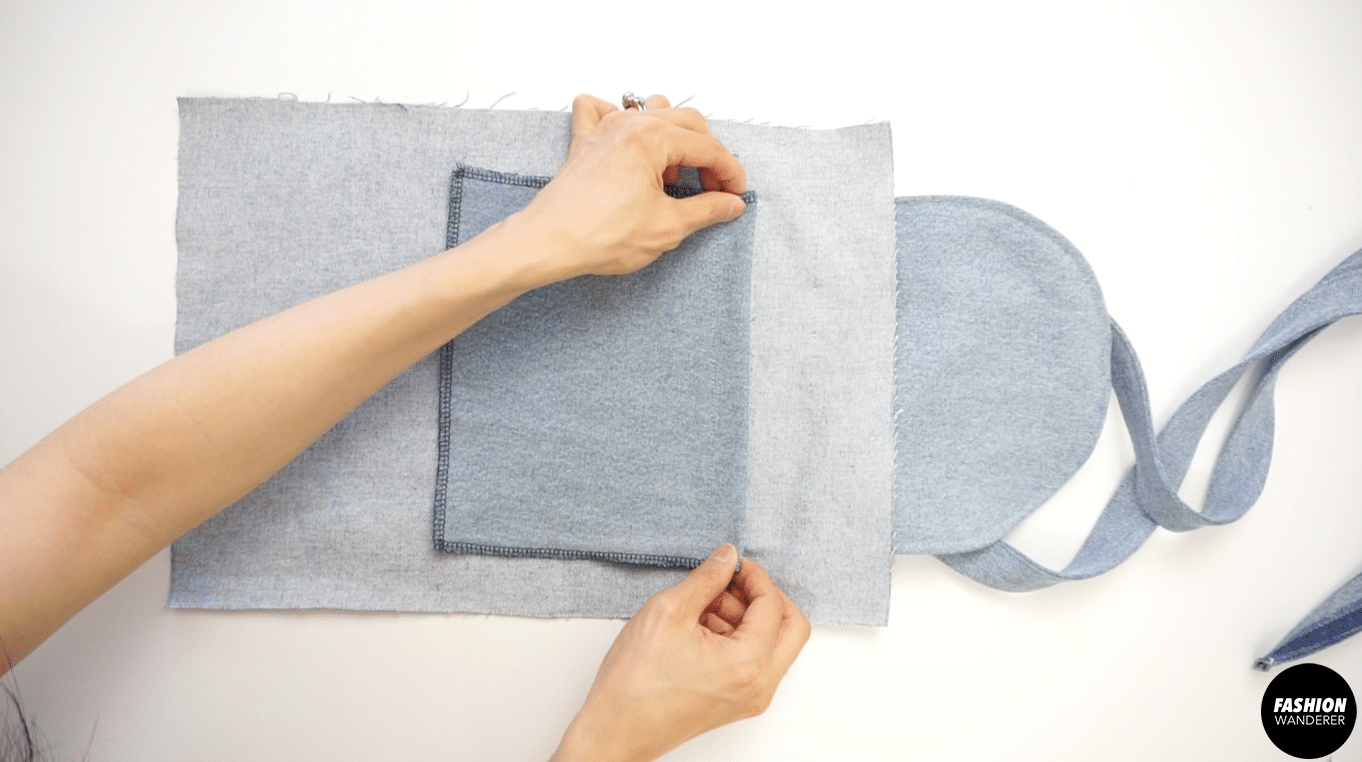
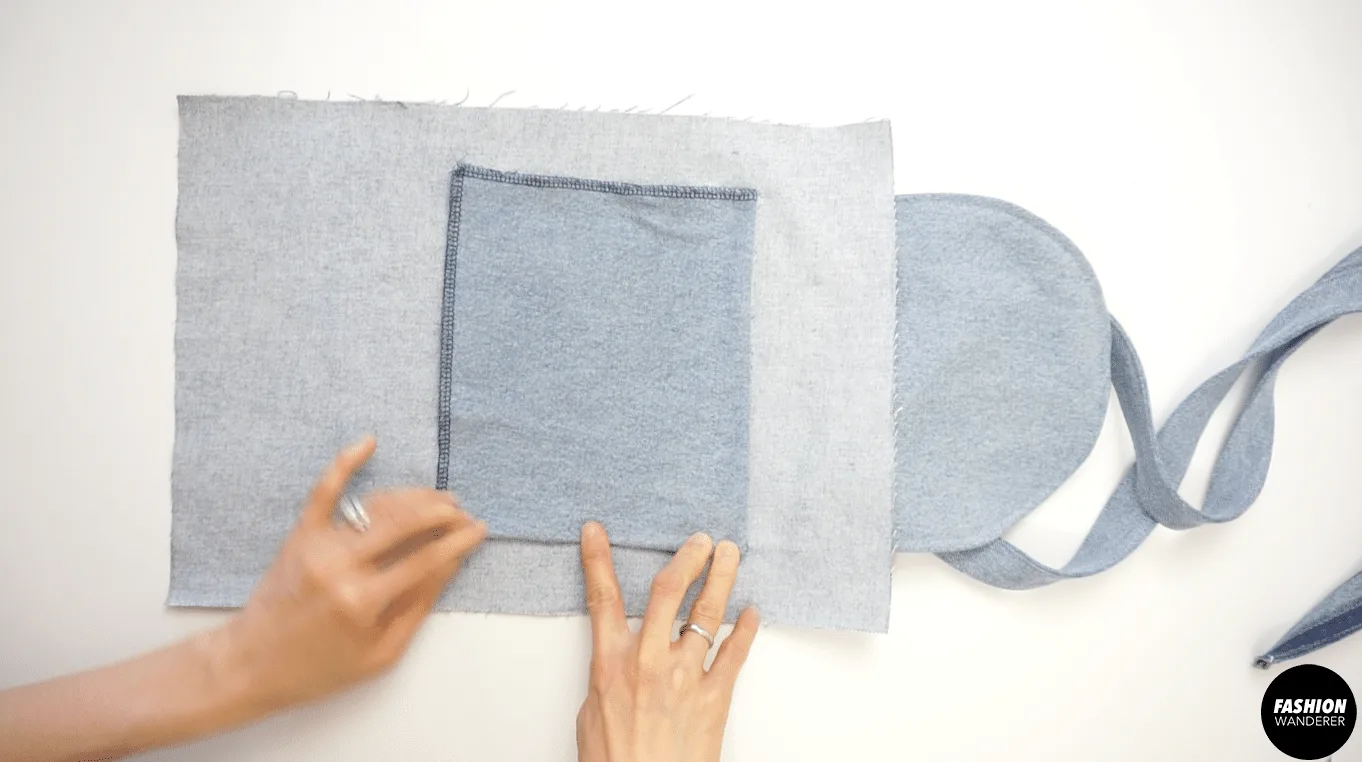
How to Sew Side Pocket
- Zigzag stitch all four sides for both pieces of the side pocket pattern.
- Flip to right side facing down and fold the top part in 1”.
- Pin to secure and topstitch ¼” away from the zigzag stitch.

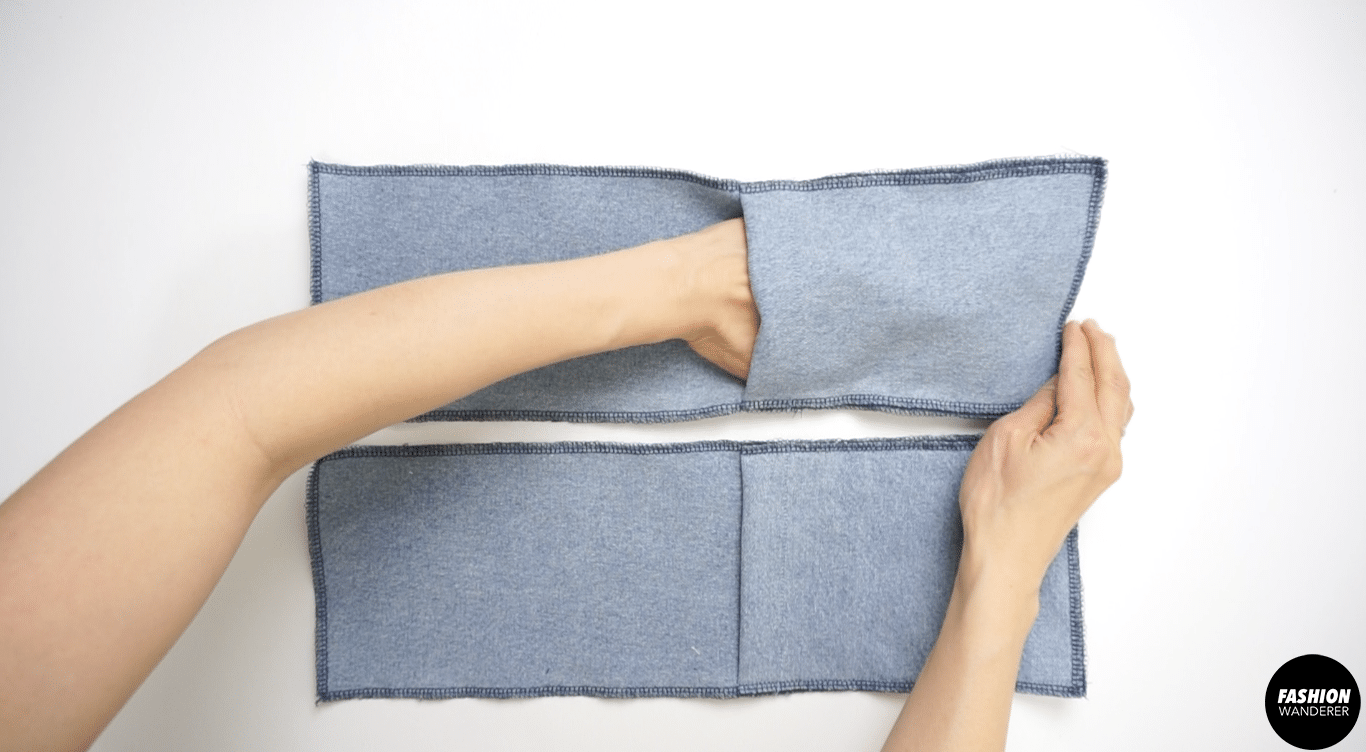
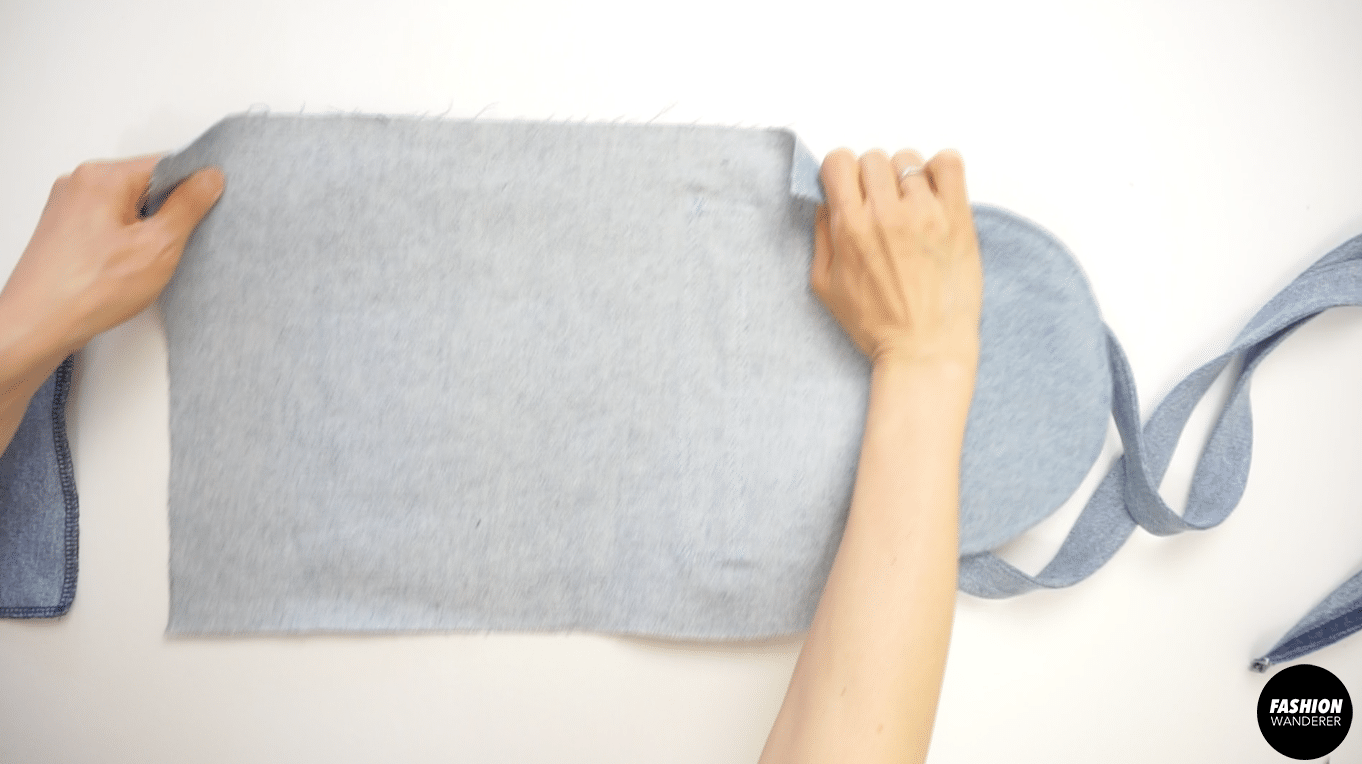
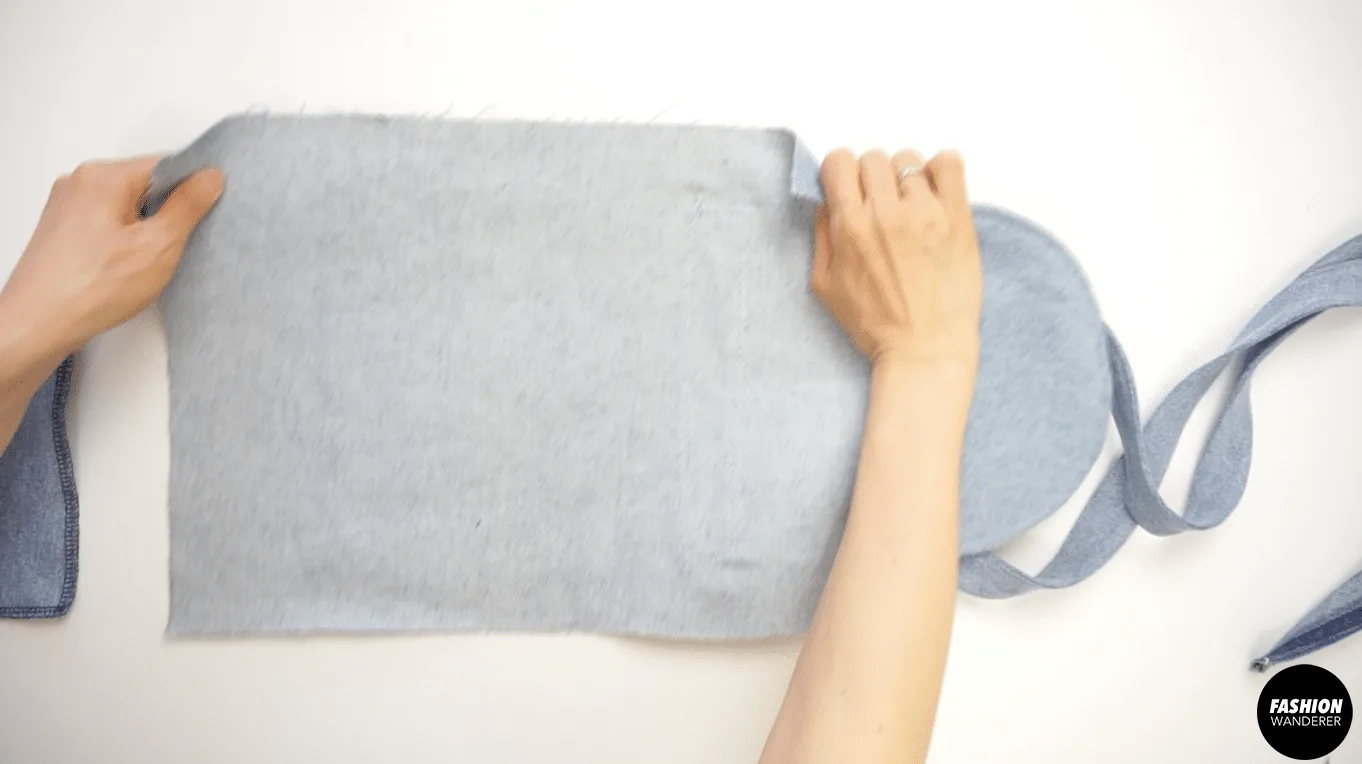
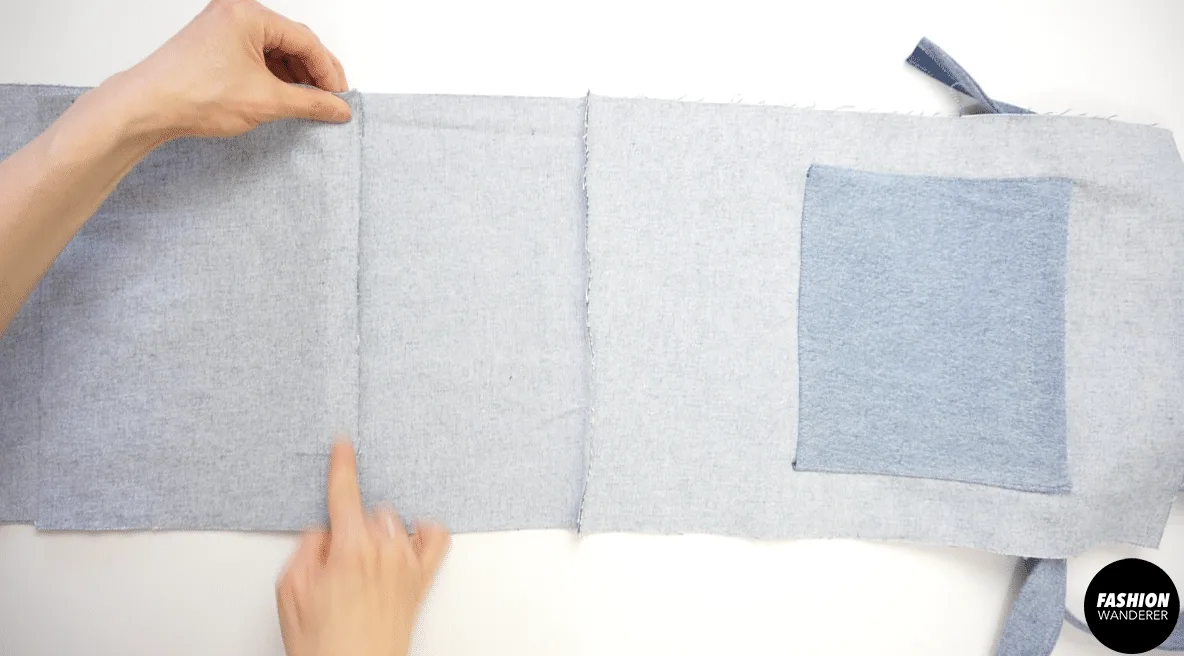
- Zigzag stitch all four sides of both pieces of side body.

- Lay the wrong wide of the pocket on top of right side of the side body pieces.

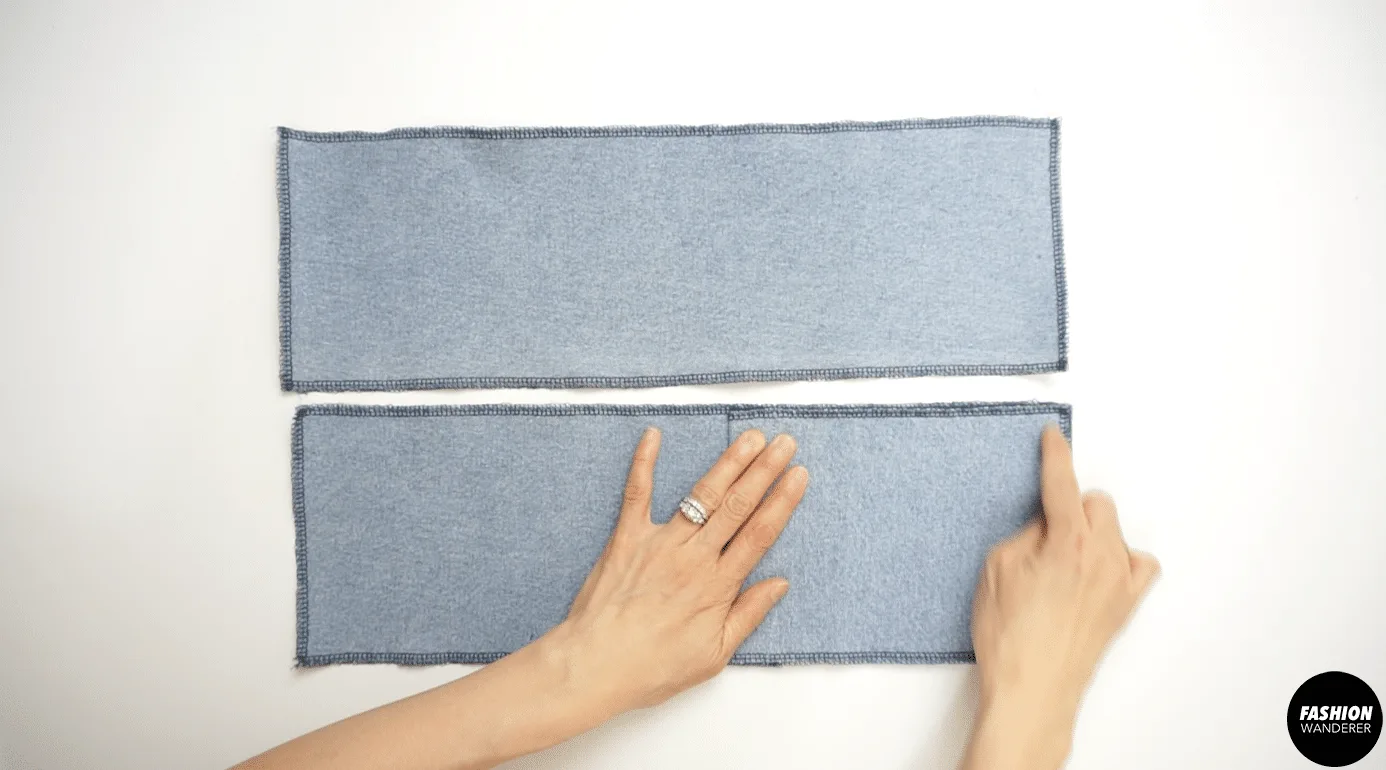
- Stitch all three sides with ¼” topstitch.

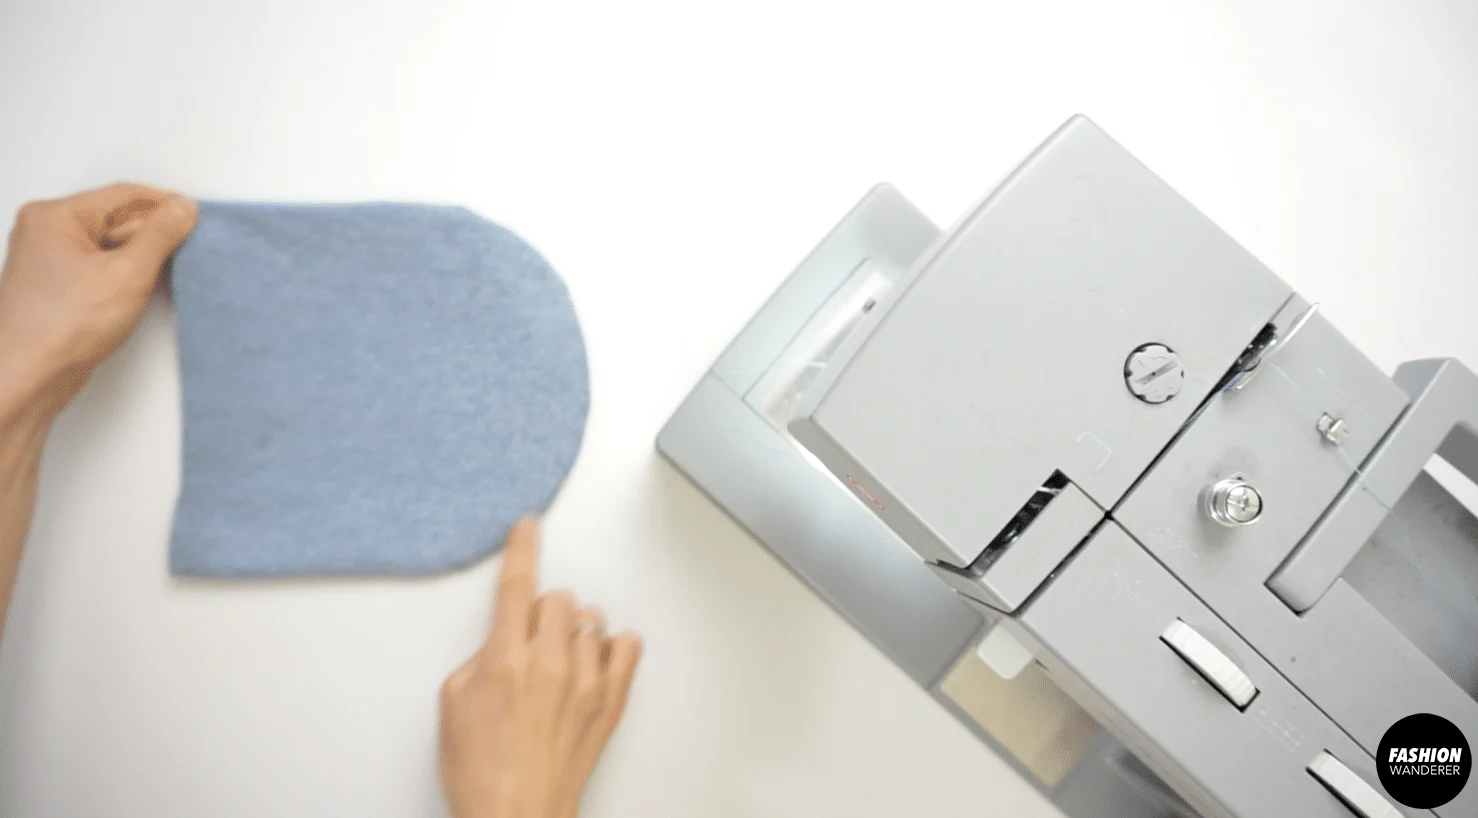
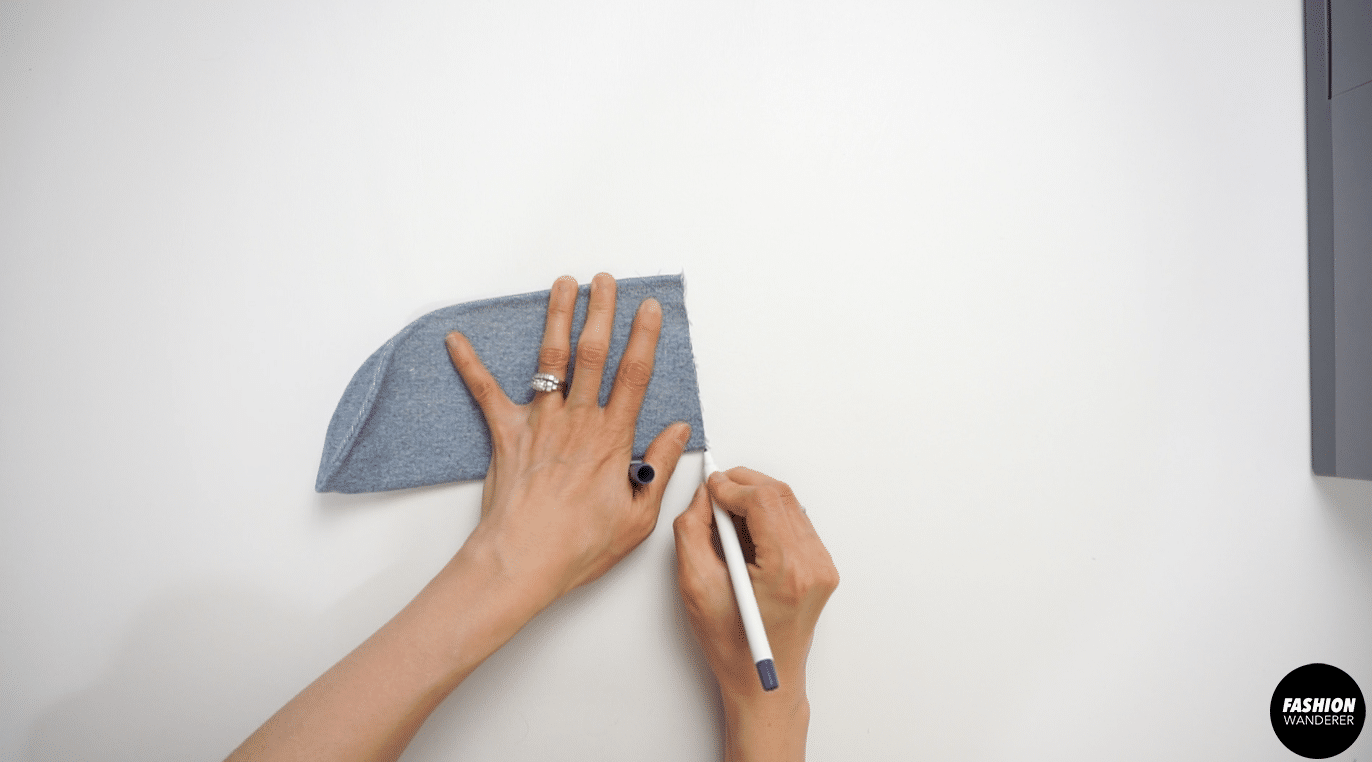
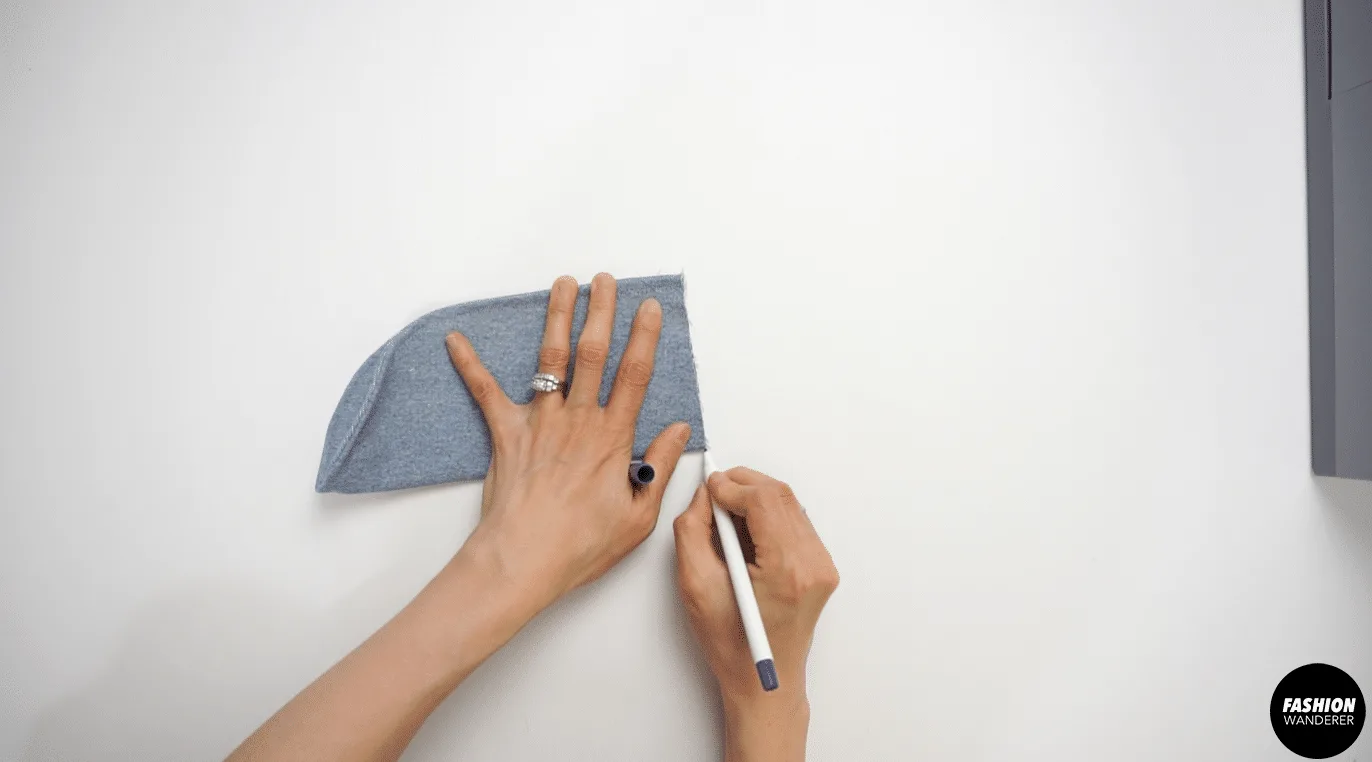
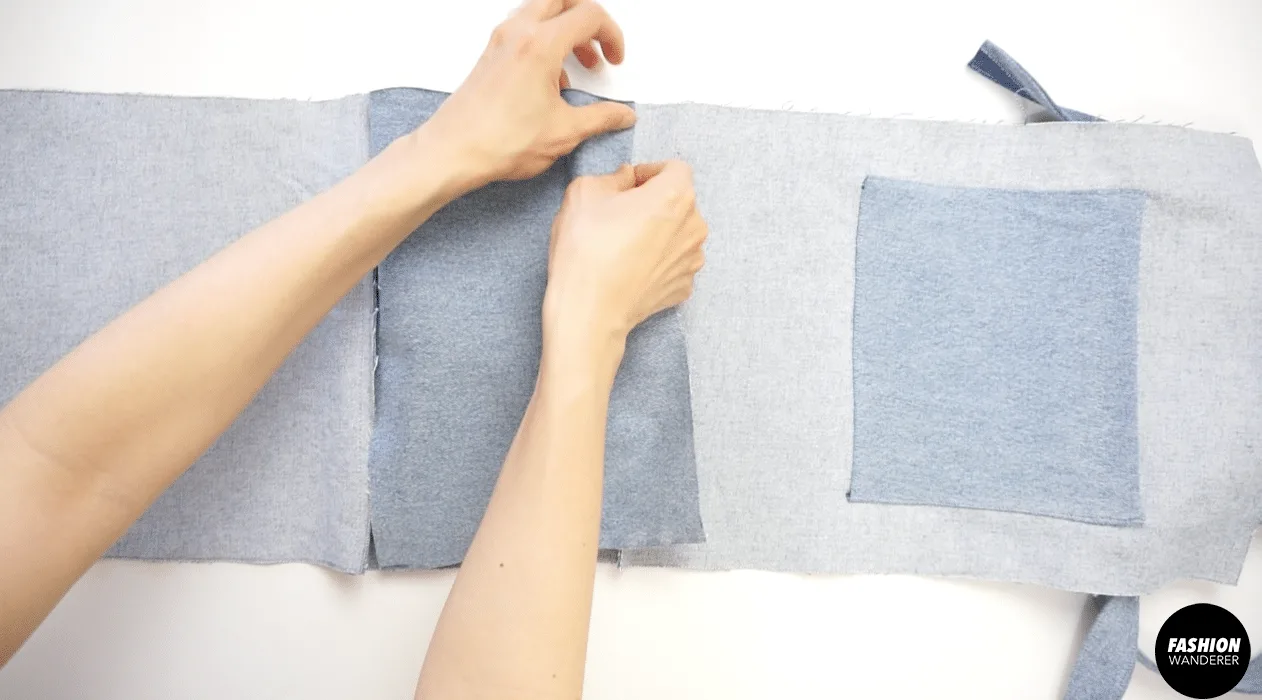
How to Sew Pocket Flap
- Place right side of pocket flaps on top of each other and sew ¼” around the edges.
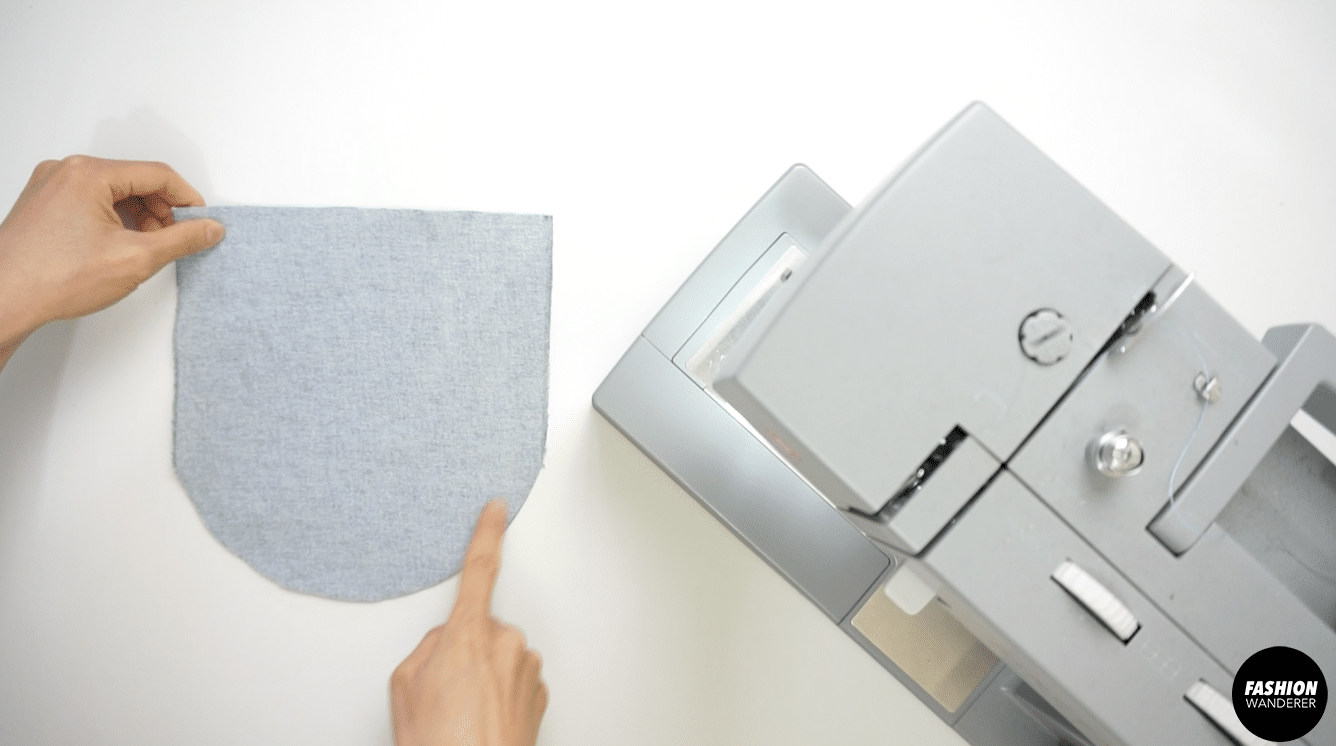
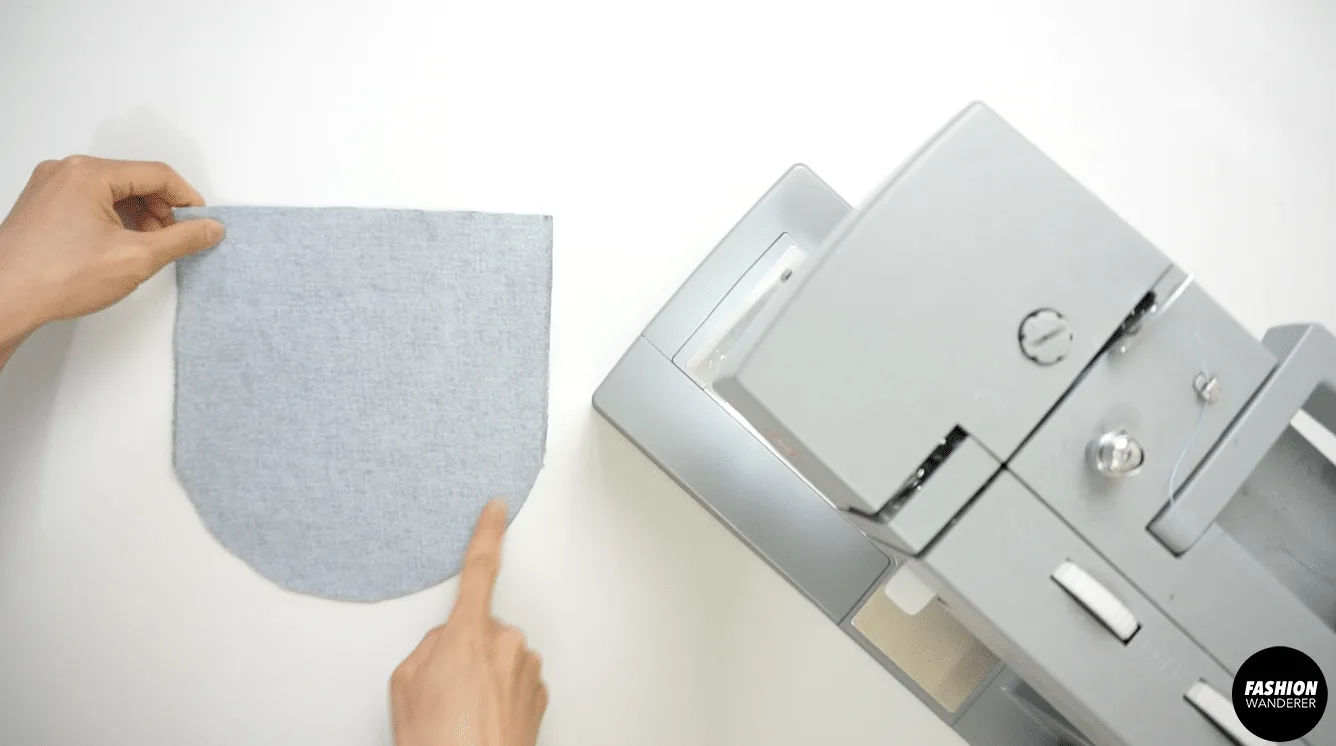
- Flip the pocket flap inside out.

- Use ⅛” edge topstitch around the flap.

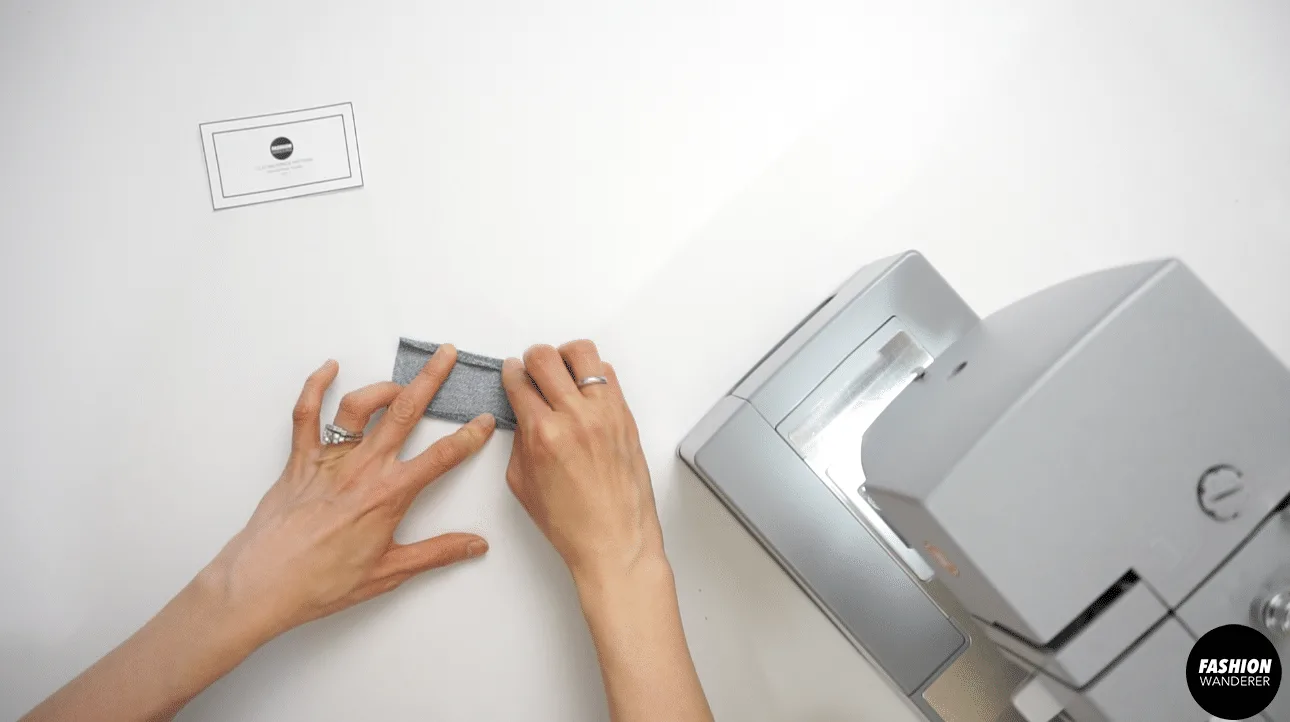
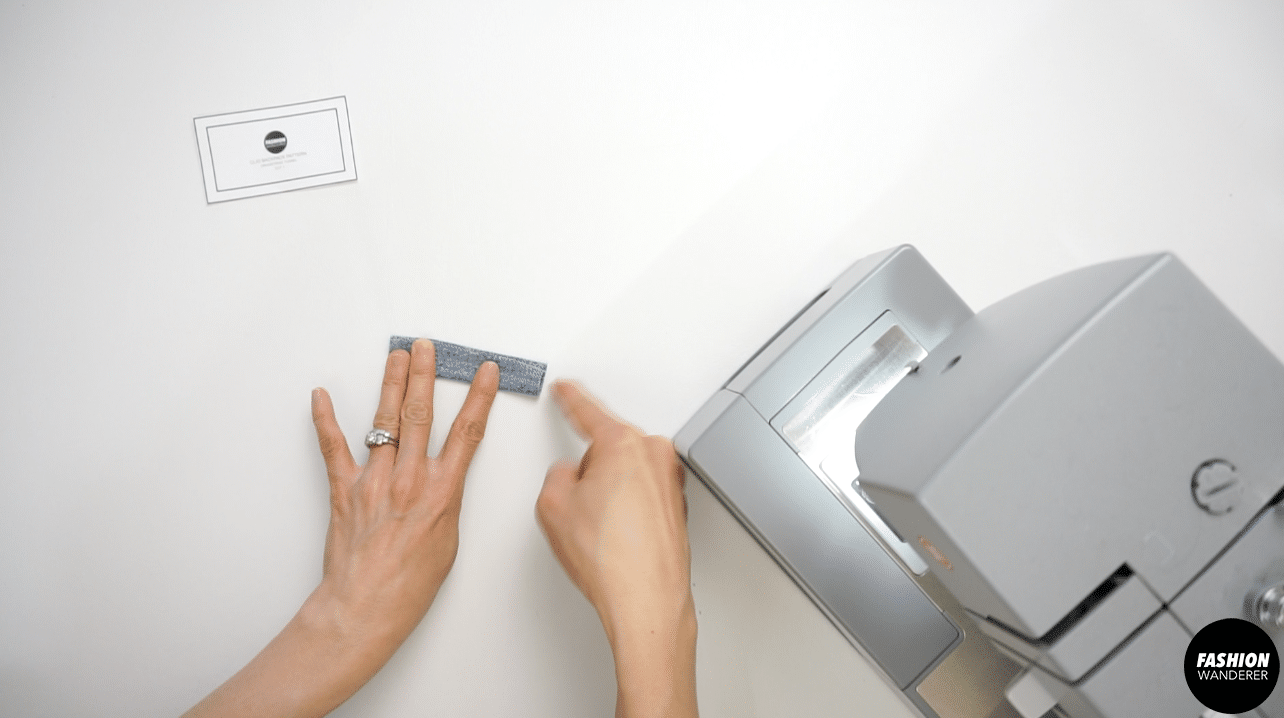
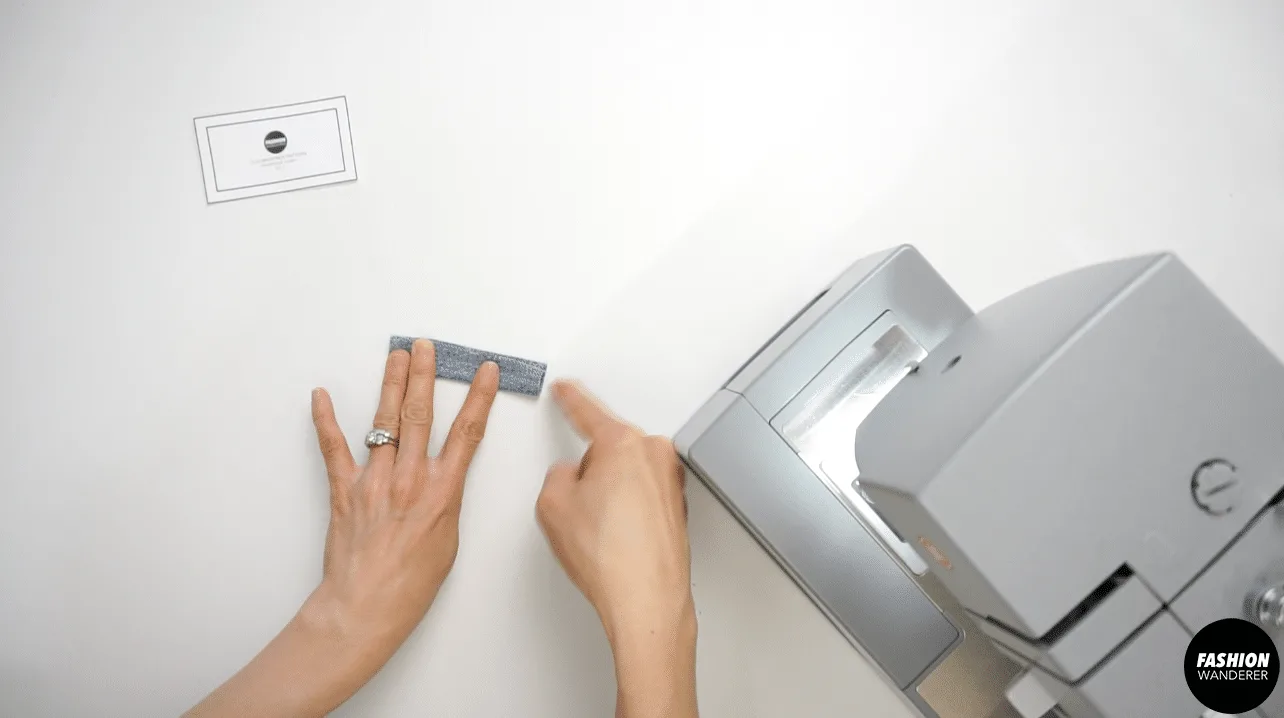
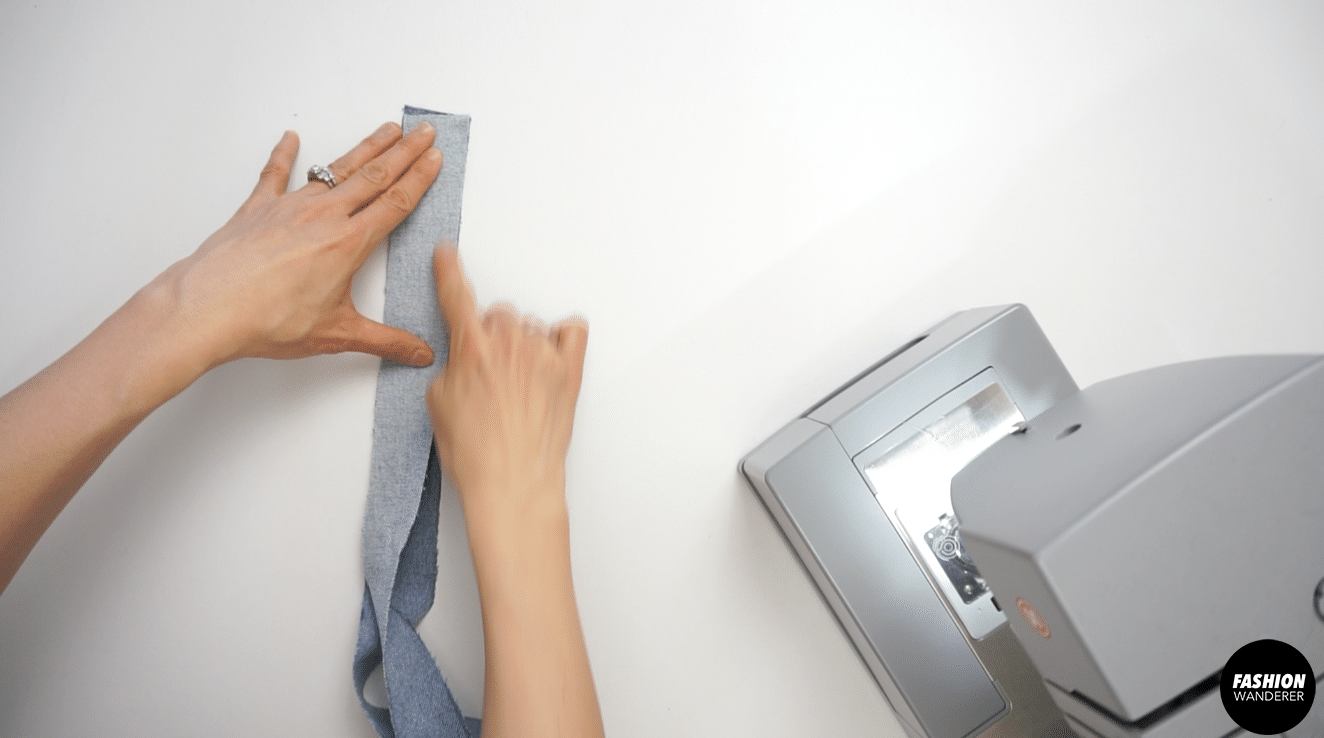
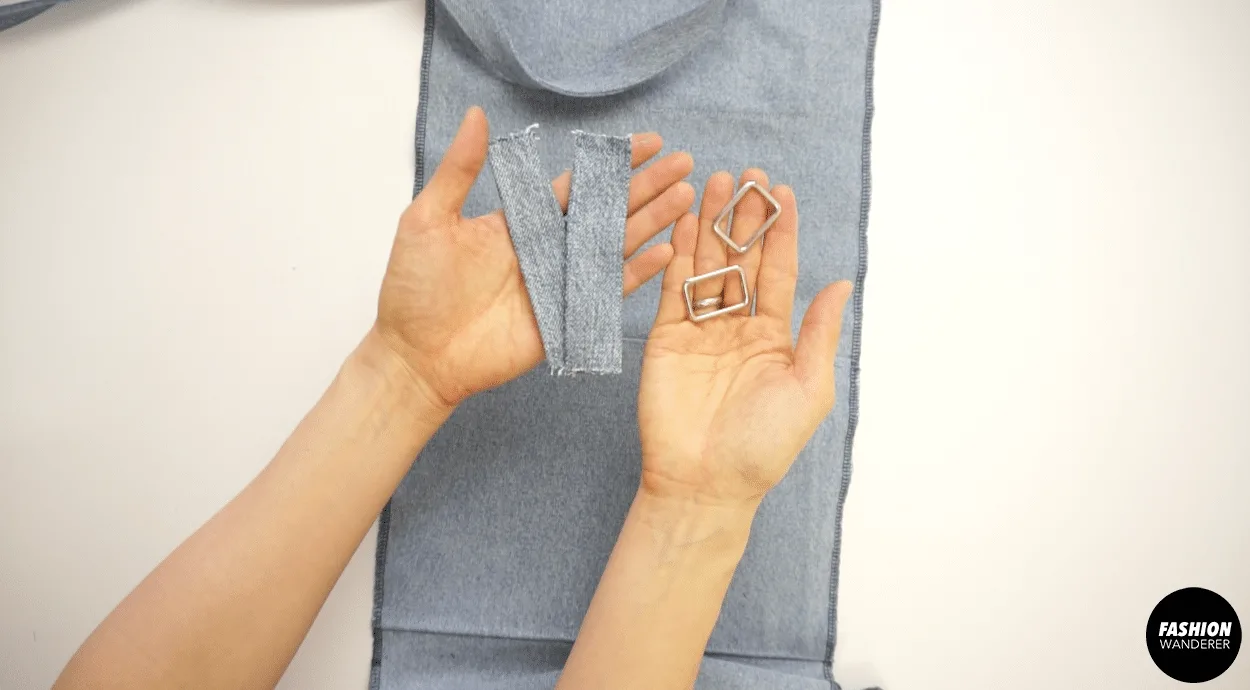
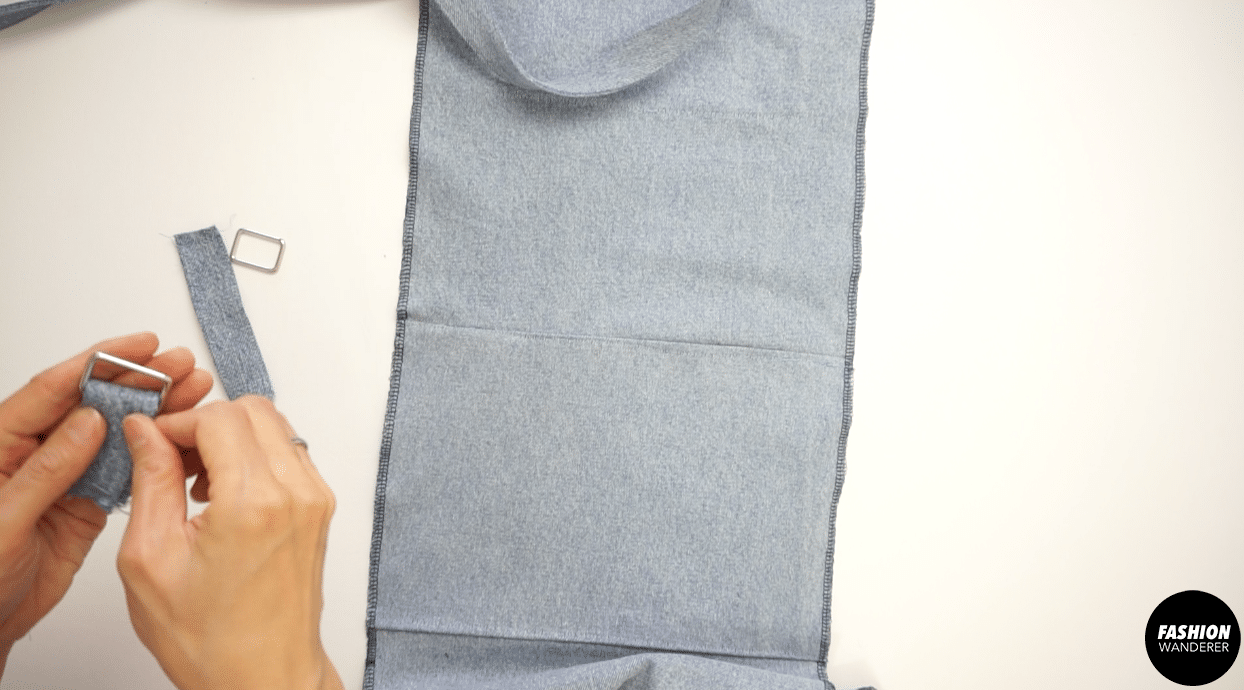
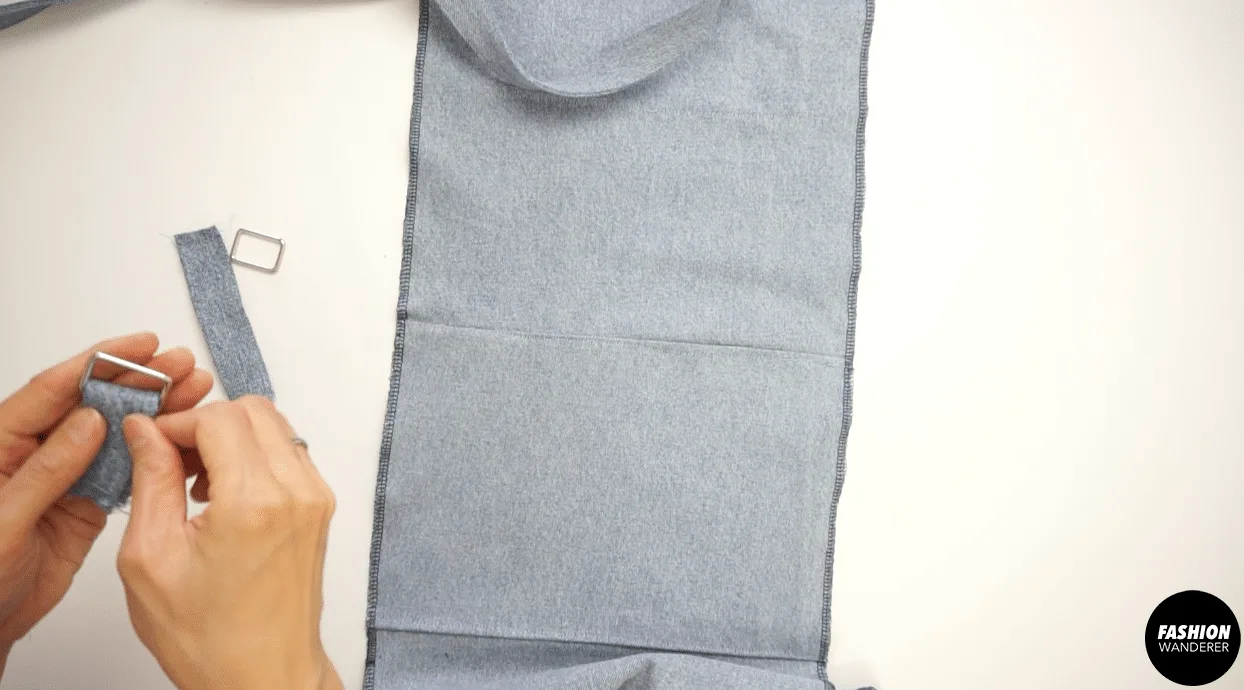
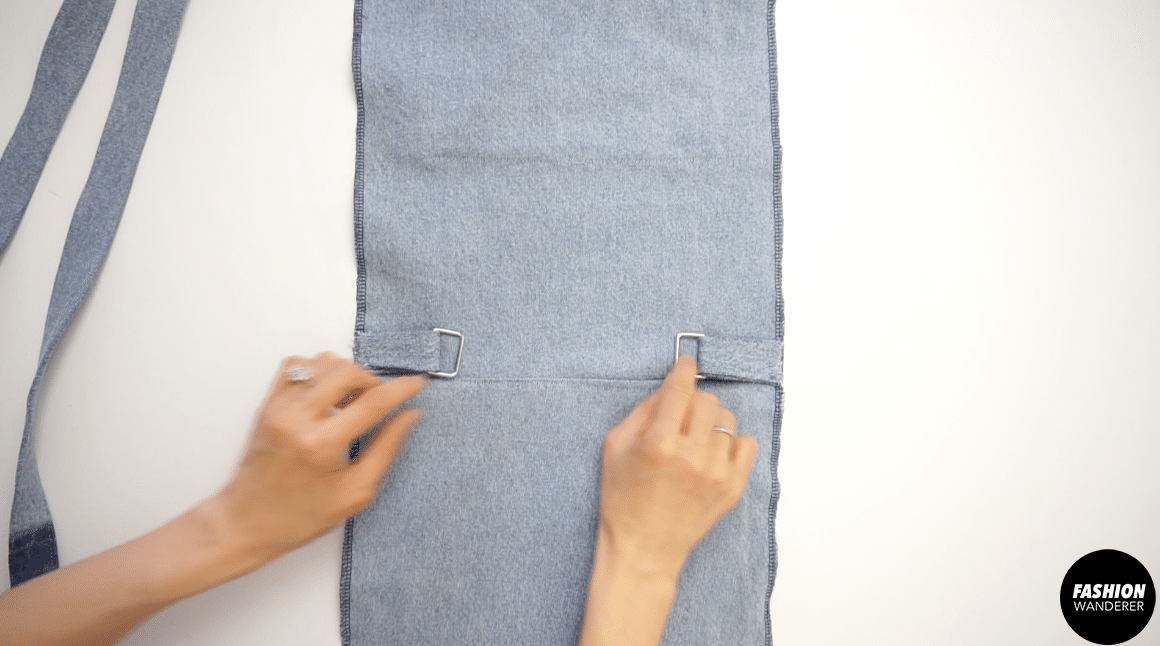
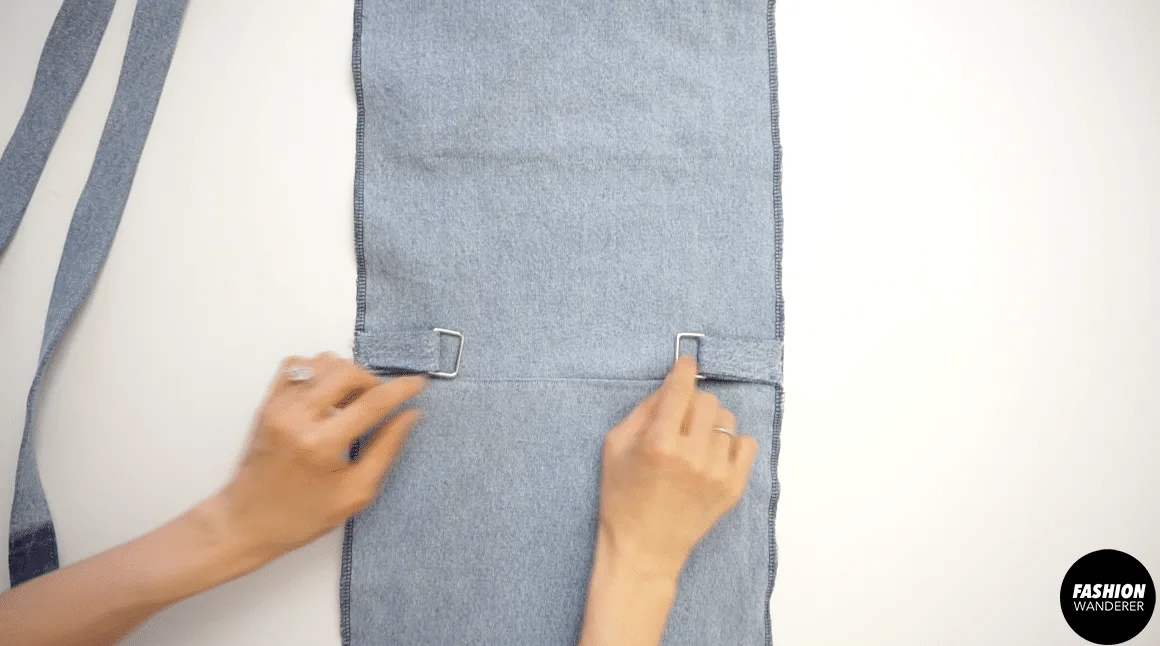
How to Sew Buckle Loop
- Fold the buckle loop pieces in half right sides facing together and sew ¼” topstitch.
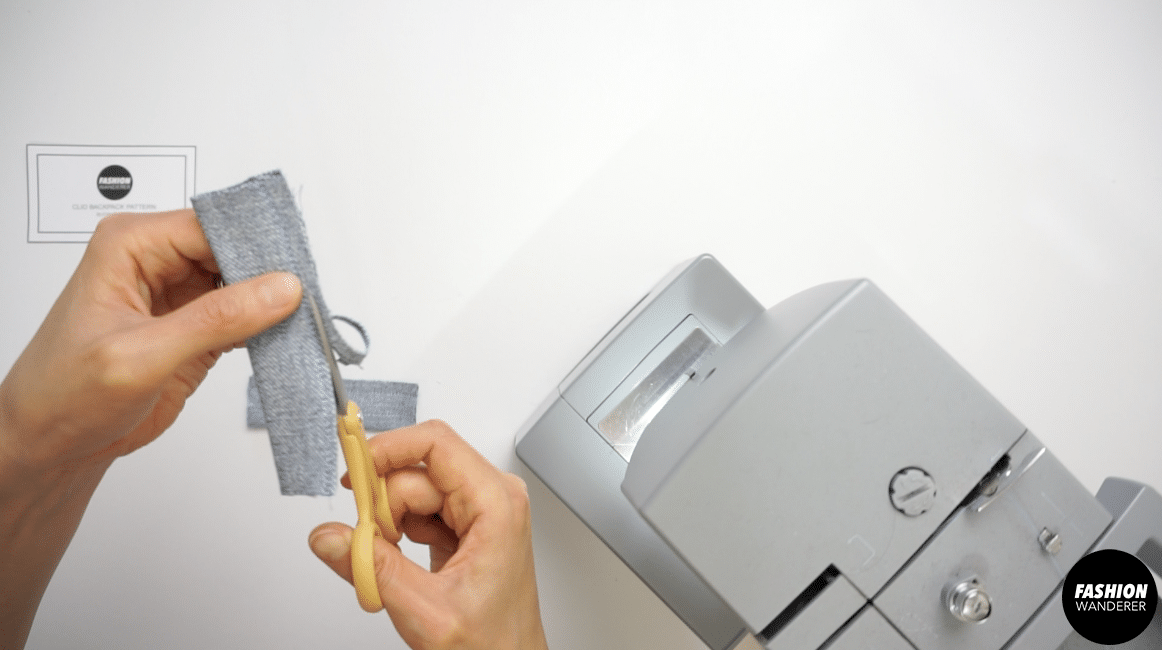

- Trim extra seam allowance in half.
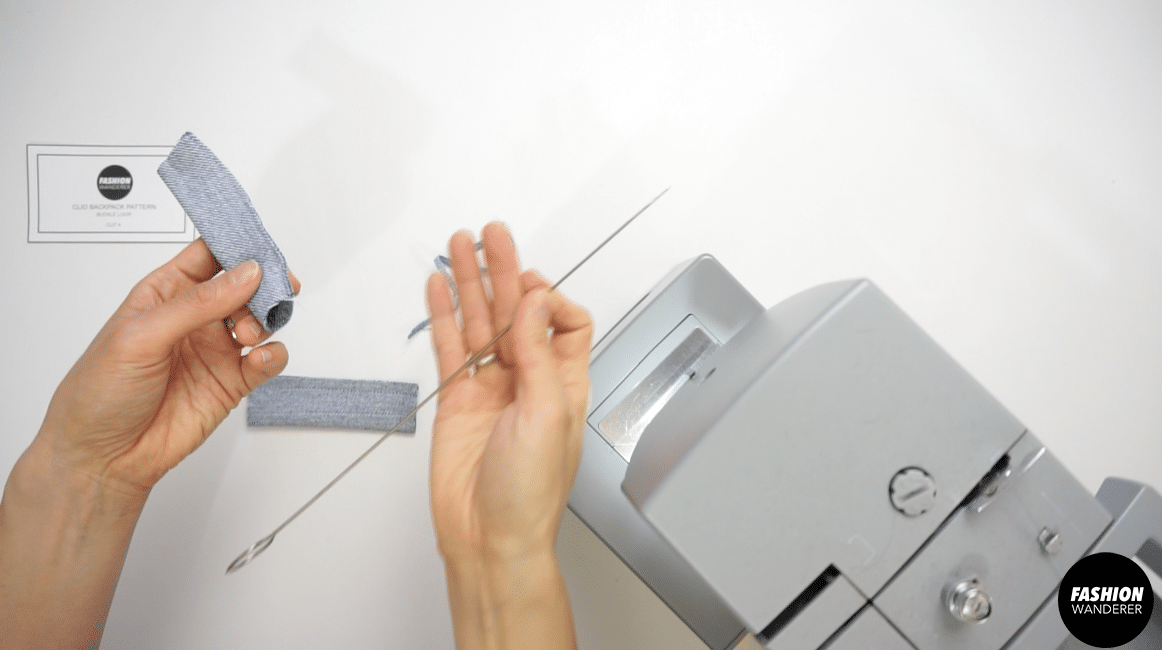

- Use loop turner to flip the loop inside out.

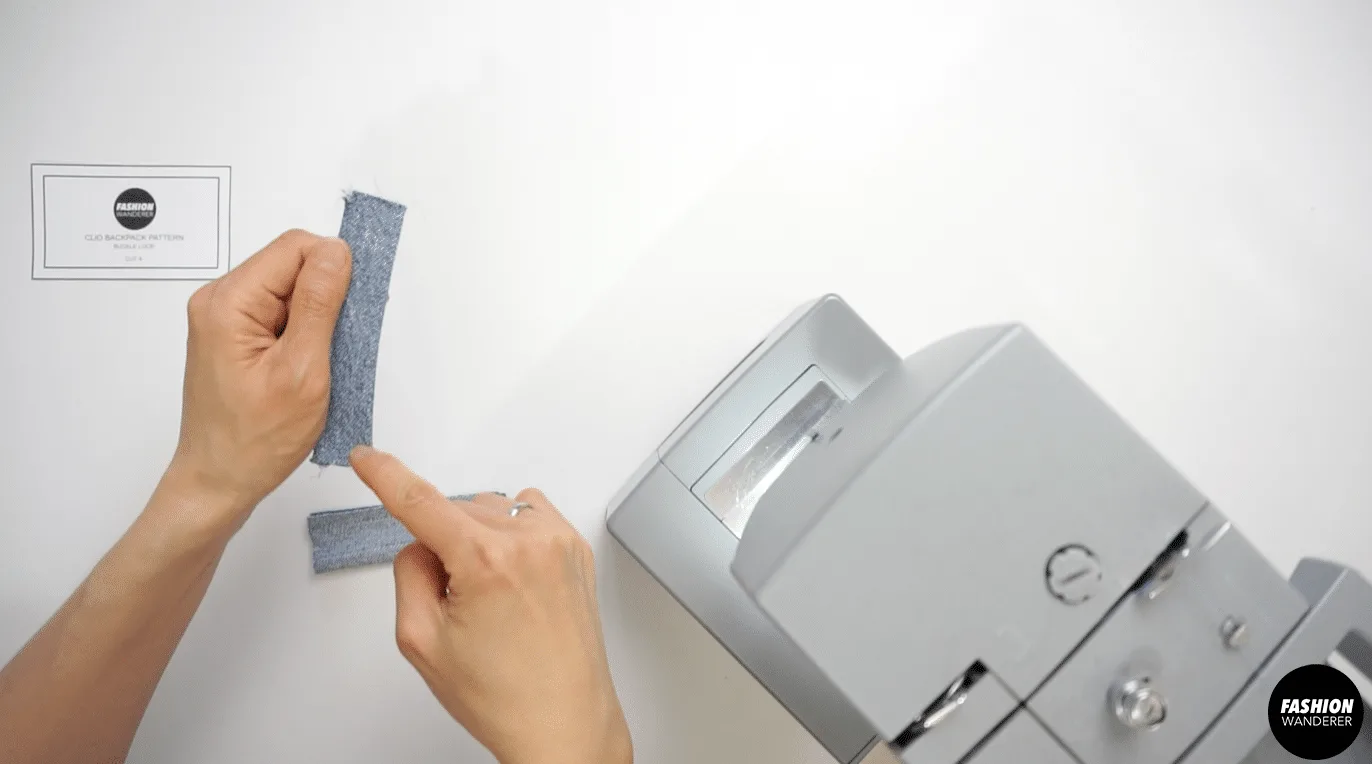
- Edge topstitch ⅛” from the seam on both sides.


How to Sew Drawstring Tunnel
- Fold the drawstring tunnel ¼” on both sides and then fold in half wrong side facing each other.

- Edge topstitch along both sides.
- Fold the drawstring tunnel piece to create 2 holes and topstitch along the center.
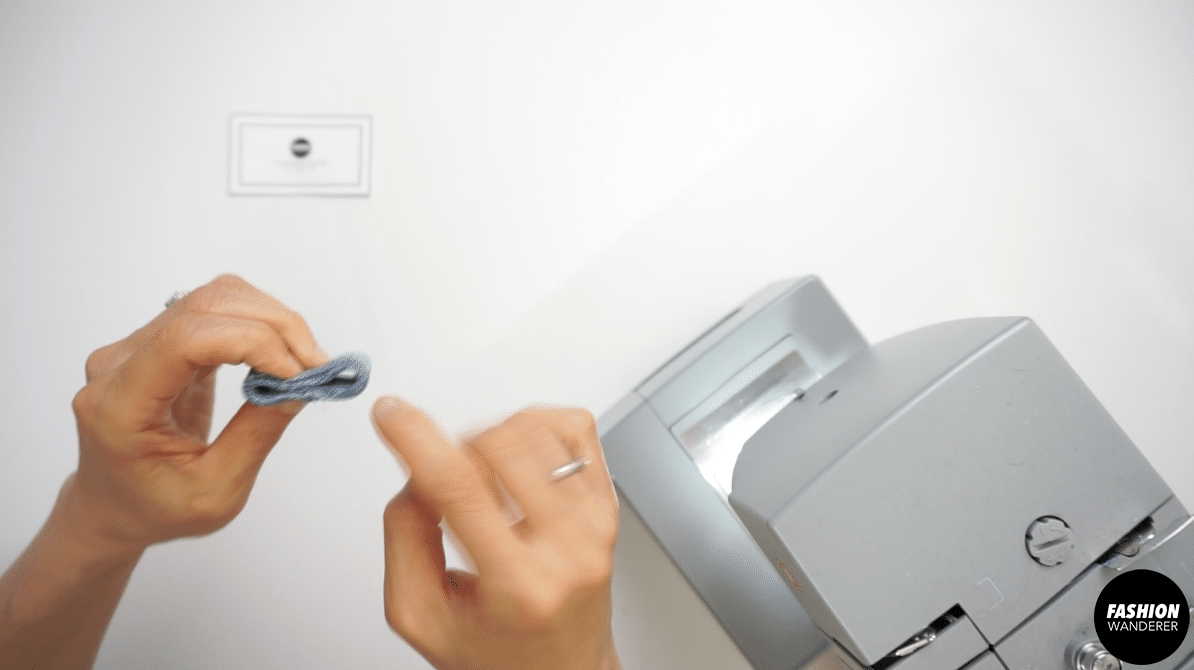
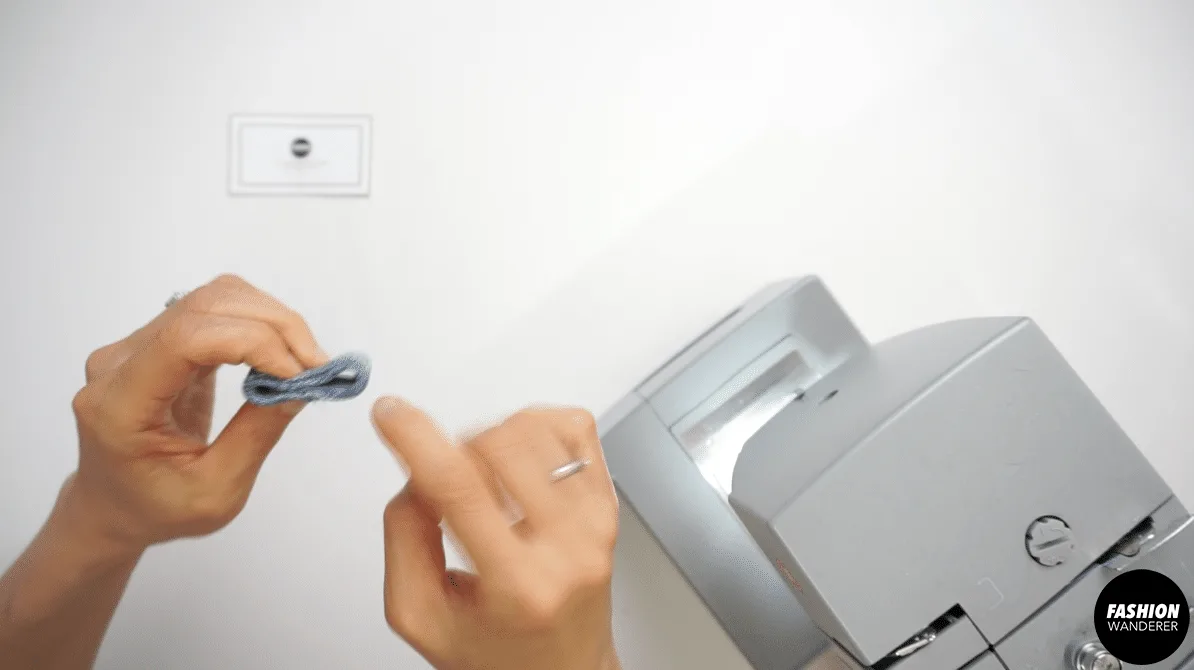
How to Sew Handle
- Fold the handle piece ¼” on both sides.
- Then fold in half wrong sides facing each other.
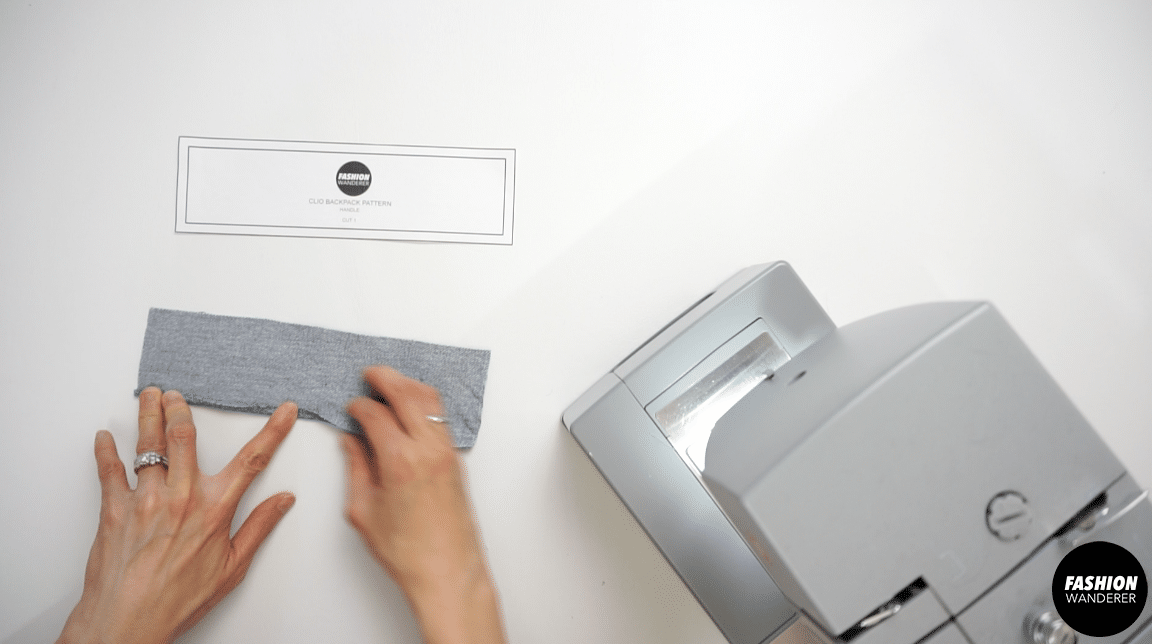
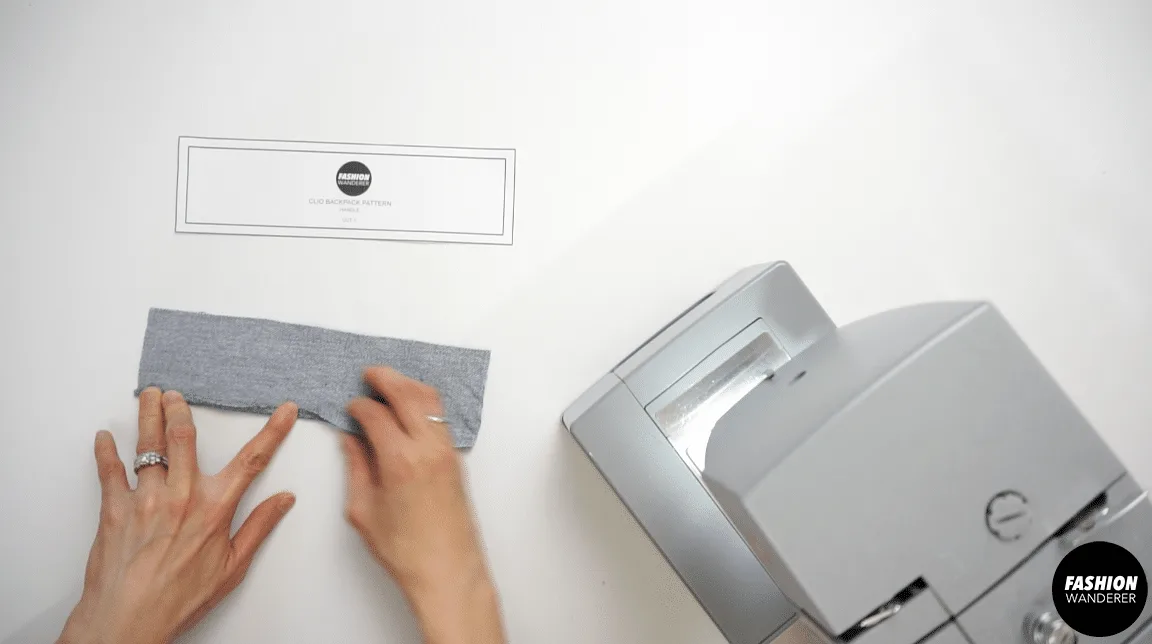
- Edge topstitch along both sides.

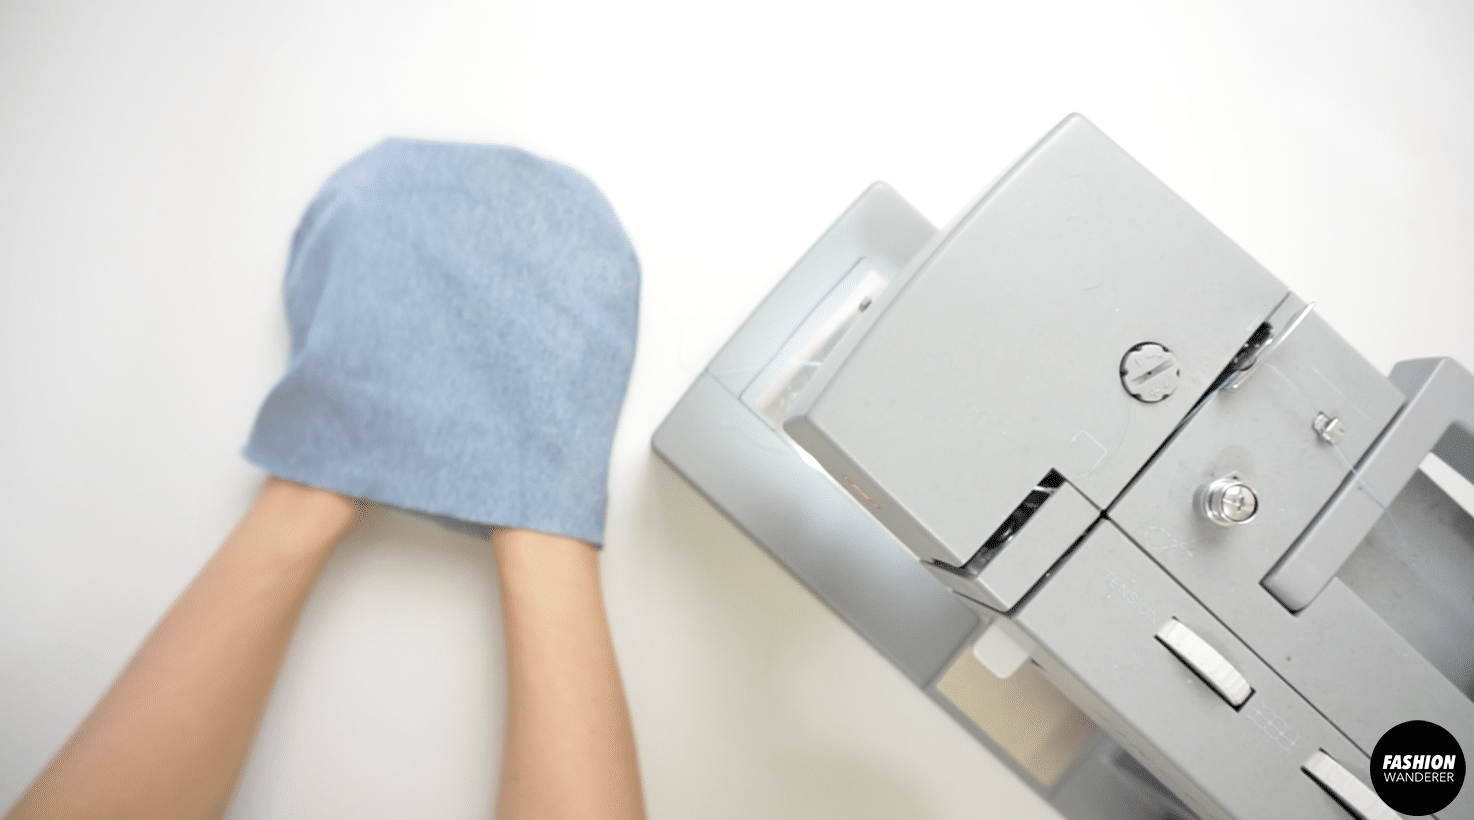
How to Sew Shoulder Strap
- Lay right side of shoulder straps together and sew ¼” topstitch.
- Open and fold the strap pieces so the wrong sides are facing and edge topstitch.

- Next, fold the ¼” seam allowance inside of the strap.

- Edge topstitch to close the strap.

- Do the same on the other side of shoulder strap.

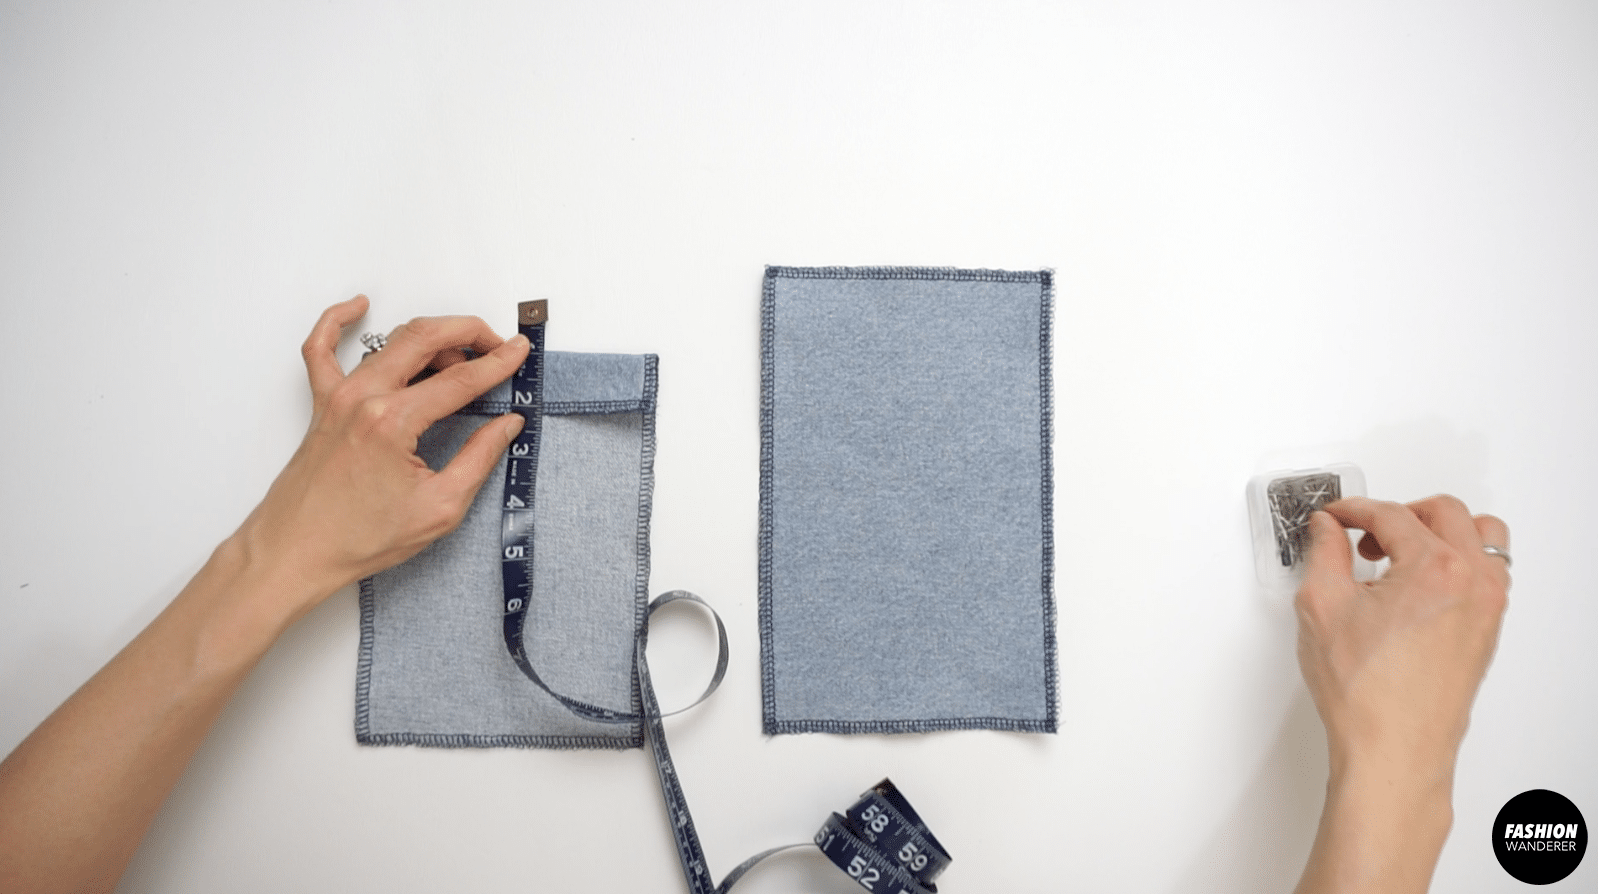
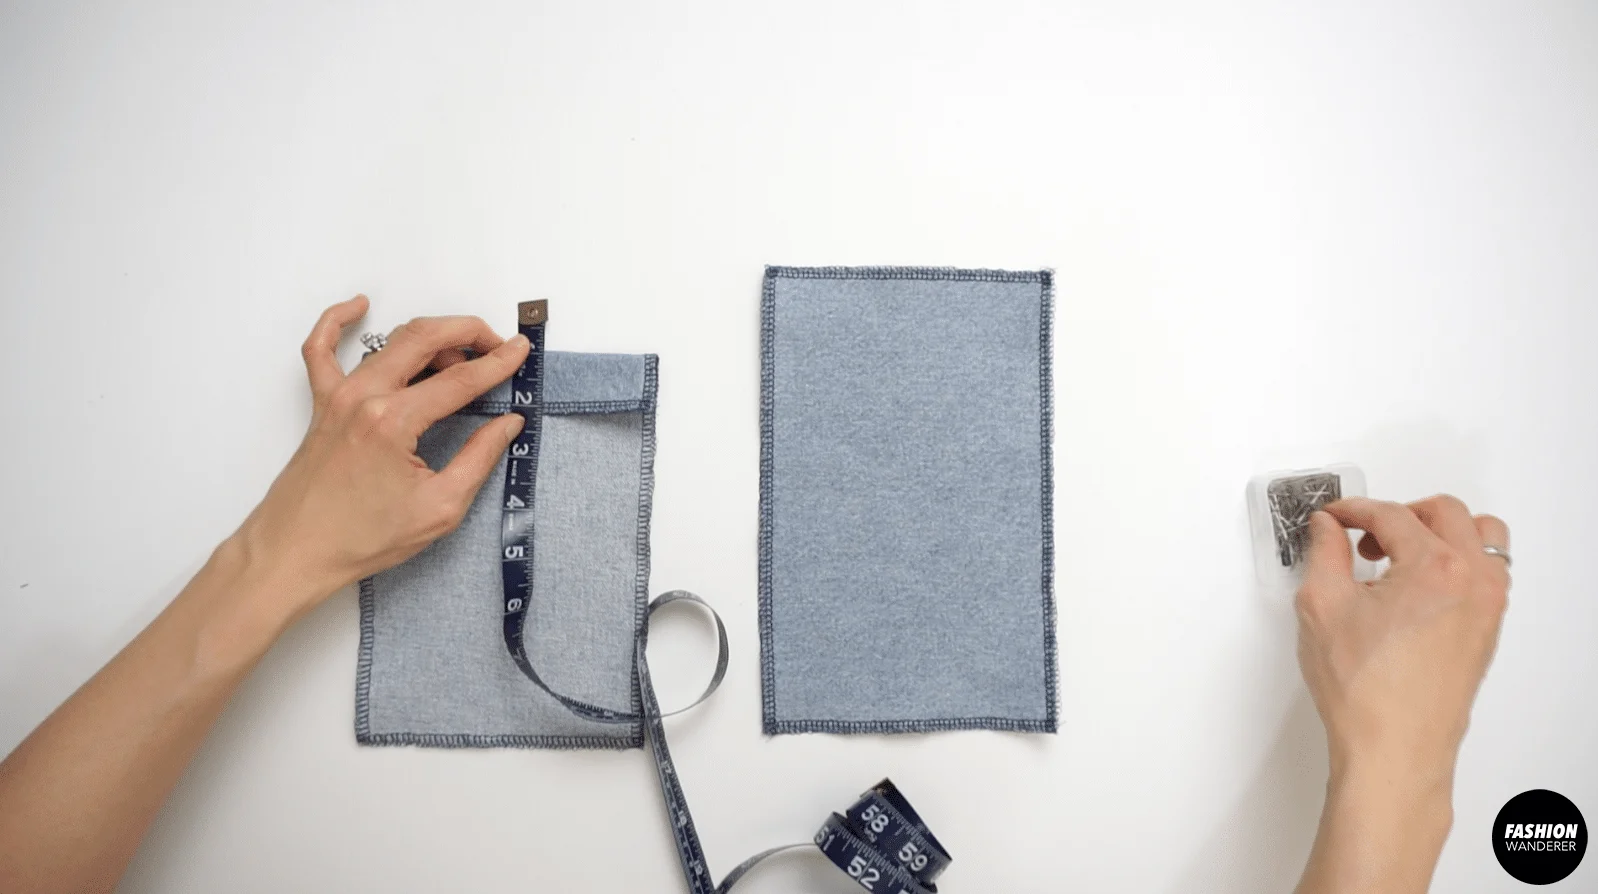
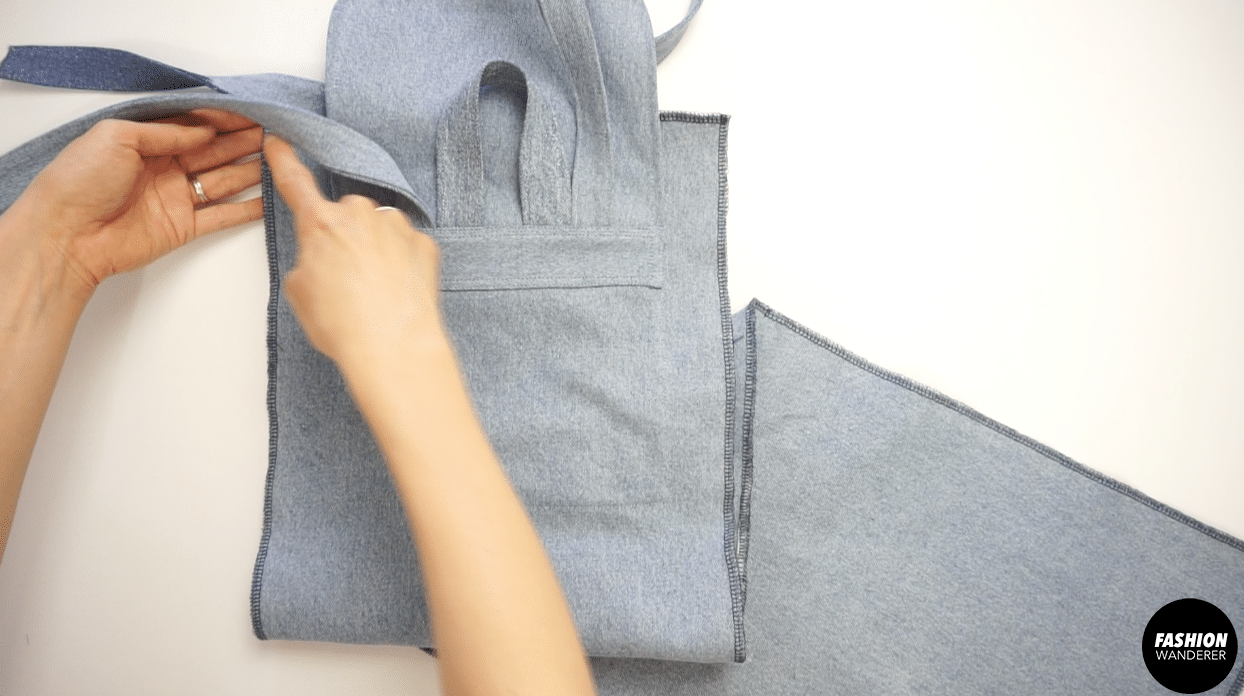
- How To Add Handle And Shoulder Strap On Pocket Flap
- Fold the pocket flap in half and mark the half point with erasable pen.
- Place the handle in the middle 1” apart from each other and pin to secure.

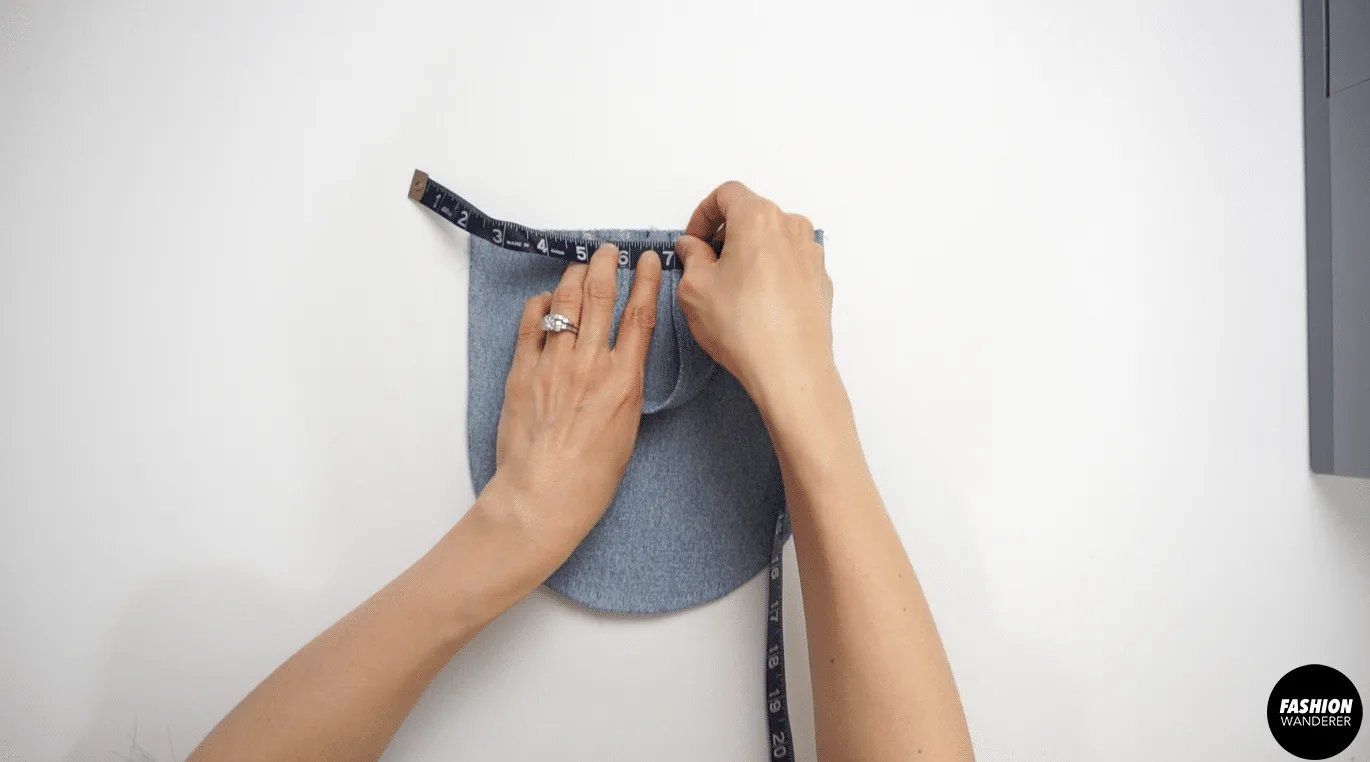
- Topstitch ¼” away from the top edge.
- Lay the shoulder strap next to the handle.
- Pin to the placement and topstitch ¼” on both sides.
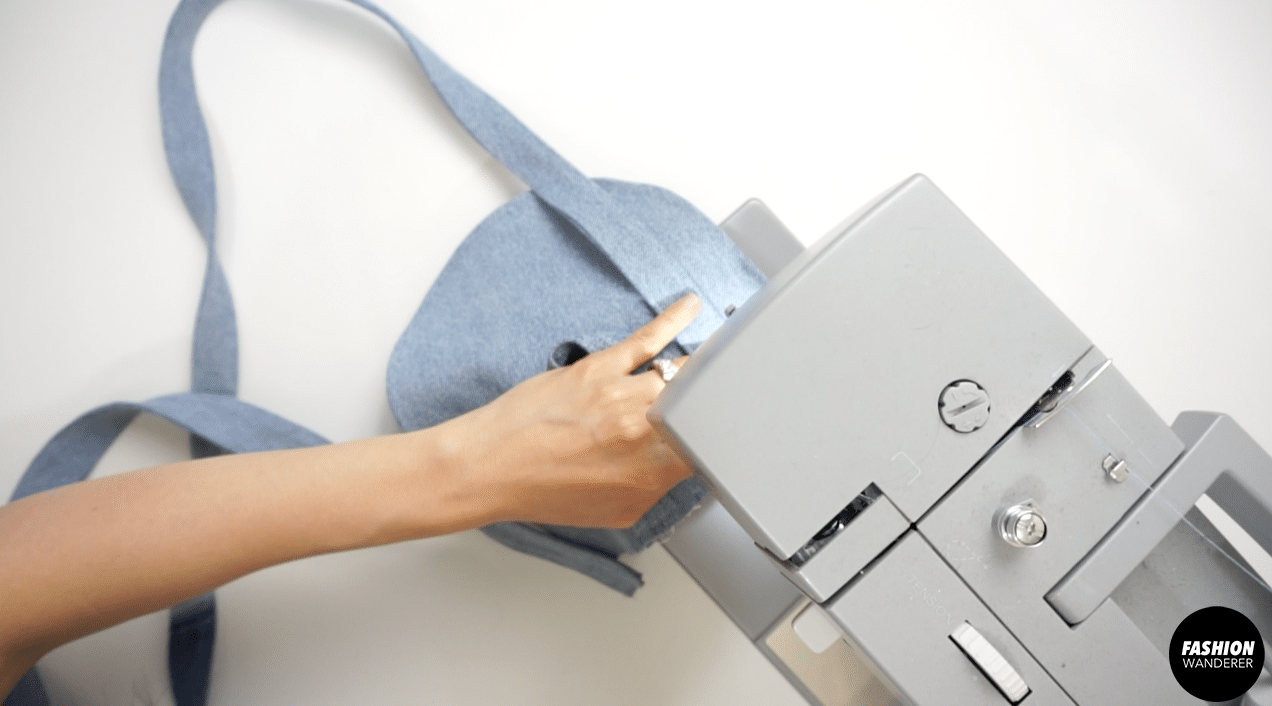

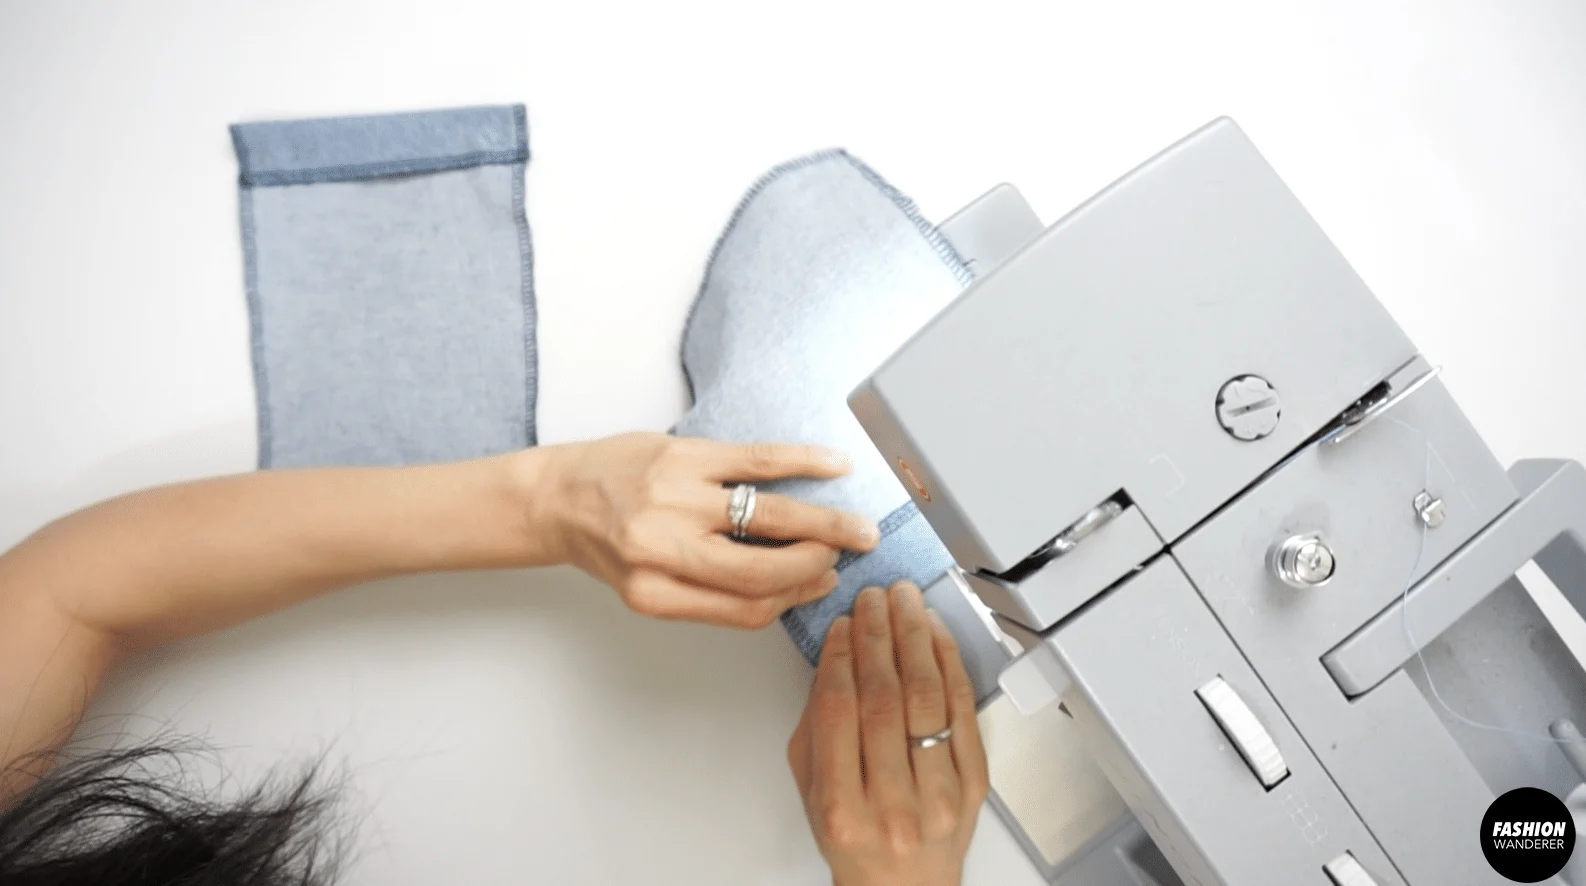
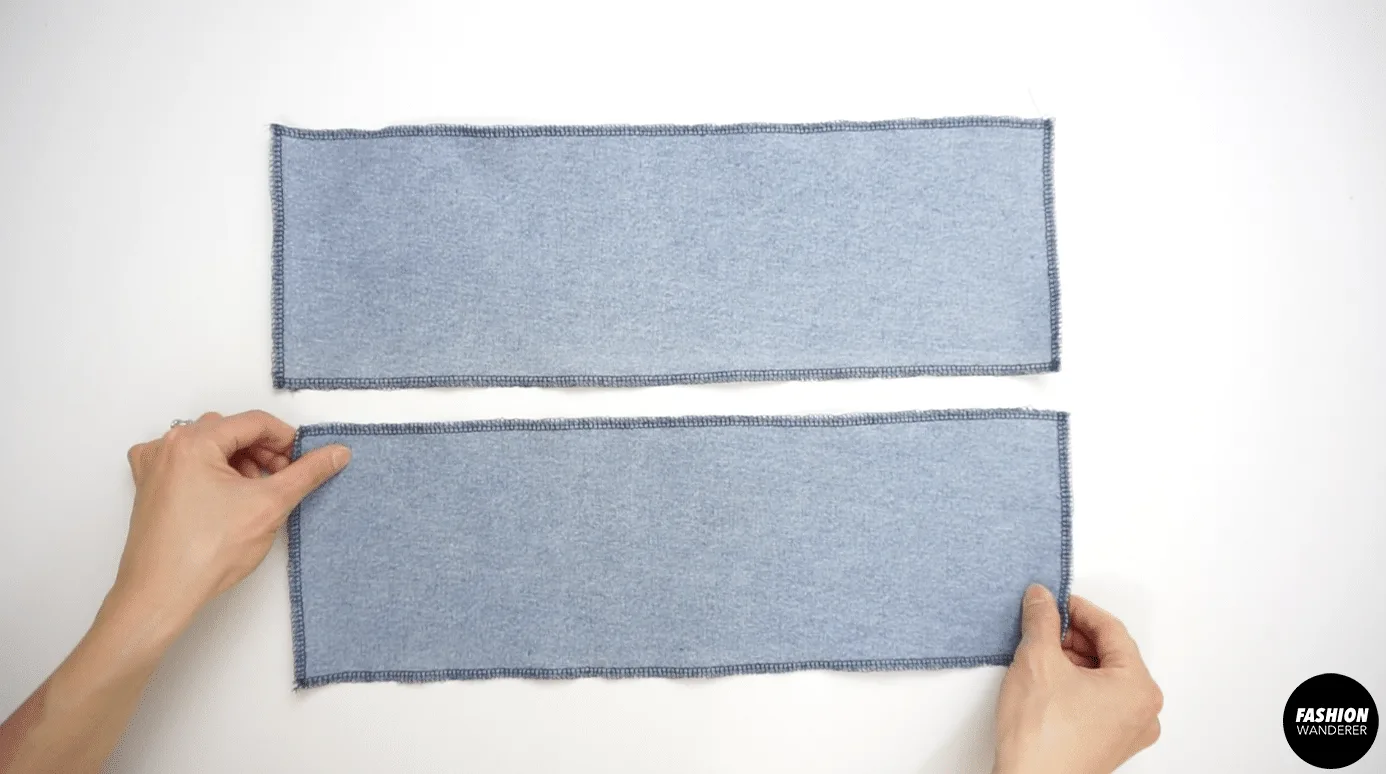
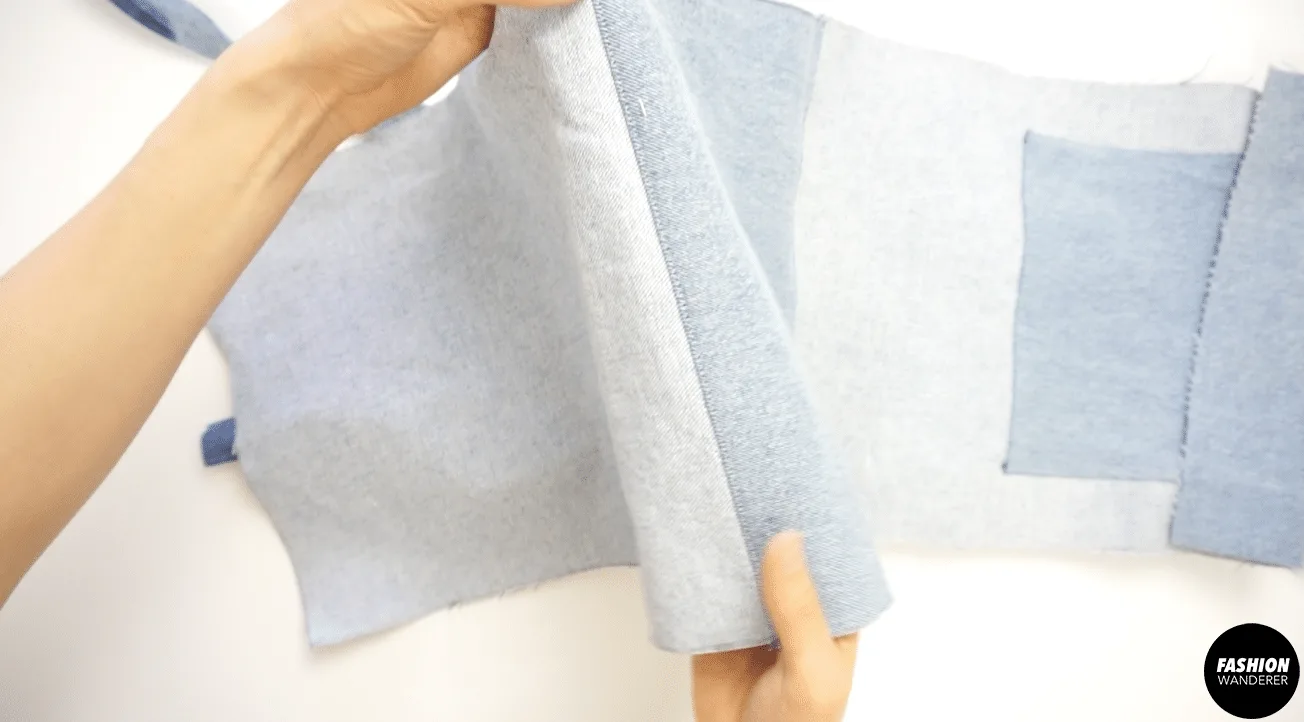
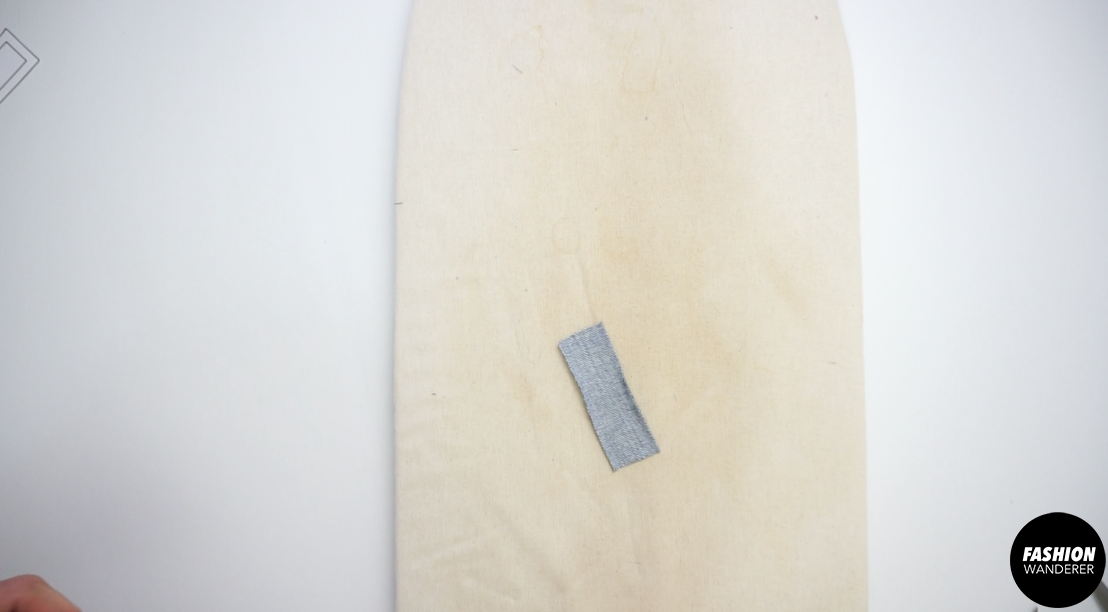
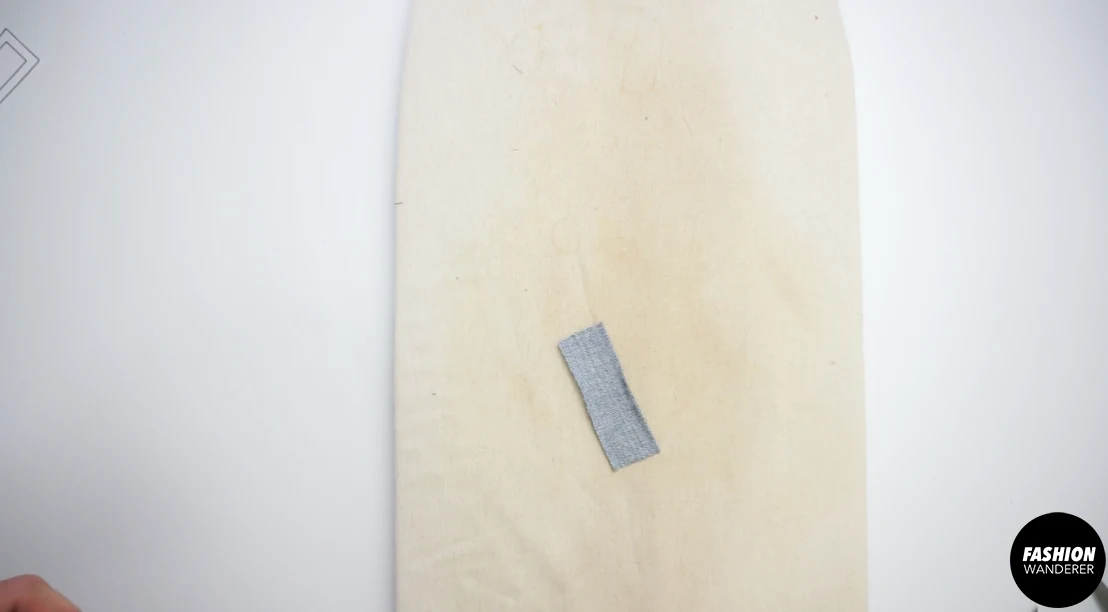
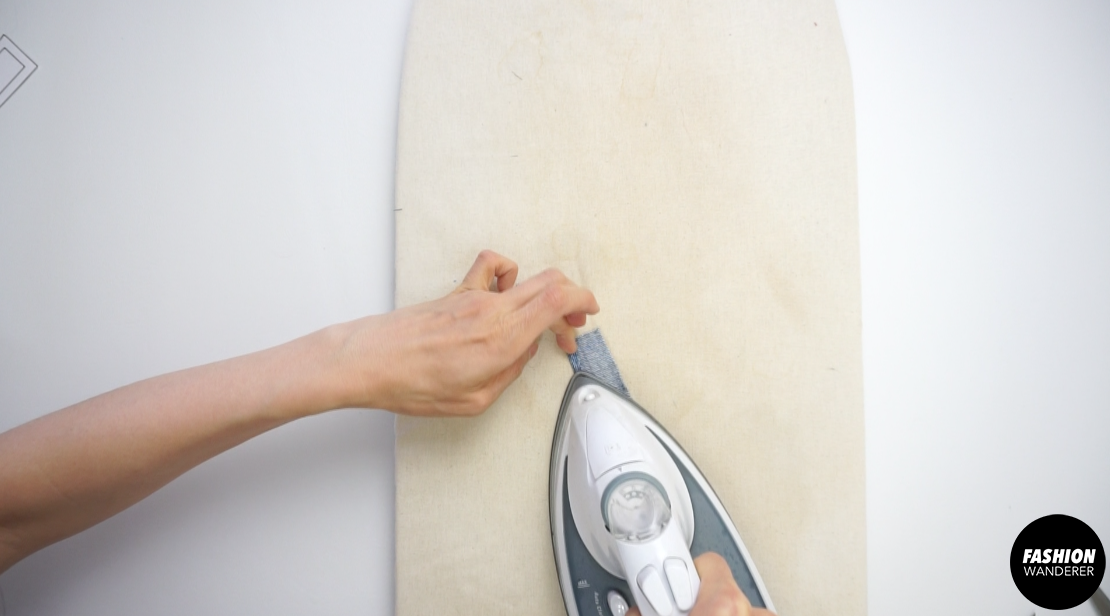
How to Make Back Side
- Place the back side pieces right side facing down on an iron board.

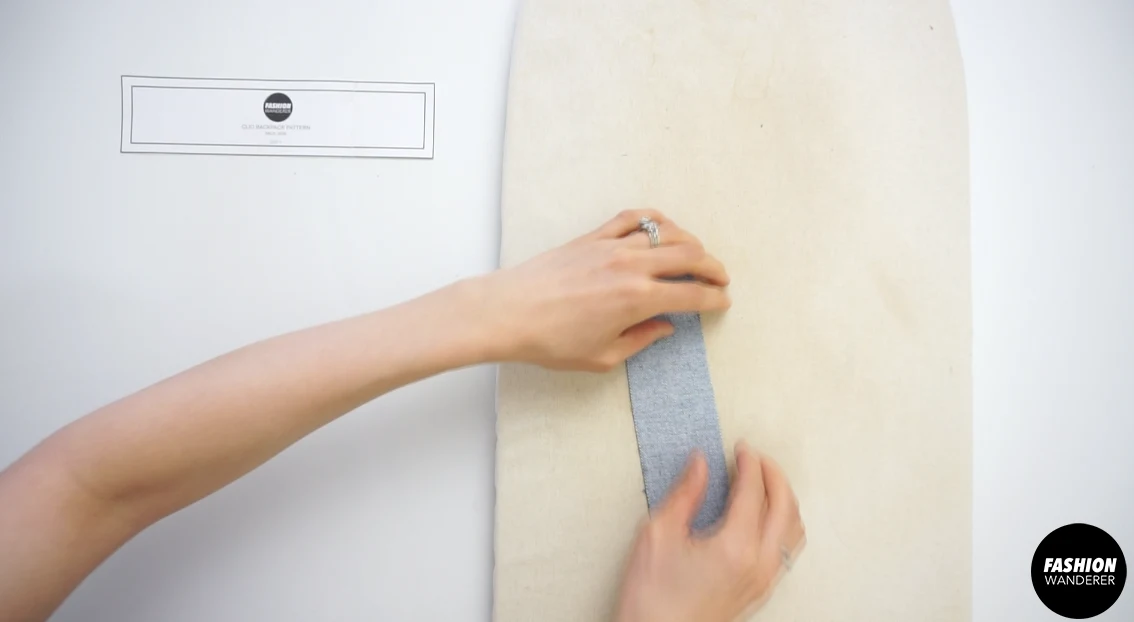
- Use ¼” double fusible tape to fold with the seam to easily iron for a clean finish.


- Do the same on the top and bottom seam with the tape.
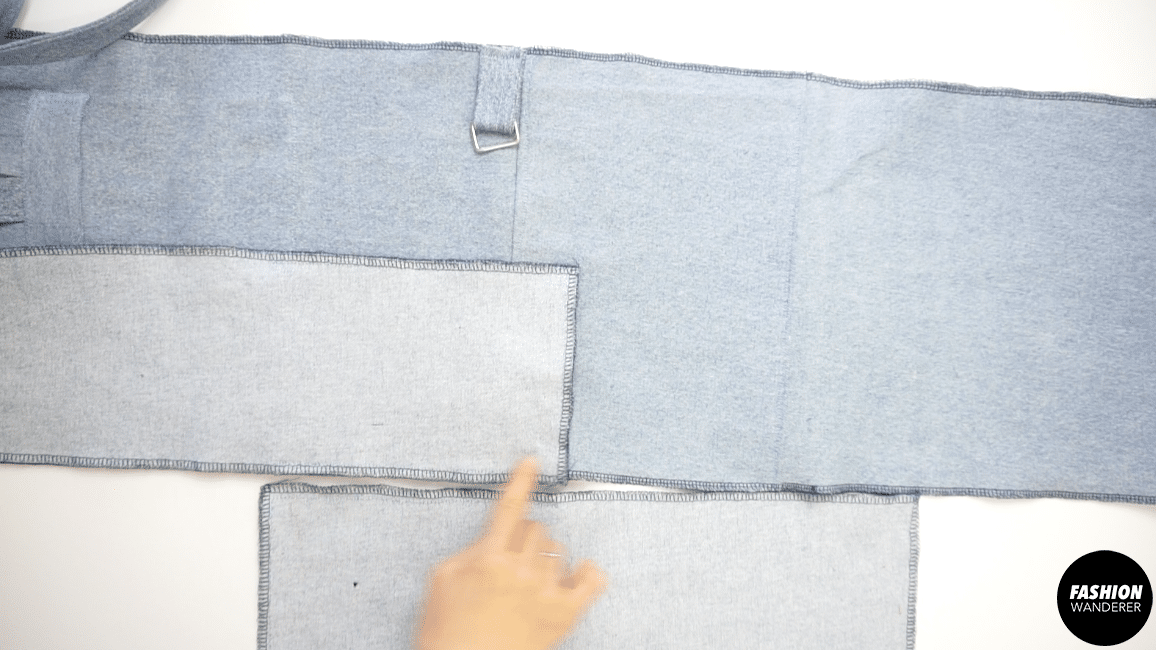
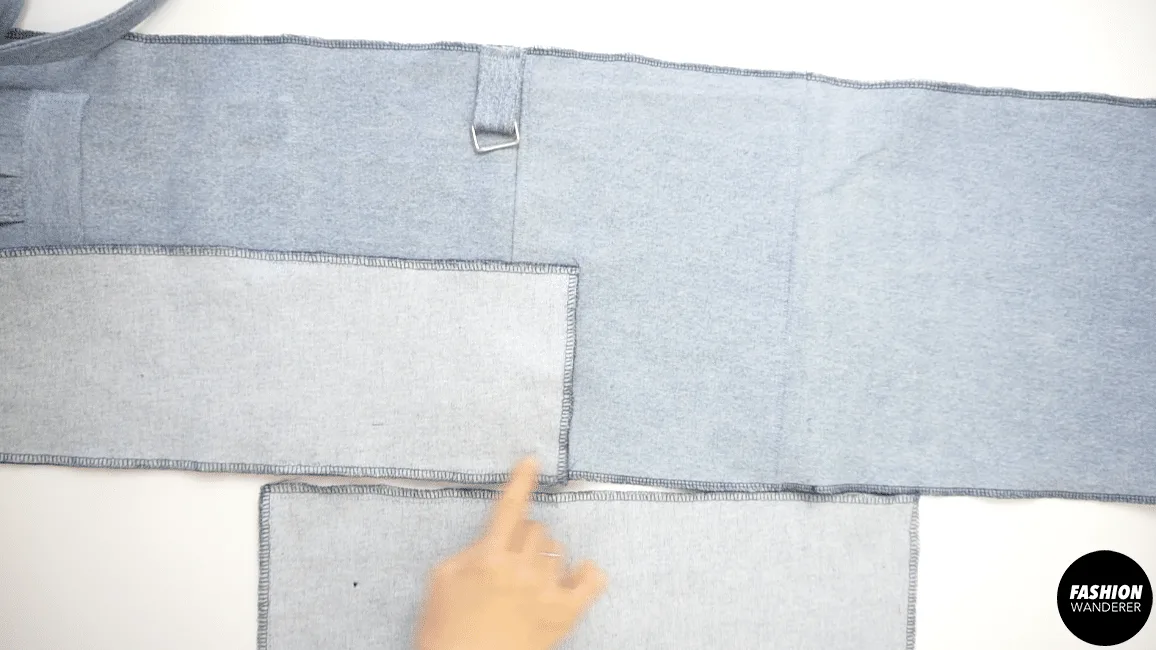
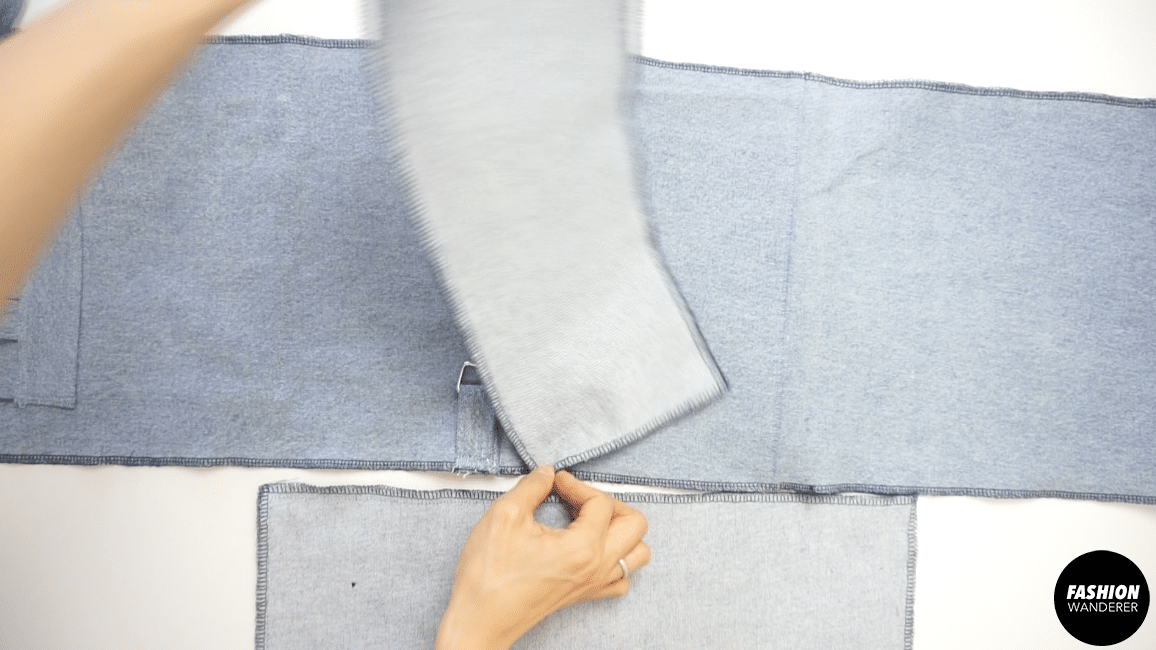
How To Attach Back Side To The Pocket Flap
- Place the back side pieces on top of the pocket flap wrong sides on top of right side with a ⅜” overlap.

- ¼” topstitch to secure the back piece with pocket flap.
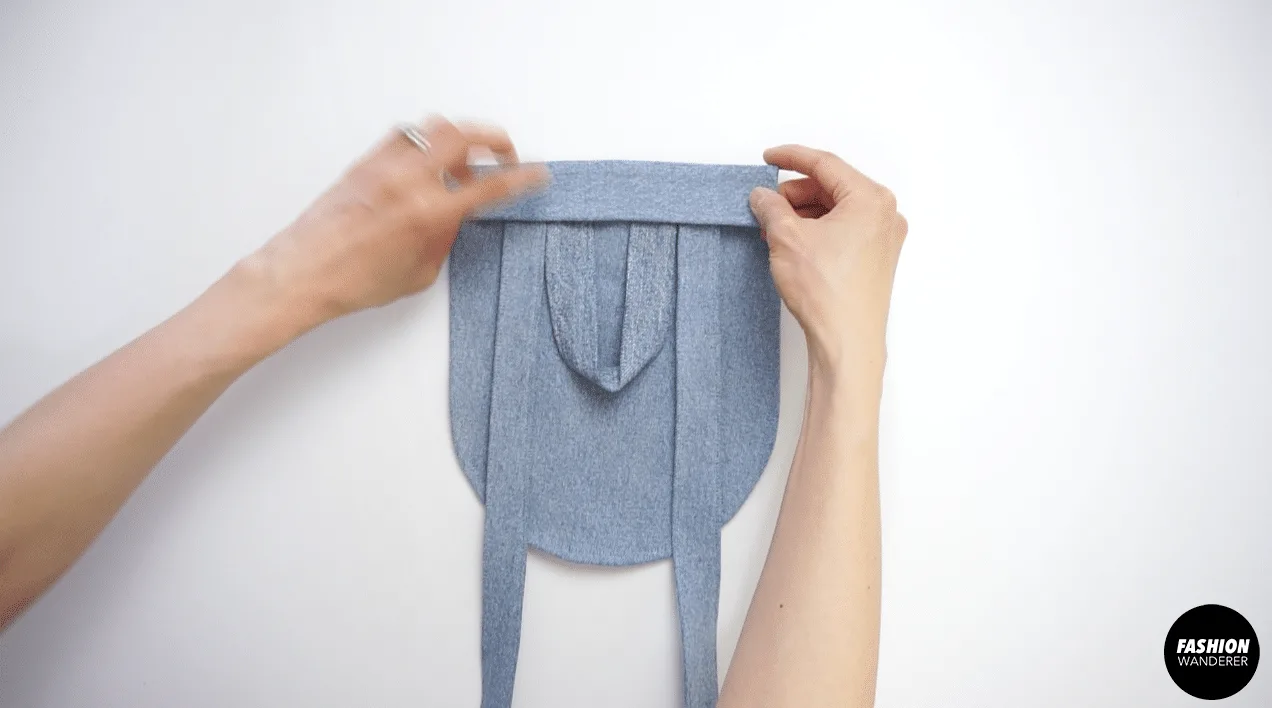
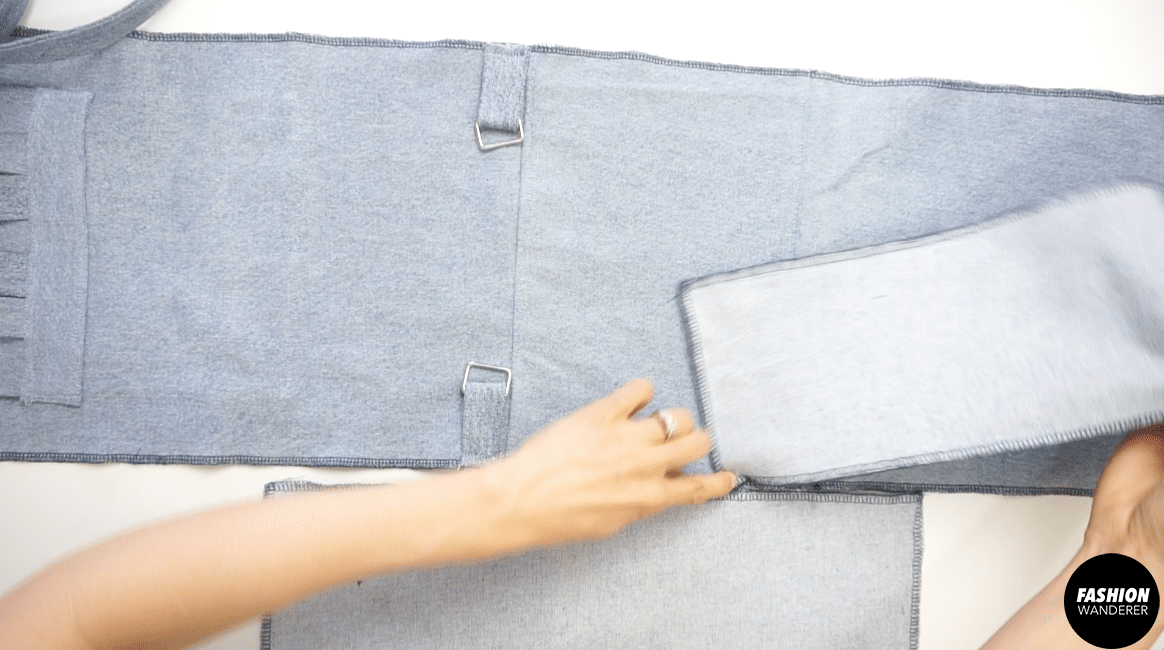
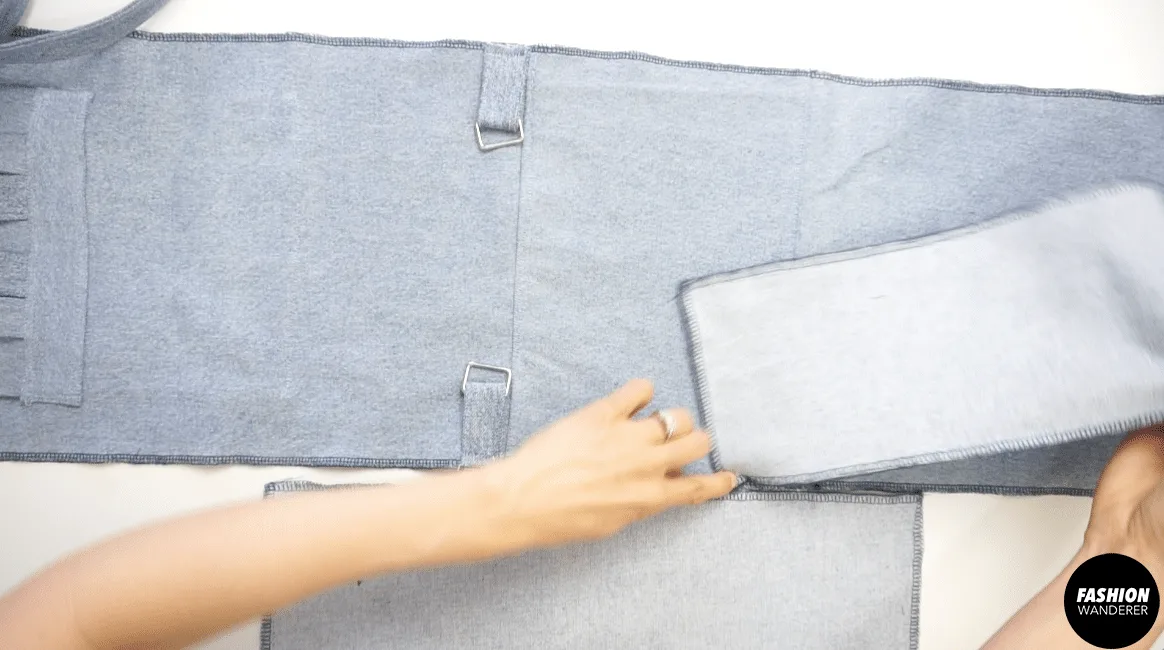
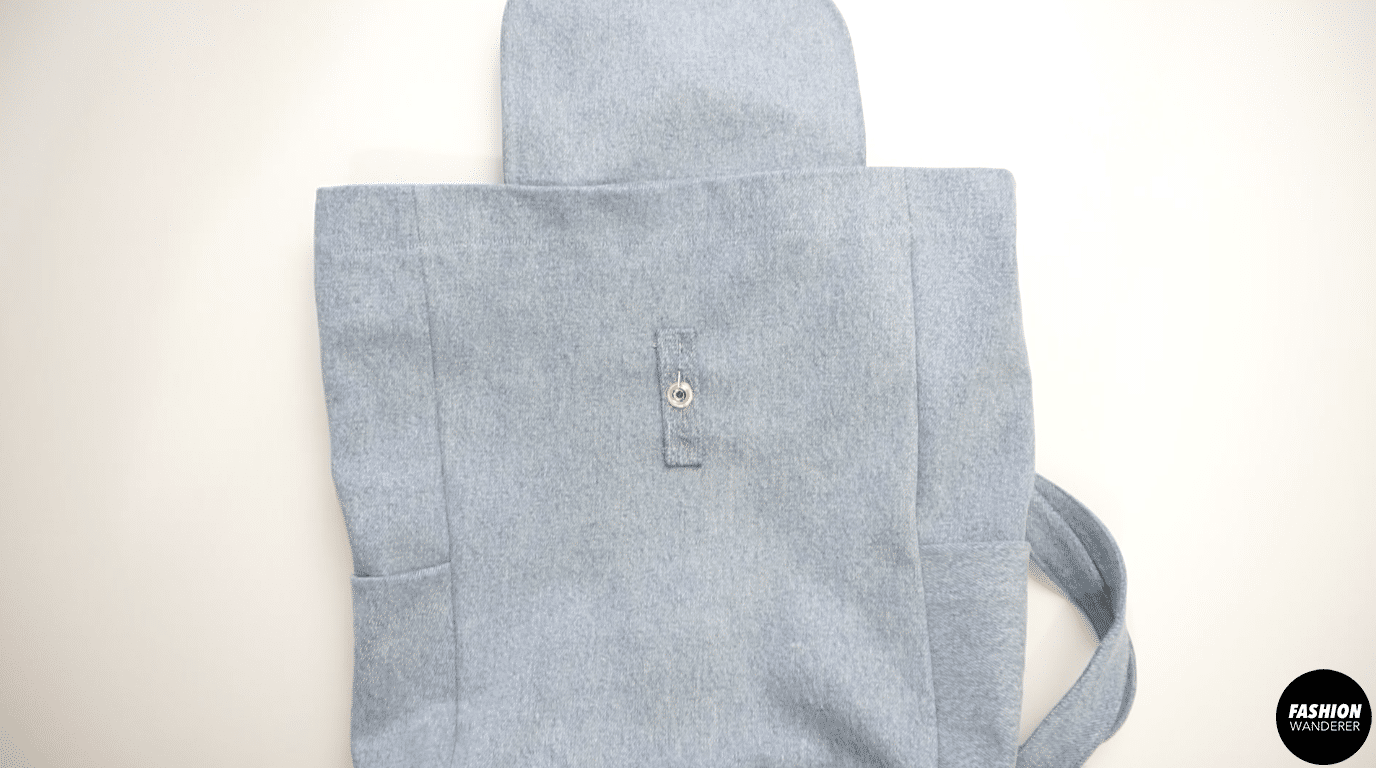
How To Attach Pocket Flap to Bag
- Lay the pocket flat on the back body piece.

- Make sure the end of back side piece is 4½” away from the top;
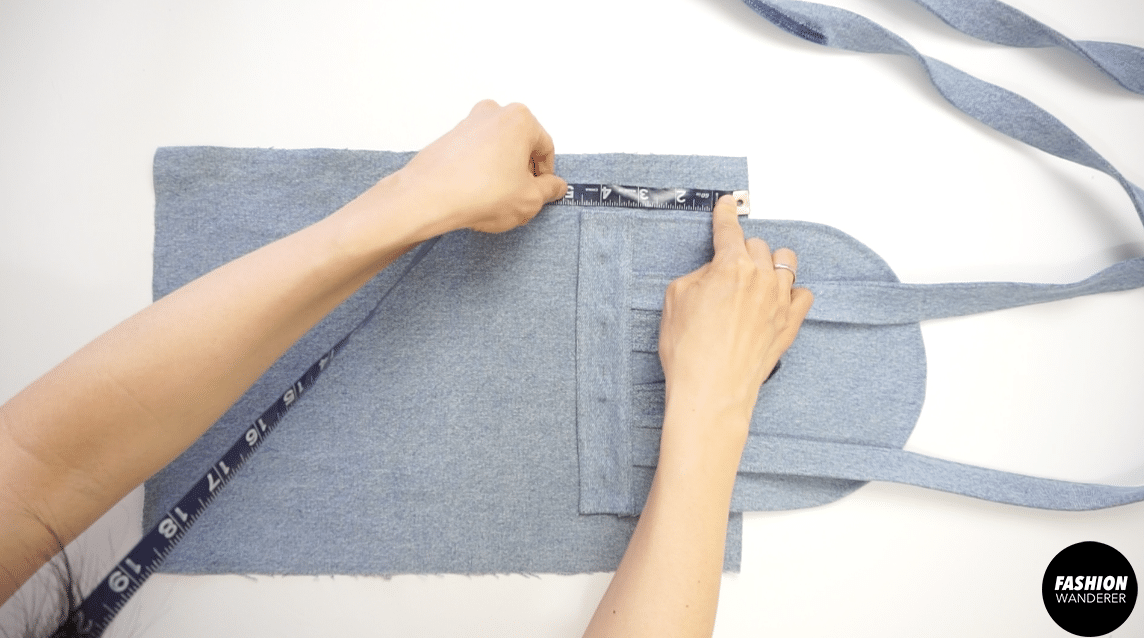
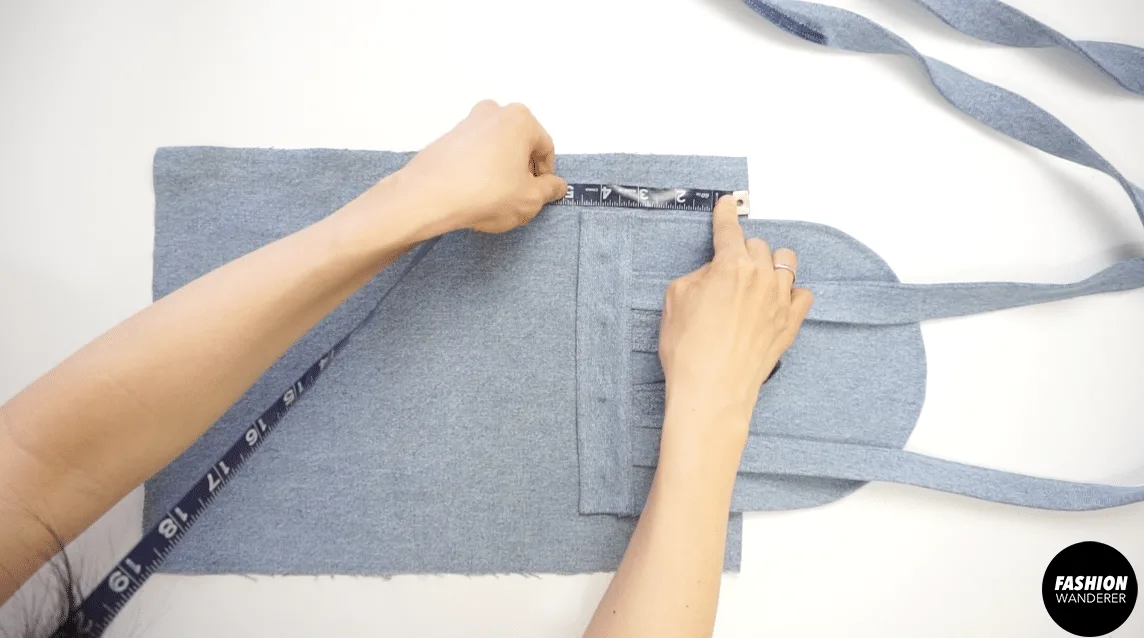
- 1½” away from both sides;
- And, 11” away from the bottom.

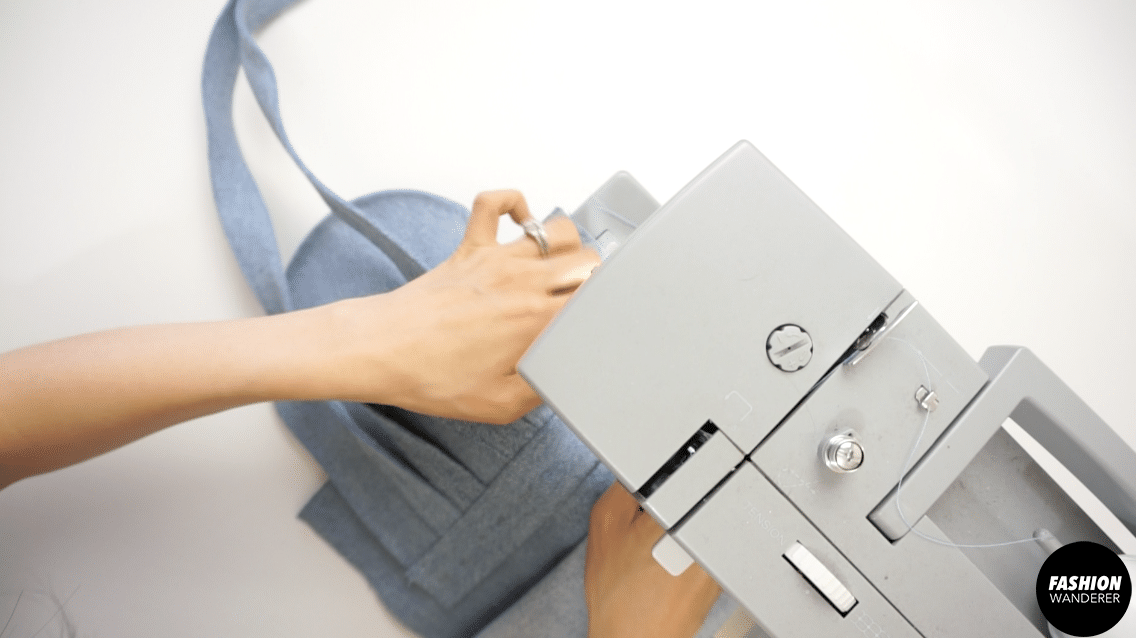
- Pin to secure and double edge topstitch ⅛” away from each stitch.

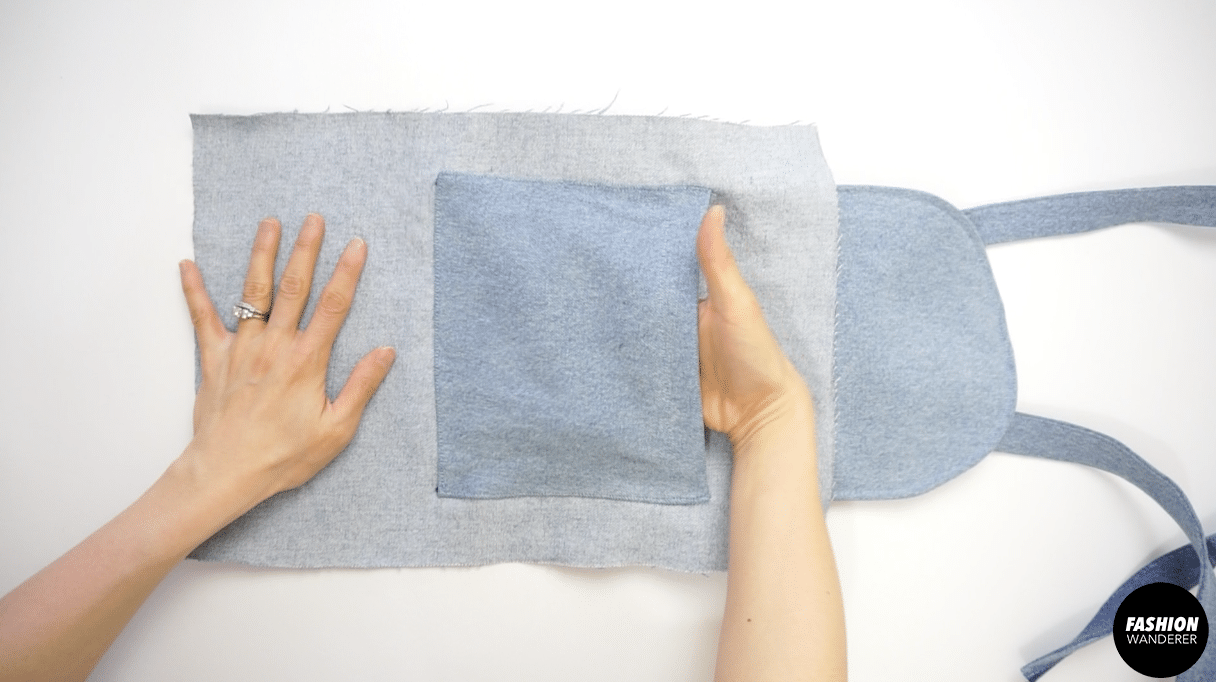
How To Attach Inner Pocket To Bag
- Flip the back body piece wrong sides facing up.
- Align the stitches to position the inner pocket pieces.

- Fold ¼” width and zigzag stitch inside.

- Edge topstitch around the pocket and backstitch on both sides of the pocket opening.

How to Sew Bottom To Back Body
- Place right side of the back piece and right sides of the bottom pieces together and ¼” topstitch.
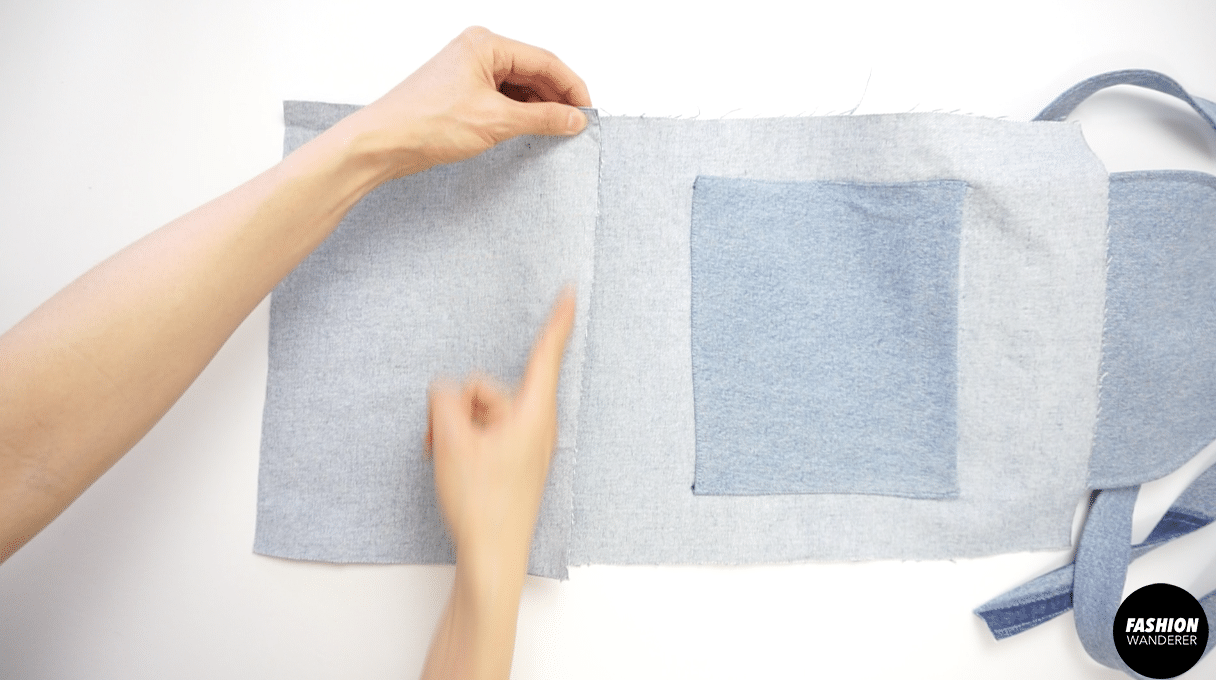

- On the other side, place right sides of the front piece and ¼” topstitch.
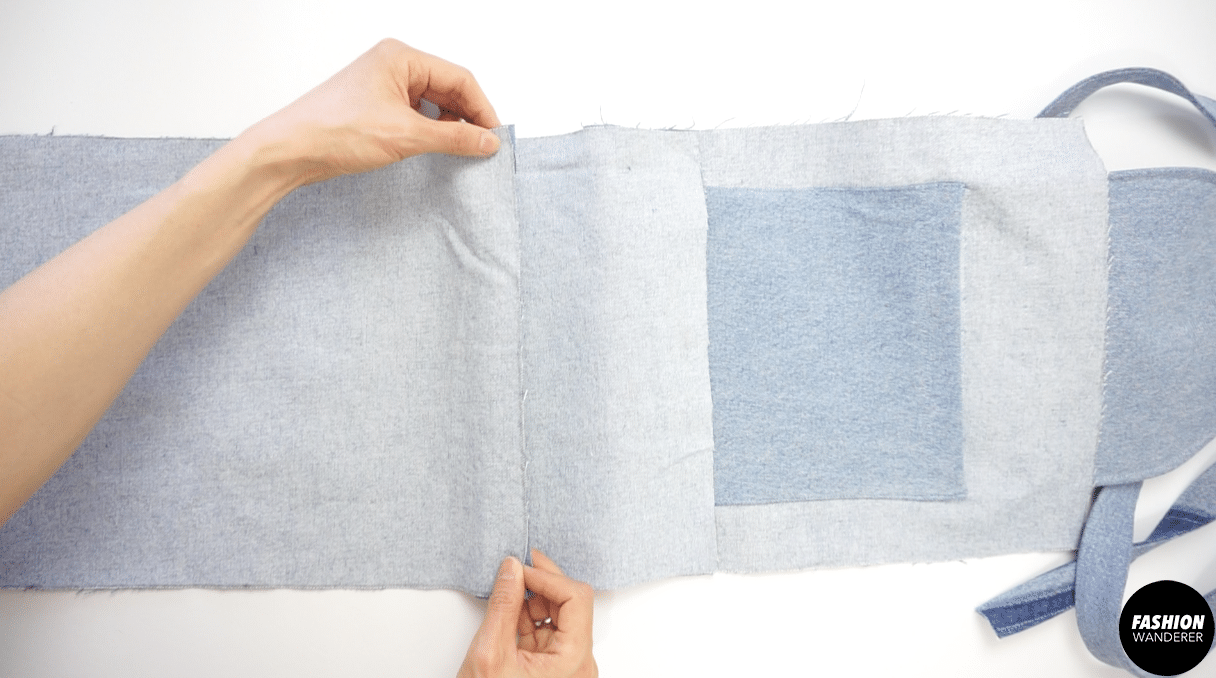
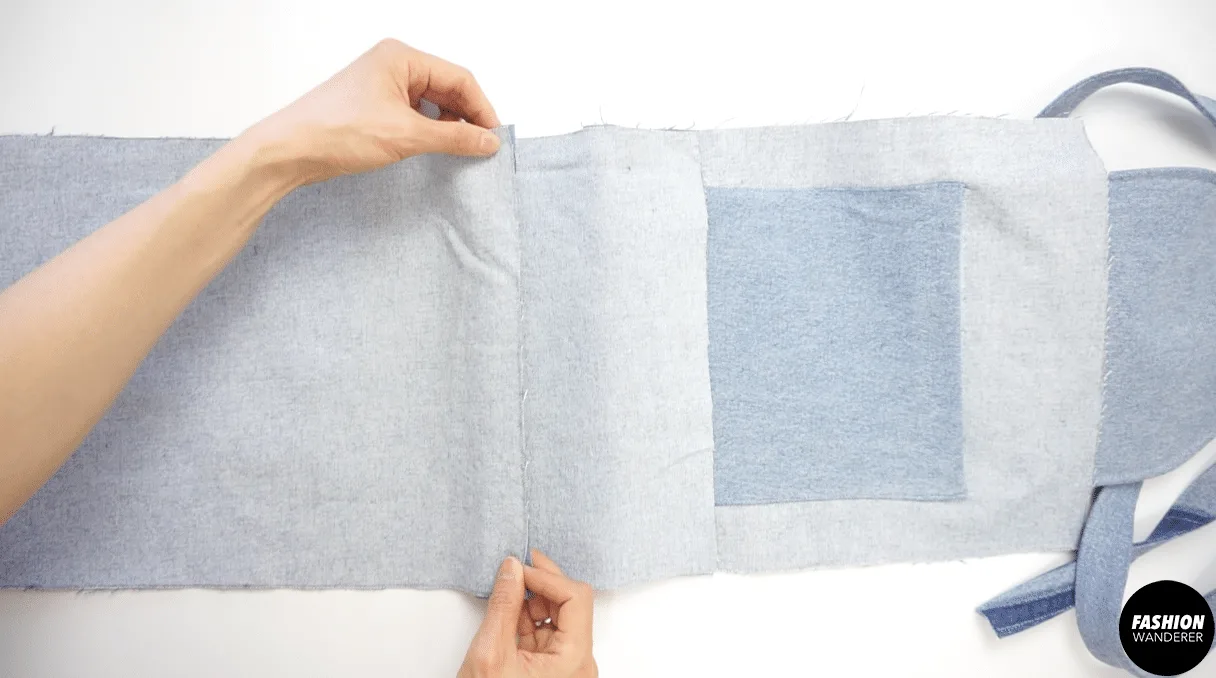
- Add second bottom piece right side facing to the wrong side of the front piece and sew ¼” seam allowance.

- Fold the piece over and edge topstitch on the bottom piece.

- Pro Tip: If the seam allowance is too thick to apply topstitch, trim 1 or 2 seam allowance in half so it is ⅛” width to sew topstitch on the bottom piece.

- Fold ¼” and topstitch on the other side.

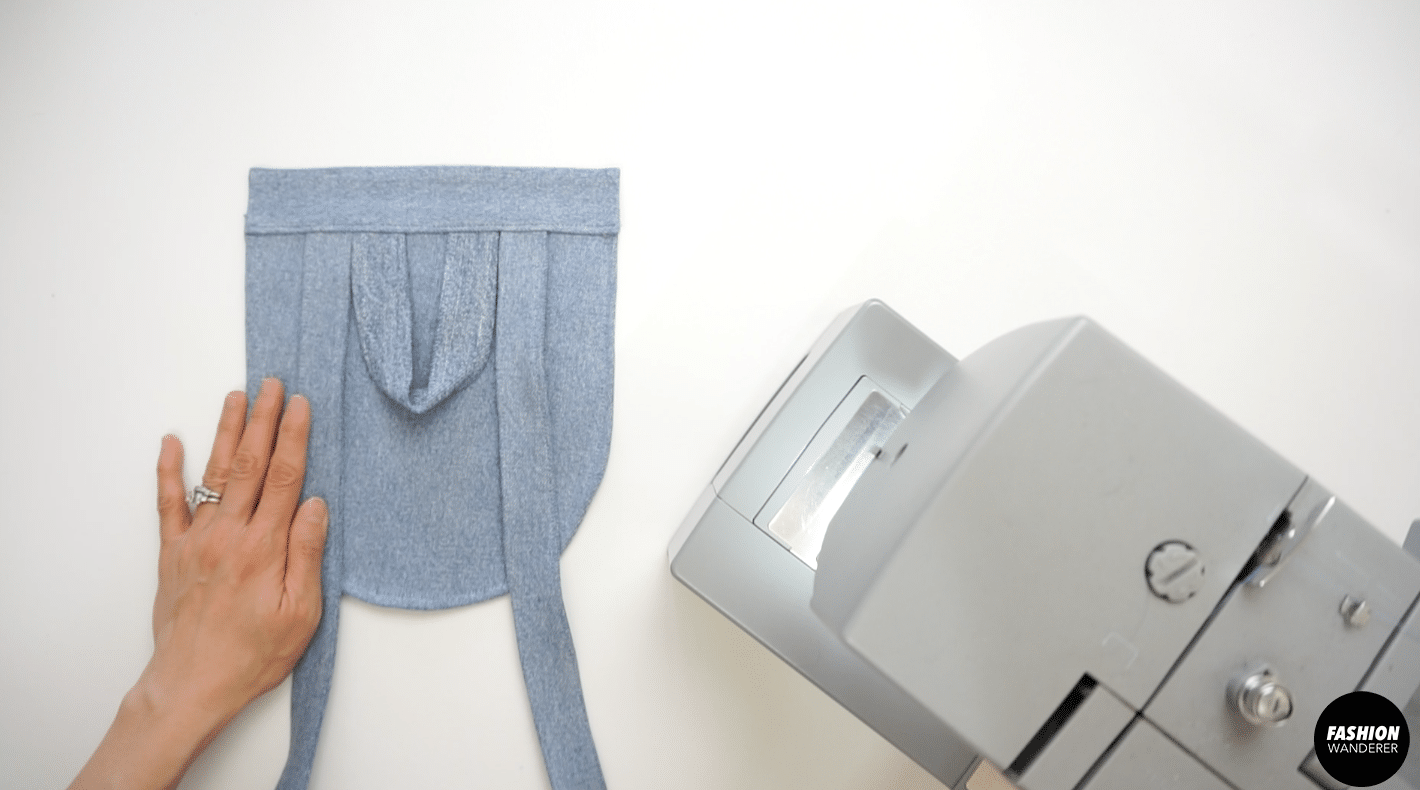
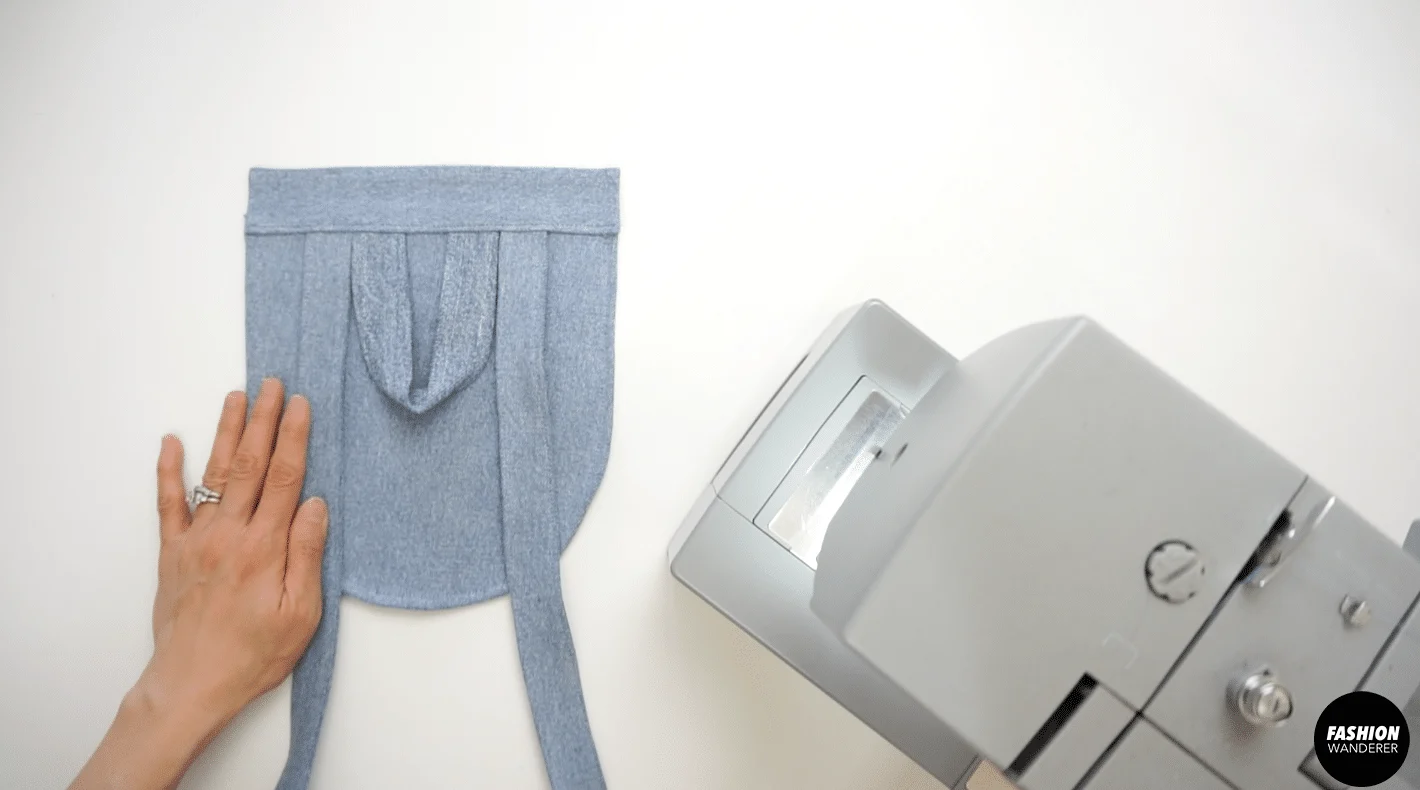
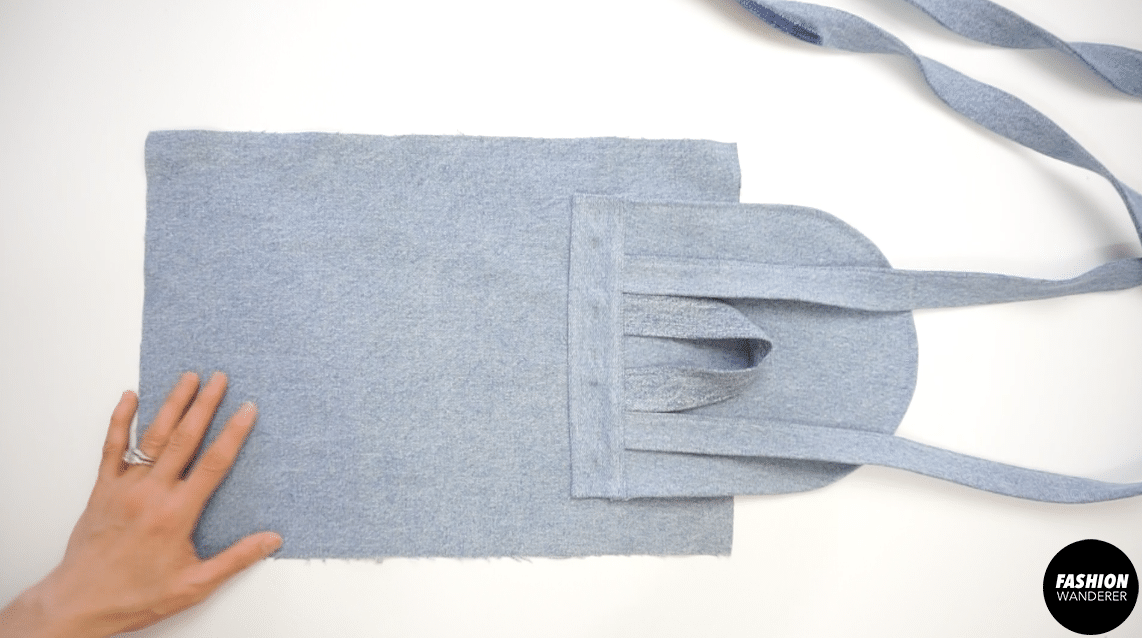
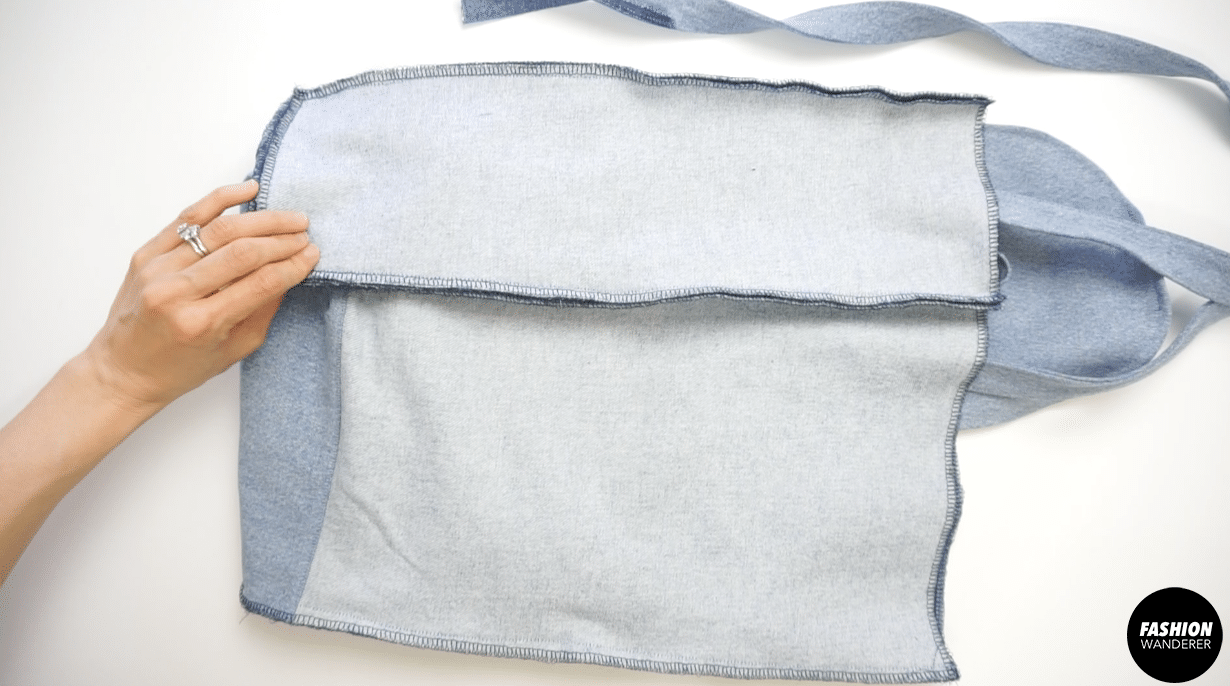
How To Assemble The Backpack
- Use zigzag stitch on all four sides of the bag from front bottom to the back piece.

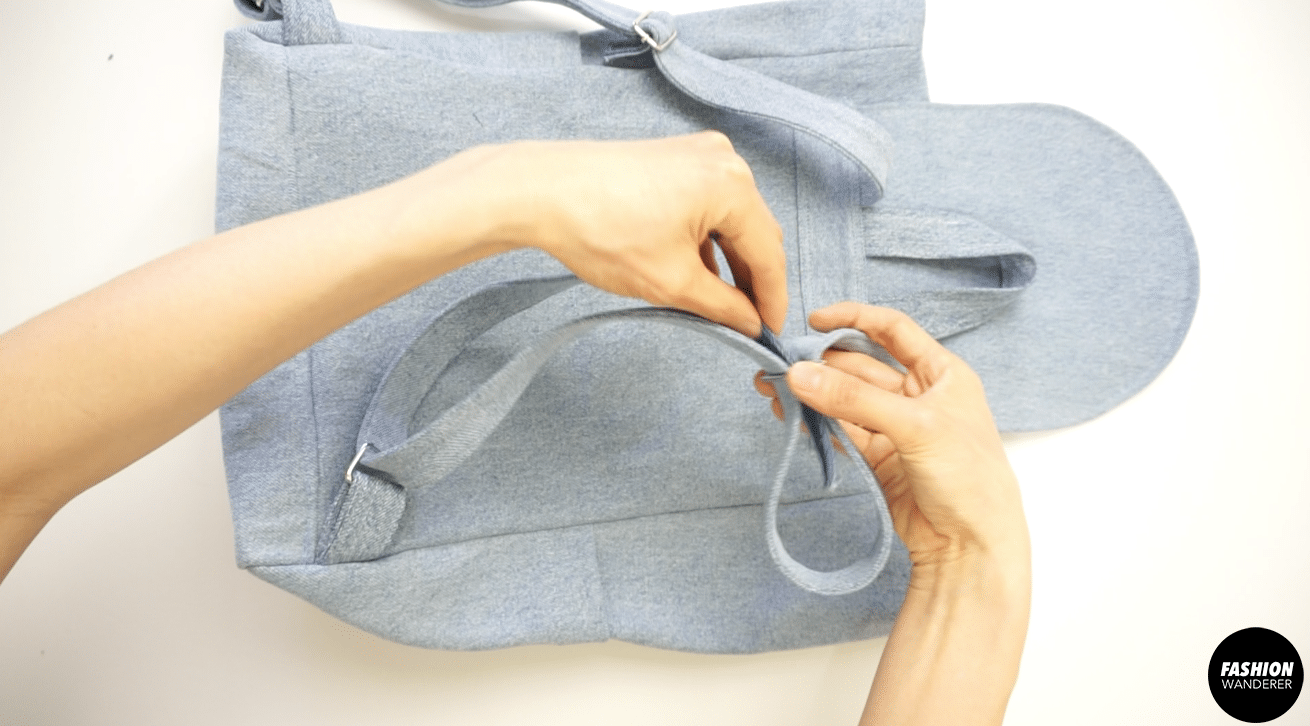
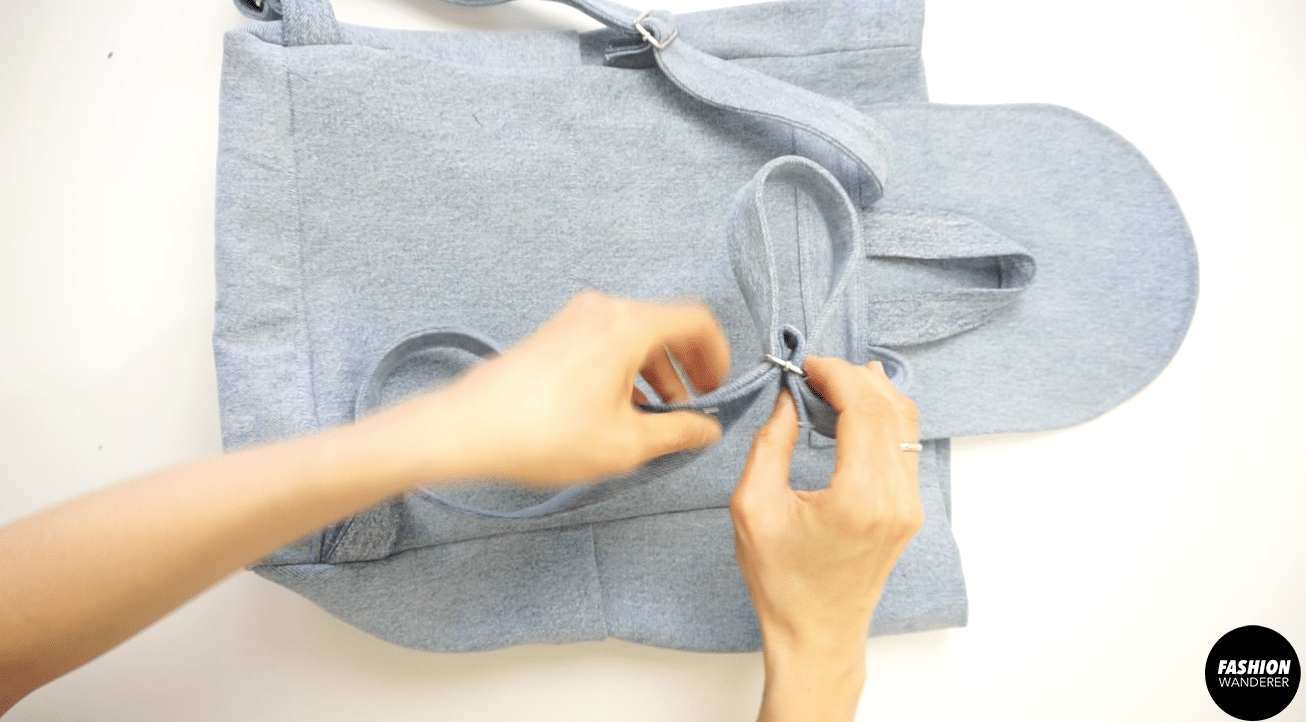
- Grab 2 pieces of rectangular ring and 2 pieces of buckle loop.
- Slide through the buckle ring and fold the buckle loop in half.

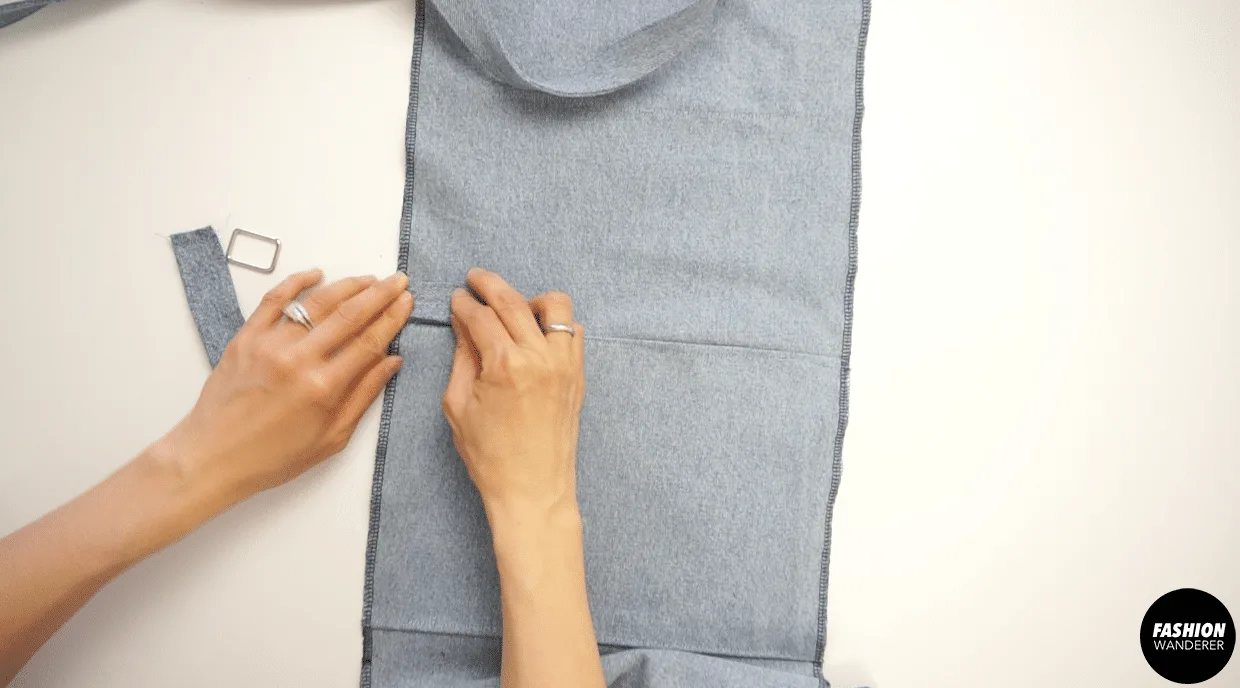
- Place the buckle loop just above the bottom seam on the back piece of the bag.
- ¼” topstitch to secure the position on both sides.
- Lay the right sides of the side pieces to the back body of the bag.

- ¼” topstitch and reach to the corner, rotate the side piece to sew the bottom ¼” topstitch.
- Rotate the the side piece when reaching the corner once again.

- Do the same on the other side.
- Flip the bag inside out.
- Fold the top edges 1½” width and ¼” topstitch around.

- Slide the shoulder strap through the rectangular buckle.
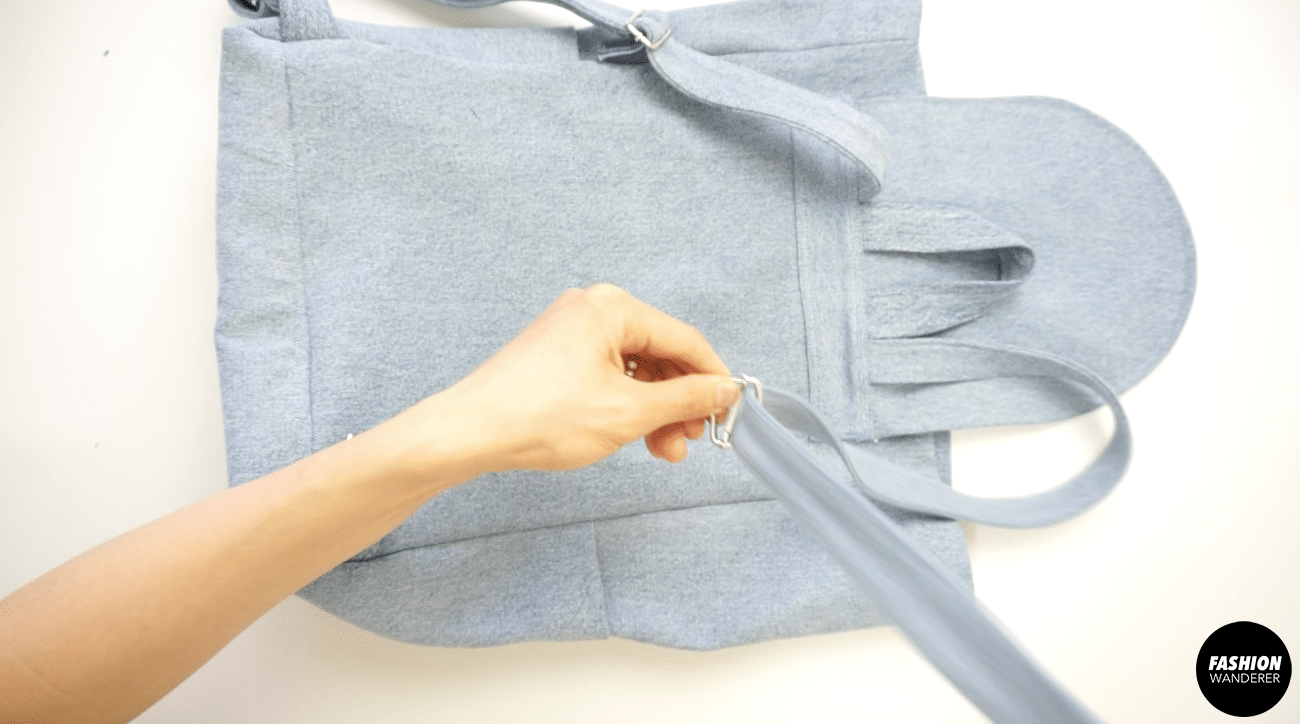
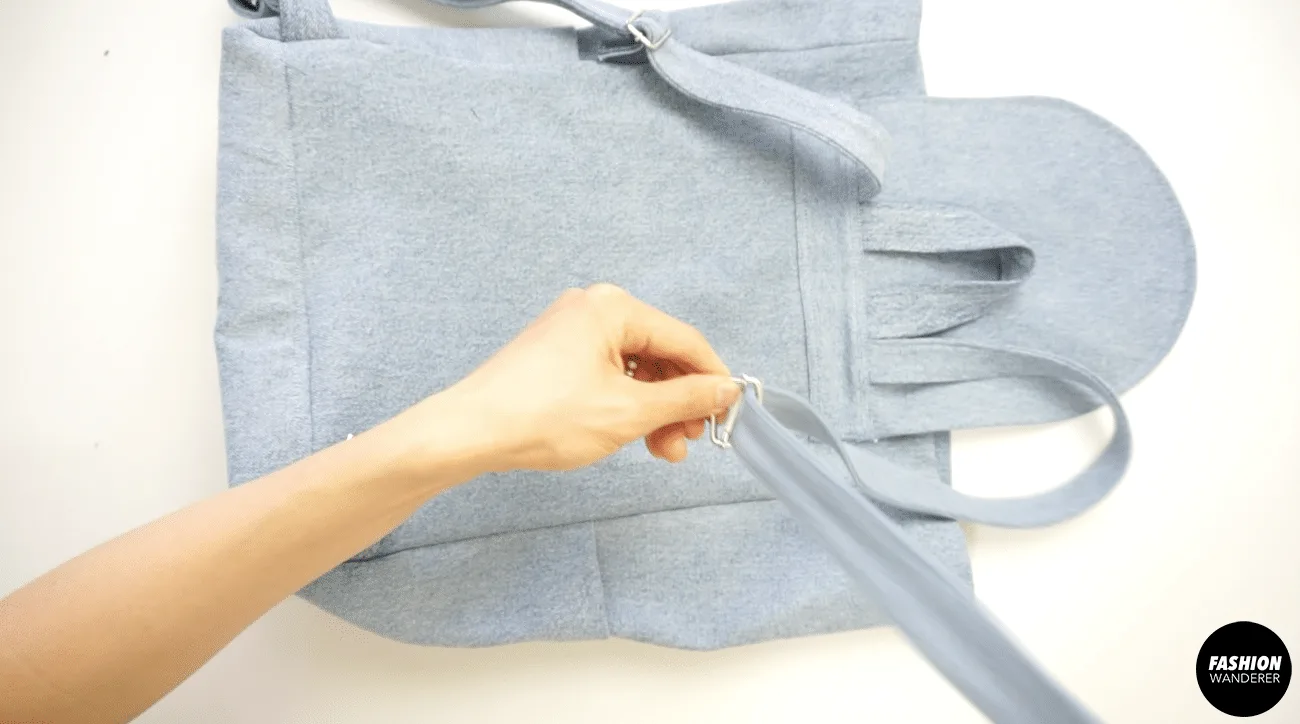
- Next, slide the shoulder strap through the rectangular ring.

- From underneath, slide once more through the buckle.

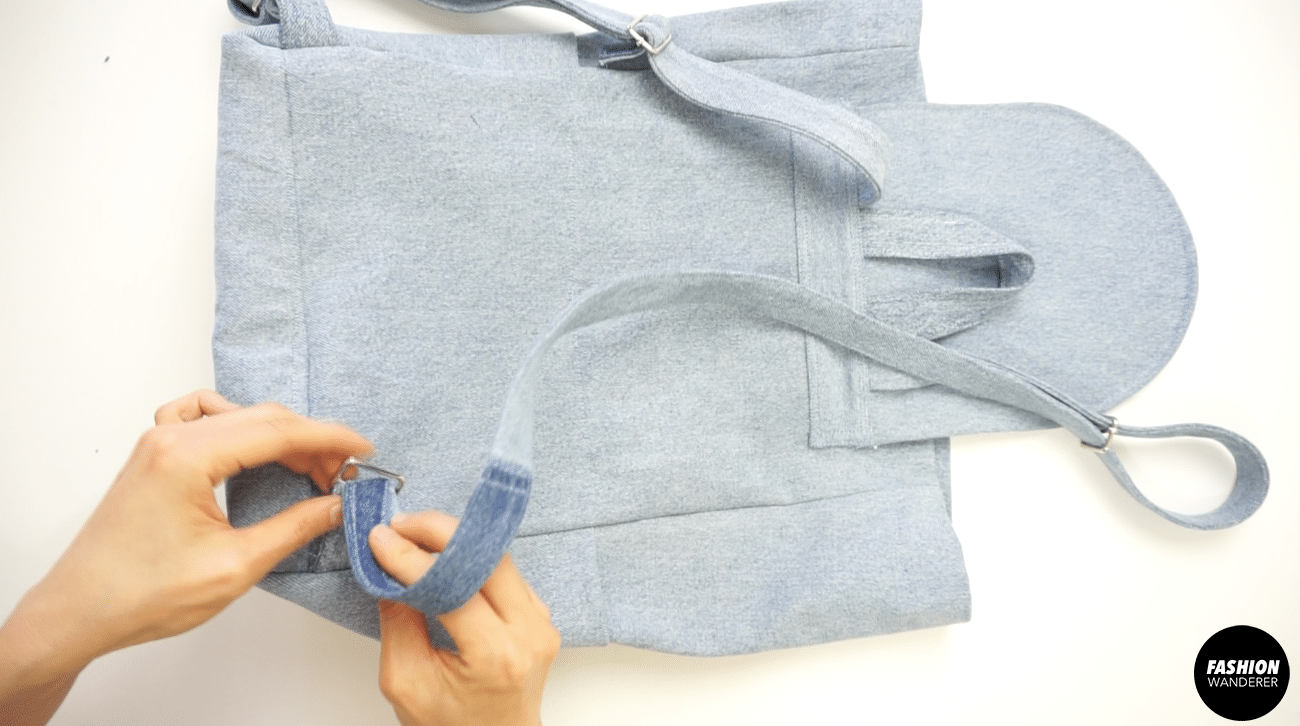
- Adjust the strap so there is 1½” long strap at the end.

- Trim any frayed thread on the edges and ¼” topstitch to secure.

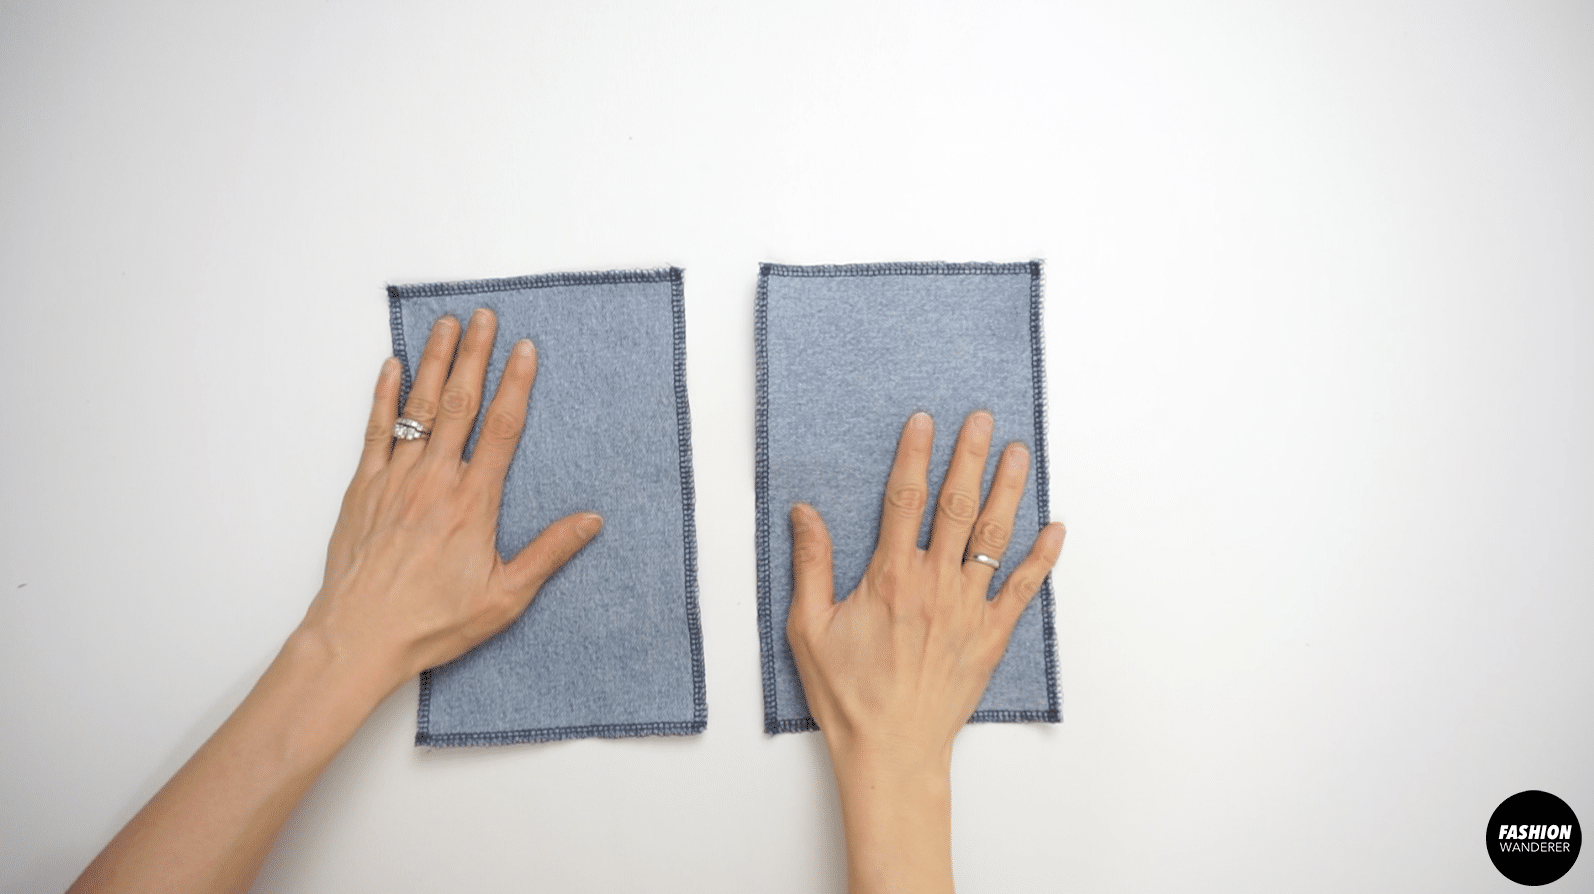
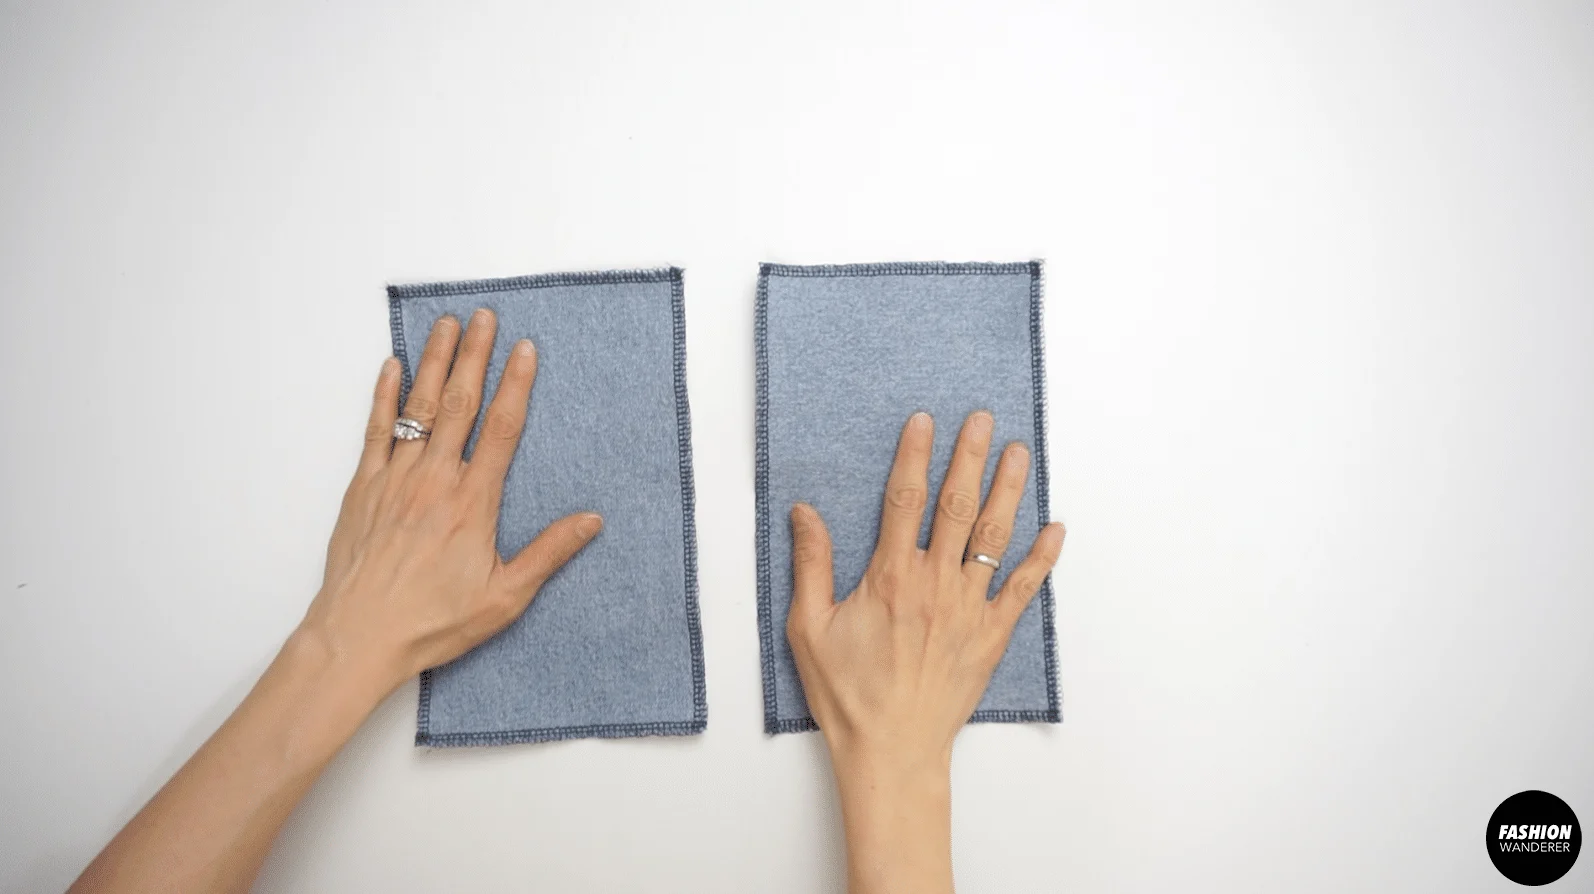
- Place the right side of snap button patch on the iron board.
- Use ¼” double sided iron-on tape to fold all four sides clean.

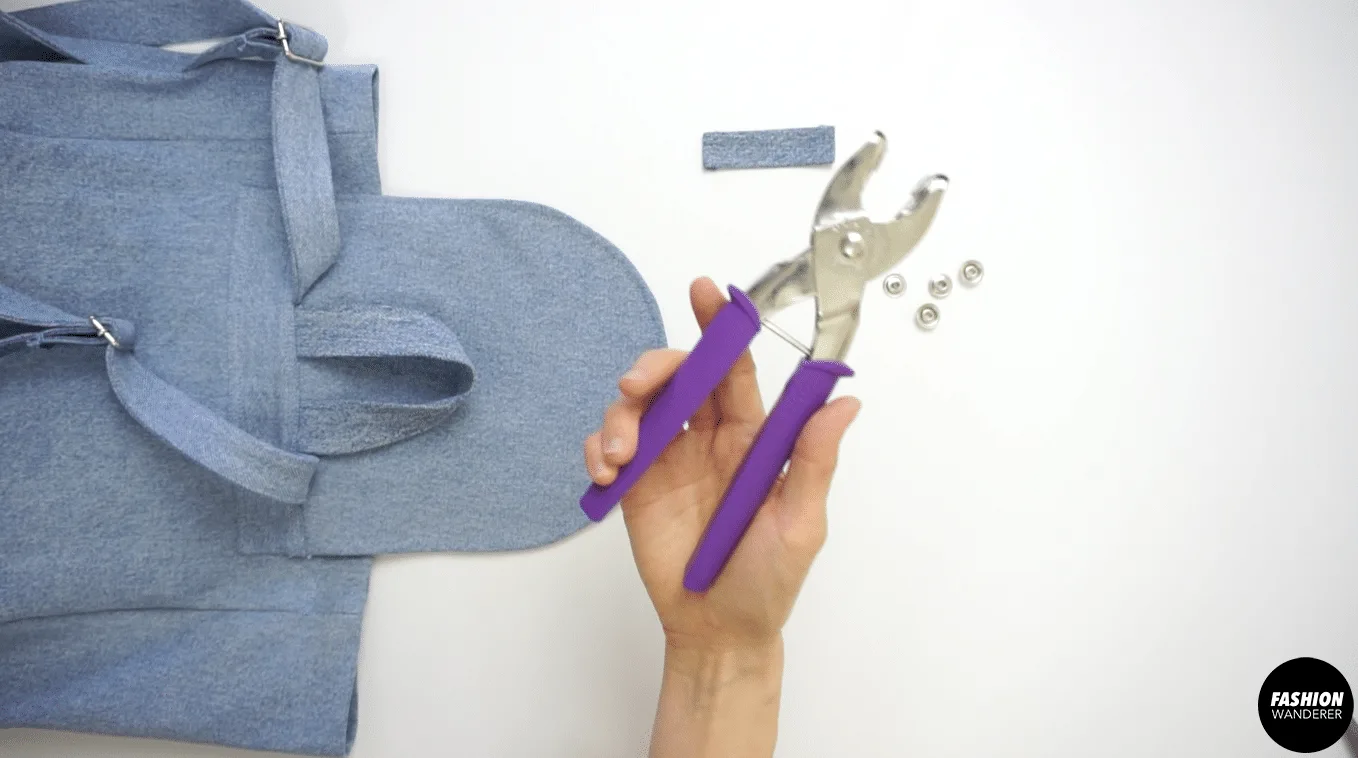
- To attach the snap button to the pocket flap and patch, grab 4 pieces of snap buttons and plier tool.

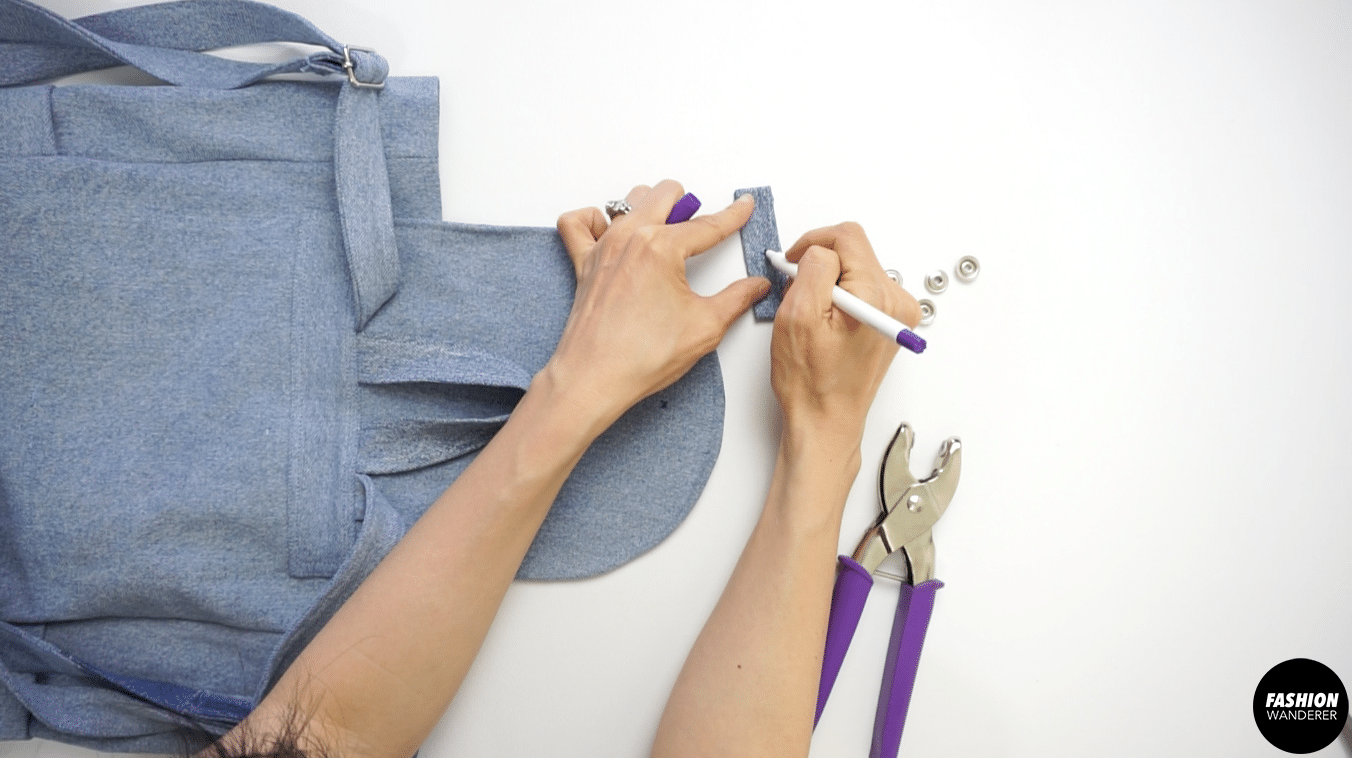
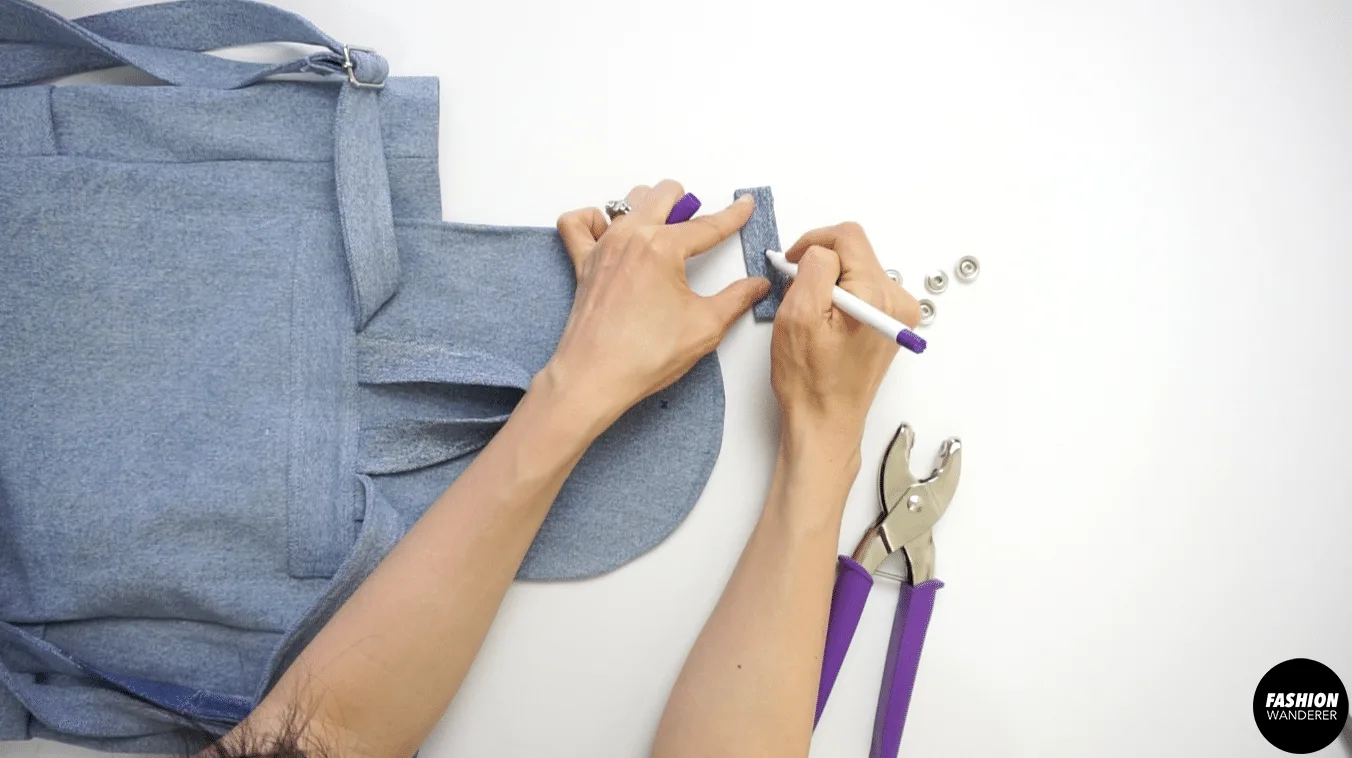
- Fold the flap in half and mark the center. Mark 1½” away from the center point.
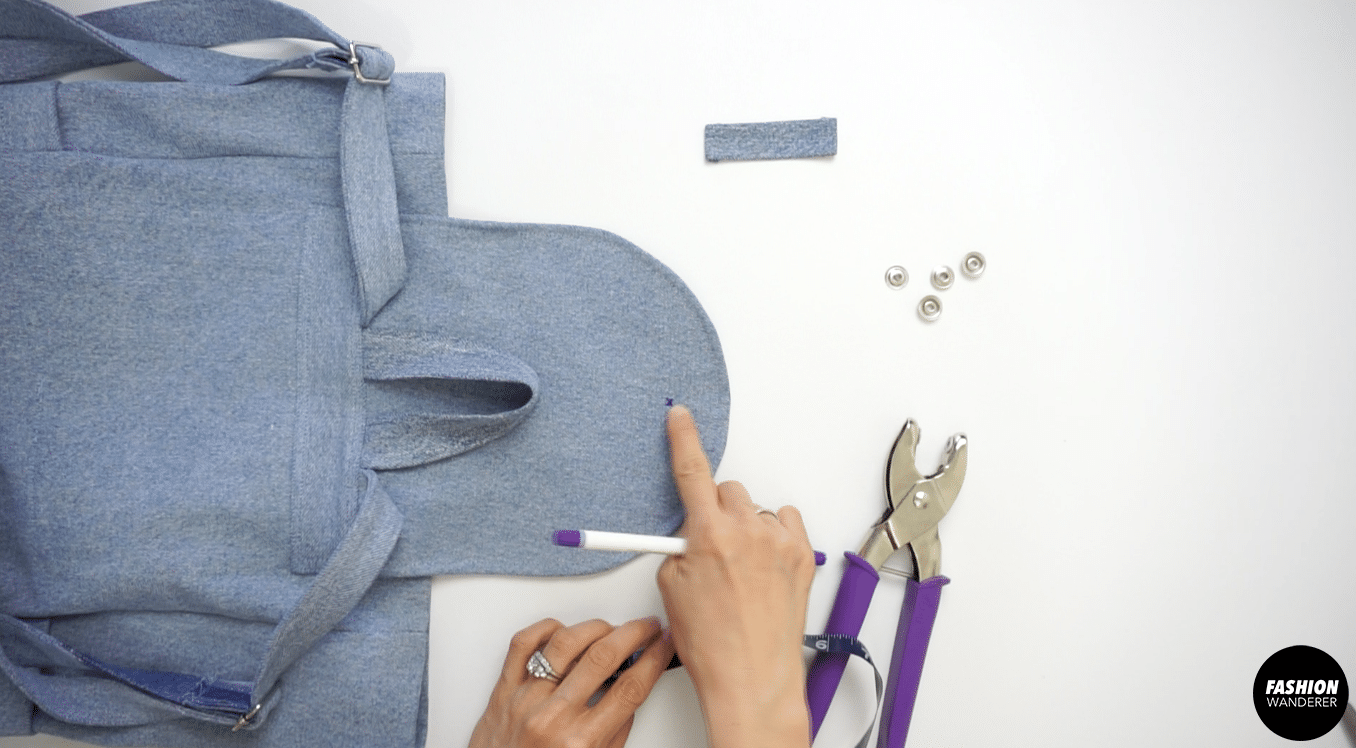

- Also, fold the snap button patch piece in half and mark the center.
- Place cap and socket on the heavy-duty plier and punch it on the marked hole.
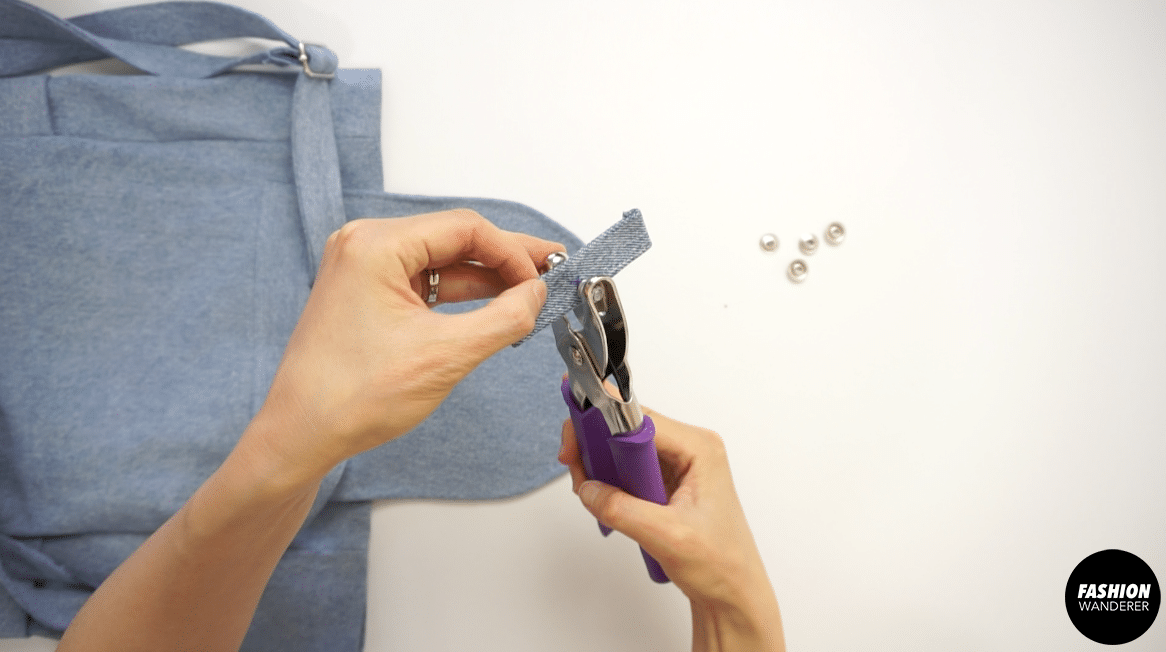

- And then replace with post and stud on the plier and add snap button on flap and patch pieces.
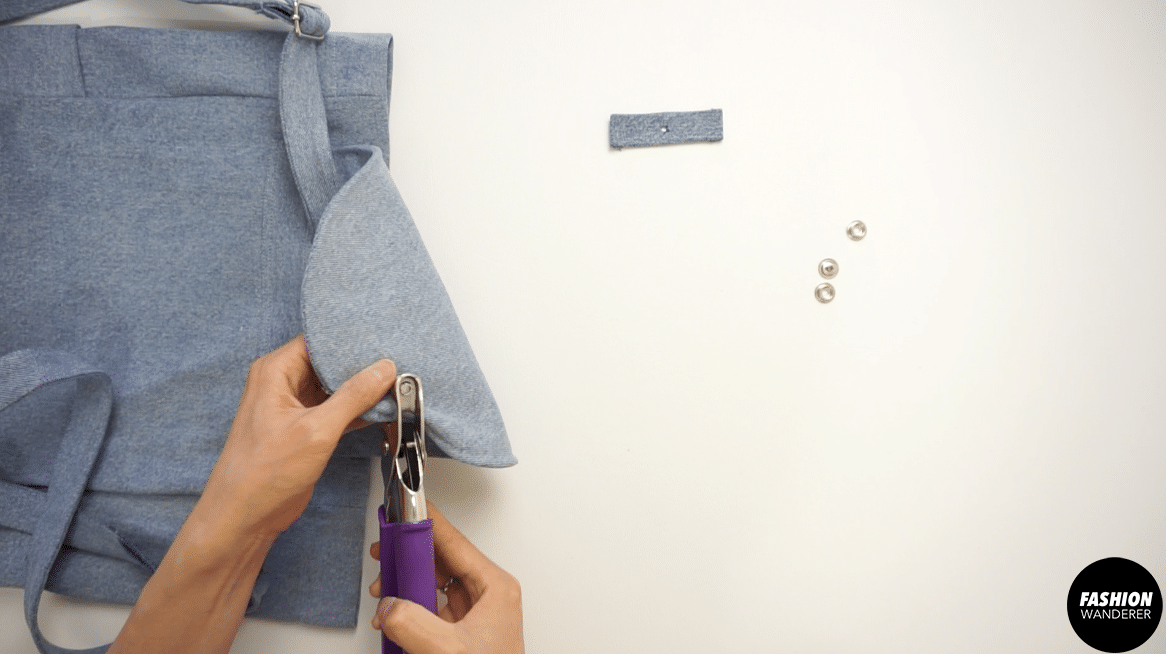

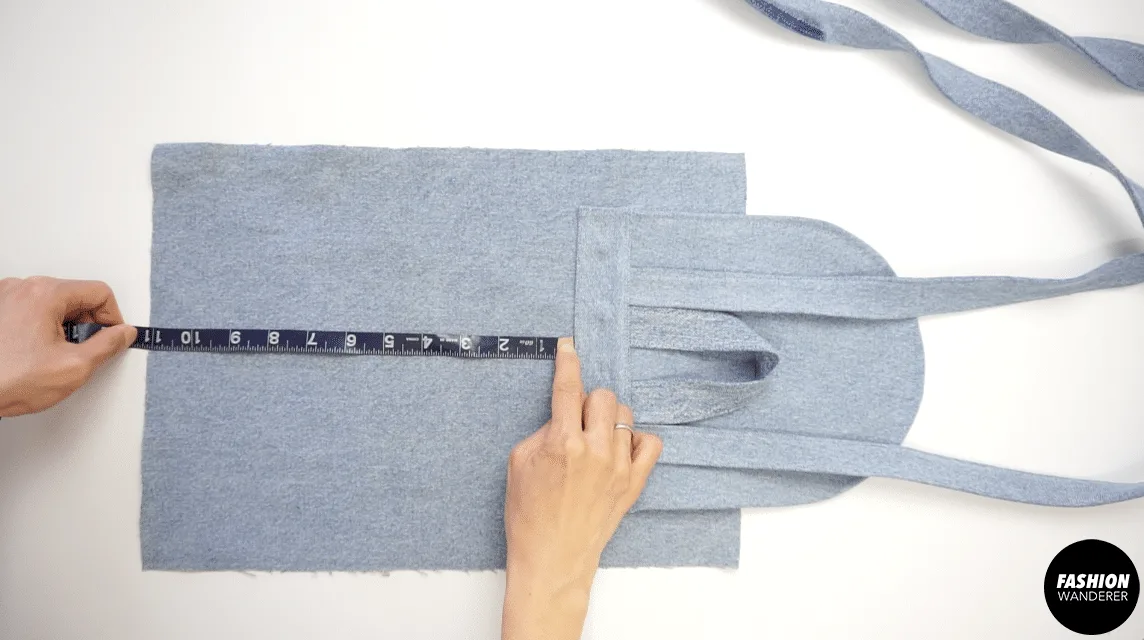
- Position the patch piece on the front of the bag.

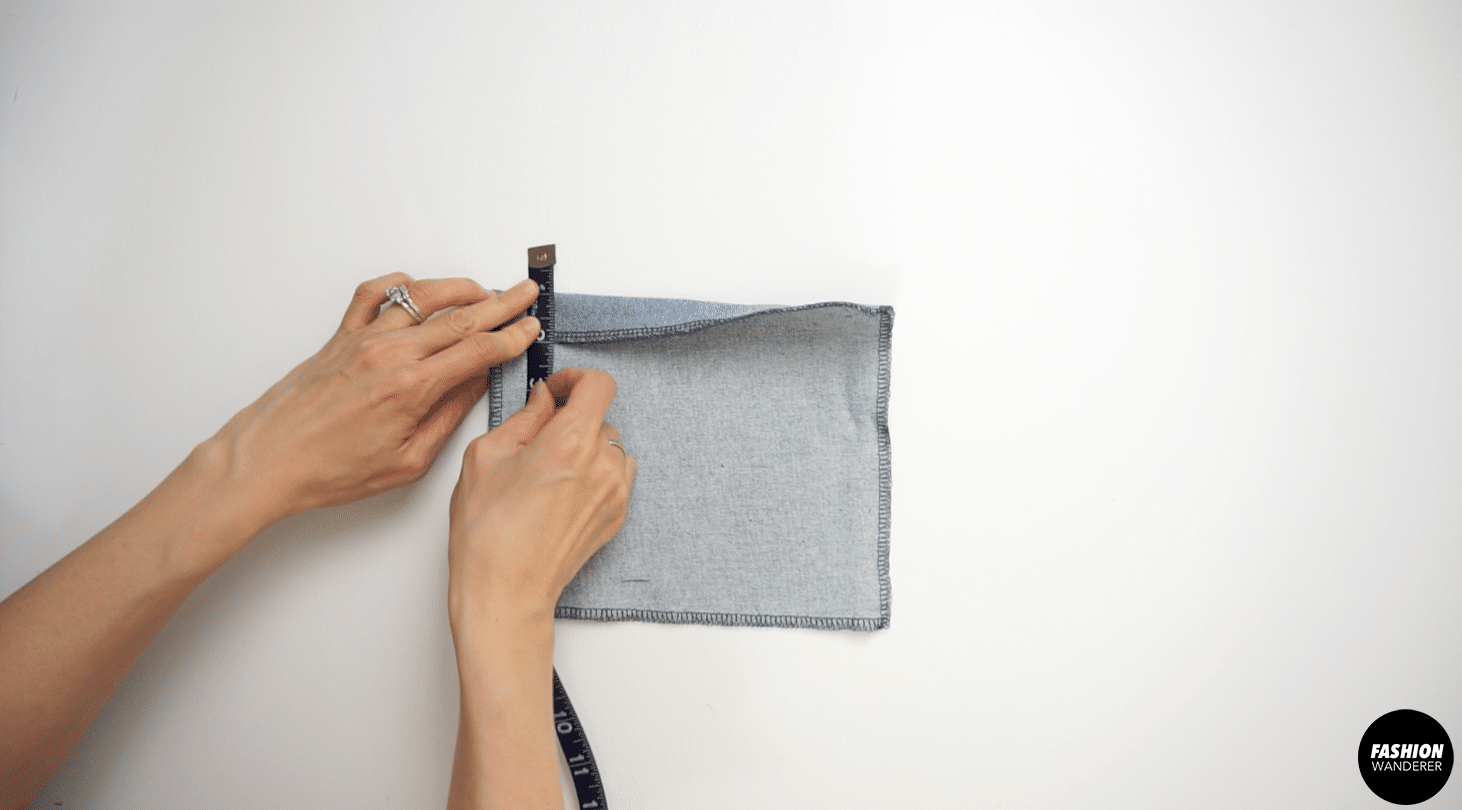
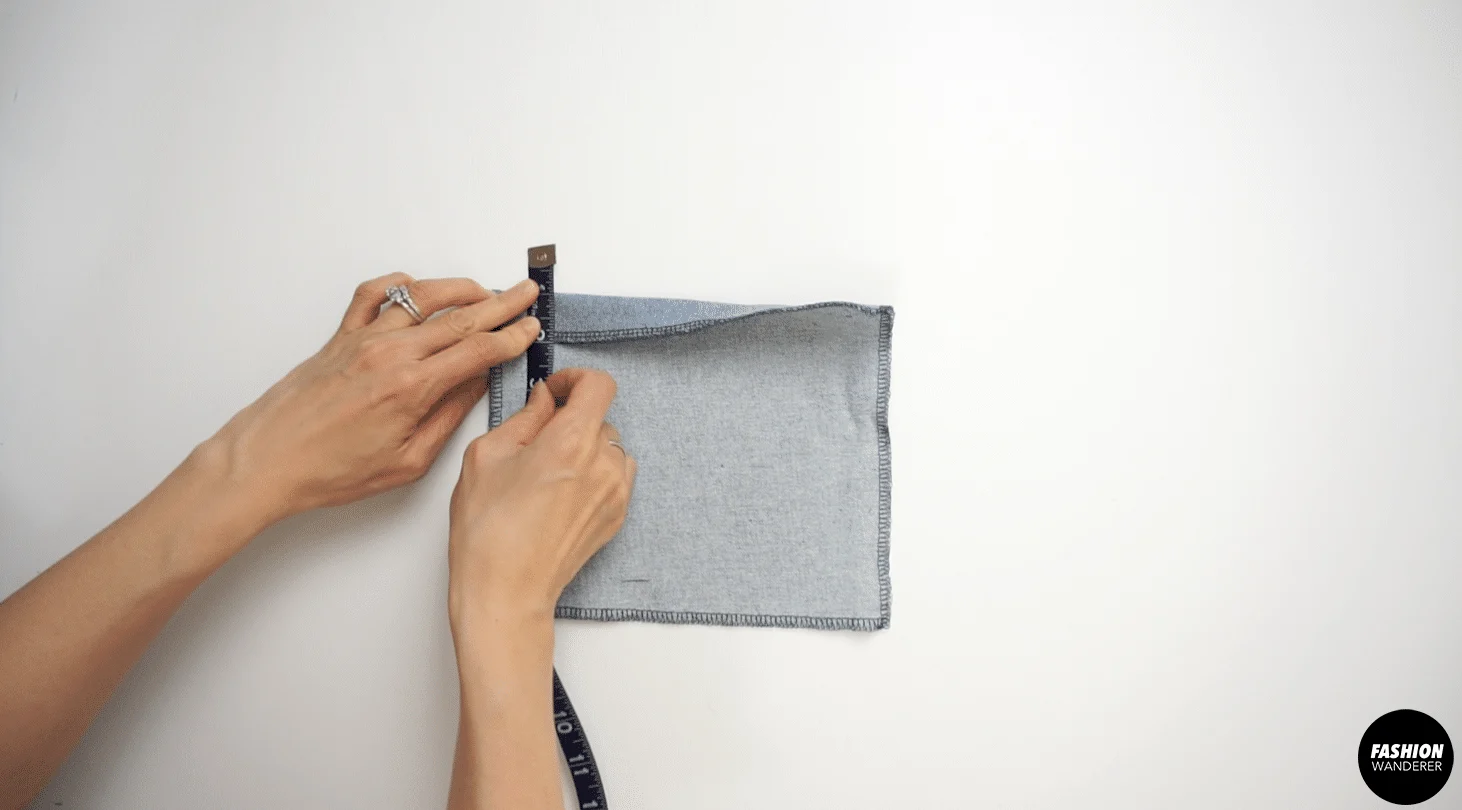
- Located 3” away from the top opening and 4¾” away from side seams on both sides.


- ⅛” edge topstitch on all four sides of the snap button patch piece.
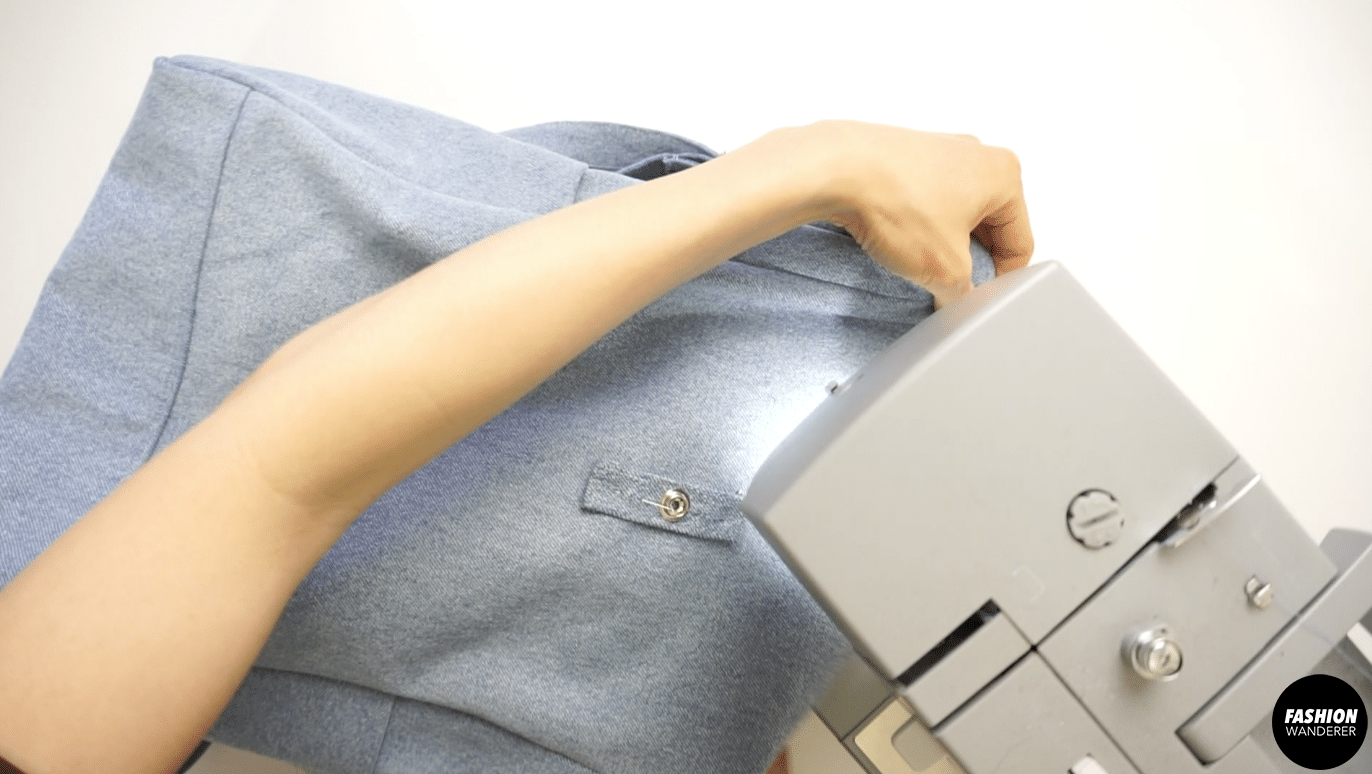

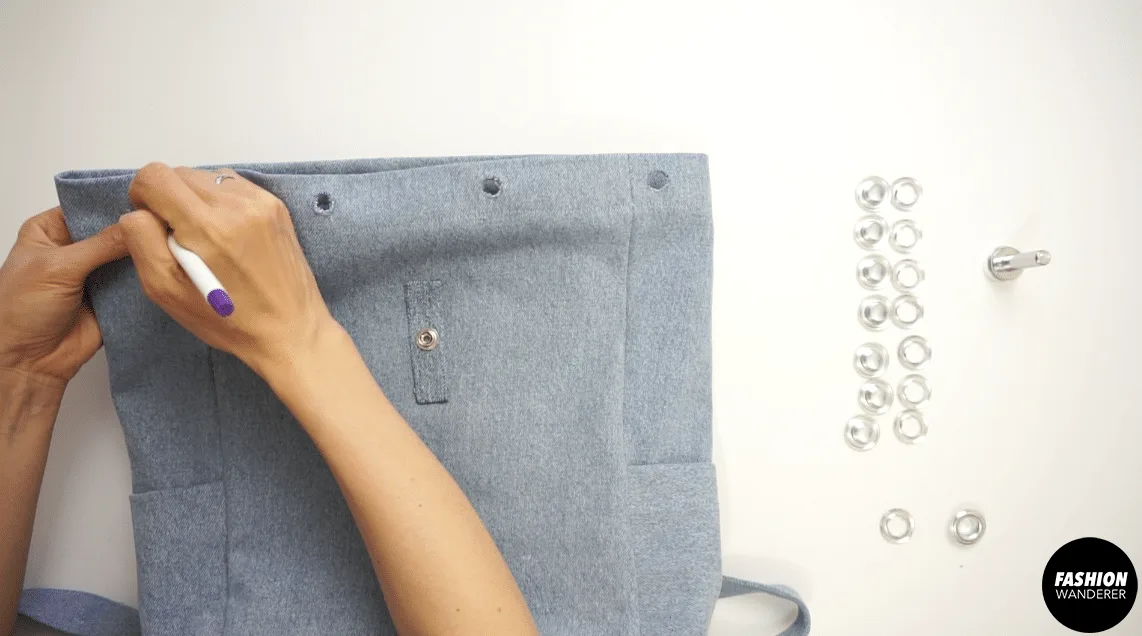
- To attach the grommets to the bag opening, use eyelet inside hole to mark the position along the opening of the bag.
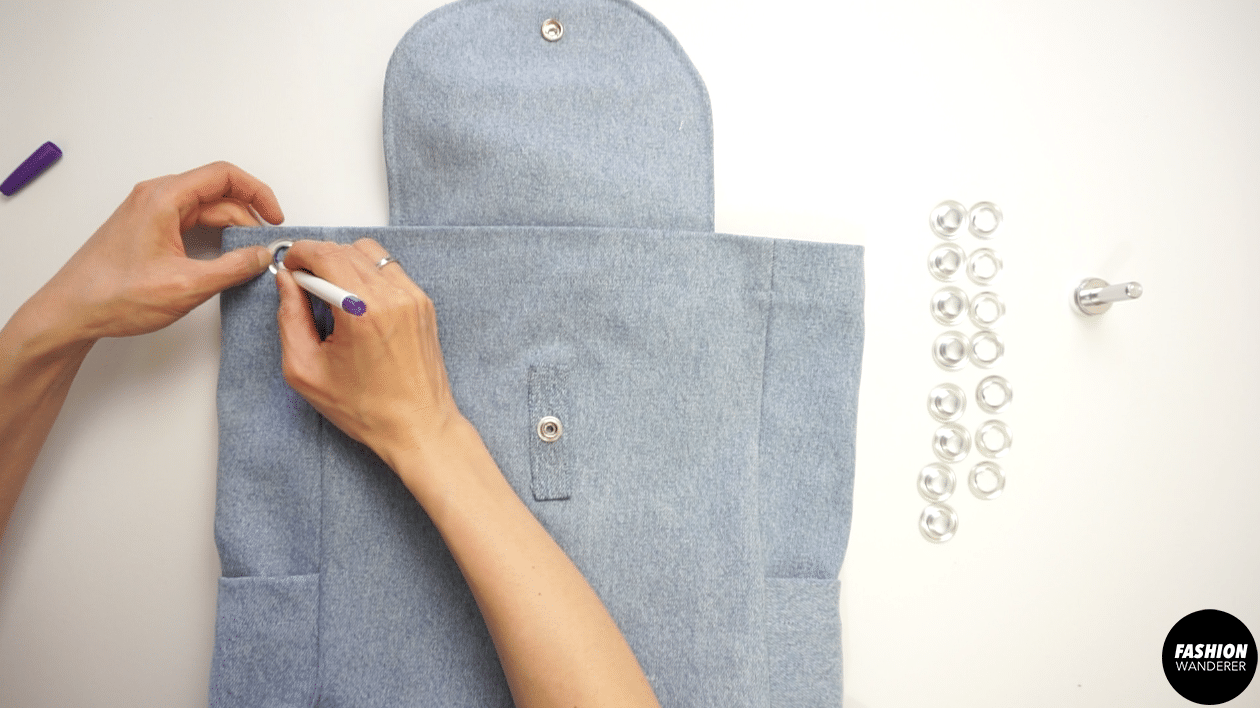
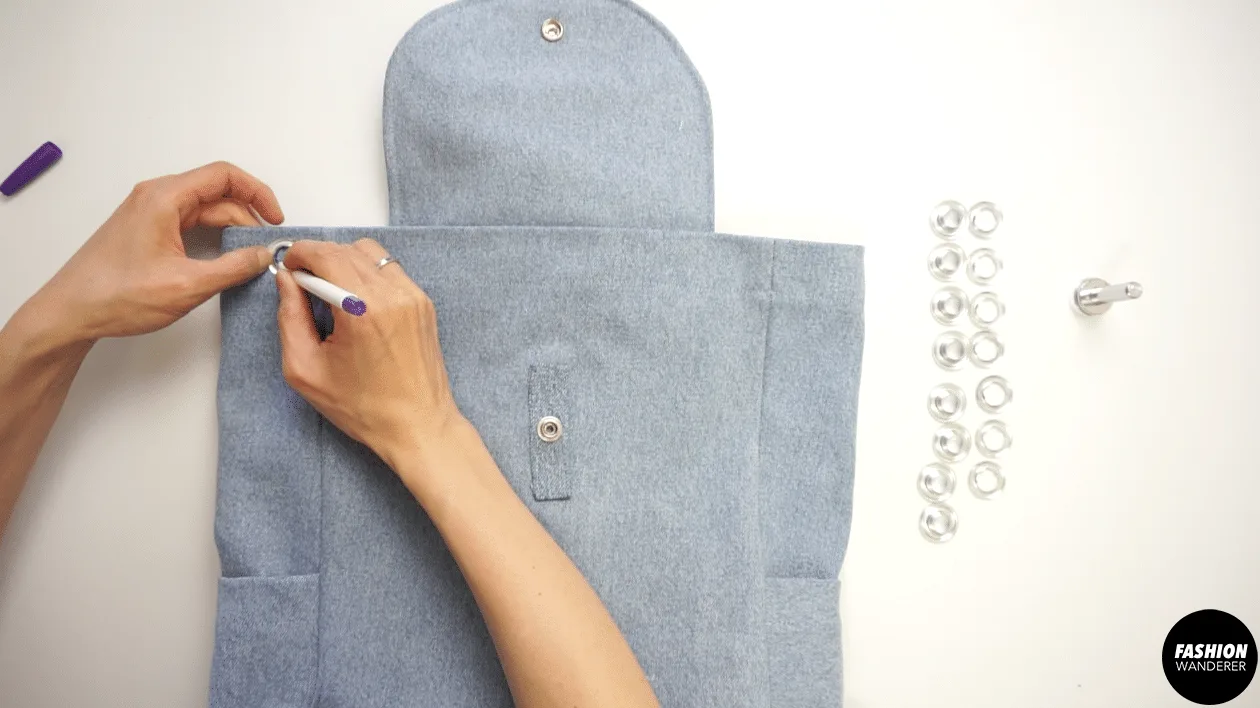
- Ensure the eyelet holes in the front are 3½” apart from each other and also away from the side seams.


- Cut out the holes and copy the holes to the back and back side of the bag.
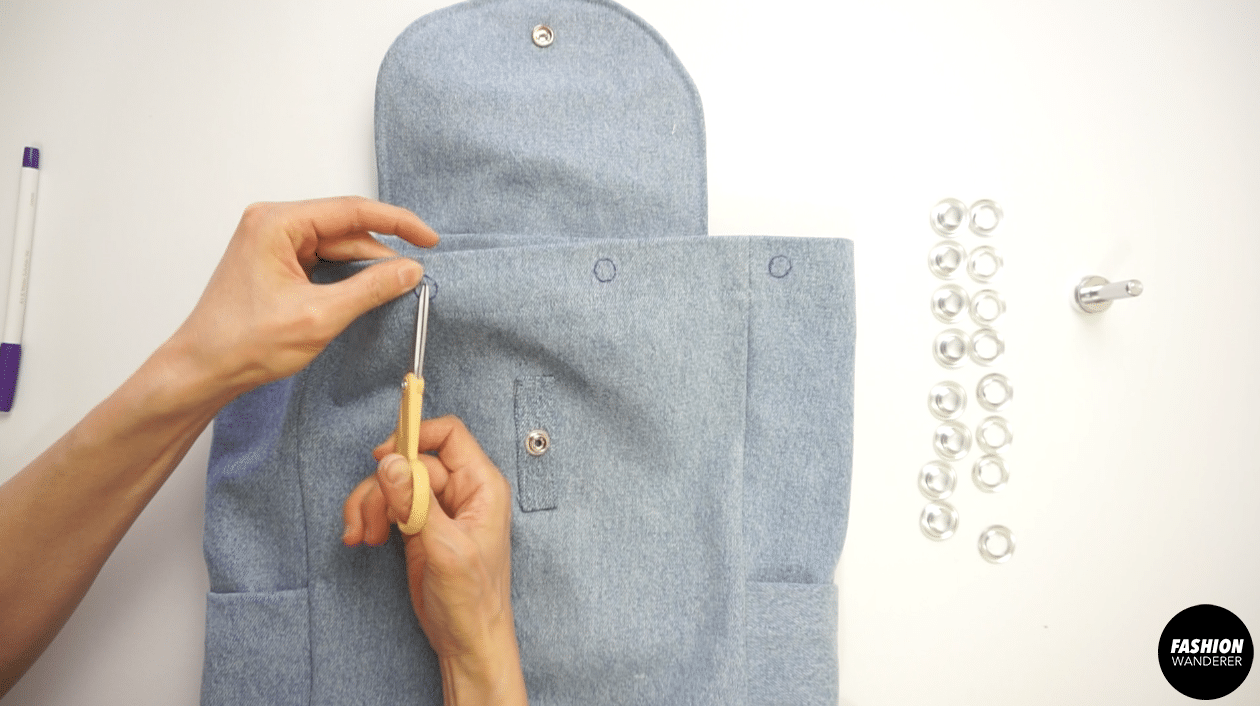

- Also, cut out the holes on the back side of the bag.
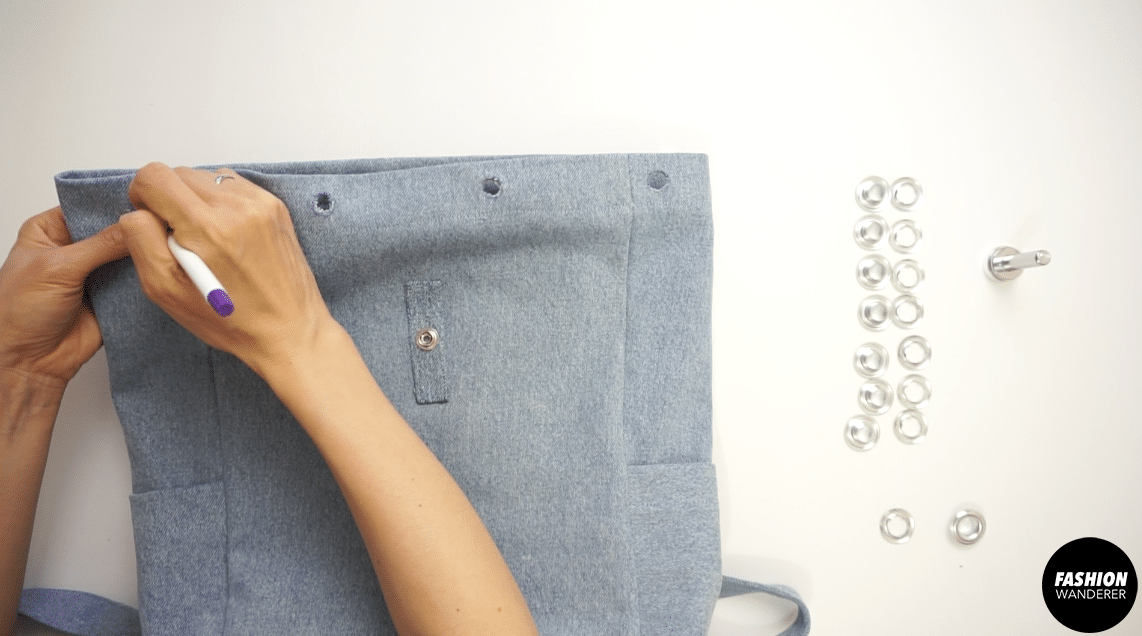
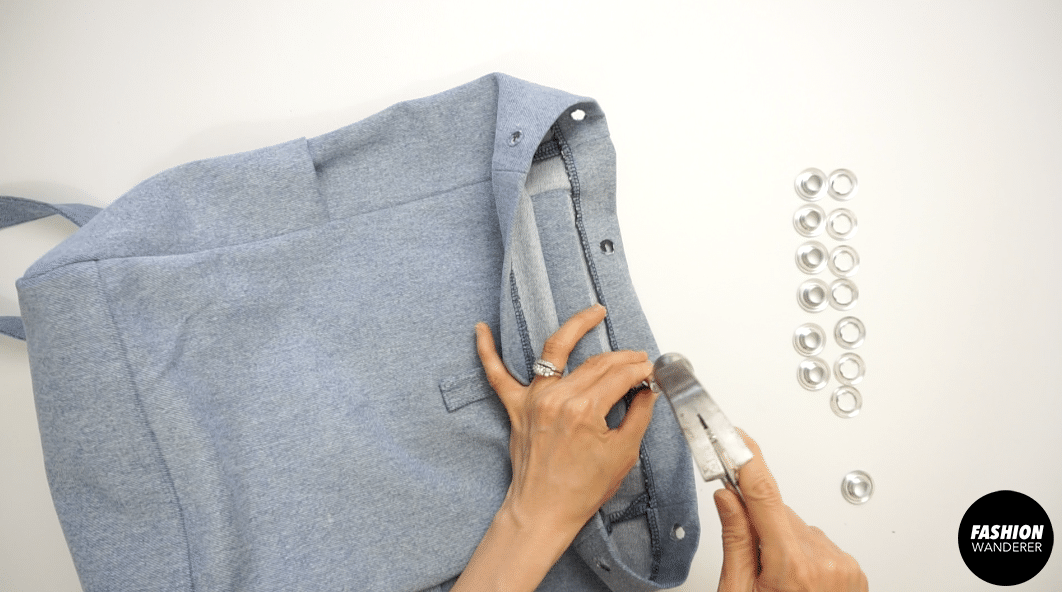
- Position the grommet and use a mallet to secure in place.
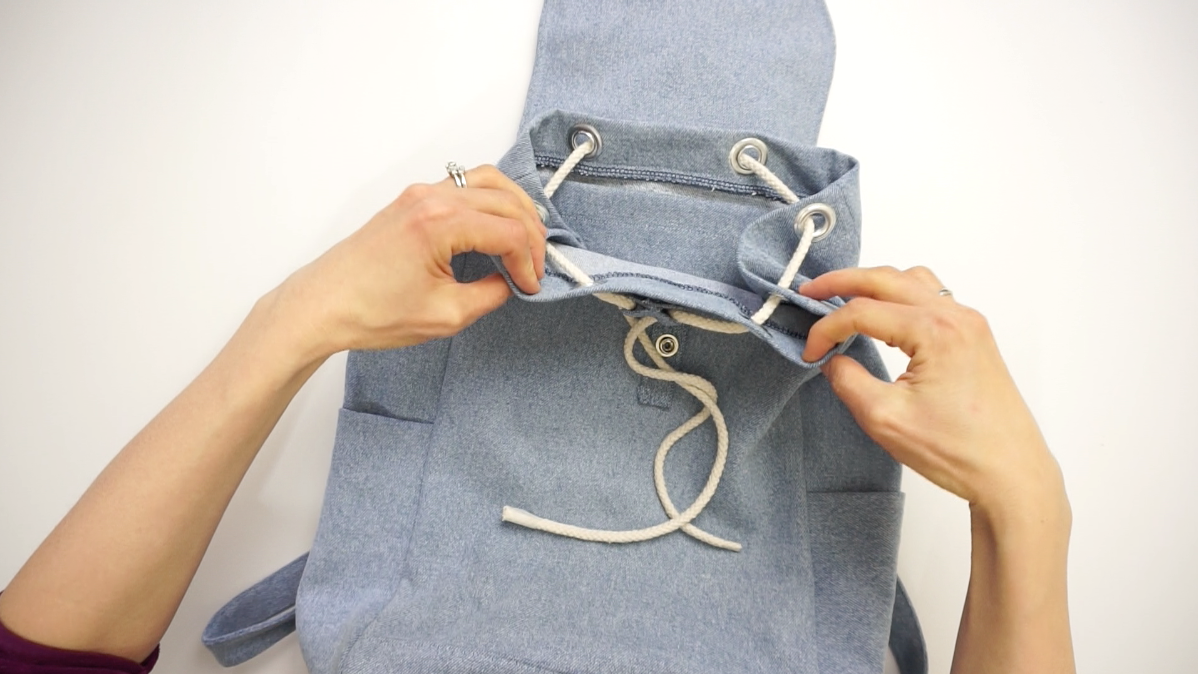
- To finish the DIY backpack, insert the cord through the eyelet hole and the drawstring tunnel to adjust the opening of the bag.


Recommended Products
As an Amazon Associate and member of other affiliate programs, I earn from qualifying purchases.


Trendy, Affordable Sewing Patterns for All Sizes


Tie Shoulder Jumpsuit Pattern


Palazzo Pants Sewing Pattern


Pocket Overall Romper Pattern


Wrap Maxi Skirt Sewing Pattern


Tie Back Top Sewing Pattern
AD Green
Friday 10th of March 2023
This backpack bag is amazing! Thank you