
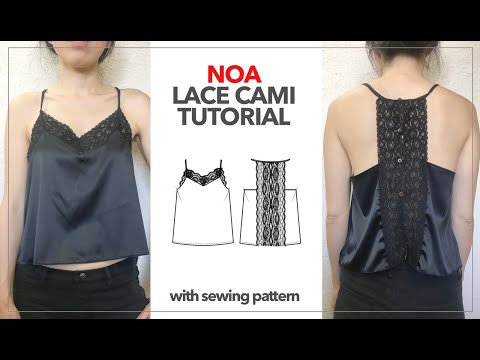
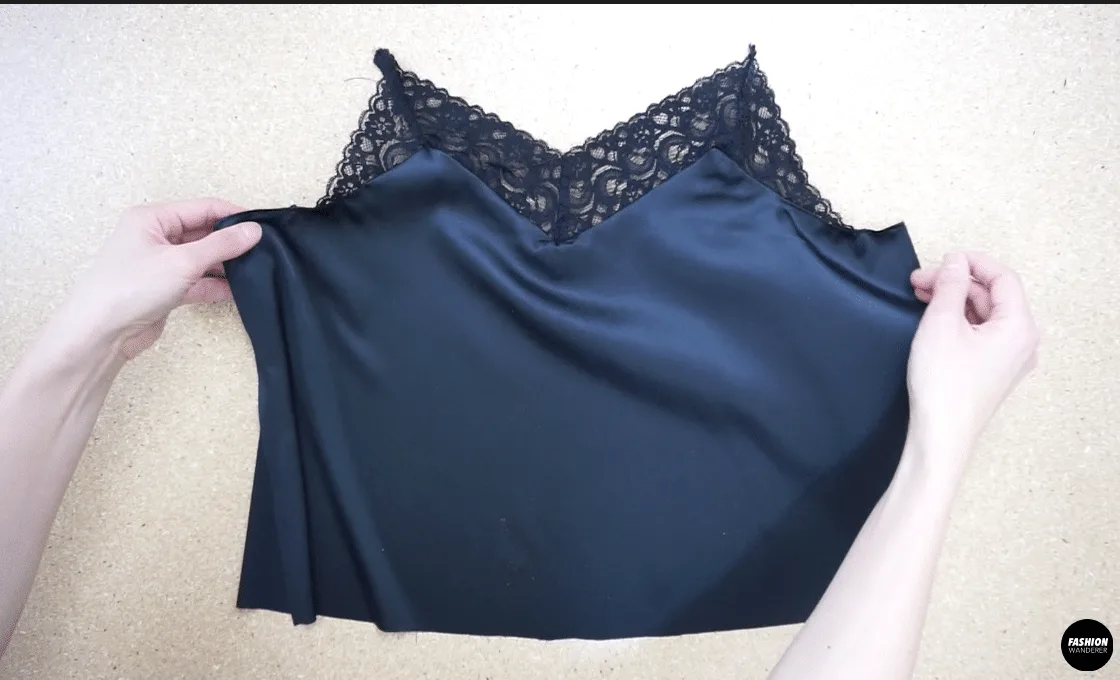
Looking for one-of-a-kind layering piece? If you never get bored with camisole, here is darling Noa lace camisole top you can find on my Etsy store.
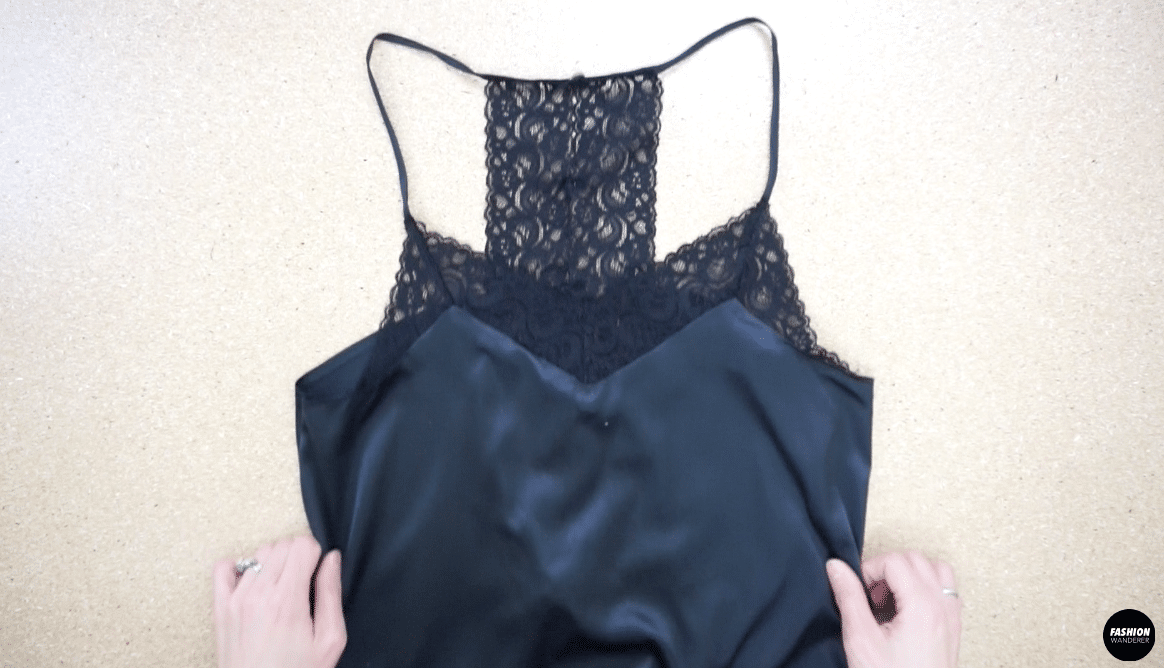
The gorgeous v-neckline with pieced delicate scalloped lace trim and slight exposed lace back with cute button closure is sure to upgrade your basic camisole to the next level.
In this tutorial, you will learn how to sew slippery satin fabric and join lace trim to the bodice to make nice sharp corners. This cami silhouette is extra roomy and has a flare at the bottom so you can wear it as it is or tucked into high waisted bottom.
Every Fashion Wanderer sewing pattern is adjustable and thoroughly thought out to style for any outfit.


Lace Camisole Sewing Pattern


You will love this Noa lace camisole with sewing pattern because…
- You will learn how to sew slippery satin charmeuse fabric in straight and pointy corners without creating bunching.
- Learn 2 ways to join lace trim and bodice to produce a clean finish.
- Adding 4-hole buttons and self fabric loops to create functional closure in the back.
- The sewing pattern is available from size 2 to 12.
- Perfect beginner level sewing project to advance your skills along.
- Practice overlock hem and straight stitch with fine sewing needle to accomplish delicate fabrication.
This Noa lace camisole tutorial is made with polyester silky satin fabric that has shine on the right side and dull on the wrong side of the fabric. The weight of the material is lightweight, which is perfect to create a luxurious look for any camisole top.
Whether you have 100% silk or polyester blend, both will work well for this sewing pattern.
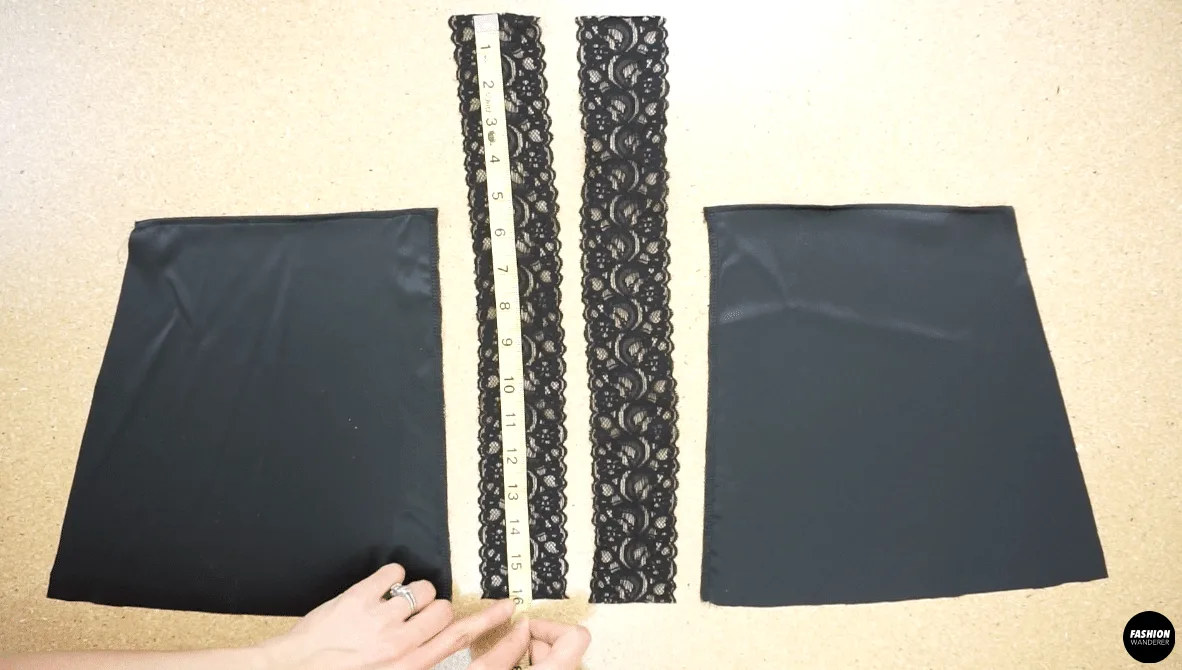
Make sure to avoid using stretchy lace trim, it will be difficult to sew neckline and back pieces. When measuring lace trim, measure one side of scallop to the other side of scallop.
For the Noa lace camisole, you need 2½” lace trim that has scallop ends on both side. Also, choose trim that does not stretch in all directions and keep the lace weight similar to the fabric you choose.


How do you make Noa lace camisole top?
To make Noa lace camisole top from any lightweight charmeuse fabric, use the helpful step-by-step tutorial with easy to follow photos and instructional video.
Start by pre-washing your fabric beforehand and let it air dry if needed so it is ready to cut and sew. If you need help with putting together the pdf pattern, here is a guide to assemble pdf sewing pattern to get started!
DIY Noa Lace Camisole Materials:
- Noa Lace Camisole Sewing Pattern
- ½ to ¼ Yard of Lightweight Silk or Polyester Silk Charmeuse.
- 1 Yard of 2½” Width Scallop Edged Double Side Lace trim
- Overlock Machine
- Sewing Machine
- 90/14 Size Sewing Needle
- Matching Color Thread
- Loop Turner
- 4 Pieces of 2- or 4- Hole Size 11L Buttons
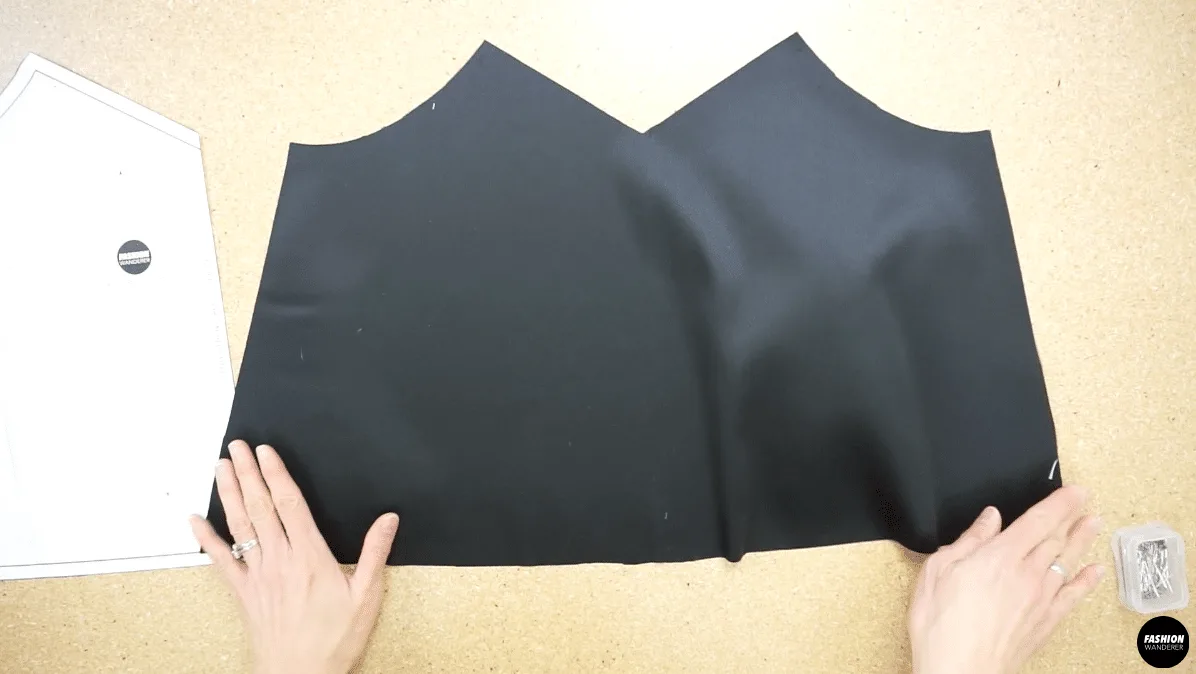
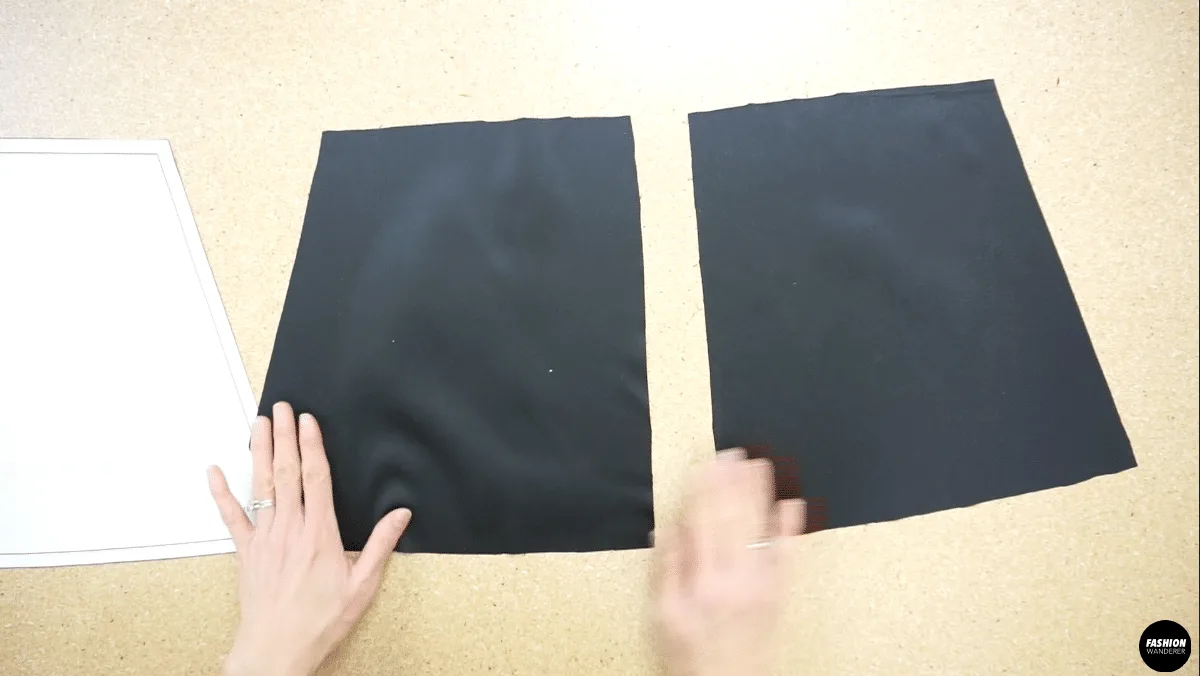
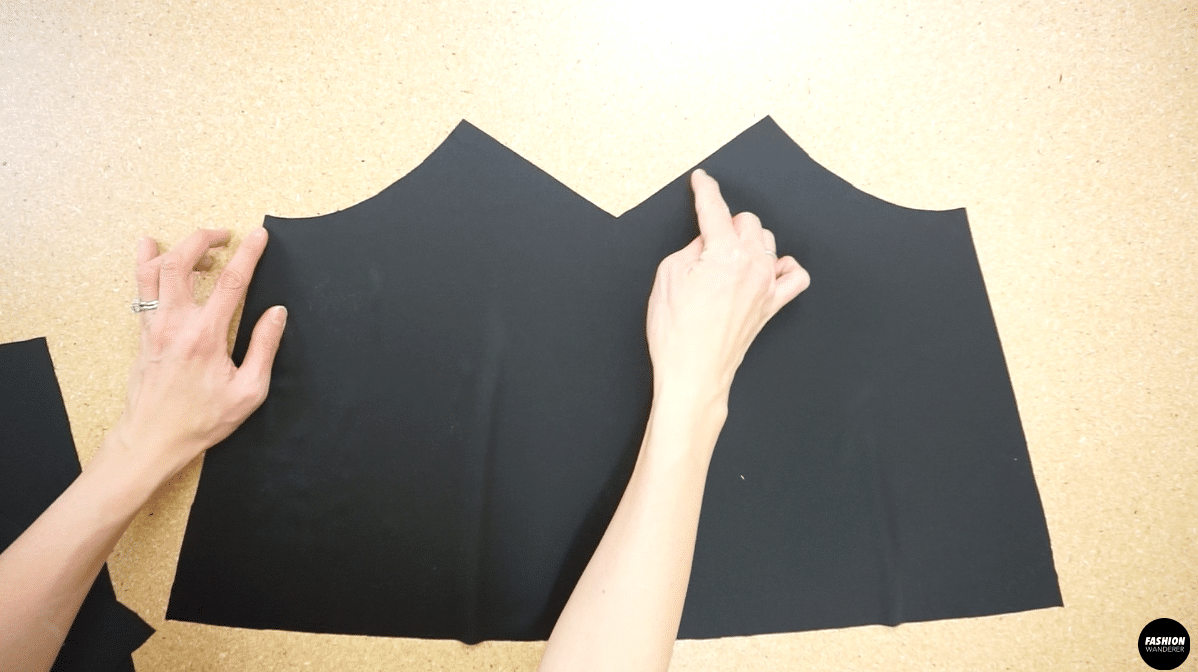
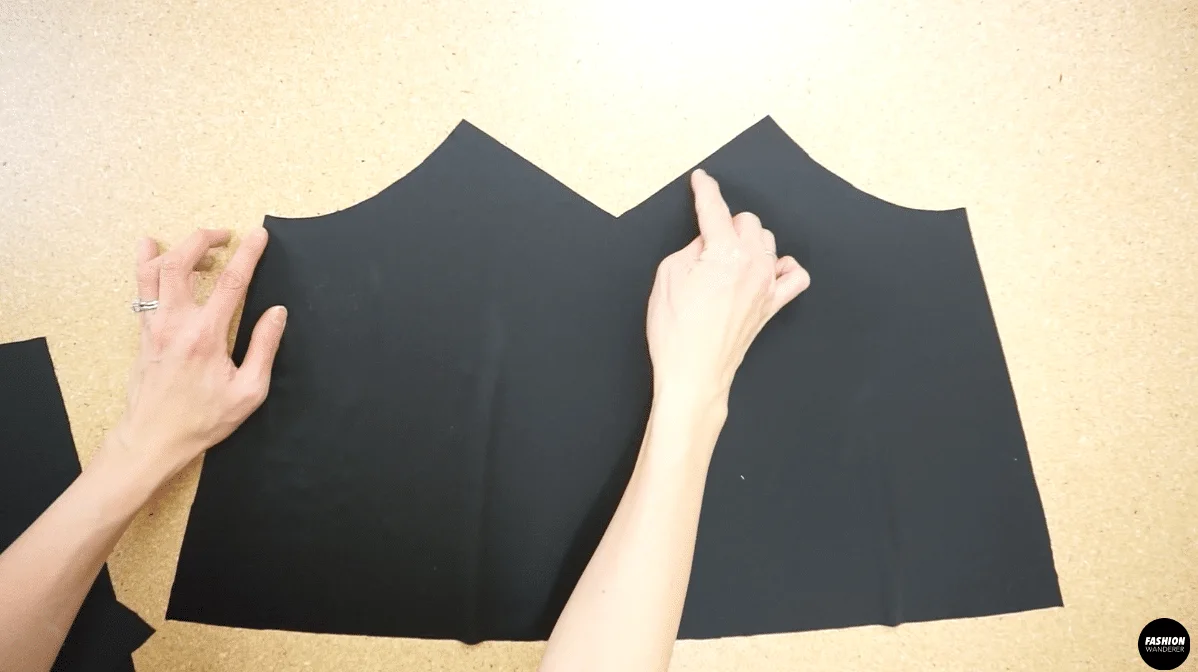
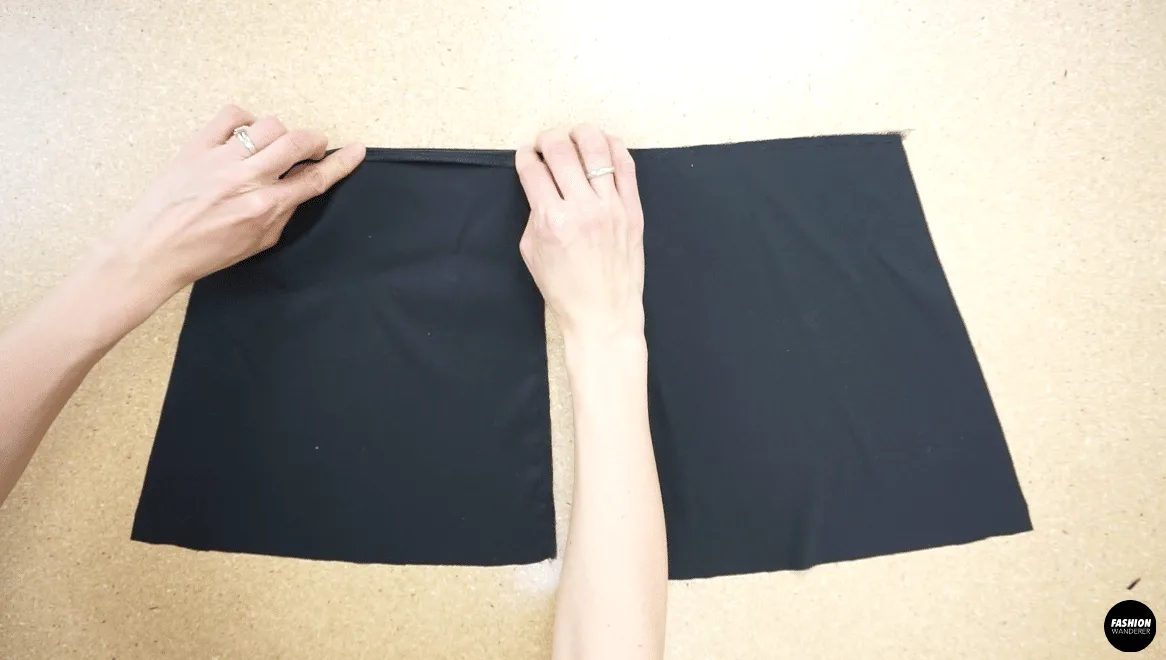
To make a Noa lace camisole, download the digital sewing pattern, assemble the pattern pieces and cut the fabric according to your size.
Use overlock stitch to secure the neckline of the front piece, back neckline and center back opening.
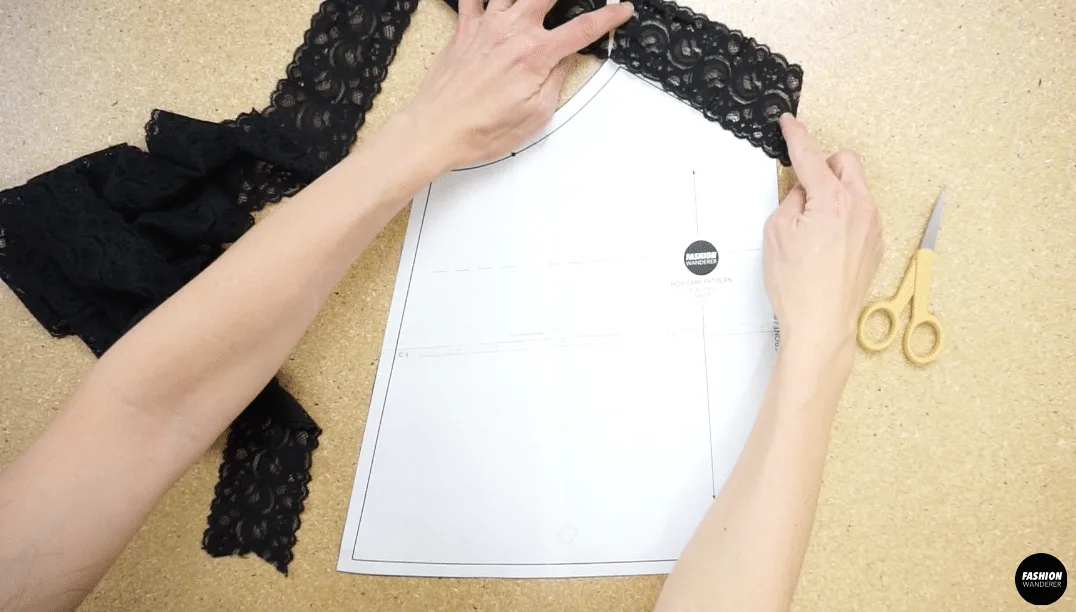
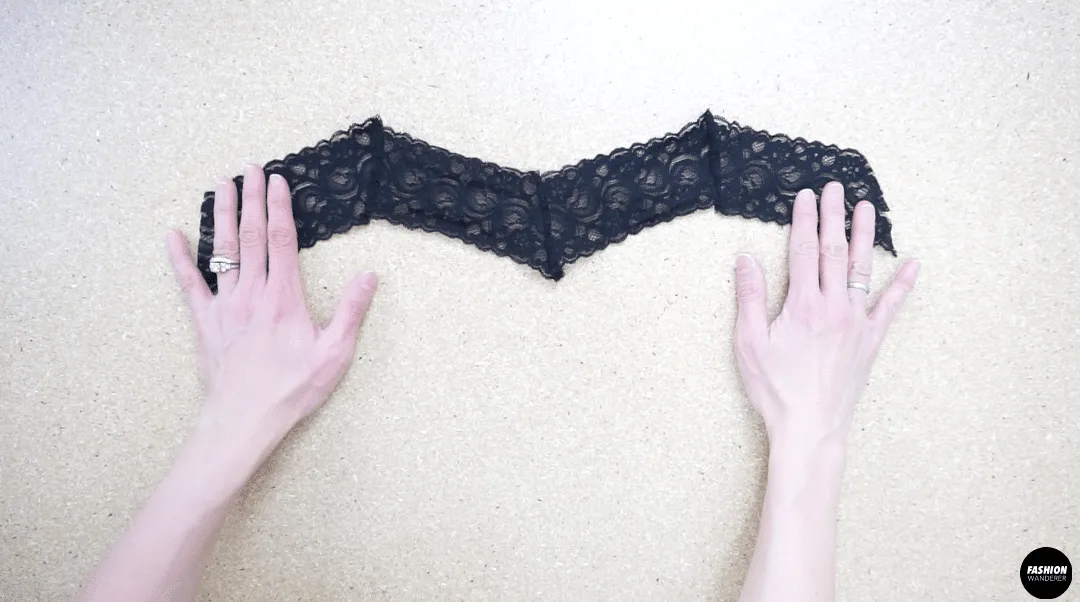
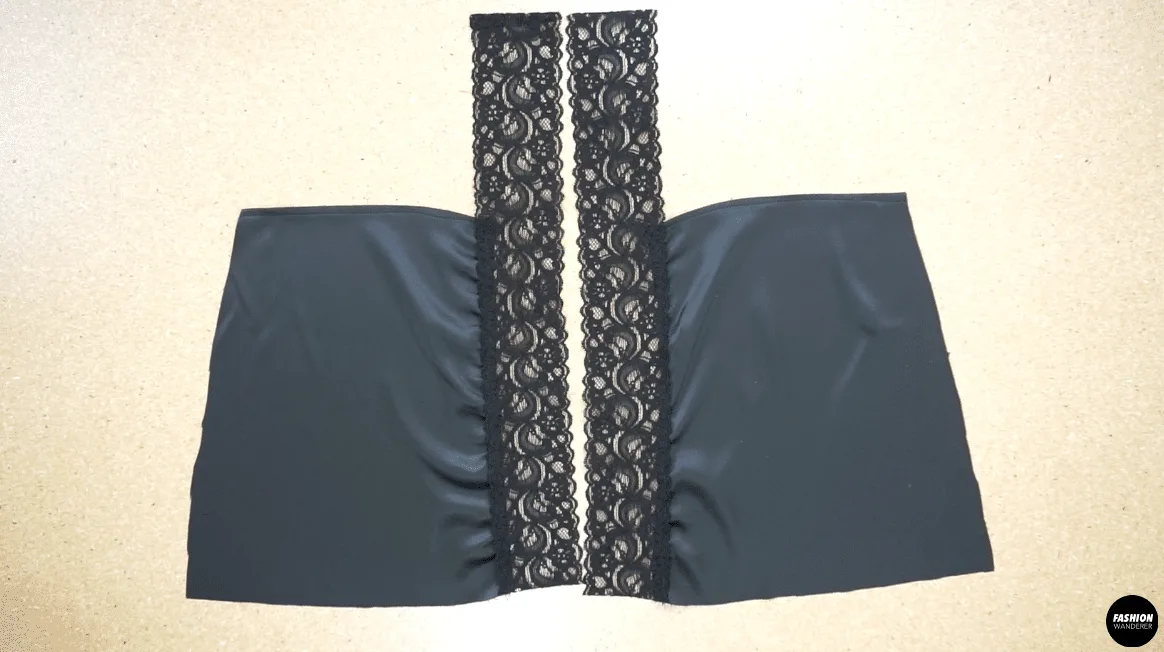
Copy the lace trim onto the v-neckline and under arm line.
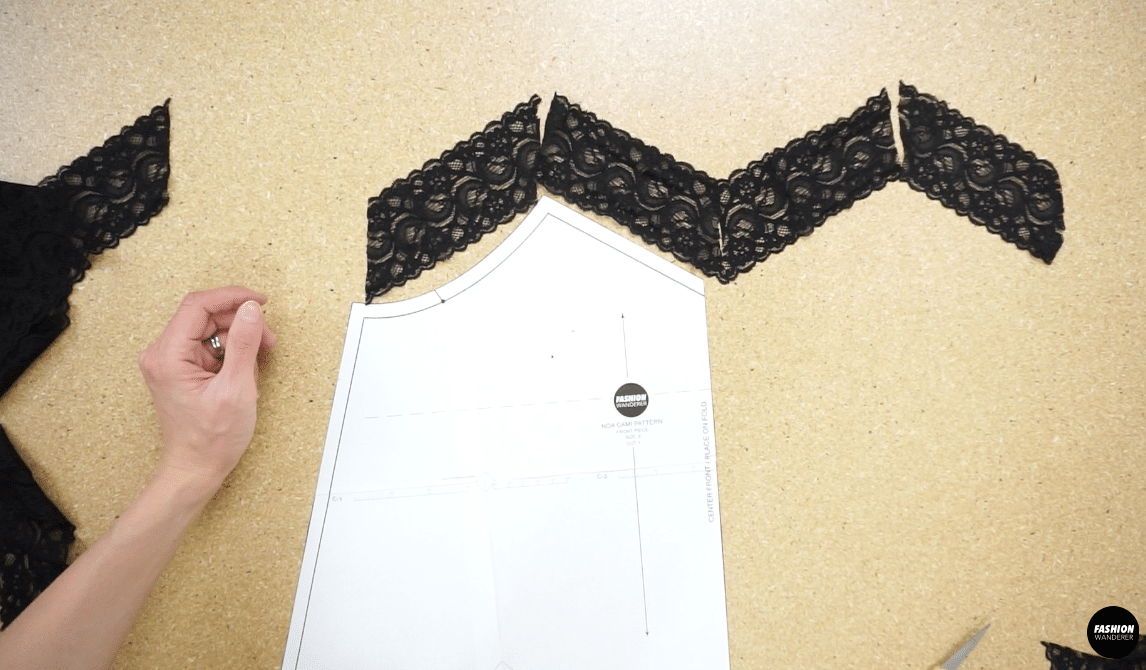
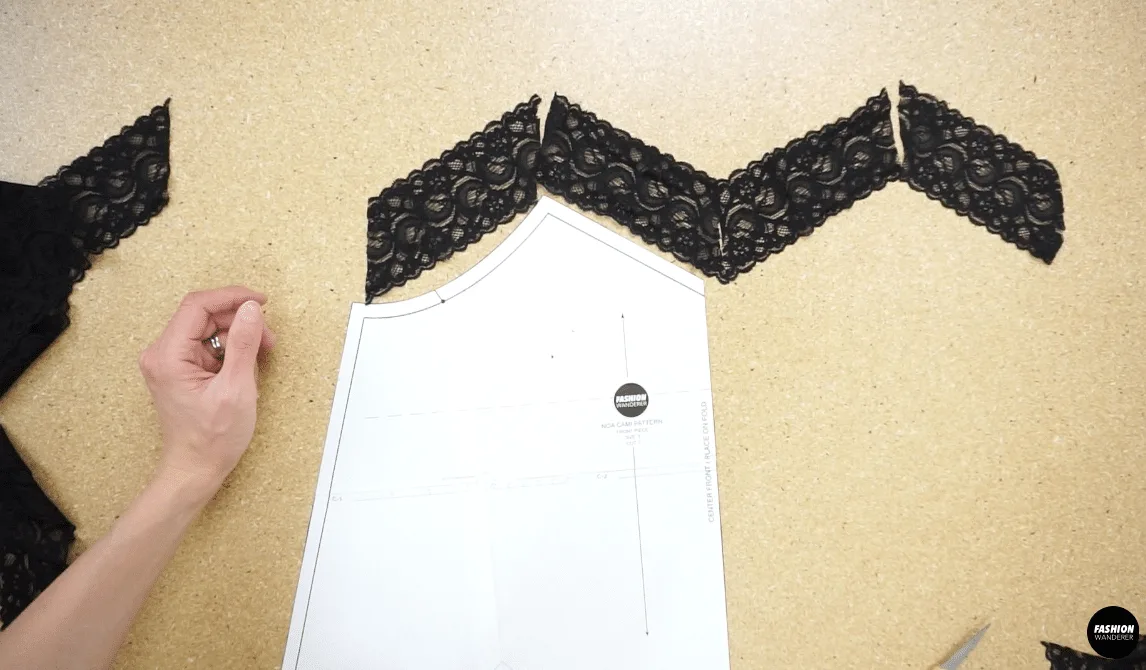
Attach lace trim pieces together to make a M shape that match the neckline.
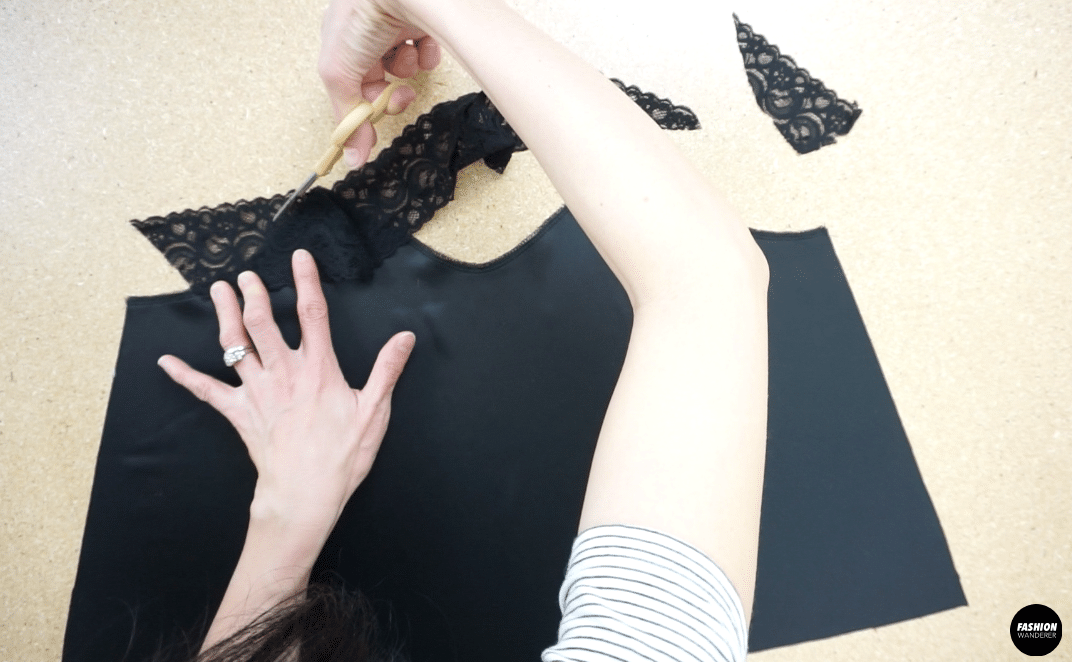
Trim the corners of the lace to create a M shape along the neckline.
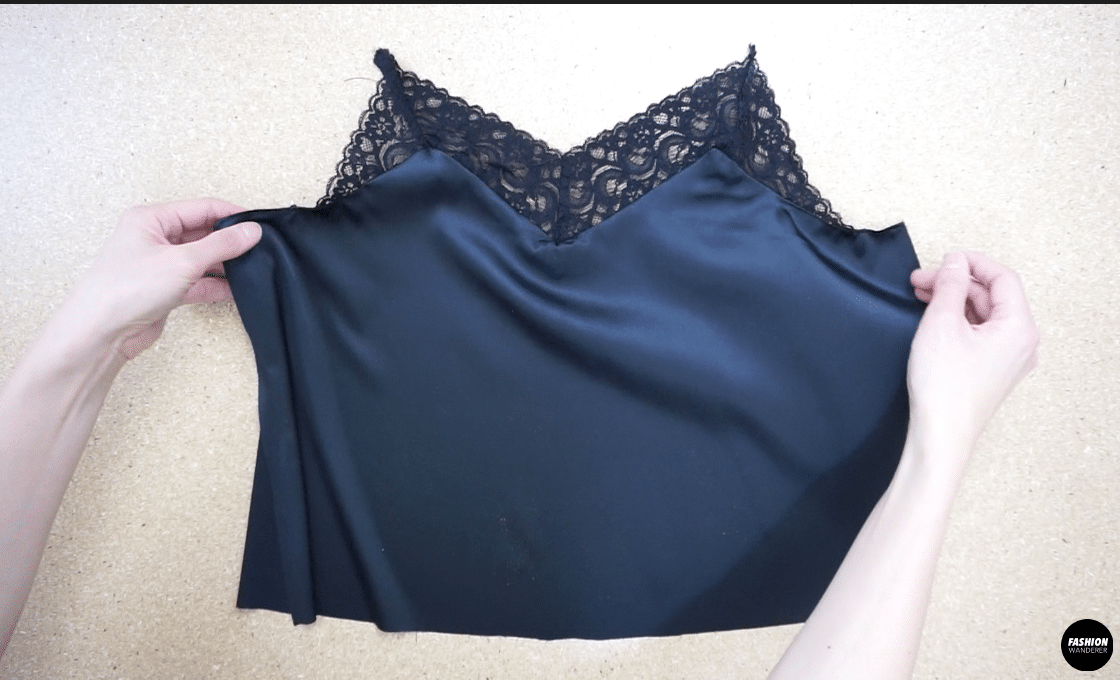
Topstitch the lace to finish front neckline.
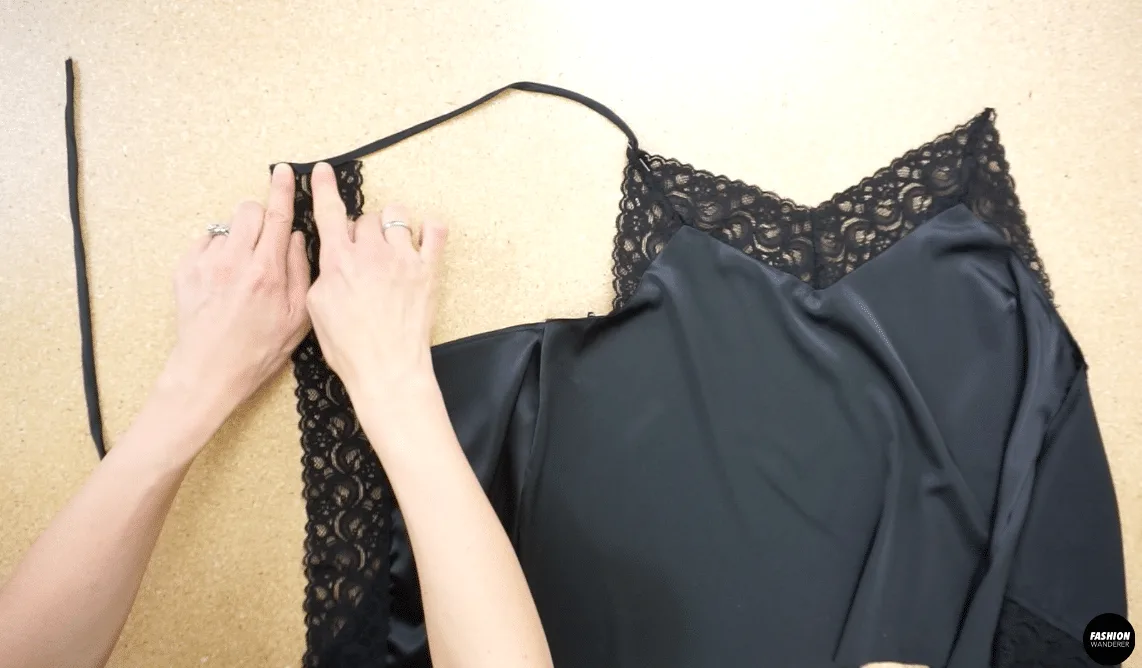
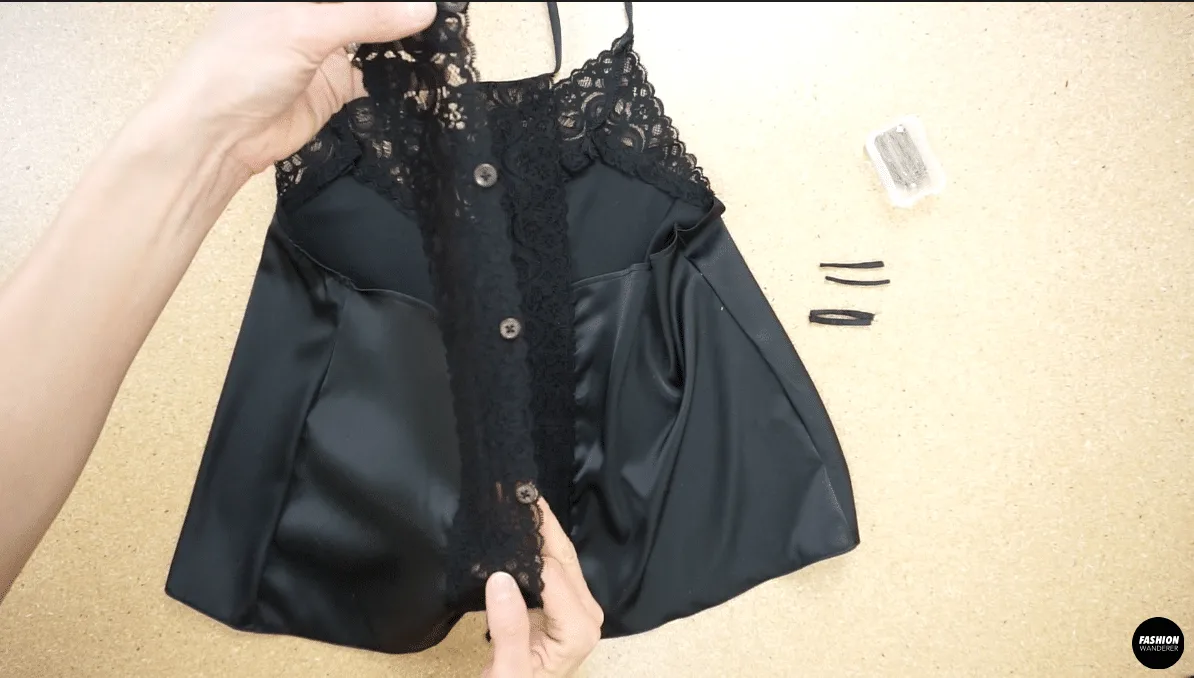
Attach the lace trim to the center back opening.
Fold the back neckline, and close the edge with topstitch.
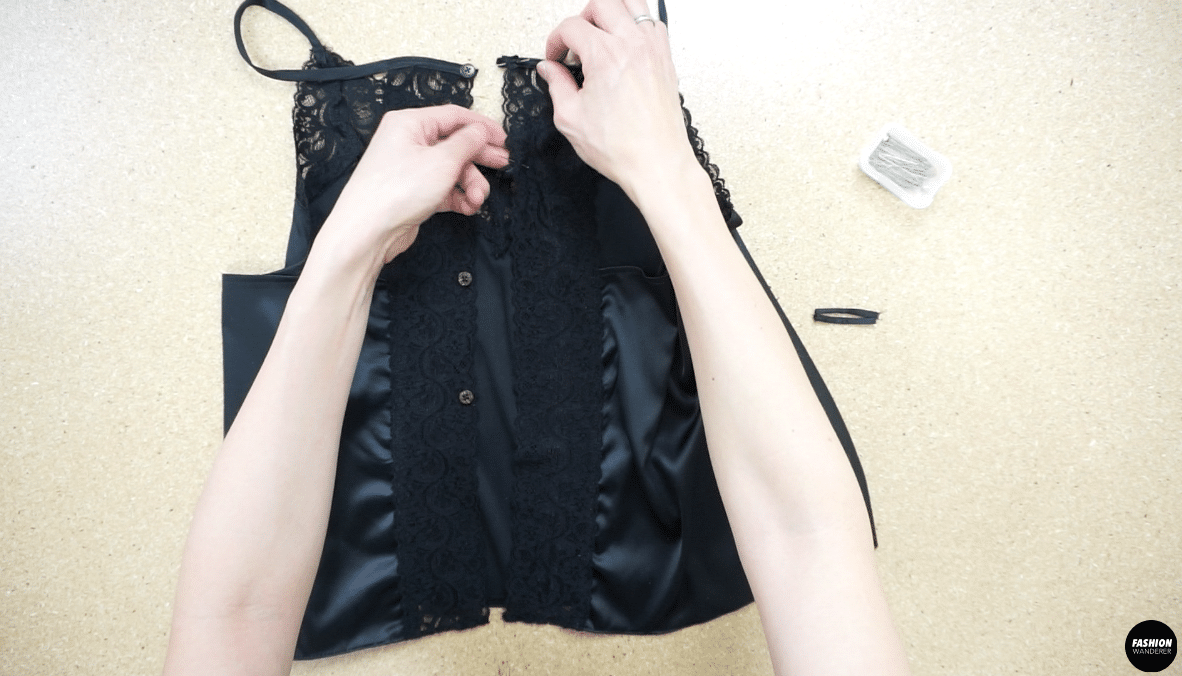
Attach the lace trim to both sides of the center back opening.
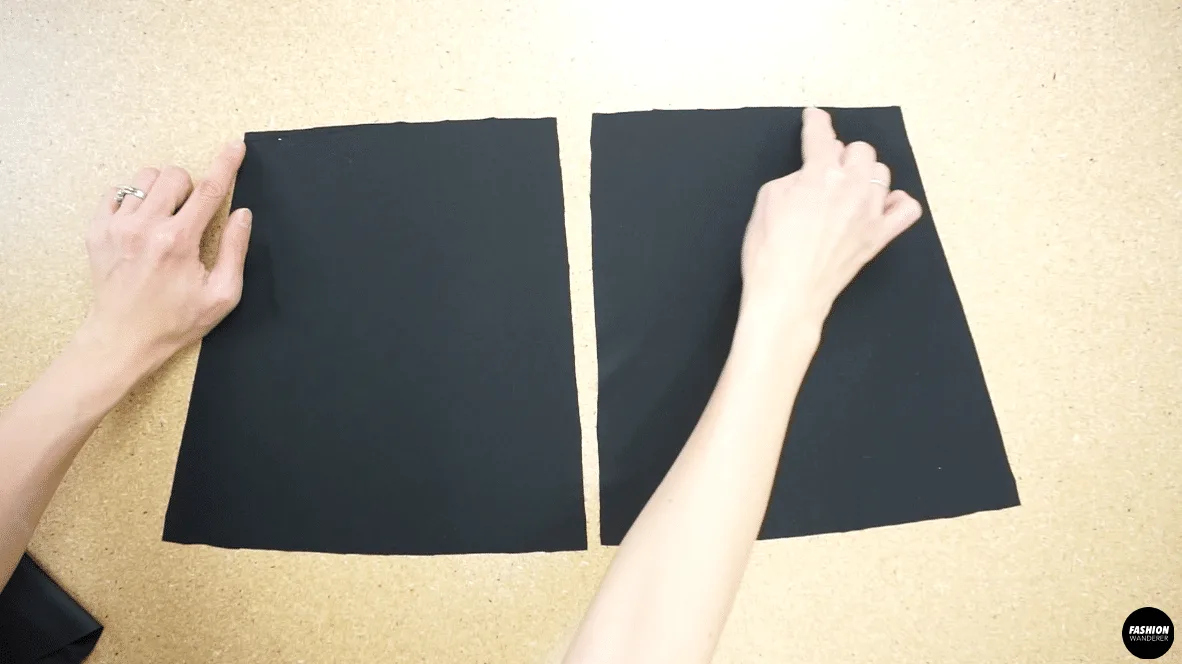
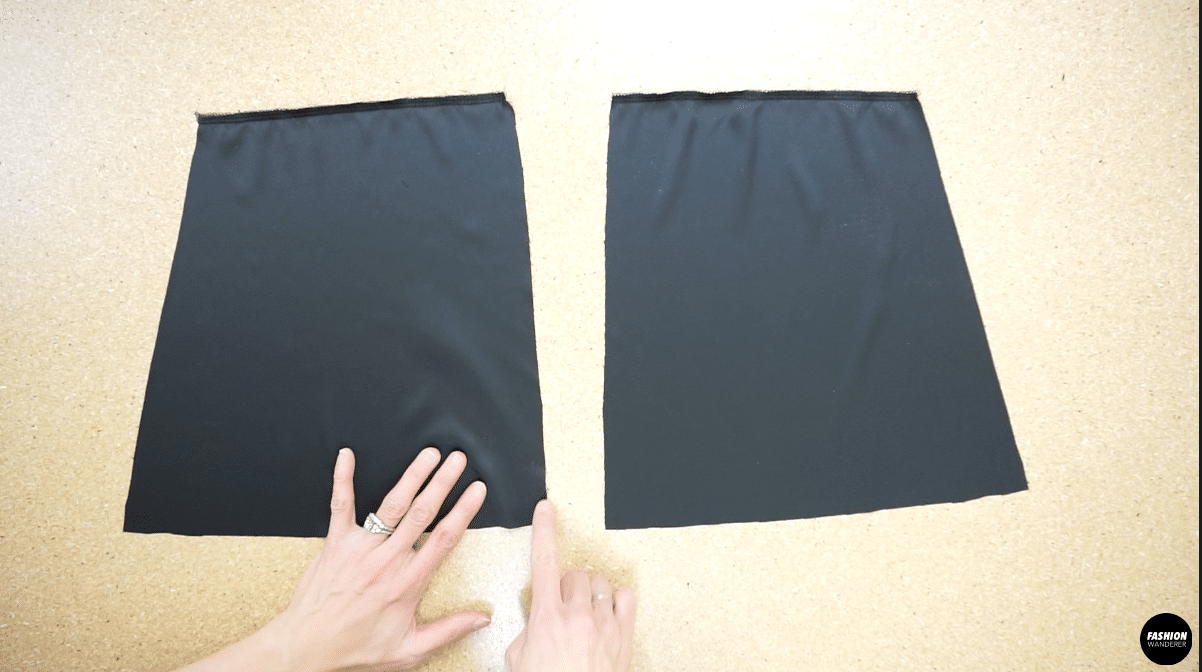
Join the side seams right side facing together.
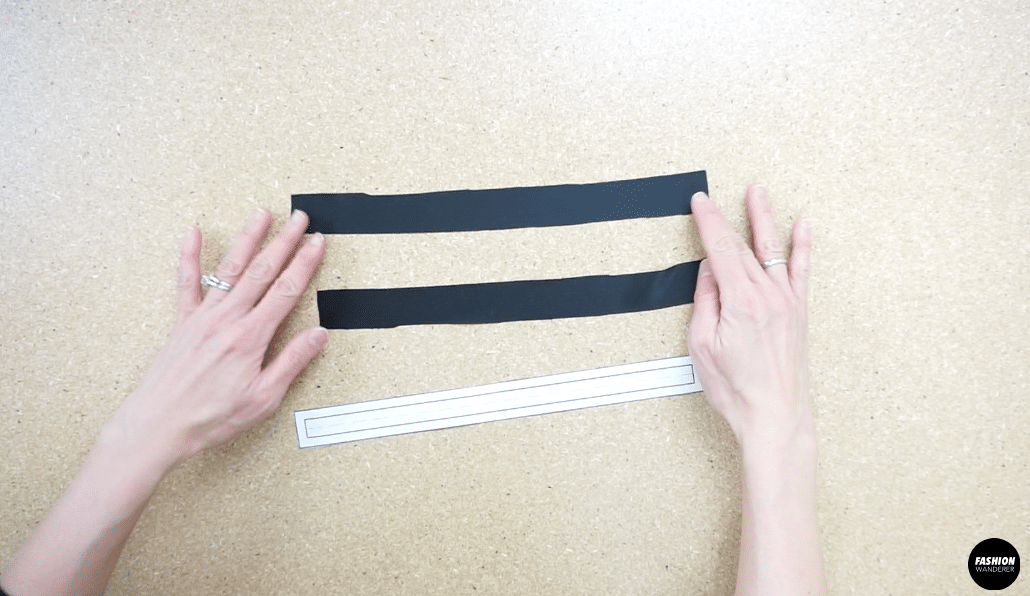
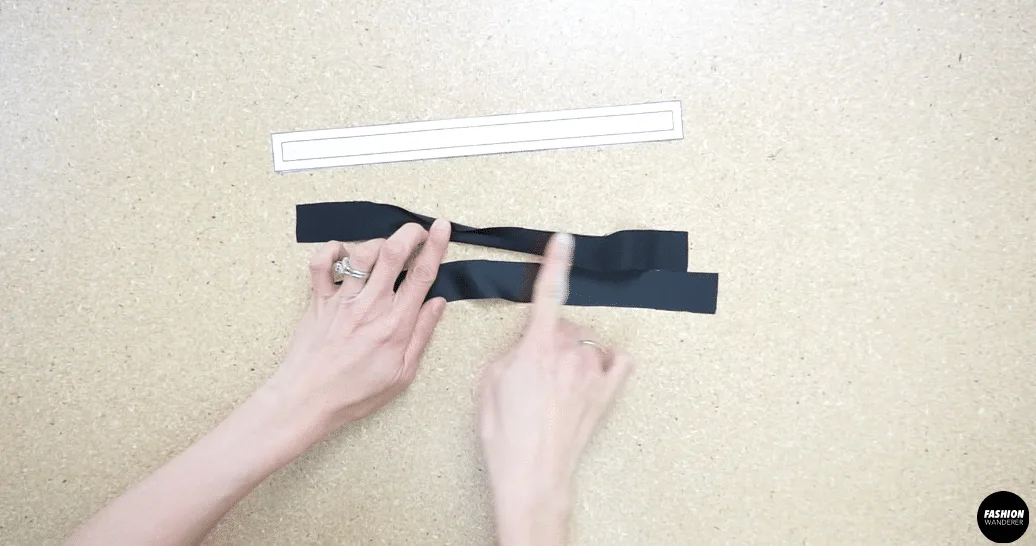
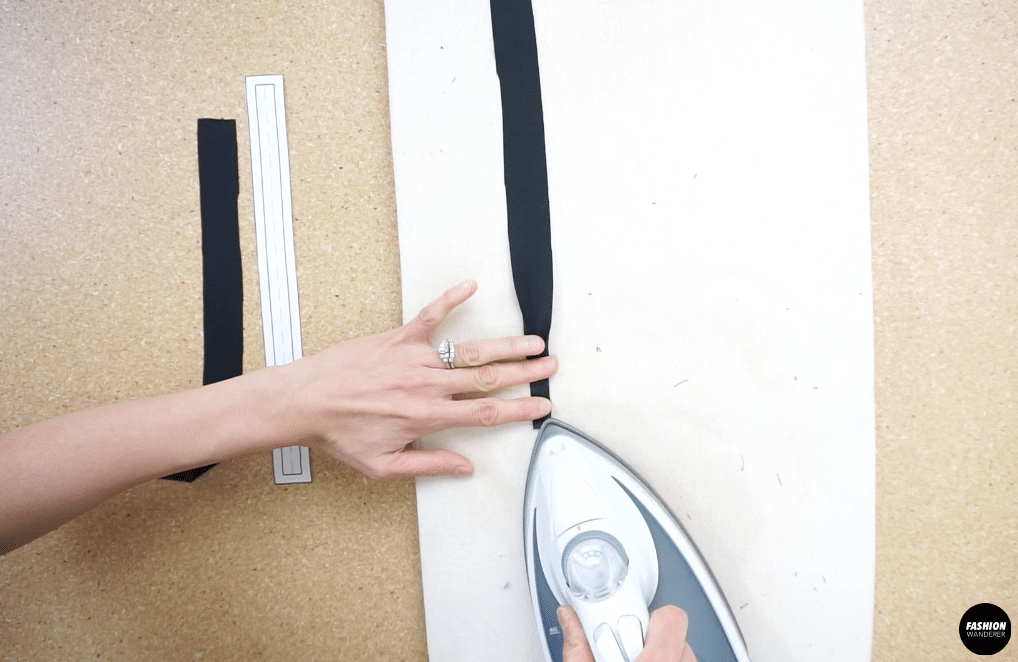
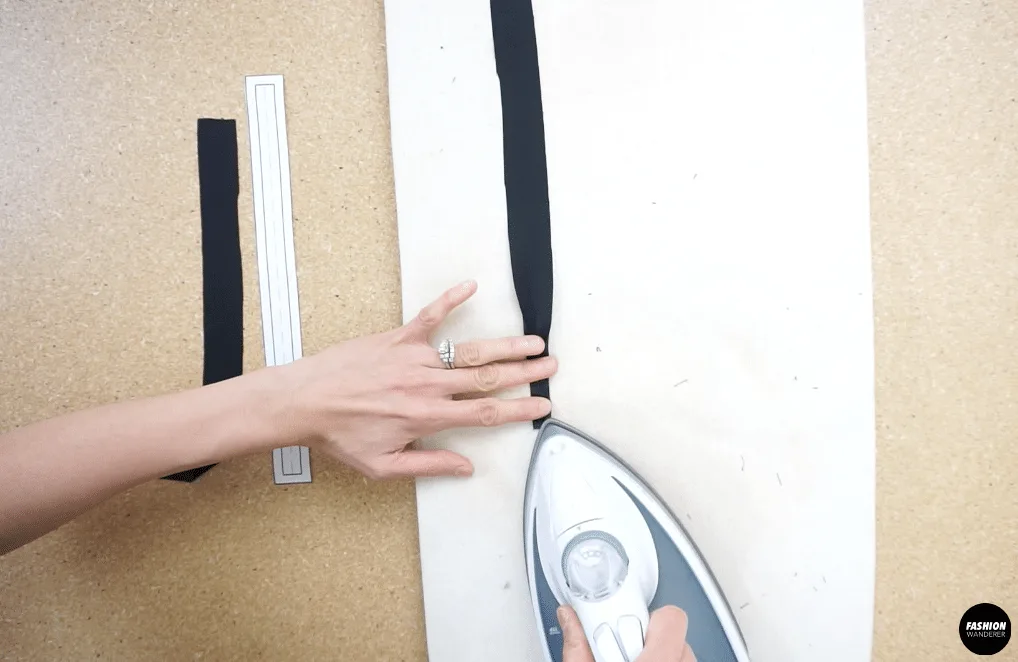
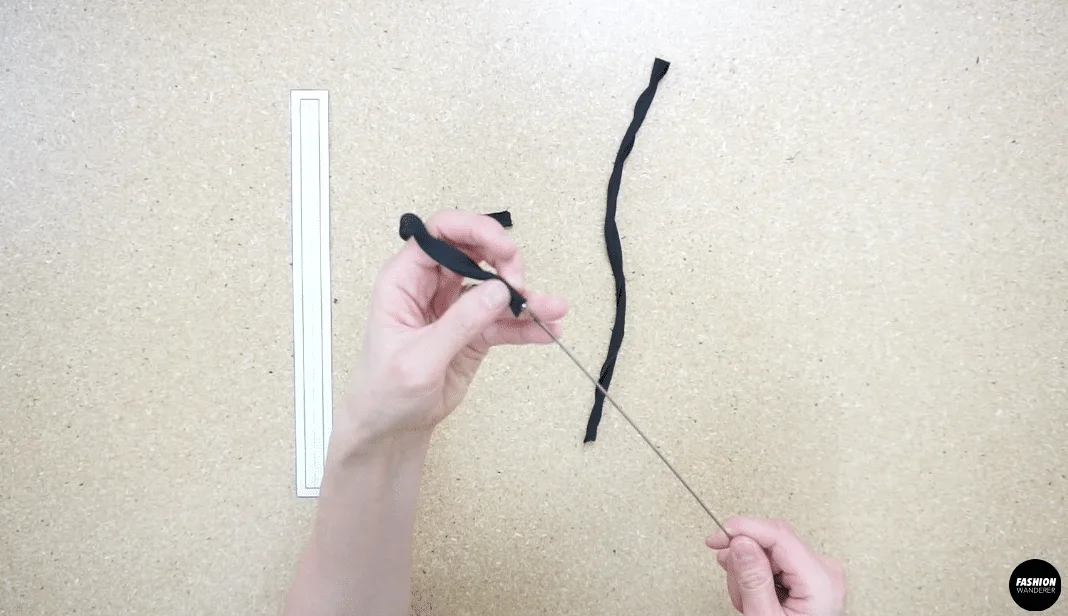
Fold the shoulder strap and close the seam, use a loop turner to flip inside out and iron shoulder straps flat.


Join the shoulder strap to front of lace trim and the back lace piece.
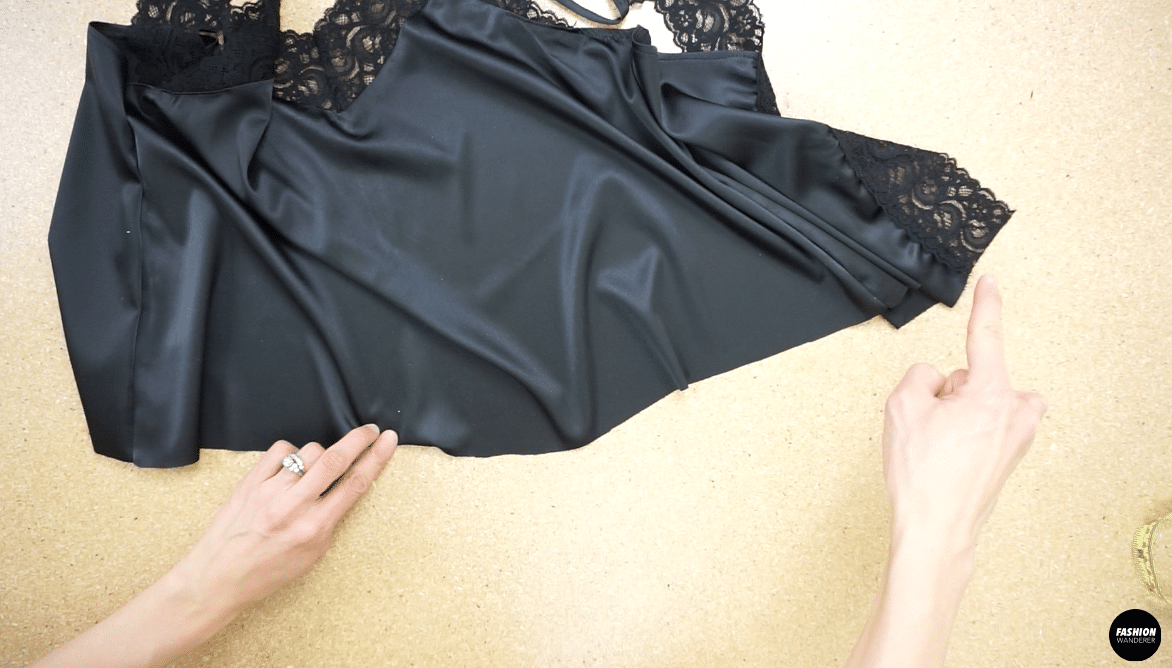
Hem the bottom opening.
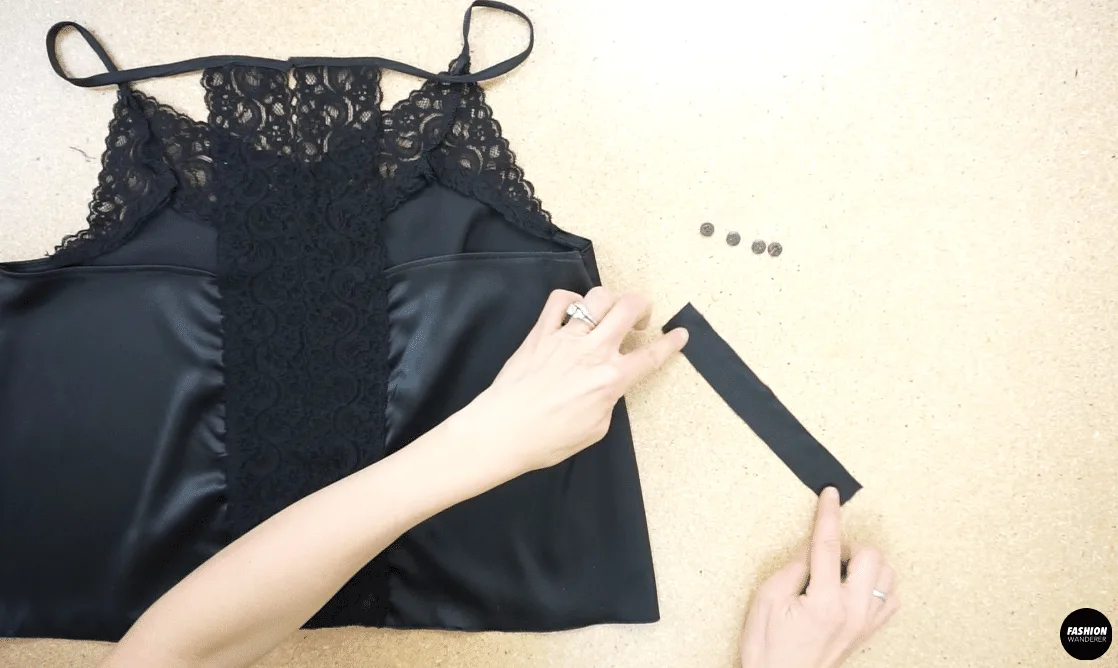
Attach buttons to the lace trim on the center back opening.
Make a short strap with leftover fabric. Fold the strap in half right side facing together and topstitch. Use loop turner to flip the strap and cut four separate 1½” long pieces.
Use the short pieces as a button closure to finish this Noa lace camisole.


Noa Lace Camisole Sewing Tips:


In this DIY lace camisole tutorial, you will learn how to sew delicate fabric and trim, join seams together and also clean finish the edges to create store-bought quality essential garment. If you are not familiar with sewing lightweight satin or charmeuse fabric, here are sewing tips that will help guide you along the journey.
- Sewing Machine: To sew silk or polyester blend charmeuse, you do not need special sewing machine. All you need is the correct needle and a good quality cotton or polyester thread. Don’t forget to choose a flat-bottomed foot for the sewing machine. Walking foot is a great alternative to help keep the silk from sliding around while sewing.
- Cutting Tips: Cutting charmeuse requires slightly different method to make the lines smooth and straight. Placing old tissue paper in-between the fabric does help to stabilize the material to achieve accurate shape and measurements when cutting.
- Sewing Needle: For sewing machine, go with 90/12 or 90/14 size for delicate and lightweight material. The fine and sharp needle will leave small holes in the fabric. For any hand sewing, the ideal size is 60/8 Microtex or universal needle.
- Ironing Method: If you are using 100% silk, be careful not to damage the surface. Always iron on the wrong side or use a pressing cloth to assist and prevent the silk from losing the shiny look.
- Puckering Issue: Lightweight satin or charmeuse tends to easily pucker when not sewn correctly. In order to prevent puckering, adjust the stitch length by shorten the setting to size 2.5 length.
Are you obsessed with camisoles? Camisoles are great essential piece that makes every outfit look beautiful.
If you are camisole collector, you will also love the elegant Vita square neck camisole to add to your DIY wardrobe. High neckline with wide shoulder strap is great addition to upgrade your old camisole.


How To Make Noa Lace Camisole
Simply download the sewing pattern and follow the step by step instructions so that you can include this Noa lace camisole in your DIY clothing collection!
Materials
- Noa Lace Camisole Sewing Pattern
- ½ to ¼ Yard of Lightweight Silk or Polyester Silk Charmeuse.
- 1 Yard of 2½” Width Scallop Edged Double Side Lace trim
- 4 Pieces of 2- or 4- Hole Size 11L Buttons
Tools
- Overlock Machine
- Sewing Machine
- 90/14 Size Sewing Needle
- Matching Color Thread
- Loop Turner
Instructions
- To make a Noa lace camisole, start by downloading the digital file, assembling the pattern pieces and cutting the fabric based on your size.


- Use overlock machine to secure the hem along the v-neckline of the front piece, back neck opening and center back with ⅜” width seam allowance.


- Copy the v-neckline and under arm line onto the lace trim about 2” away from the side seam.

- Sew lace trim right side together and overlock to join and create M shape.
Attach the lace trim to the front and back bodice.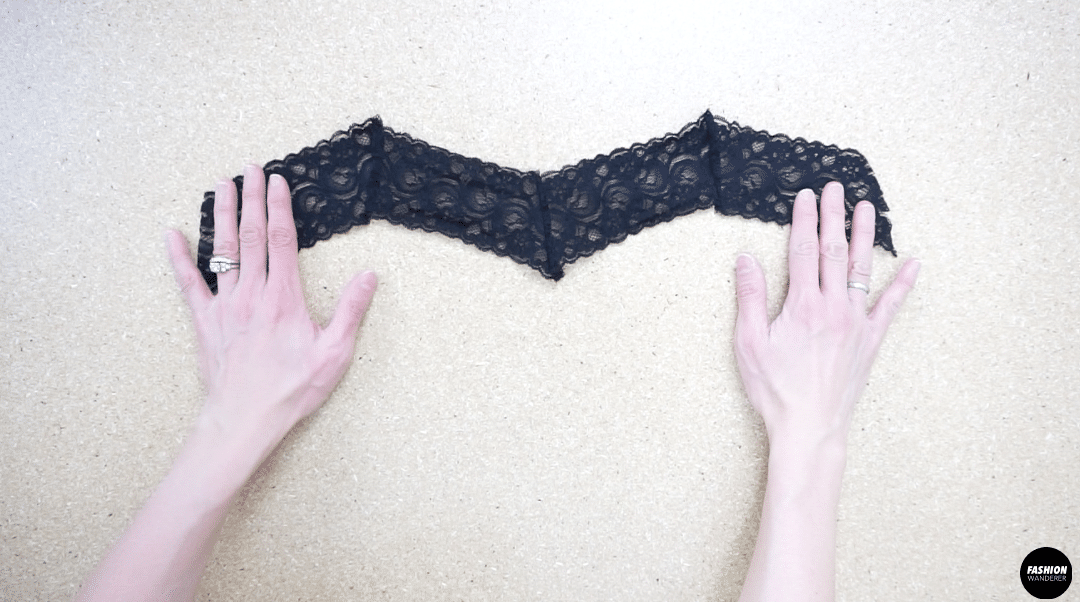
- Trim the corners of the lace to create a smooth line.


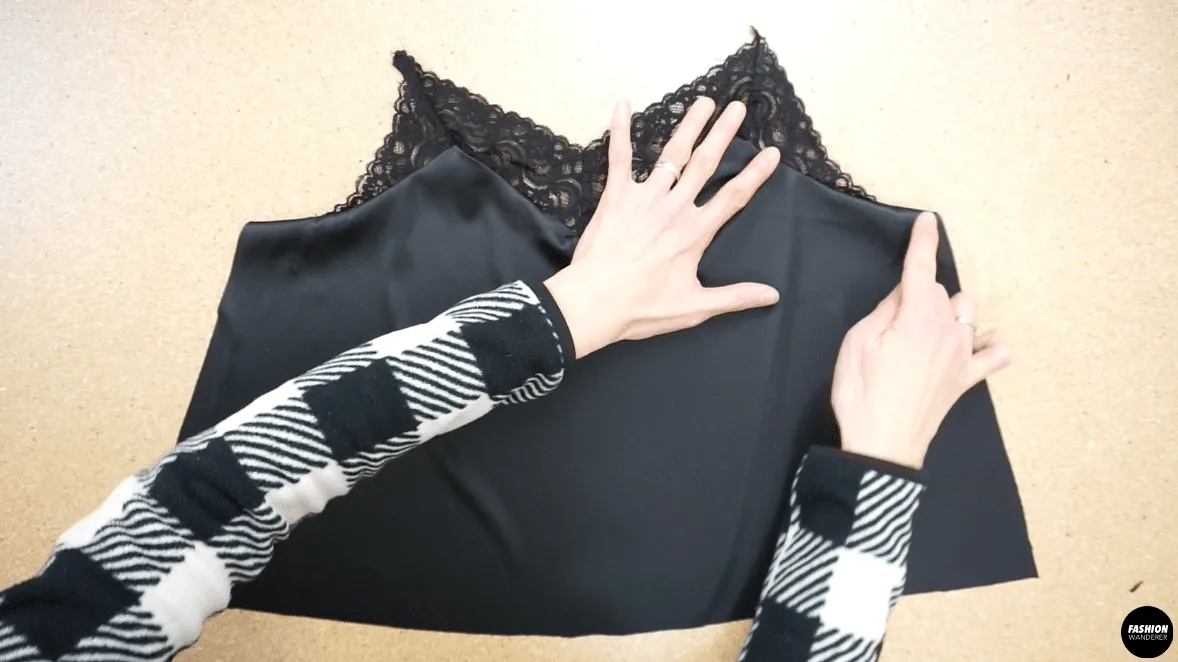
- Topstitch to finish the lace neckline.
- Fold the center back, and close the edge with topstitch. Then attach the lace trim to the center back opening on both sides.


- Clip the pointy corner on the center of the neckline and chest area to create smooth joint when ironed.
- Next, overlock ⅜” width side seams right side facing together.
- Fold the shoulder strap right side facing each other and sew ¼” seam allowance.

Then, use a loop turner to flip inside out.
Iron shoulder straps so they lay flat.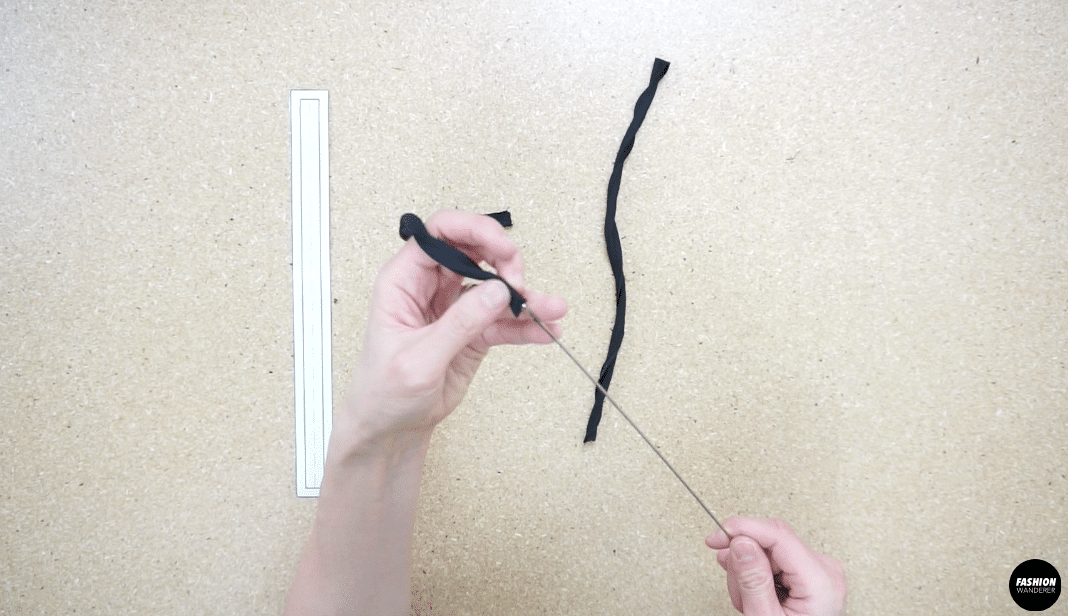
- Overlap the shoulder strap to front of lace trim piece about ½” and straight stitch back and forth to secure.
Lay the strap flat on the back lace piece and edge topstitch on both ends of the strap.
- Hem the bottom opening with ⅜” width overlock, fold the hem and closely edge topstitch.

- With leftover fabric, copy the strap pattern with a 7” long piece.

Fold the strap in half right side facing together and topstitch so the width of the button loop is less than ¼” wide.
Use loop turner to flip inside out and cut the strap into four pieces that are 1½” long.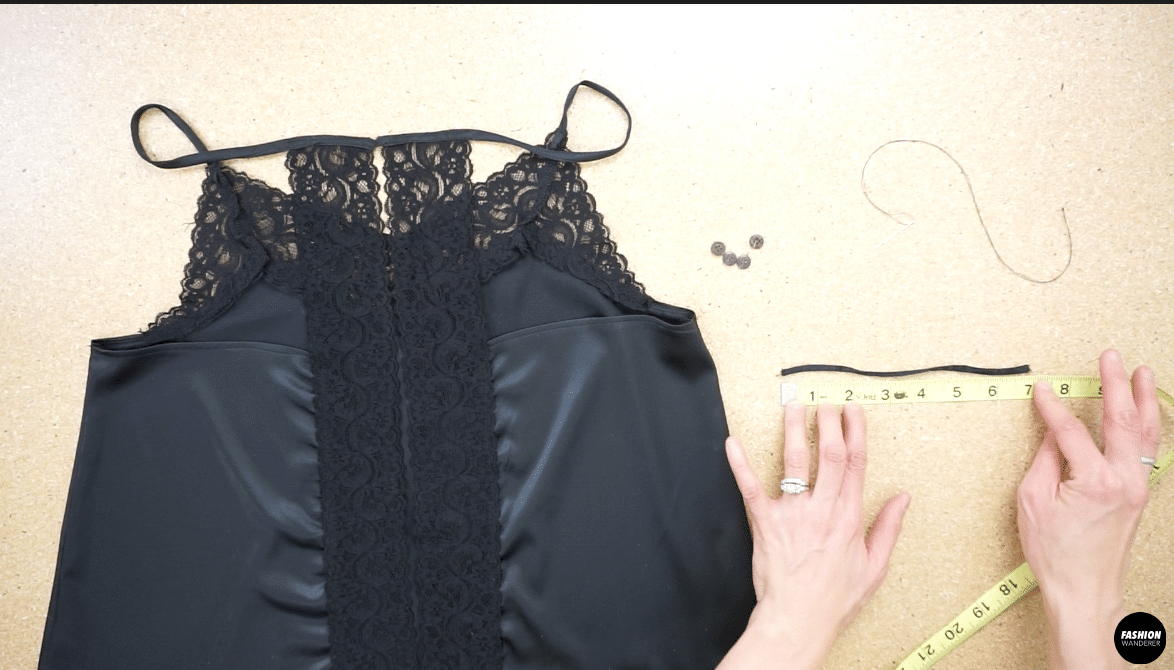

- Use 2- or 4-hole size 11L buttons to position on the lace trim.
Hand sew to secure.
- Overlap the loop ends together and position on the inside of the lace trim. Insert behind the lace (wrong side of lace trim) and stitch back and forth to secure the button closure position and complete this Noa lace camisole.


Recommended Products
As an Amazon Associate and member of other affiliate programs, I earn from qualifying purchases.


Trendy, Affordable Sewing Patterns for All Sizes


Tie Shoulder Jumpsuit Pattern


Palazzo Pants Sewing Pattern


Pocket Overall Romper Pattern


Wrap Maxi Skirt Sewing Pattern


Tie Back Top Sewing Pattern