
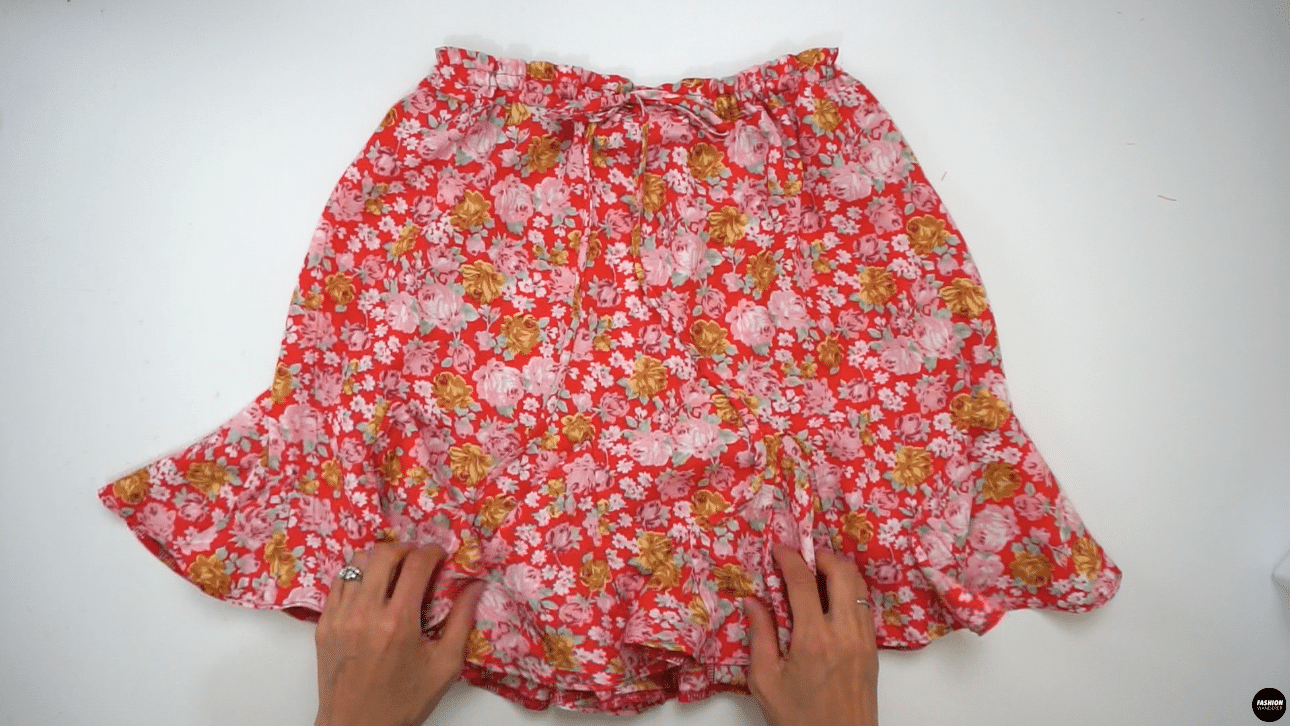
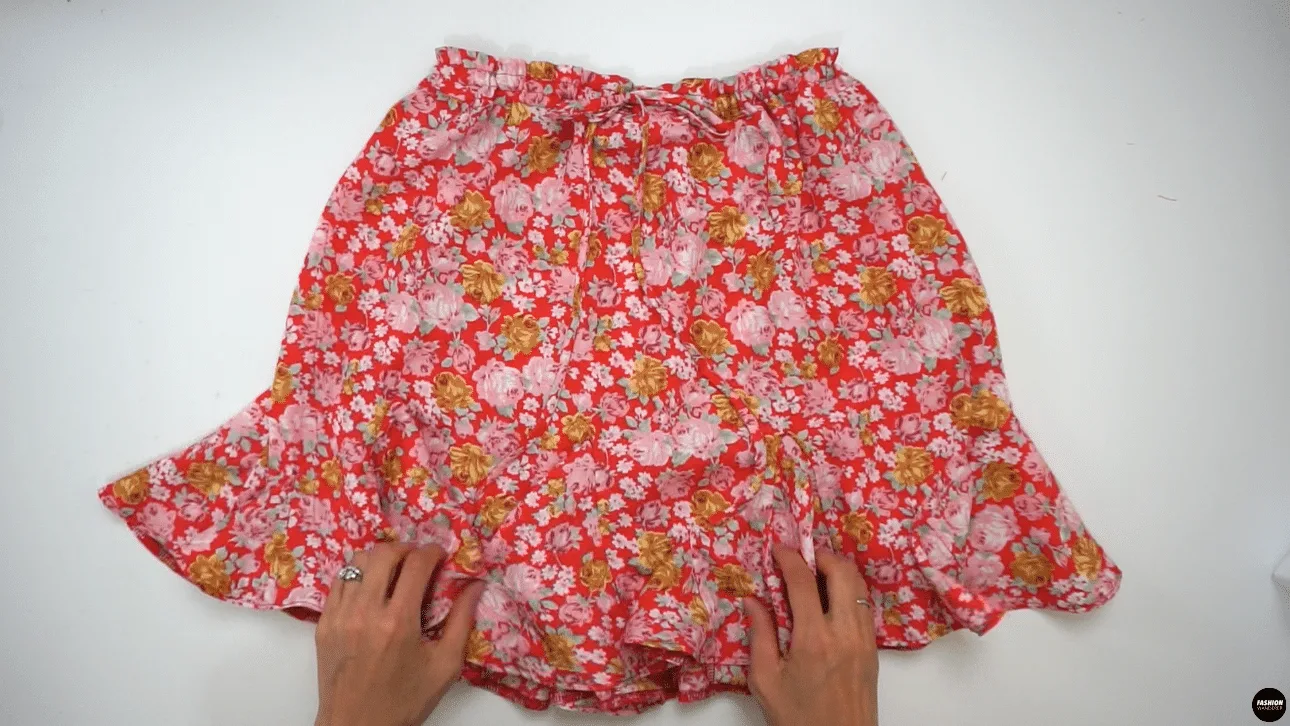
Do you have a pretty mini skirt in your summer wardrobe? This Stella mini skirt features flared skirt bottom with high waist silhouette, difference sized godet and tie along the waistband.
It give vibrant and fun look to pair with simple t-shirt or cropped top to make your favorite summer outfit a star.
How do you make a tie waist godet mini skirt? Pre-treat the fabric prior to cutting and sewing. Fold the fabric along the selvage and cut out the pattern pieces based on the dotted size line.
Follow the sewing tutorial to sew this pretty tie waist godet skirt by making individual godet insets, topstitched waistband, and adjustable bias strap to complete the sewing project.
What is a godet? A godet is a triangle piece of fabric that is inserted to a dress, skirt, or top to make it flared by giving width and volume.
This godet skirt is perfect sewing project for beginners to practice inserting godets with lots and lots of straight stitches in order to be more comfortable with your sewing machine.
Every sewing pattern from Fashion Wanderer includes step by step pictures and easy to understand video instructions. The tutorials include sewing tips and techniques to use for each fabric that works for the sewing projects.
The how-to tutorials are detailed enough for beginners to read and follow. But if you need any help along the way with the sewing steps or questions regarding Stella skirt, feel free to contact me on any platform, I’m happy to help you!


DIY Tie Waist Godet Mini Skirt Sewing Pattern


You will love this DIY tie waist godet mini skirt because…
- The Stella skirt sewing pattern comes in sizes ranging from US 2 to 12 and UK 6 to 16 to choose from.
- All sewing pattern pieces include ⅜” or 0.95cm seam allowance to be able to make flexible fit adjustments as you sew.
- Learn to use loop turner to create bias cut strap for waist tie.
- Master straight and overlock stitch to join the godet to the skirt piece.
- Perfect for beginners to learn to professionally hem the skirt finish.
This pretty skirt offers various options to create from casual to going out outfit. In addition, the flexible high waist to regular waist can be adjusted depending on your desired style.
Use this DIY tie waist godet mini skirt sewing pattern and tutorial to add the garment to your favorite summer wardrobe.


How to make tie waist godet mini skirt from scratch

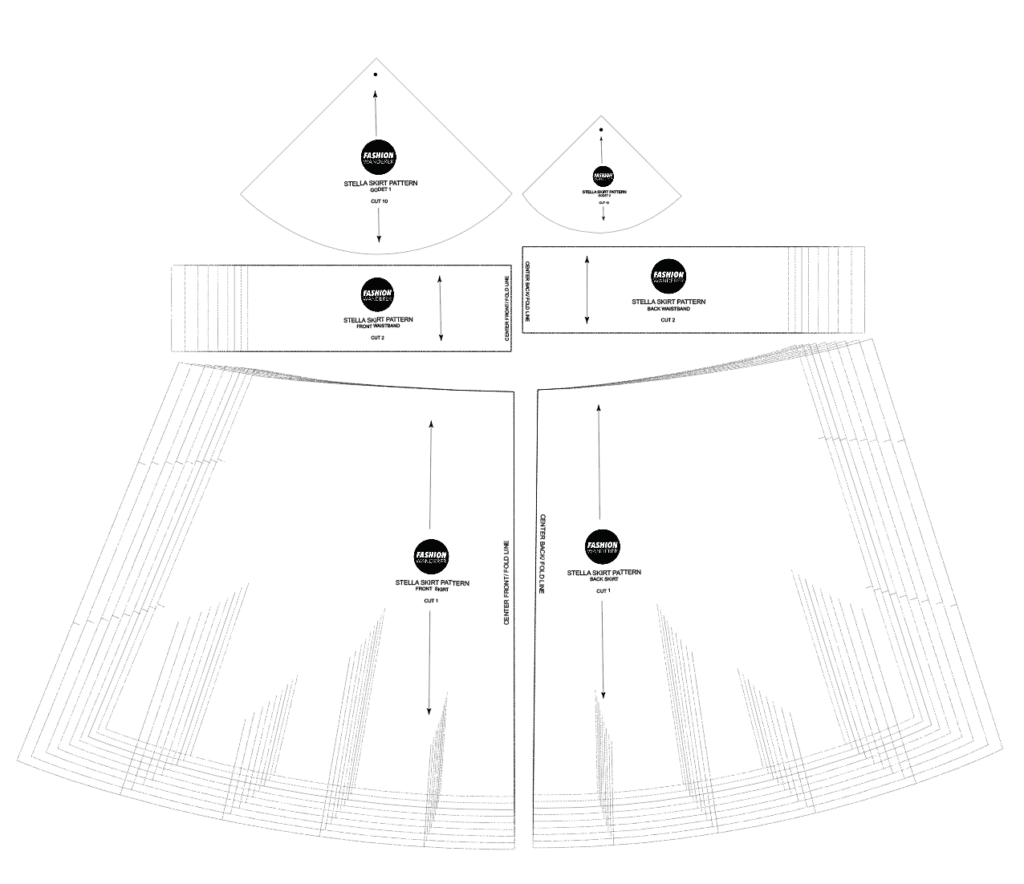
Start by downloading and printing out the Stella mini skirt pattern and match the diamond shape on each page to assemble the pdf sewing pattern to get it started.
Ensure to check your body measurement to find out the correct size on the size guide chart. For this sewing project, you only need waist and hips to find the true bottom size.
This will help you to avoid from making alterations after the garment is sewn. Take time and find out these two measurements so that you can have perfect fitted skirt to wear.
Whether you work with polyester crepe-de-chine or rayon fabric, know the fabric content and special care instructions to pre-treat the fabric before and after.
For all polyester based fabric, choose universal polyester thread and size 90/14 sewing needle. If you have sewing needle that has been used total of 7-8 hours, change sewing needle to avoid puckering or skipping stitches.
Also, refer to manual to properly thread your sewing machine to start your project.
In addition, keep the thread tension, but make sure the bobbin is threaded consistently to avoid from jamming the under thread while you sew. It will help you to create clean and even stitches throughout the production.
DIY Tie Waist Godet Mini Skirt Tutorial Material:
- Stella Skirt Sewing Pattern
- Poly Crepe-De-Chine ¾ yards for 60” width or 1¼” yards for 45” width
- Loop Turner
- Buttonhole Sewing Foot
- Measuring Tape
- Water Erasable Fabric Pen
- Pins
- Fabric Scissors
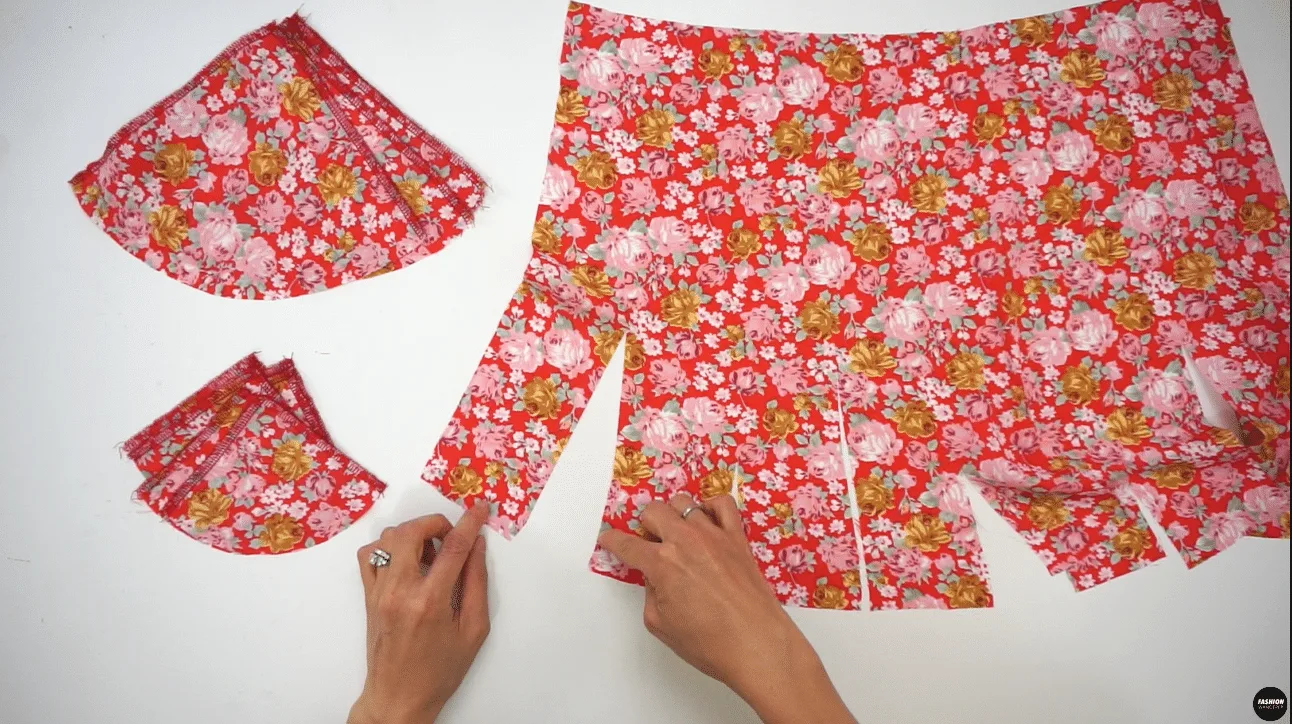
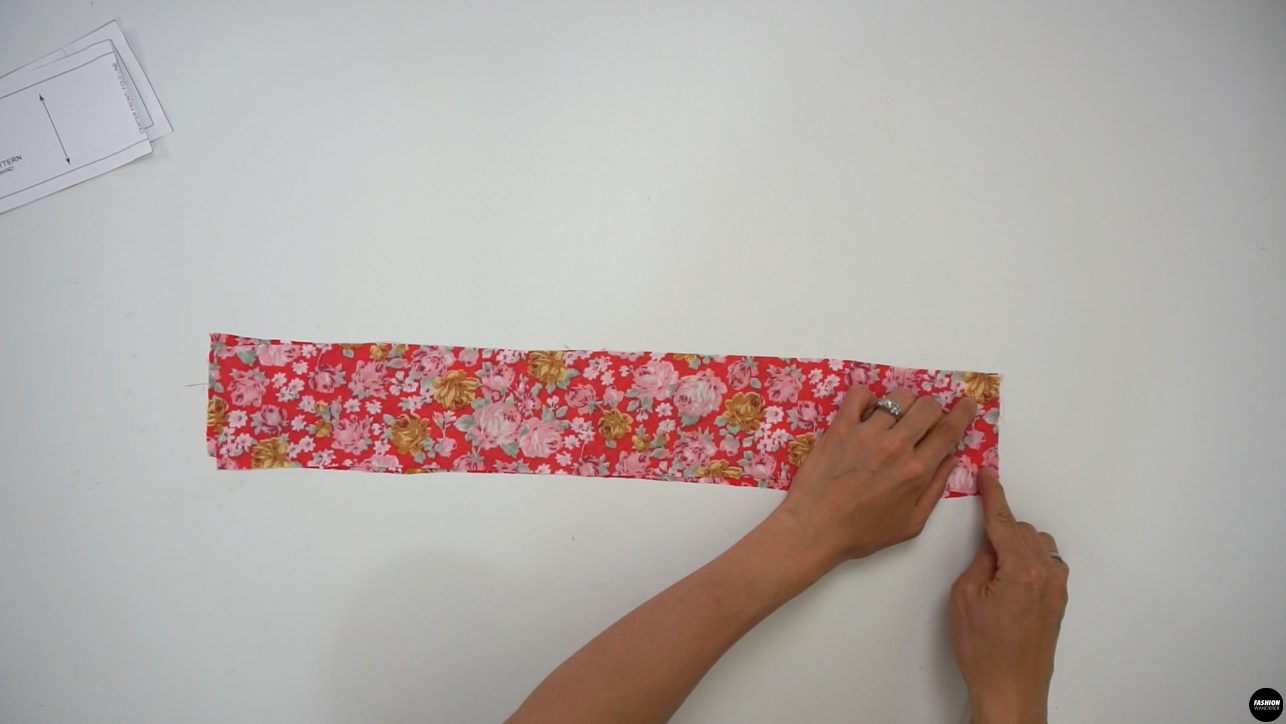
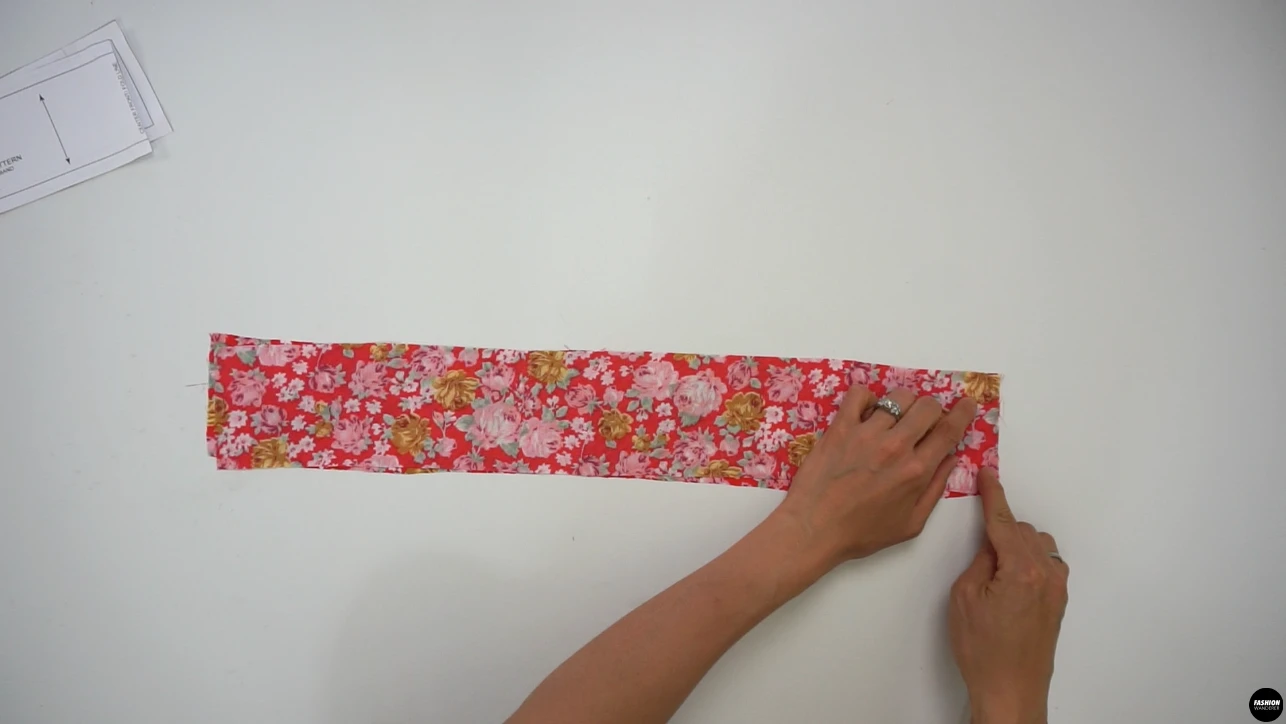
Finish the cut edges of Godet #1 and Godet #2 with overlock stitch using a Serger. Place Godet pattern by spreading opening the cutline of the Front Skirt right side facing each other and pin.


Sew along the seam allowance until the triangular point. Sew the other side by starting with backstitch to the point with adjusted smaller size stitch length.
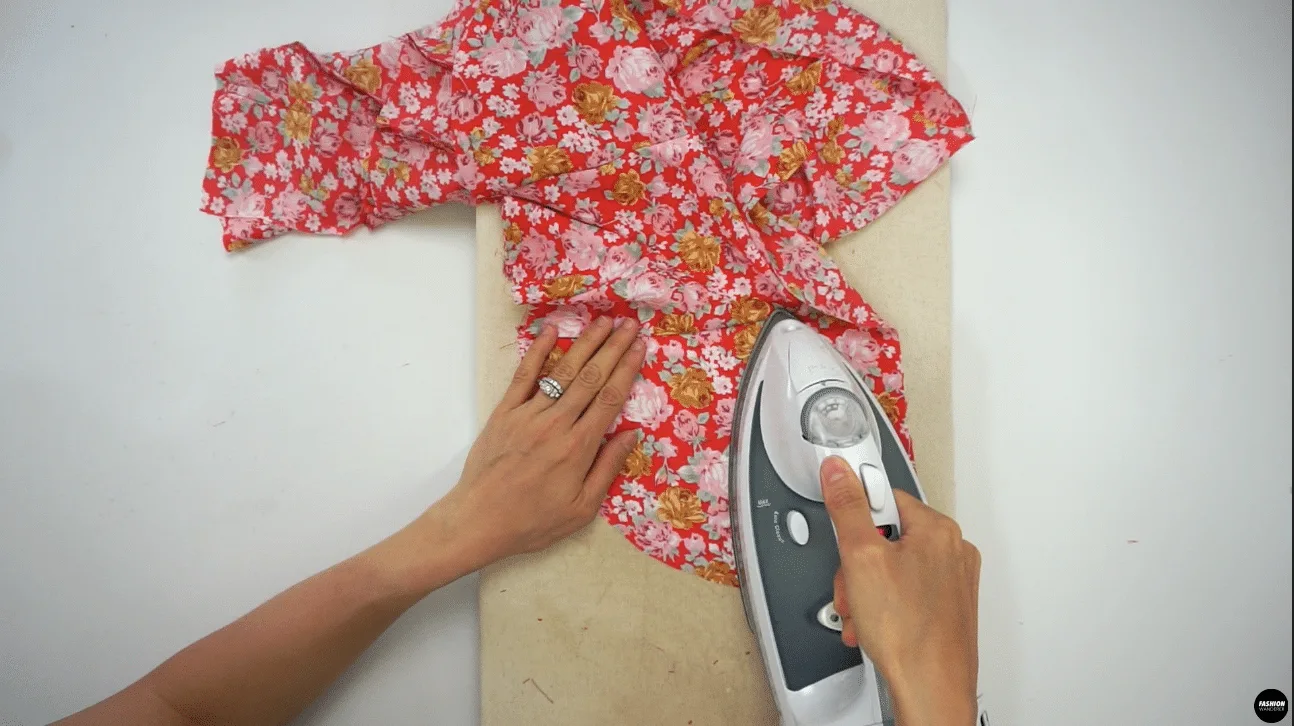
Continue to attach Godet #1 and Godet #2 to complete the Front and Back Skirt. Press with iron so the seam allowance is away from the triangle Godet shape.
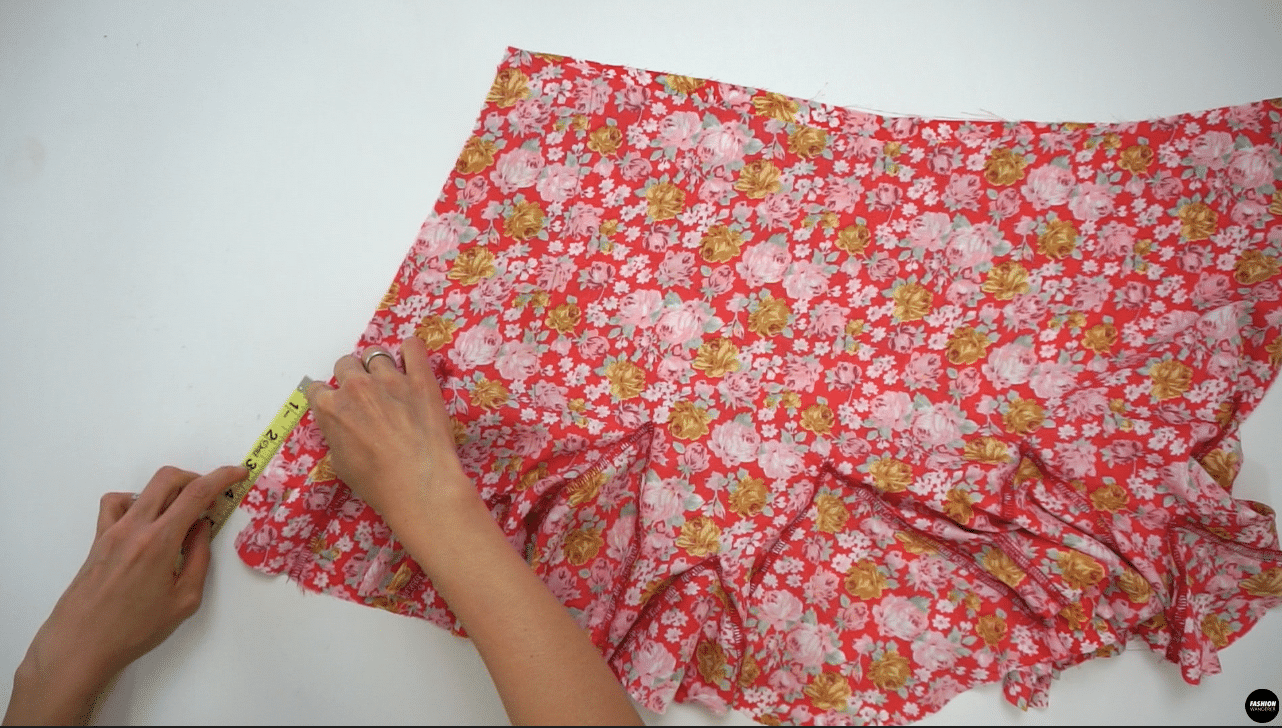
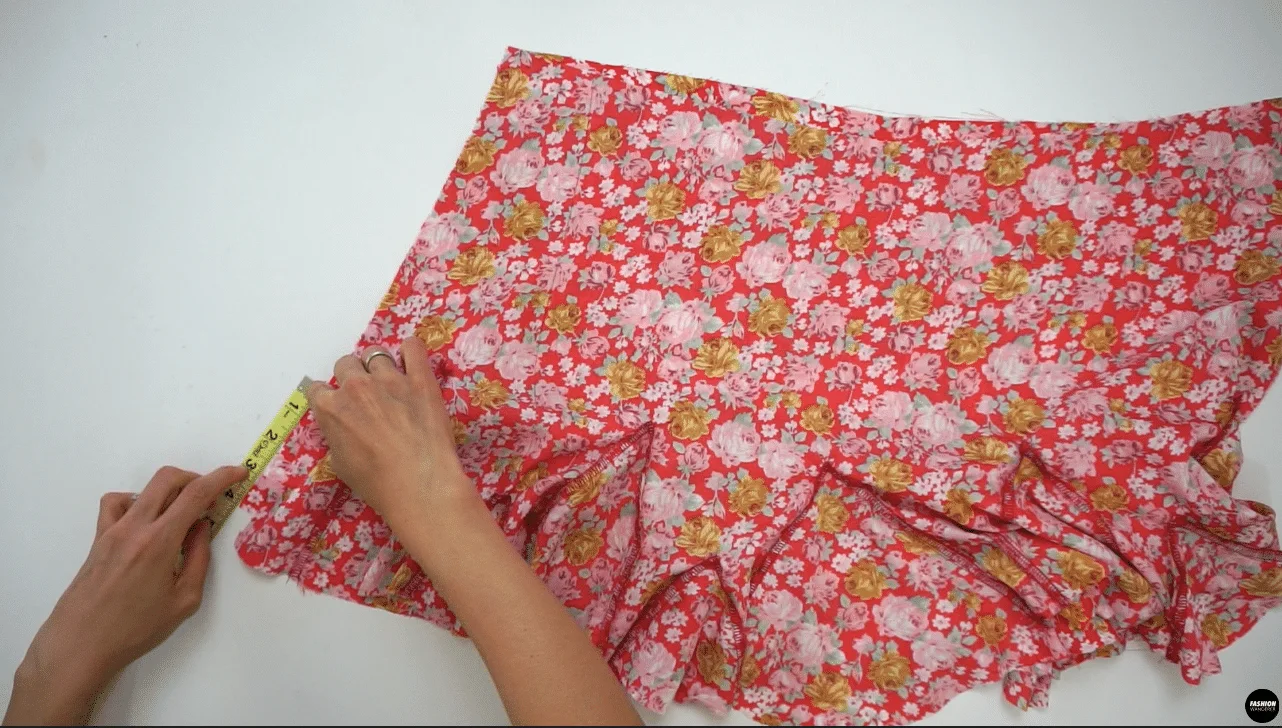
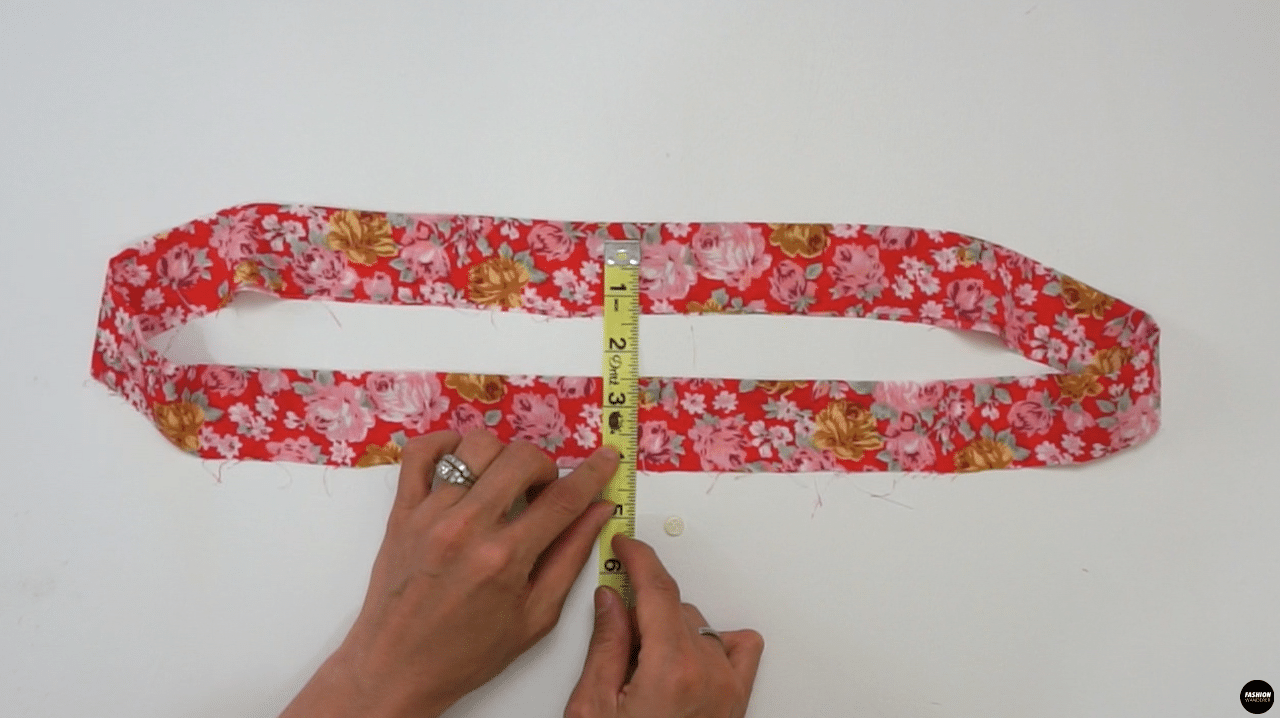
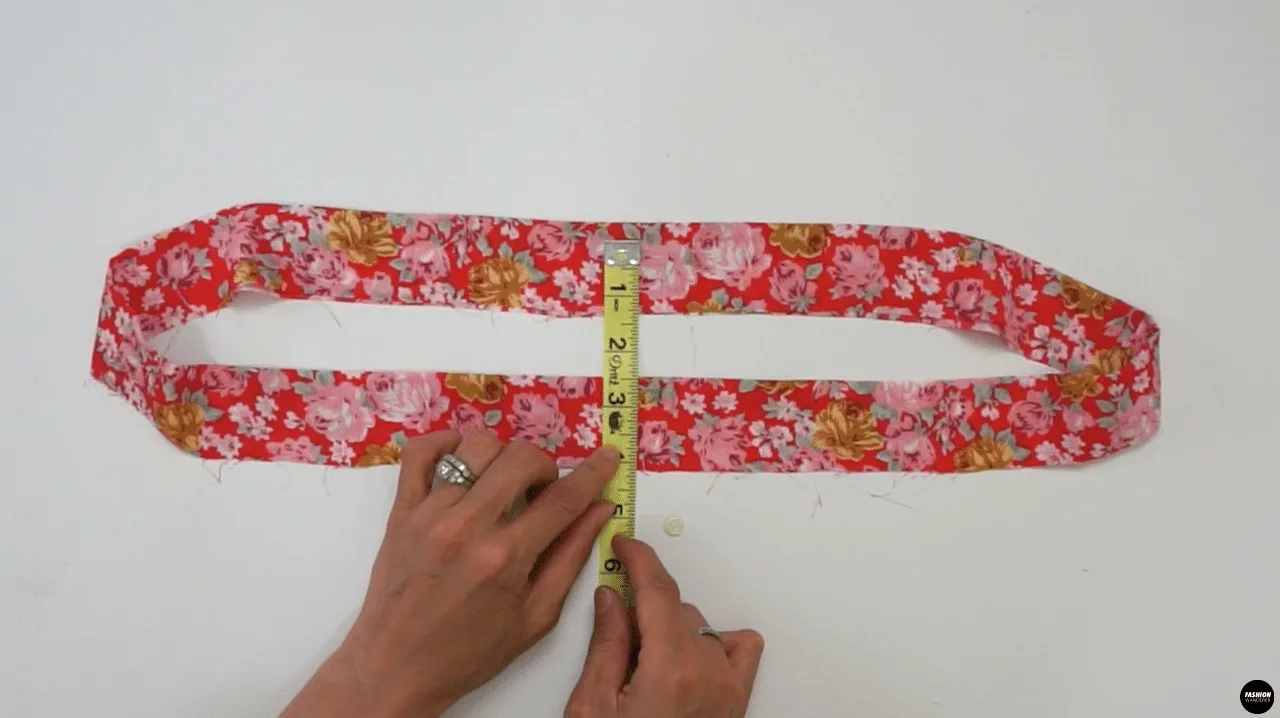
Match the side seam by placing Front and Back Skirt facing each other, and measure the Godet #2 height and pin. Close the seam allowance on the Skirt on both sides until the pin mark.
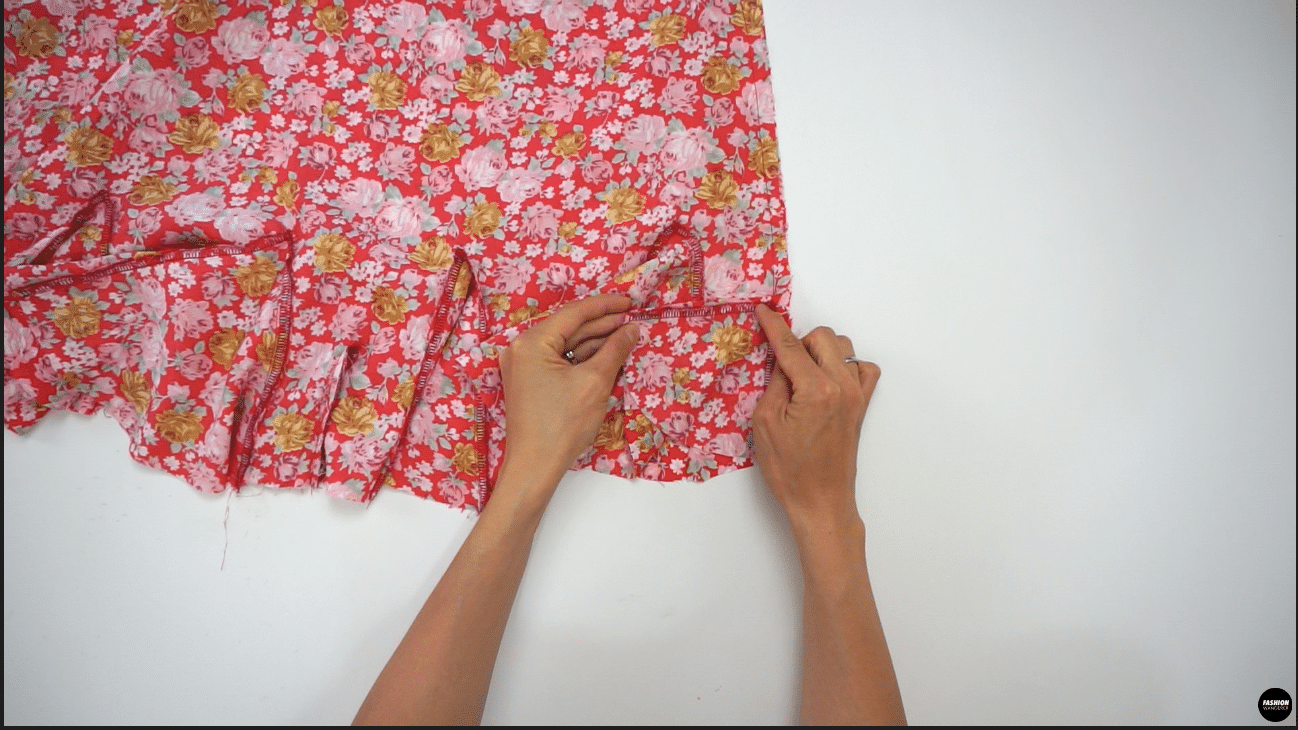
Insert the Godet #2 on the side seam. Press open the side seam and finish the edges with overlock stitch.
Close the side seam of the Front and Back Waistband, fold the band in half lengthwise and press with iron. Mark the tie string opening and use buttonhole sewing foot to create fray-free 2 buttonholes ½” apart from the center front.
Decorate the waistband with double topstitch about ½” apart all around the Front and Back Waistband.
Slide the waistband through the skirt and attach with ⅜” seam allowance and finish with overlock stitch. Press with seam allowance facing toward the skirt.
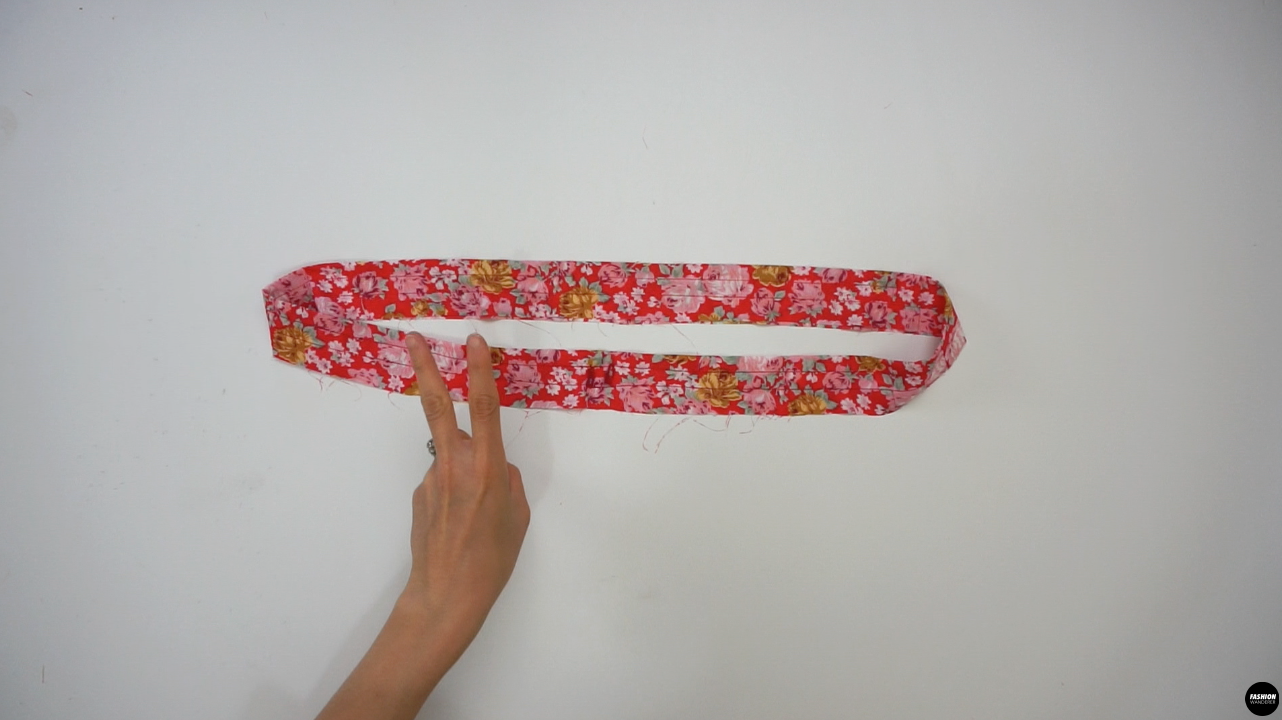
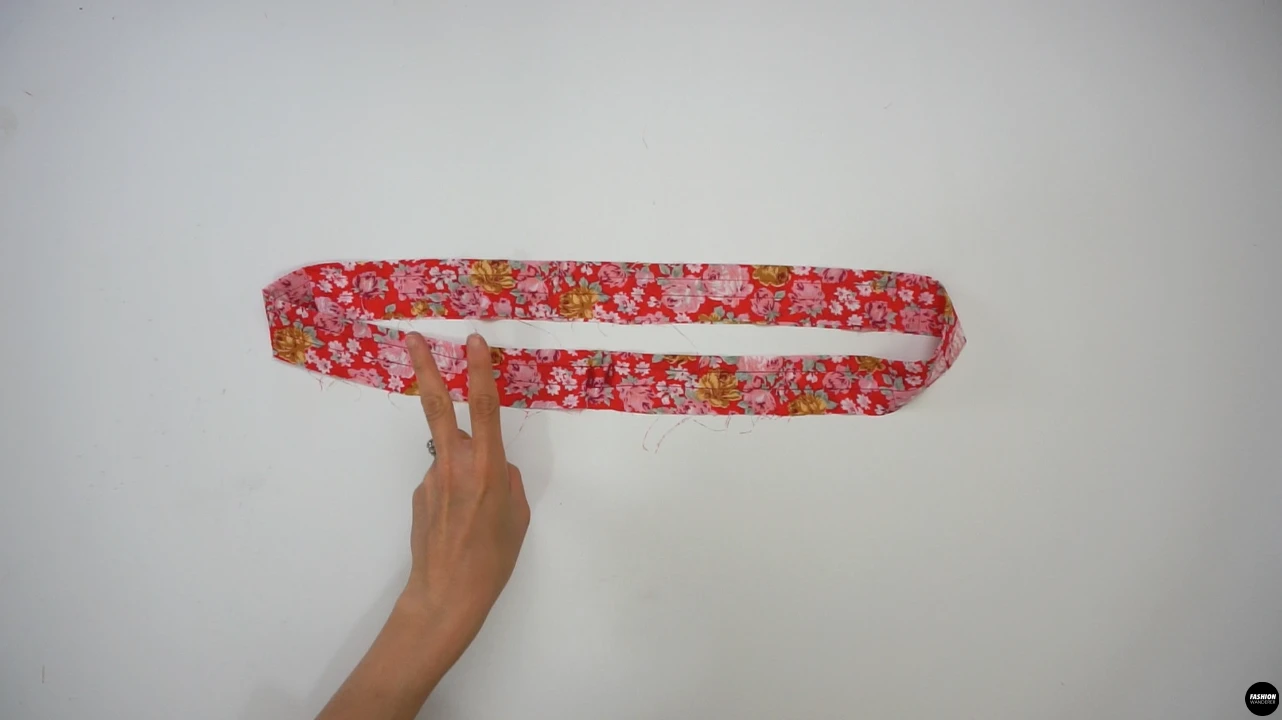
Join the bias cut strap and sew ¼” width seam allowance and use loop turner to flip inside out, then give a nice gentle press to make the strap flat. Use small safety pin to go through the tunnel easily.
Distribute the gathering around the waist opening. Finish the hem of the skirt with overlock stitch and use single fold hemming method to complete the skirt.


DIY Tie Waist Godet Mini Skirt Sewing Tips


Polyester crepe-de-chine is stable and easy to sew. Generally, crepe fabrics have a flowy drape and work well with godet inserted garment.
It often features a crinkled or pebbly surface that can be bit rough to touch. However, crepe yarn is twisted tightly which is very durable and lasts long.
If you have lightweight delicate crepe de chine fabric, use sewing pins for delicate fabric as it is easier to slide through the fabric without snagging the surface of the fabric. Also, use sharpest fabric scissors because it tends to snag.
When start sewing this flimsy fabric, I recommend using a walking foot for more stability and to avoid from the fabric being sucked into the bobbin case.
- Sewing Needle: When sewing polyester fabrication, generally start with brand new size 90/14 sewing needles. Some crepe de chine or rayon fabric tends to be even more lightweight, in this case , choose a sewing needle that is 75/11 or 70/10 to create smaller size holes.
- Thread: Use a lightweight cotton or lightweight poly-cotton thread. Also, try to match thread color that is slightly lighter or darker than the fabric depending on the color scheme you are following.
- Stitches: For regular seams, go with 2.0 to 2.5 stitch length. However, when you start sewing godet on the point area, adjust the stitch length to 1.0 to 1.5mm instead of backstitching the corner. When sewing poly crepe fabric, keep the tension set to 2.5 and test on a scrap of fabric. If you see tension or puckering, lower the tension and adjust the stitch length to smooth out the seam.
- Loop Turner: Utilize a loop turner to flip narrow tube inside out. Make sure to push the latch through the fabric about ¼” from point to pull the loop turner toward you. Try to gently pull and avoid the fabric disengaging from the hook.
- Waistband: In this tutorial, the waistband pattern is used as a tunnel for the drawstring or add elastic instead of the tie front for an easy alternative. When you choose to use elastic instead of tie front string, remove the double topstitching, and instead use safety pin to slide through the elastic and join to create relaxed elastic waistband. On the other hand, if you follow the original waistband as in tutorial, use ⅜” width circumference button to create buttonhole for drawstring. This will help your finished garment look store-bought quality with a professional finish.
- Ironing: It’s important to press the seam while you sew. For side seams, use iron to press the seam open. And for godet, press the seam allowance away from the triangular shape. Ironing every seam and stitches helps to smooth out flat seams and makes it easier to sew the next part.
To make tie waist godet mini skirt, learn these sewing tips and techniques on poly crepe de chine fabric. Due to easily fraying tendency of crepe fabric, it’s recommended to finish the cut edges with Serger to create an even overlock stitch.
As an alternative solution, you may use zigzag stitch to keep the fabric away from fraying.
In this tutorial, we are using single fold hemming technique to hem the skirt. However, you may apply double narrow fold hem using a special sewing machine foot as well.
Before starting the sewing tutorial, test on a scrap of crepe fabric to sew bias cut and practice godet insert. This will help you to find the correct stitch length and tension that works best for your fabric choice.
Review these sewing tips to accomplish Stella mini skirt easily and mistake free!

DIY Stella Tie Waist Godet Mini Skirt
Are you looking for a cute skirt to add to your DIY summer wardrobe? If you are want a versatile bottom piece that easy to sew, this skirt is what you are looking for!
Simply follow the step by step instructions to learn to sew two sizes of godet inset, waistband with tunnel, and drawstring with basic stitches.
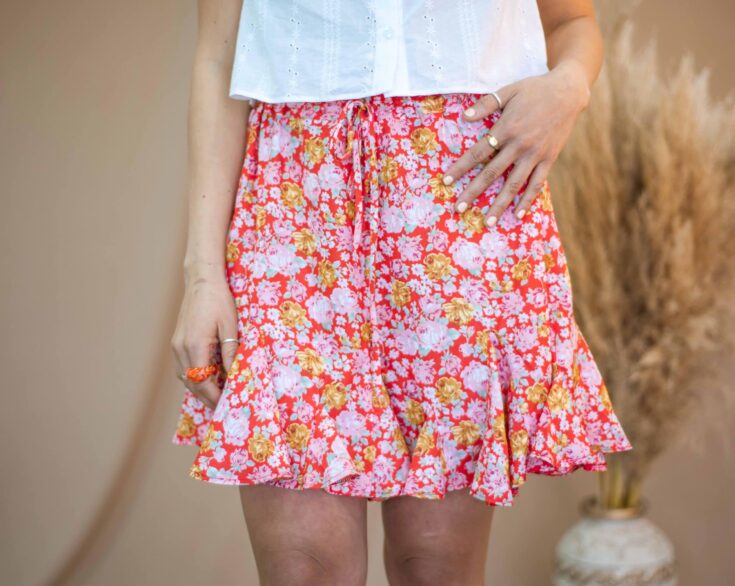
The Stella mini skirt features a bright floral print that defines the godet mini skirt creating a chic summer-inspired piece. It has a slight high waist fit along the hips, and flares out along the hem silhouette.
Also, the adjustable tie waist can make it tight or loose to tuck in your top to complete the outfit.
From godet to front tie detail, this skirt includes simple and functional designs. Follow us to sew this tutorial and help with the sewing pattern to accomplish this feminine and darling mini skirt to pair with any cropped length top of your choice.
Materials
- Stella Skirt Sewing Pattern
- Poly Crepe-De-Chine ¾ yards for 60” width or 1¼” yards for 45” width
Tools
- Sewing Machine
- Serger
- Loop Turner
- Thread
- Fabric Scissors
- Measuring Tape
- Water Erasable Fabric Pen
- Straight Pins
Instructions
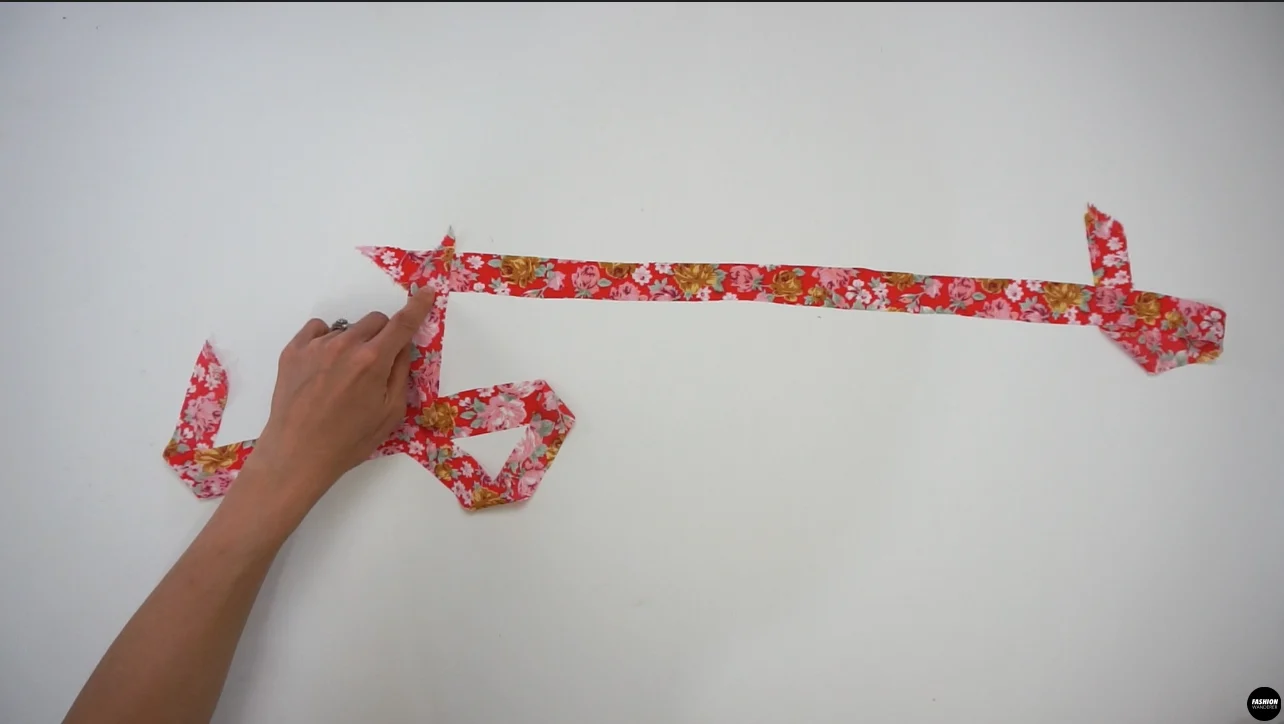
For this Stella tie waist godet mini skirt tutorial, start by assembling the pattern pieces:
1 pieces of Front Skirt
1 piece of Back Skirt
2 pieces of Front Waistband
2 pieces of Back Waistband
10 pieces of Godet 1
10 pieces of Godet 2
60” Long of Drawstring Tie
How to Finish Godet Pieces
- Start with the 10 pieces of Godet #1, and overlock stitch along both right and left straight sides; leave the curve cut edges as it is.
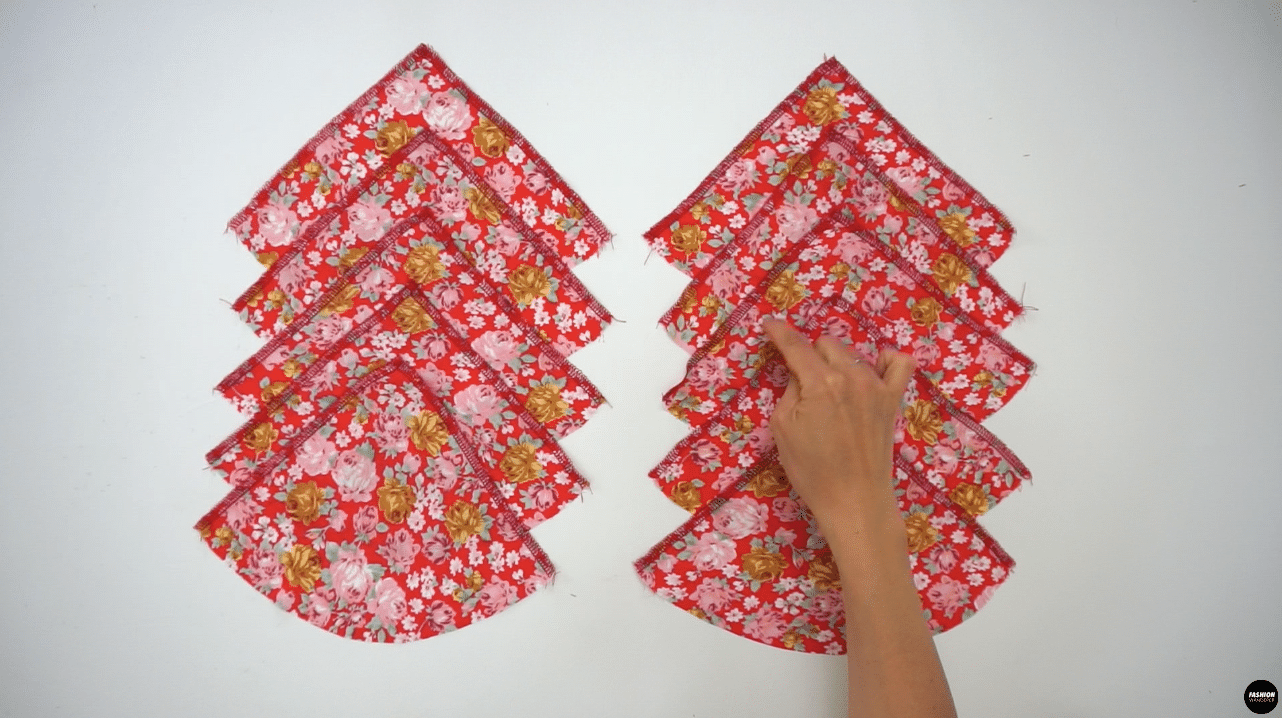

- Also, apply the same overlock finishes on the smaller size pieces of Godet #2.
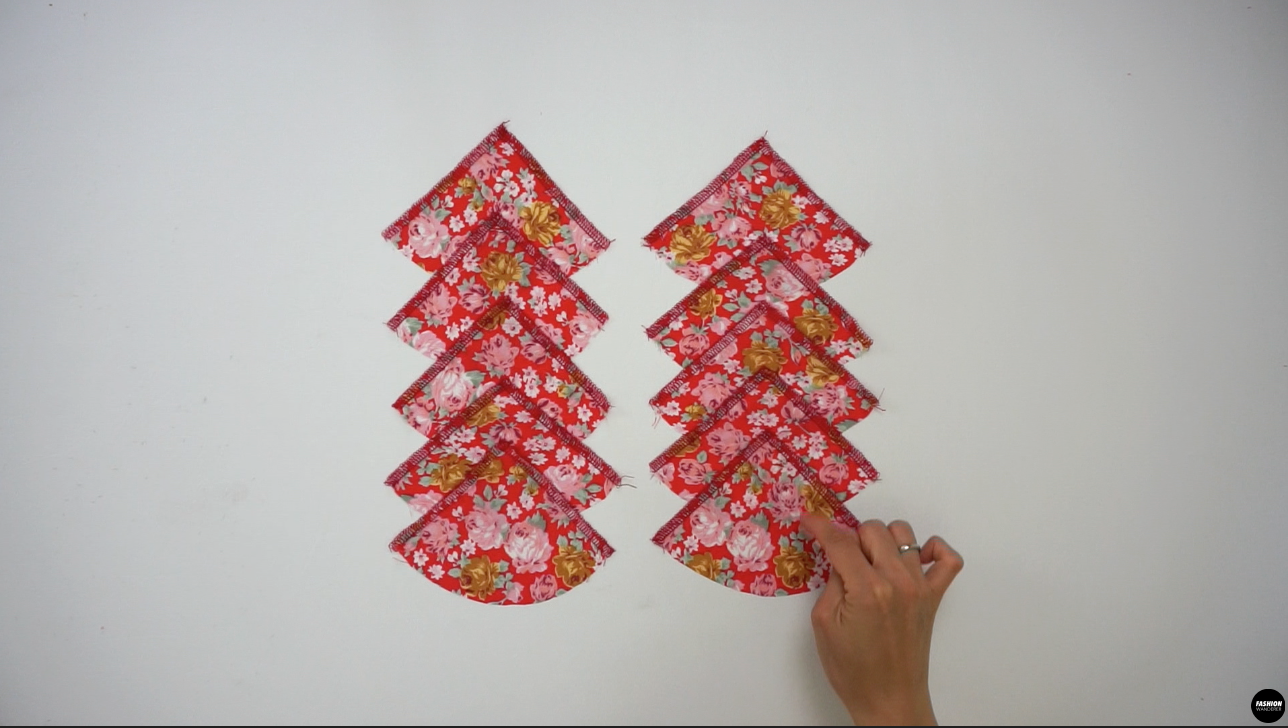
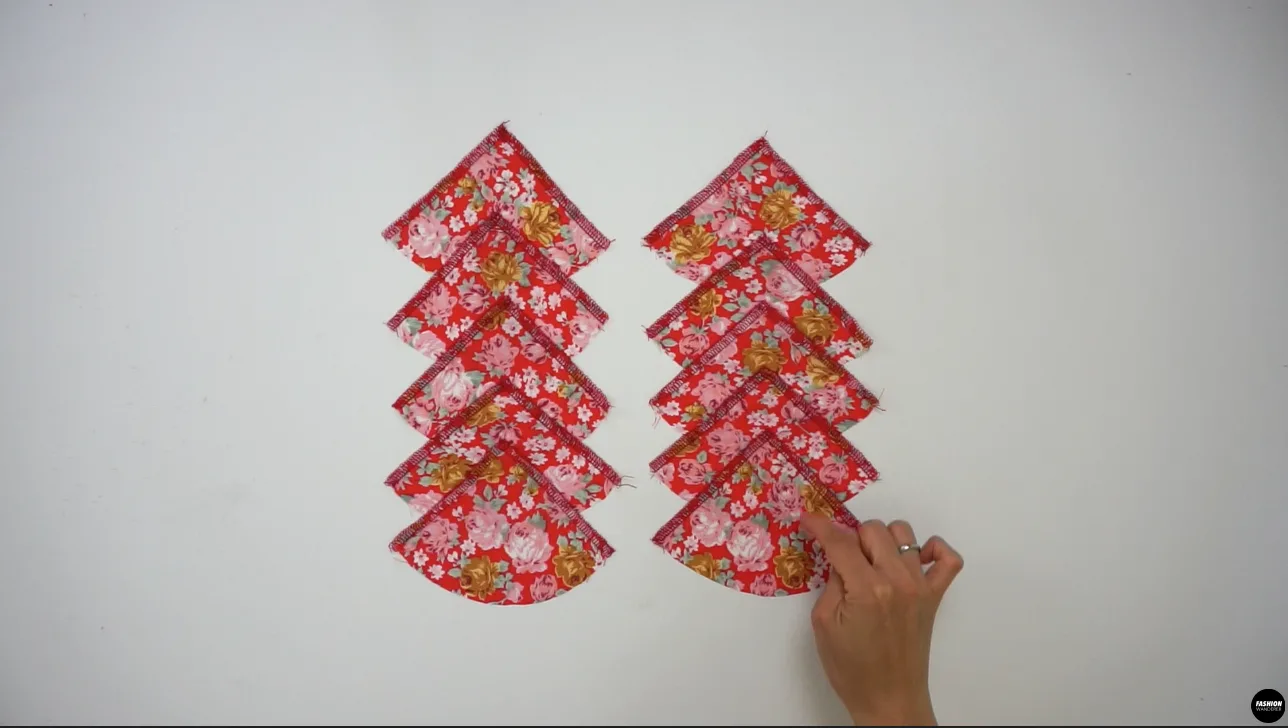
- Press with an iron to remove any puckering or crinkles.
How to Sew Godet on Skirt
- Place Godet #1 pattern on the first cut line of the Front Skirt right side facing each other starting on the left side. Pin and sew ⅜” from the hem until a point where the seam allowance meets at a triangle. Match and pin the remaining right side of the godet to the opening and sew ⅜” straight stitch. Make sure to not backstitch near the point, and instead change the stitch length to 1 mm at the godet point. Then, change back to 2.5 stitch length and finish with backstitch along the hemline. Continue to insert Godet #1 pieces on all slits along the Front Skirt.
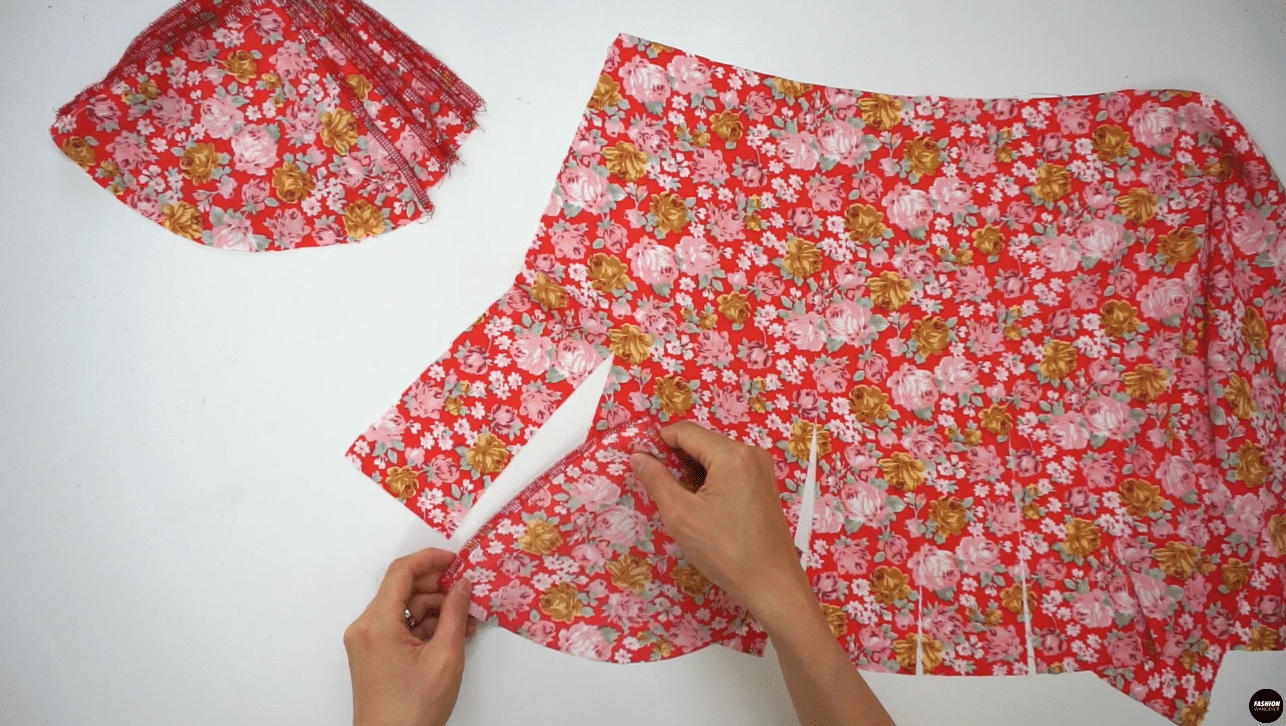

- Next, attach the smaller size Godet #2 on the Front Skirt as well using ⅜” seam allowance on left side first, and then finish on the right side.

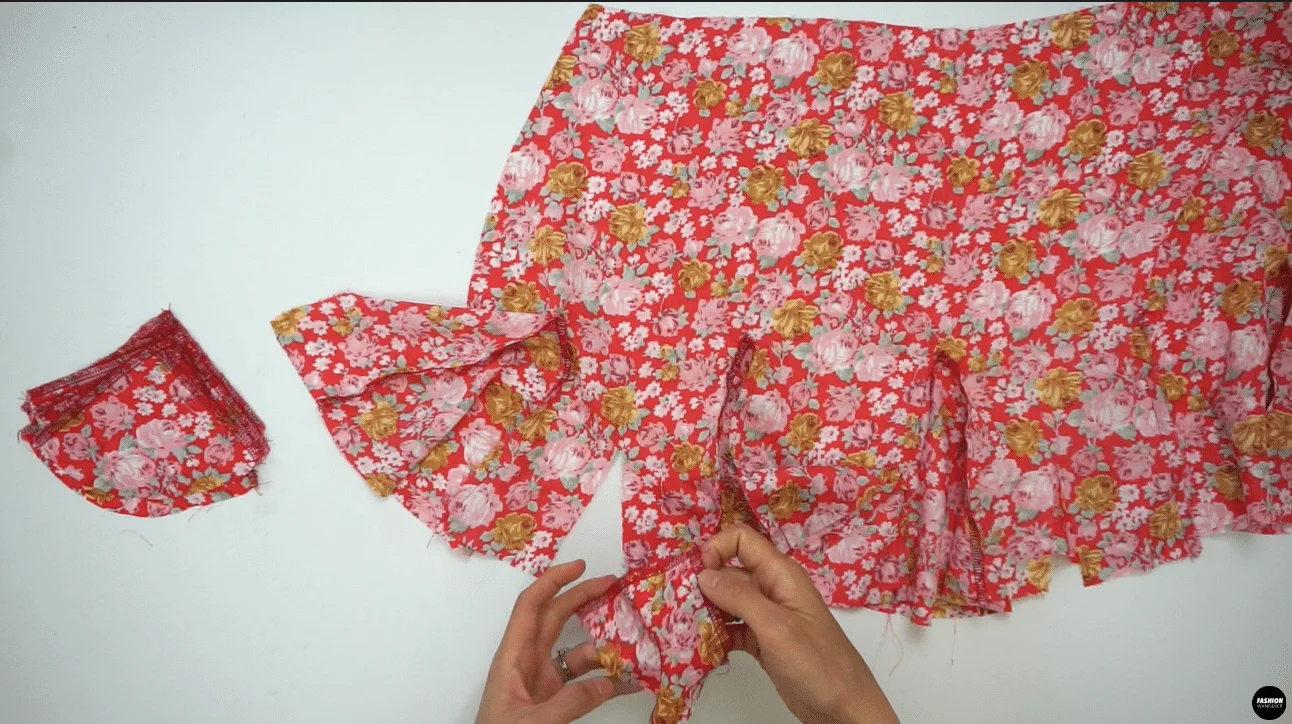
- Give a nice press afterward so the seam allowance is away from the triangle Godet pieces all around the Front Skirt.

- Do the same to add Godet #1 and Godet #2 on the Back Skirt by placing right side facing each other to sew ⅜” straight from hem to the point. Then, sew other side with ⅜” seam allowance until where the two seams intersect. Press the Godet afterwards and set aside.

- Place right side of the Front Skirt and right side of the Back Skirt facing each other along the side seam. Measure 4” above the hemline and pin both pieces together. This will be your remaining Godet #2 locations. Do the same on the other sides. Sew the side seams with ⅜” width seam allowance.
- Insert the Godet #2 pattern piece on the right side of the Front Skirt and sew ⅜” width seam allowance to the side seam ends. Then, sew other side to Back Skirt with ⅜” width seam allowance. Finish the raw edges with overlock stitch and press the side seam open and seam allowances away from triangular shape godet.

How to Sew Drawstring Tie Front Waistband Skirt
- Place right side of the Front Waistband and right side of the Back Waistband and sew ⅜” width seam allowance on both side seams. Press the seams open and fold the waistband lengthwise in half and press with iron.
- In the Center Front of the waistband, measure ½” away from the folded edge and mark with water erasable pen. Then, measure ¼” away on both sides to indicate the opening for the drawstring tie. The opening of the tie is ⅜” long. Use buttonhole foot and a small button that is ⅜” in circumference to make the opening.
- Next, double topstitch around the waistband ½” apart from the folded edge.
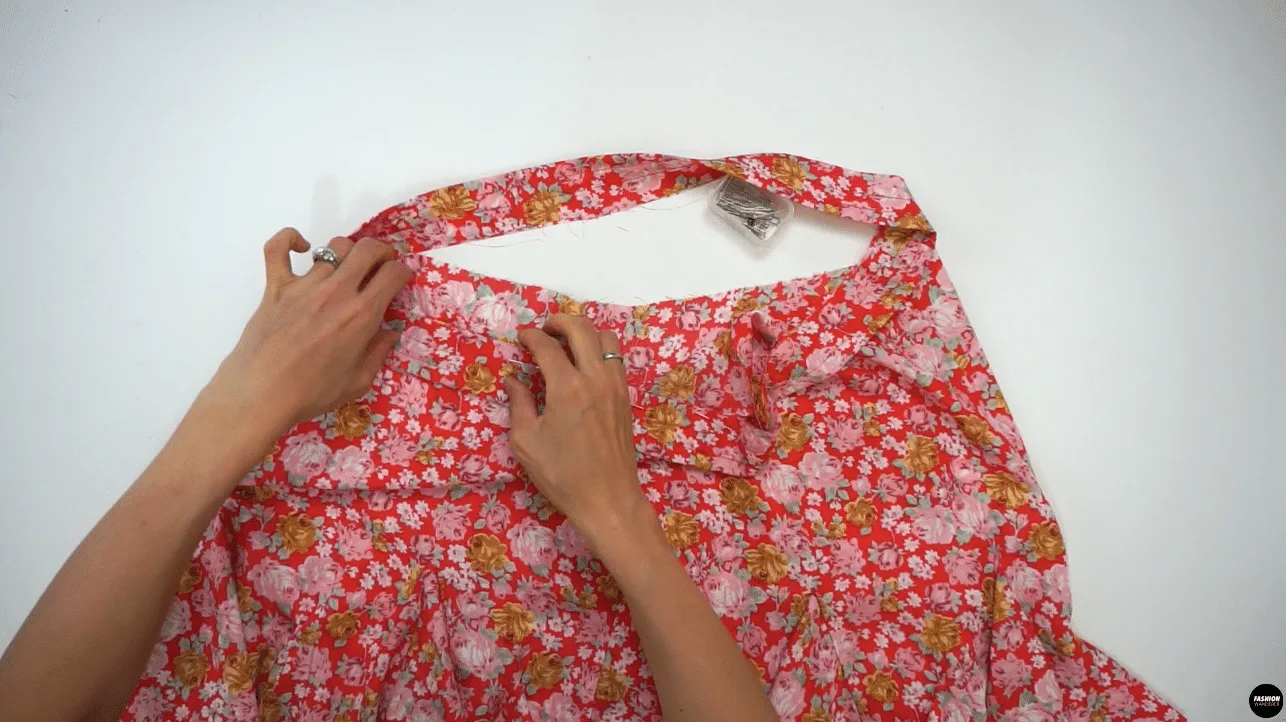
- Slide the waistband through the Skirt by matching Center Front, Center Back, and side seam notches. Pin and sew ⅜” width seam allowance around the waist opening, and finish with overlock stitch. Press the seam allowance toward the skirt.

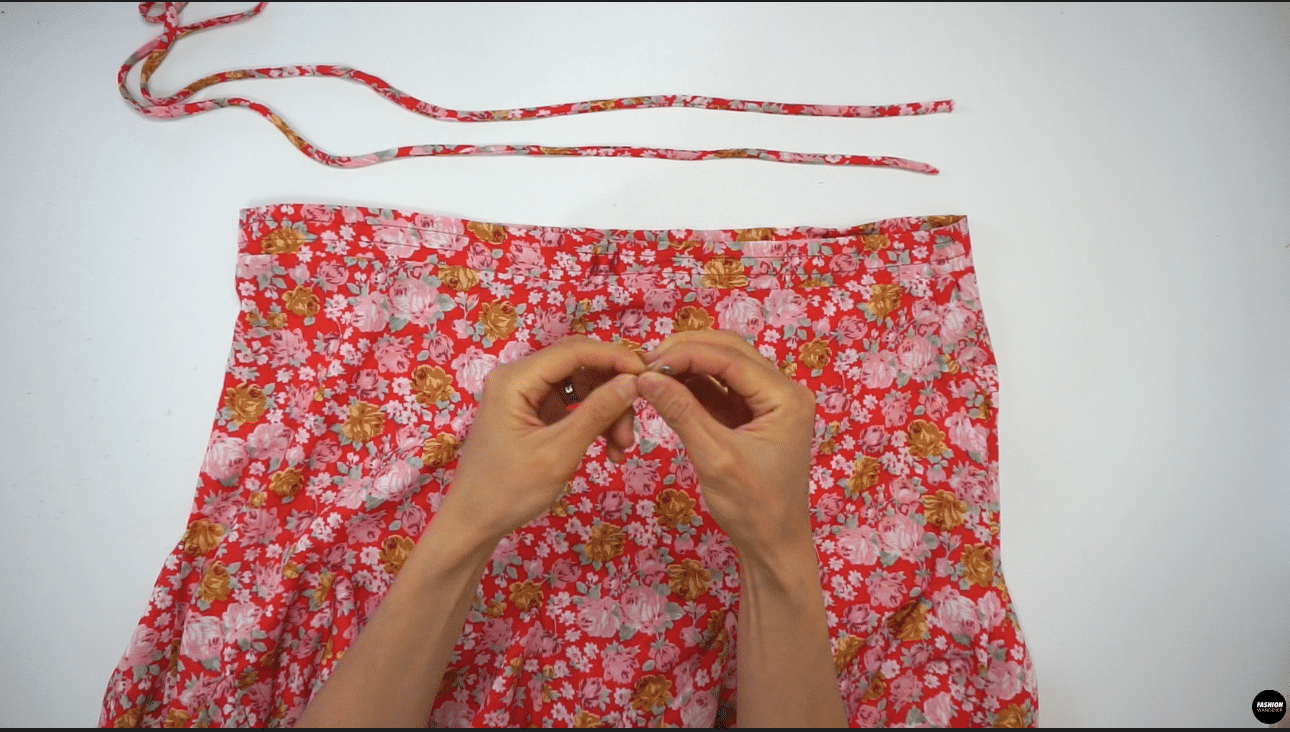
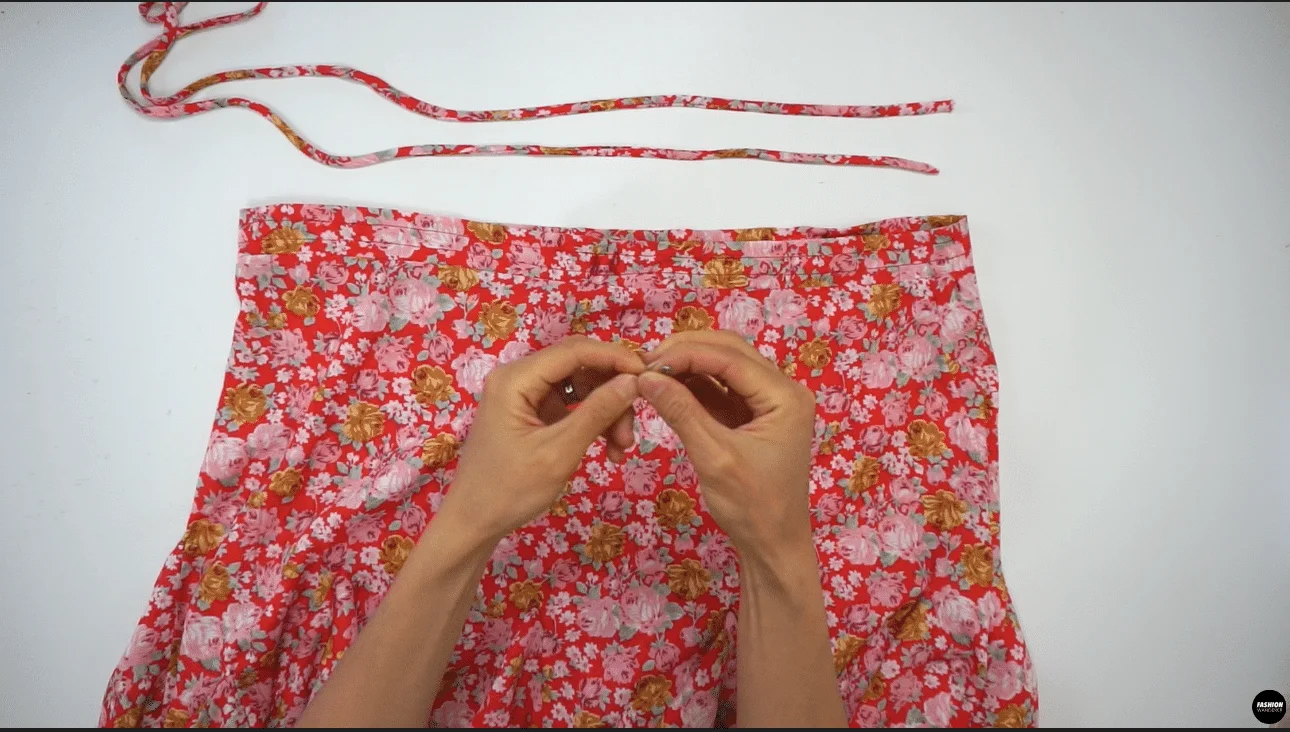
- Join the 2 pieces of 1” width and 30” long bias cut on one side and stitch diagonally to make it into one piece. Trim the edges and press the seam open. Fold the strap lengthwise facing right sides together and straight stitch ¼” width seam allowance. Use a loop turner to flip the strap inside out. Press gently to shape the drawstring tie.
- Use small size safety pin to attach one end of string and slide through one of the waist openings. Take time to slide around the waistband so the safety pin comes out on the other end of opening hole.
- Finish the hemline with overlock stitch, then fold inside and ¼” width single fold hemline around the skirt opening.
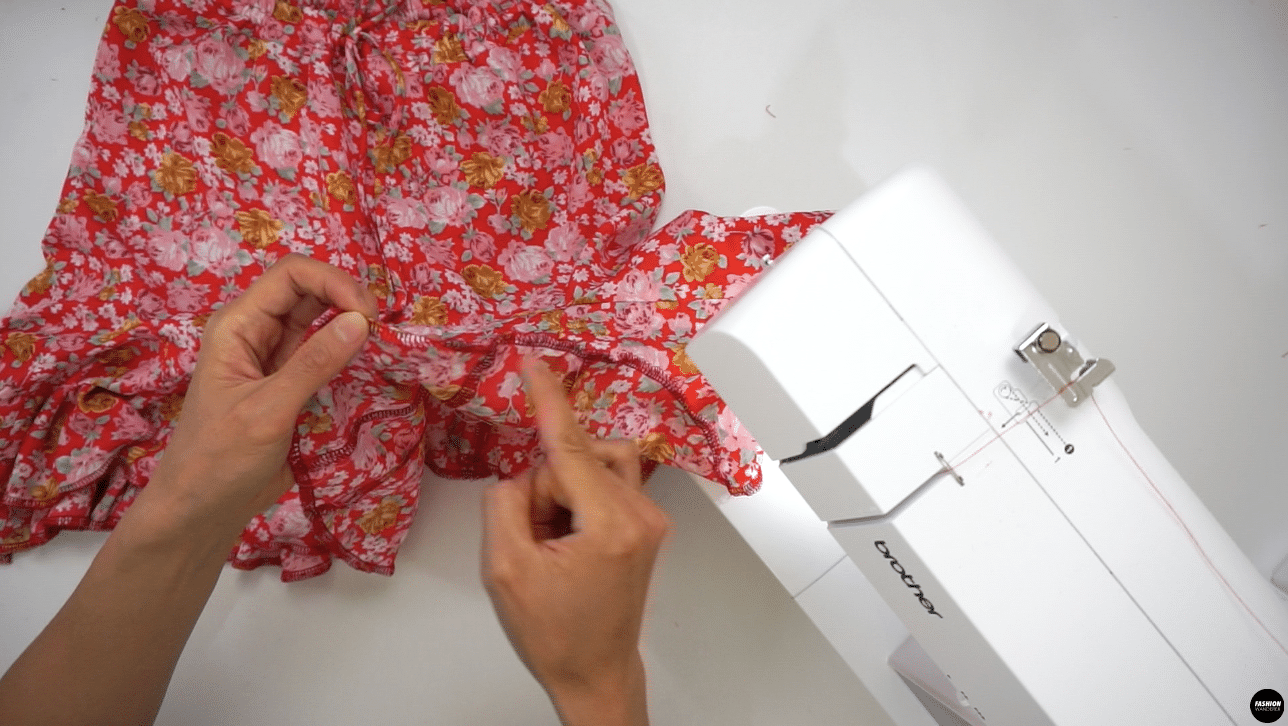

- Adjust the gathering along the waist opening by tying a cute bow at center front to complete this Stella mini skirt. Give one last press all around and pair with any cropped length top as you wish.
Recommended Products
As an Amazon Associate and member of other affiliate programs, I earn from qualifying purchases.


Trendy, Affordable Sewing Patterns for All Sizes


Tie Shoulder Jumpsuit Pattern


Palazzo Pants Sewing Pattern


Pocket Overall Romper Pattern


Wrap Maxi Skirt Sewing Pattern


Tie Back Top Sewing Pattern