
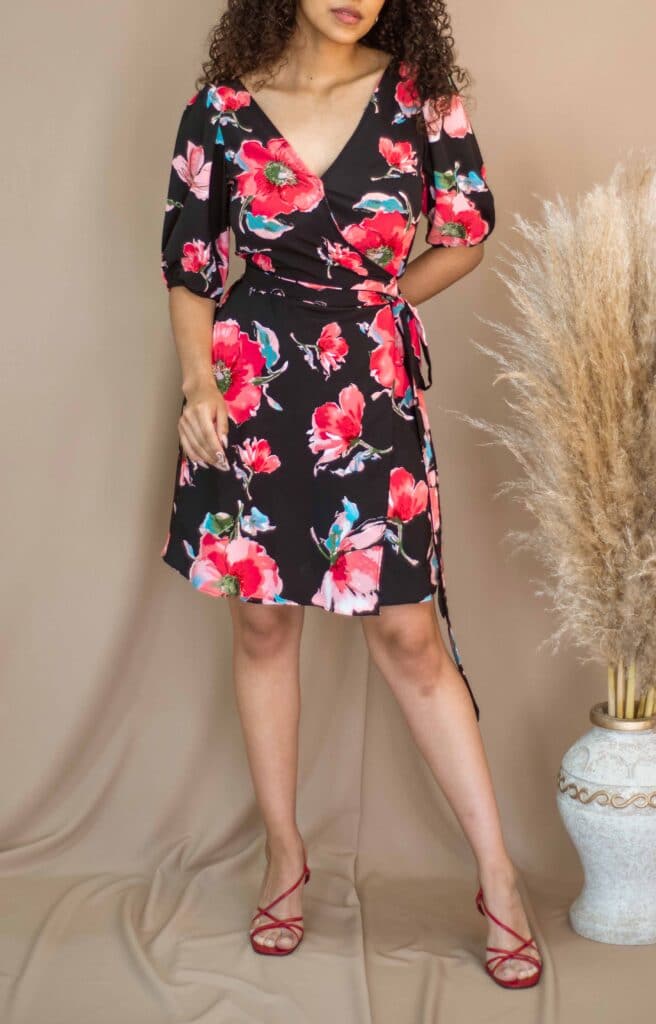
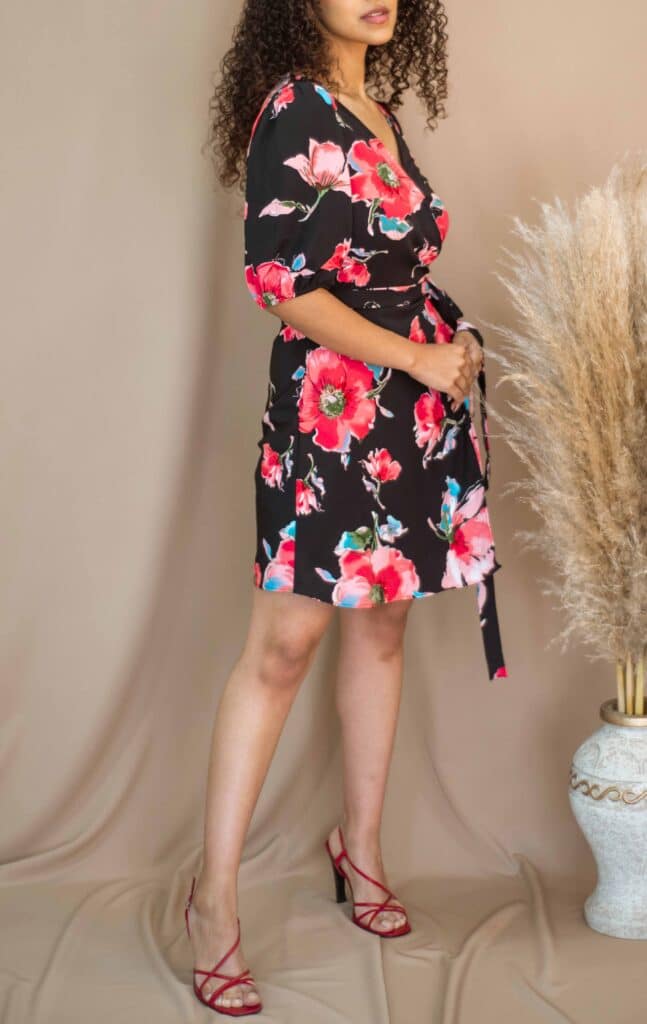
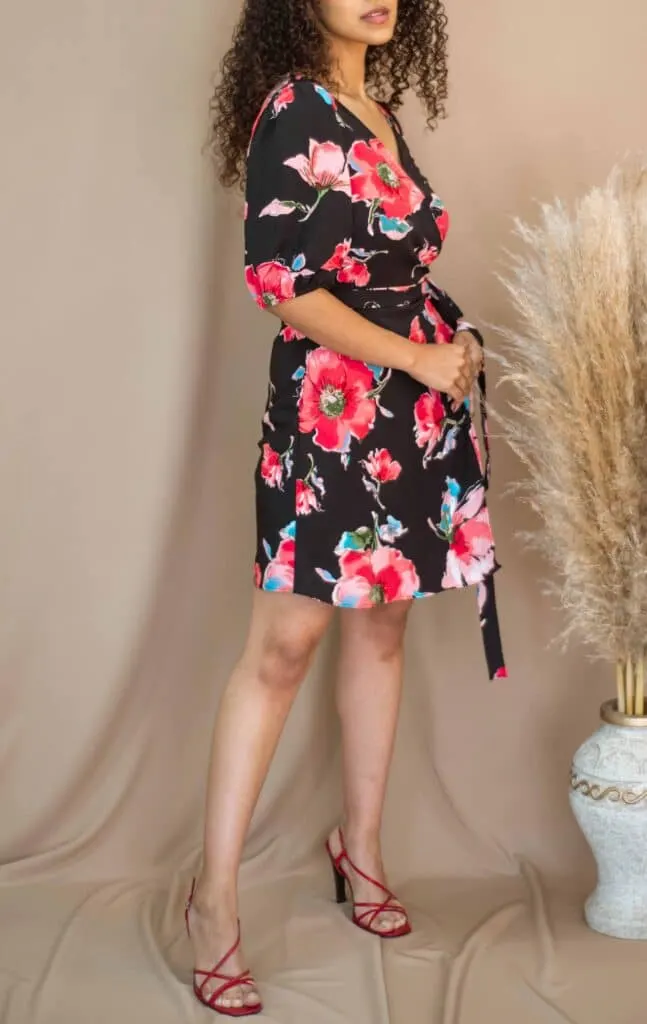
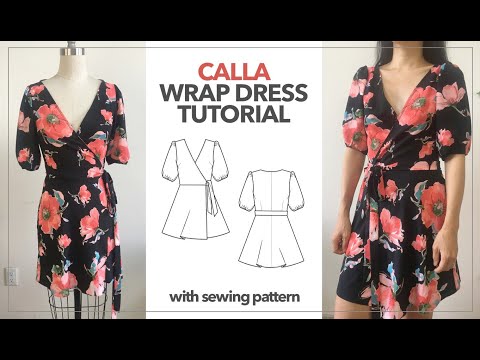
Are you looking for a sewing pattern to make a wrap dress with puff sleeve silhouette? From functional tie strap around your waist to comfortable elastic sleeve detail, this dress design is all you need to accomplish a classic and feminine look.
Subscribe to the email list for the Calla wrap dress sewing pattern. This puff sleeve wrap dress is a perfect addition to your DIY wardrobe.
If you have medium-weight poly crepe, rayon, or even cotton fabric that does not require lining, it’s perfect to convert into this pretty Calla wrap dress.
Fashion Wanderer sewing patterns are adjustable. In this case, you may lengthen to make it into maxi wrap dress with puff sleeve, or even shorten the pattern to make a work-friendly wrap blouse to pair with a pair of pants, jeans, or skirt.

Puff Sleeve Wrap Dress Sewing Pattern


You will love this DIY Calla wrap dress sewing pattern because…
- Each sewing pattern comes with detail instructions, step-by-step photos and video tutorial.
- Easy to assemble the pdf sewing pattern.
- Perfect for beginner and intermediate level.
- You have access to different sizes of the printed pattern.
- Unlimited downloads to reprint when you want!
For this Calla wrap dress tutorial, I used a poly crepe de chine medium sized flower printed fabric. I fell in love with the print, the material is easy to sew and does not need a lining because it wasn’t sheer at all.
So, if you have something similar like I used for this tutorial, go ahead and sew along with me.
However, you should not feel limited. If you have other fabrications and prints, explore your options to create your own unique version of this wrap dress design.
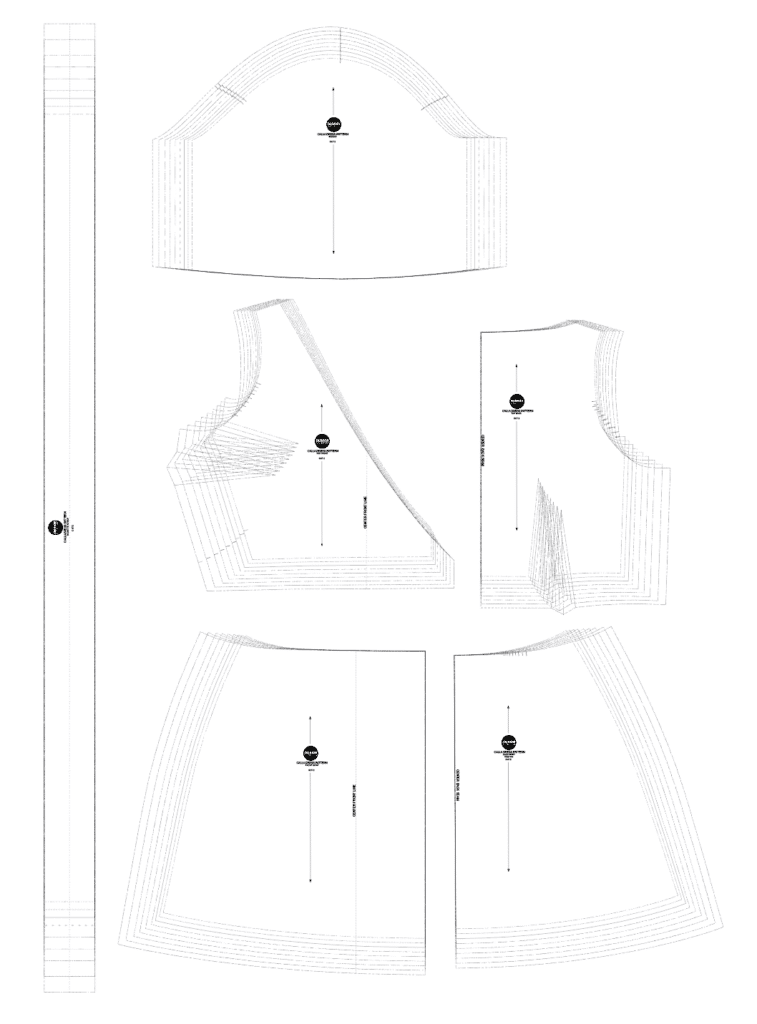
Using a sewing pattern is so convenient. Use your body measurements and cut the size that fits you. Each sewing pattern indicates dotted line designs from size 2 to size 12, so make sure to have correct sizing from the chart on our website.
How do you make a Calla wrap dress?
In order to accomplish this pretty Calla wrap dress, determine fabric choices and prepare in advance by washing, air drying and ironing before you cut and sew. By doing so, you will have even cutlines and seems, and the finished dress will also be clean and ready to wear right away!
DIY Calla Wrap Dress Materials:
- Calla Wrap Dress sewing pattern
- 1¾ to 2 yards of medium weight fabric
- ¼” Width Elastic Band
- Sewing Machine
- Loop Turner
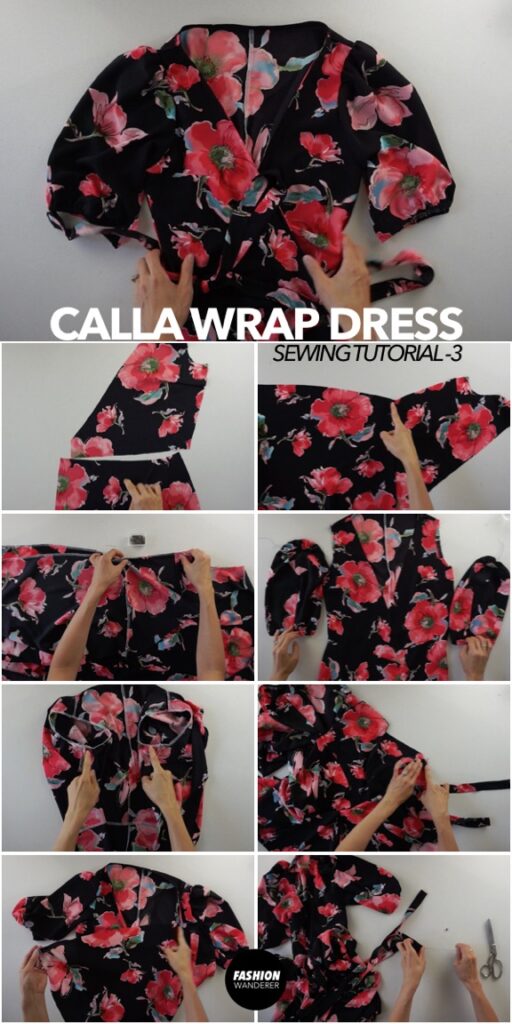
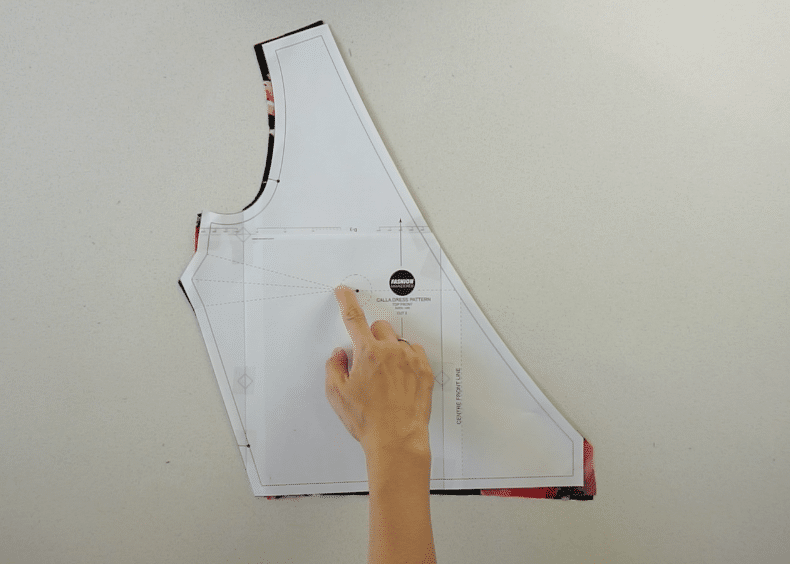
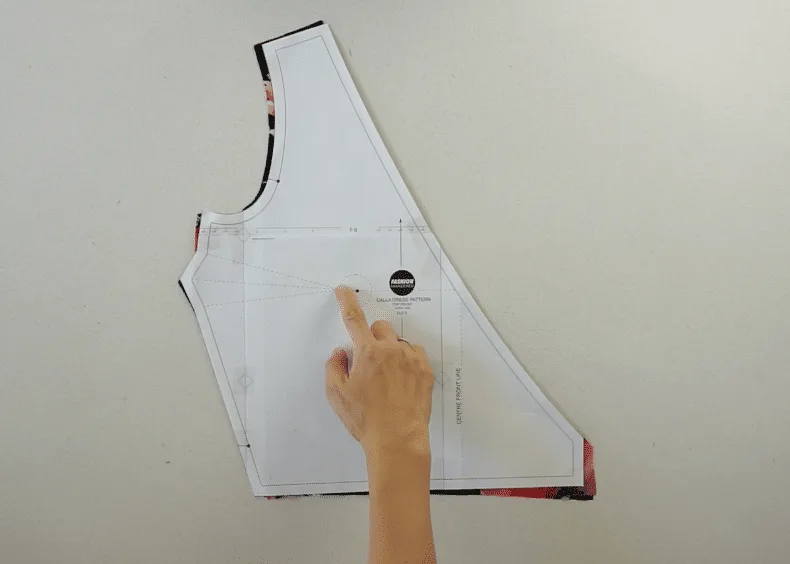
To make the calla wrap dress, print the pattern and cut out each piece.
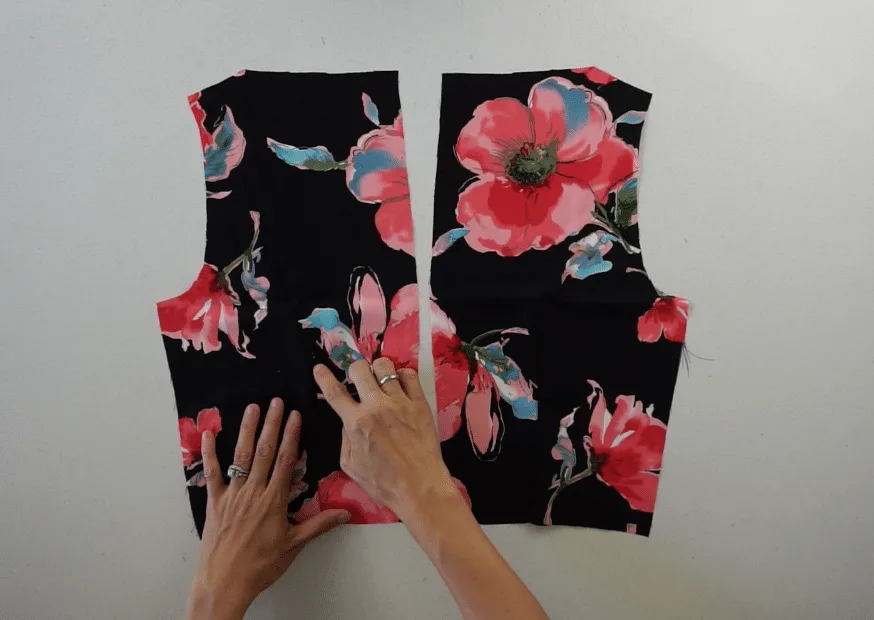
Close the bust darts on the front and back bodice pieces.
Make the puff sleeves, with shirring on the shoulders.
Make both waist straps.
Attach the back bodices, sew the back skirt, and complete the back of the dress.
Attach the front bodice pieces to the front skirt pieces.
Attach the dress pieces along the shoulder seam and side seam.
Join the puff sleeves to the bodice.
Attach the waist strap to the waistline.
Clean finish the neckline with a ¾” wide bias strap.
Clean finish the front opening and hemline to finish the Calla wrap dress.

DIY Calla Wrap Dress Sewing Tips:

In this DIY Calla wrap dress, you will learn various methods to complete the sewing project. Simply print out and pick your size to cut out.
As you sew along, I’ve put together sewing tips that will help you to have fool-proof sewing journey. Read them through and always do a test stitch on a piece of fabric before getting started.
- Sewing Machine: When first starting the sewing process of your Calla wrap dress, make sure to thread the machine correctly. Also, change the thread color if you need overlock machine to use for this project. Test on a scrap of fabric to make sure you don’t have any skipping stitches or other issues moving forward.
- Needle & Thread: If you stick with medium-weight non-stretch woven fabric, you may keep a universal sewing needle and polyester-blend thread for Calla wrap dress. If you can’t find the matching color for thread, try to go with a similar tone as the background color of the fabric.
- Stitches: For this tutorial, you will use overlock stitch to finish the raw edges inside, and straight stitch to join two pieces together. The average straight stitch on a sewing machine is 2.5mm, which is about 10-12 stitches per inch. Depending on the sewing machine brand, you may choose 0 to 3 for any medium-weight fabric.
- Loop Turner: In order to make the waist strap for the Calla dress, you will need to cut two separate straps. I used a loop turner to turn each strap inside out. But if you don’t have the tool in your sewing kit, you can also use a safety pin to make it work. Make sure the safety pin is small enough to travel through the strap tunnel and slide it through to the other side.
- Inbinding: Using self fabric inbinding is great finishing execution along the neckline. In order to make your own, simply fold the remnant fabric in half (or bias) and cut ¾” width straps. By doing so, it will create nice curve along the neckline. Press with an iron after opening up the first ¼” topstitch, then easily turnover the inside edge to create a sharp neckline. If your fabric is slightly too thick to double fold, you can also use same color fabric that is lighter weight.
Don’t forget to signup to the email list above to get the wrap dress sewing pattern. The printable pdf file will be sent to you immediately!

How To Make A Calla Wrap Dress With Sewing Pattern
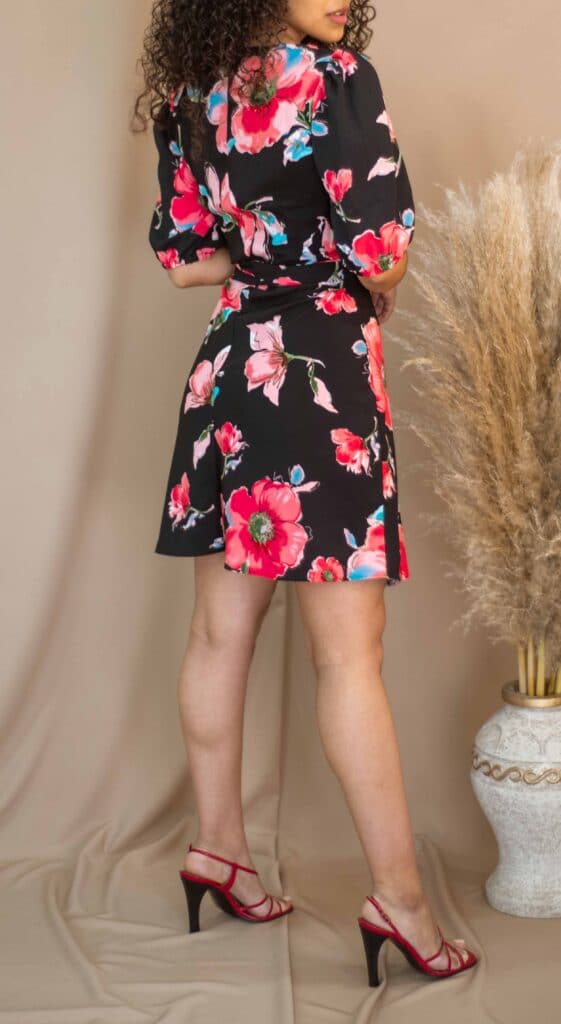
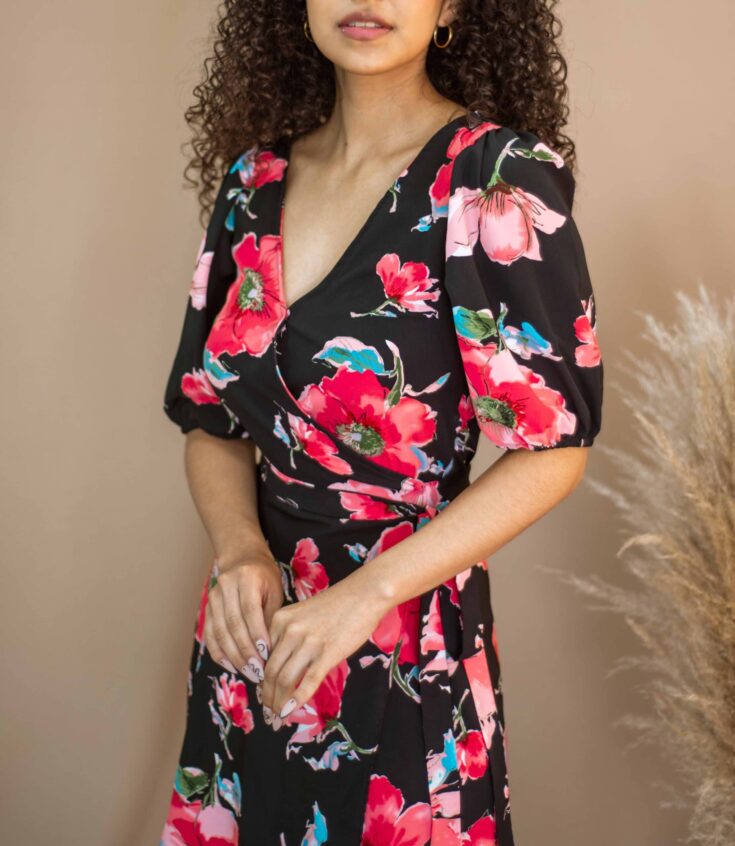
If you are obsessed with puff sleeve, then you will love this Calla wrap dress. Slight shirring around the shoulder and nicely snugged cuff with elastic gives an elegant look to the design.
Simply sew along by following the instructions and copy the sewing pattern on a piece of your favorite fabric. After assembling the pieces together, give a nice steam iron and enjoy your new wrap dress!
Materials
- Calla Wrap Dress Sewing Pattern
- 1¾ to 2 yards of medium weight fabric
- ¼” Width Elastic Band
Tools
- Sewing Machine
- Loop Turner
Instructions
- For this Calla wrap dress tutorial, start by assembling the pattern pieces.
- Fold a piece of fabric in half, and pin the paper pattern to the fabric.
Also, pin around the edges so that the two layers of fabric remain taught.
Copy the front bodice,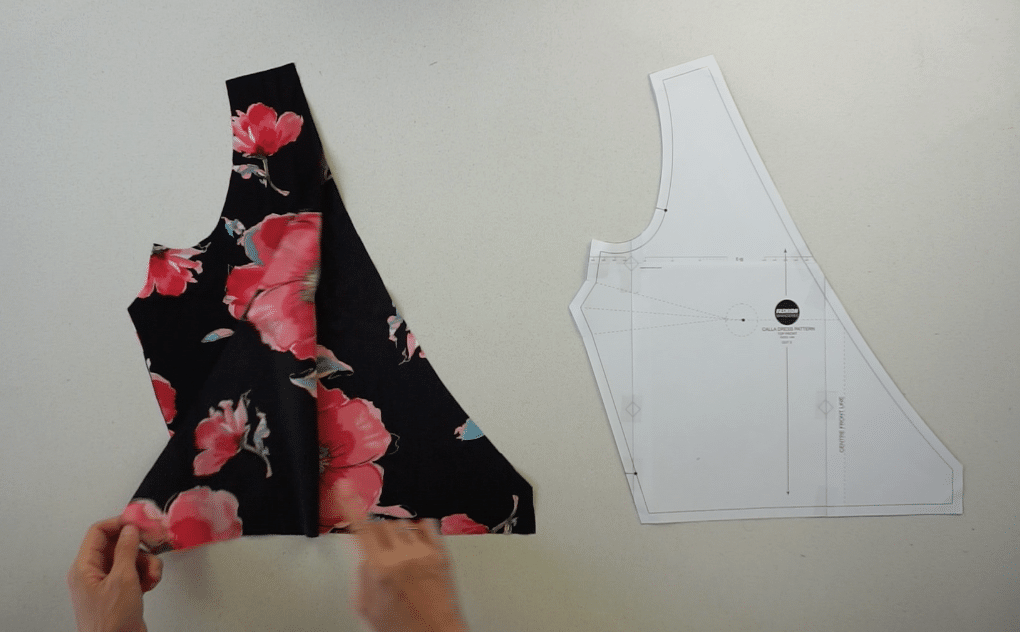

and also the back bodice pieces.
- Fold another piece of fabric in half, pin to secure and copy the puff sleeves,
waist straps,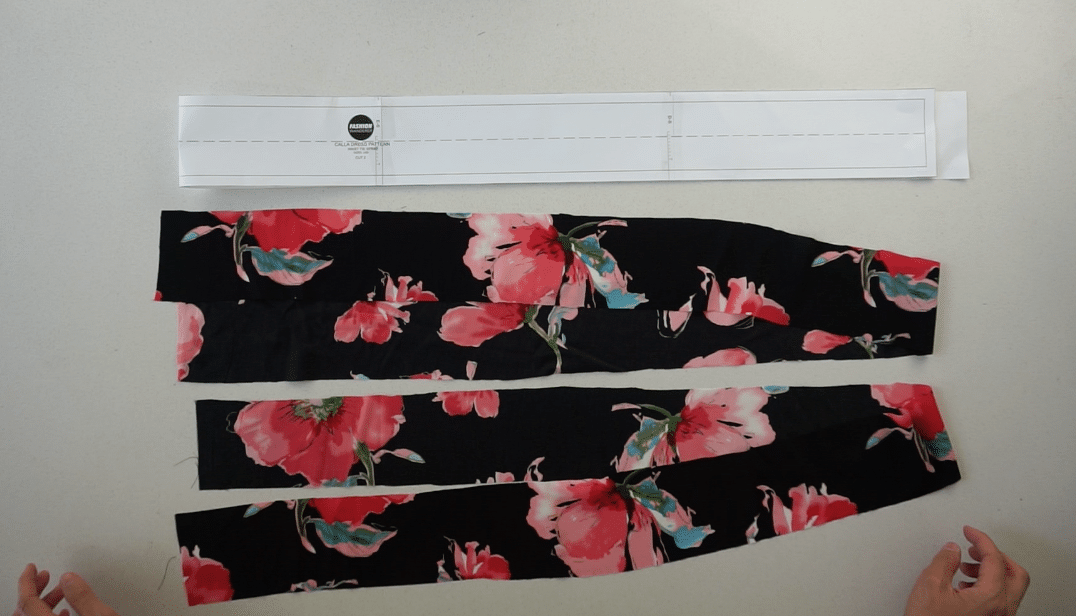
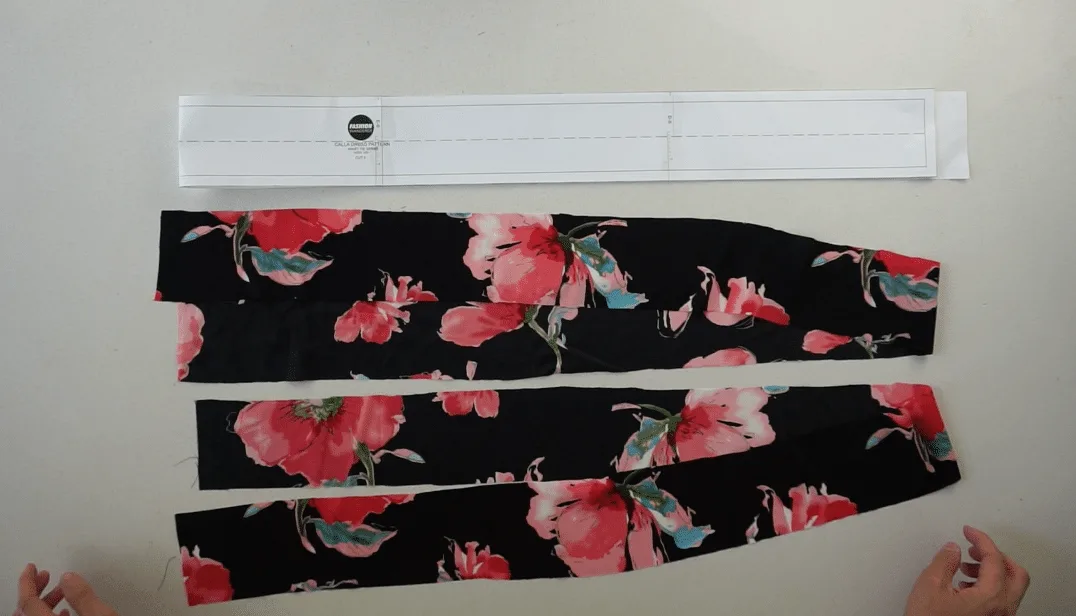
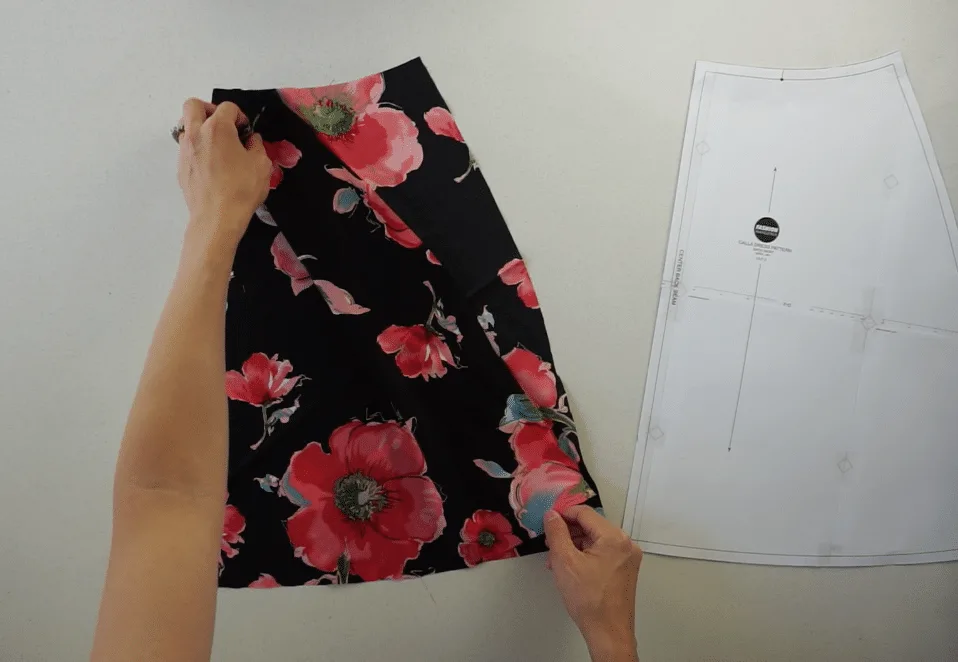
front skirt,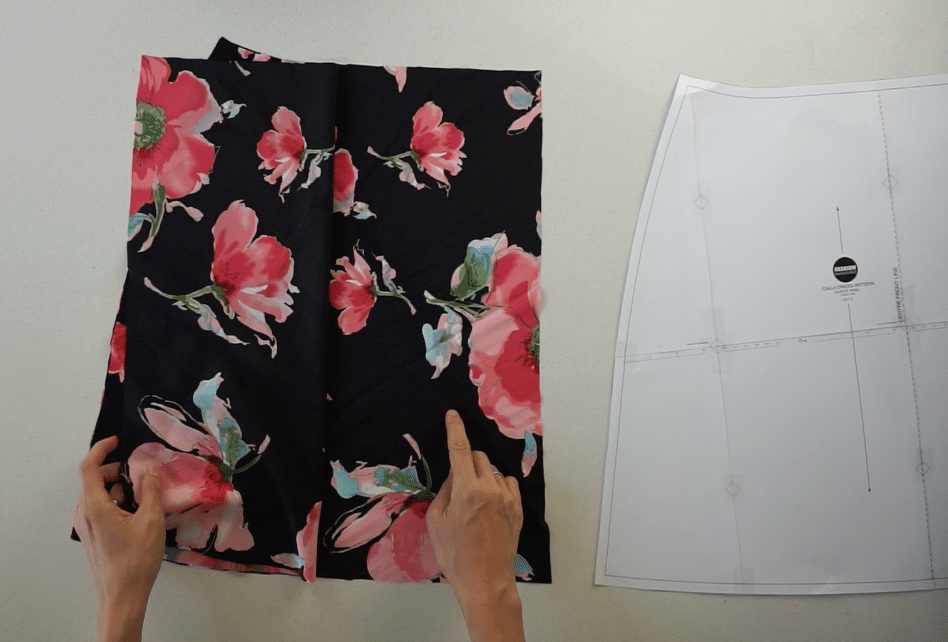

and also the back skirt pieces.
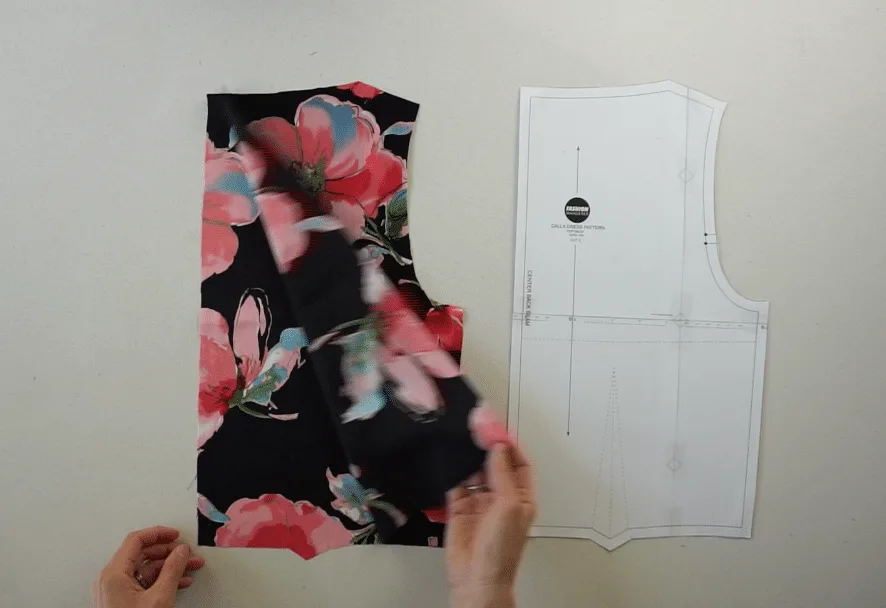
- To close the bust dart on the front bodice piece, locate the position of the dart on the pattern piece.
Line up the dart on the fabric and mark with chalk.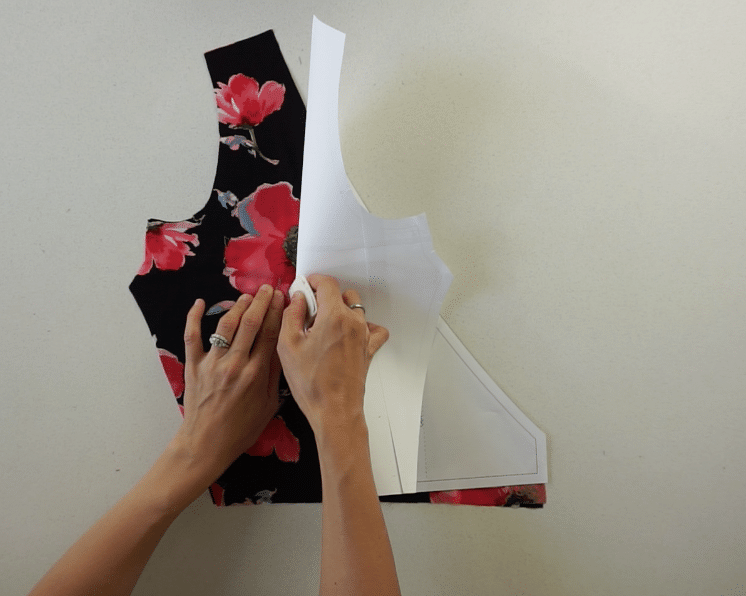

Fold the fabric along the marking, pin to secure and close the bust dart.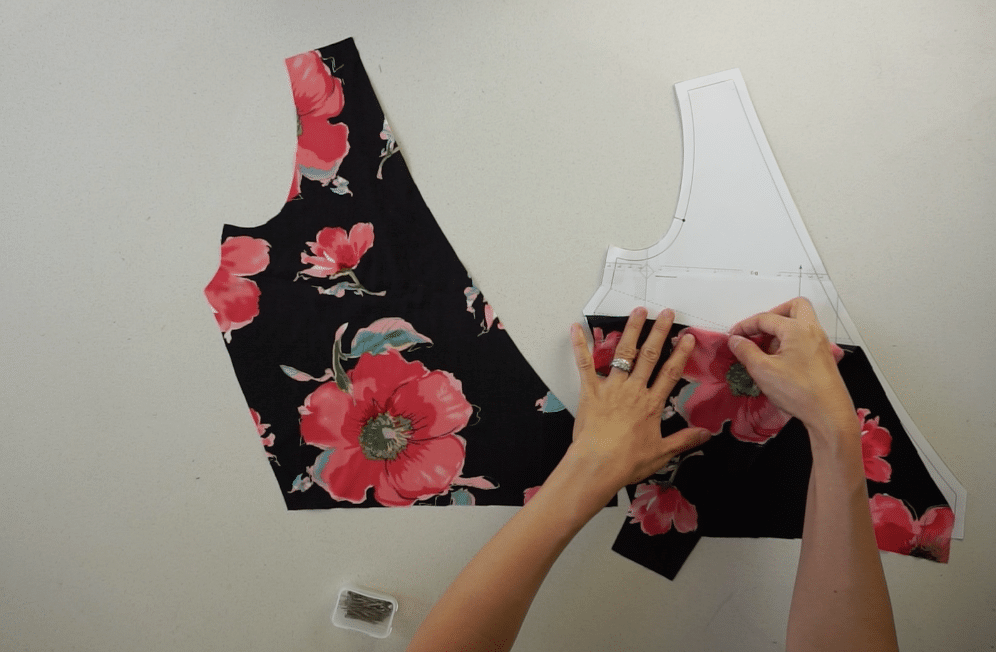
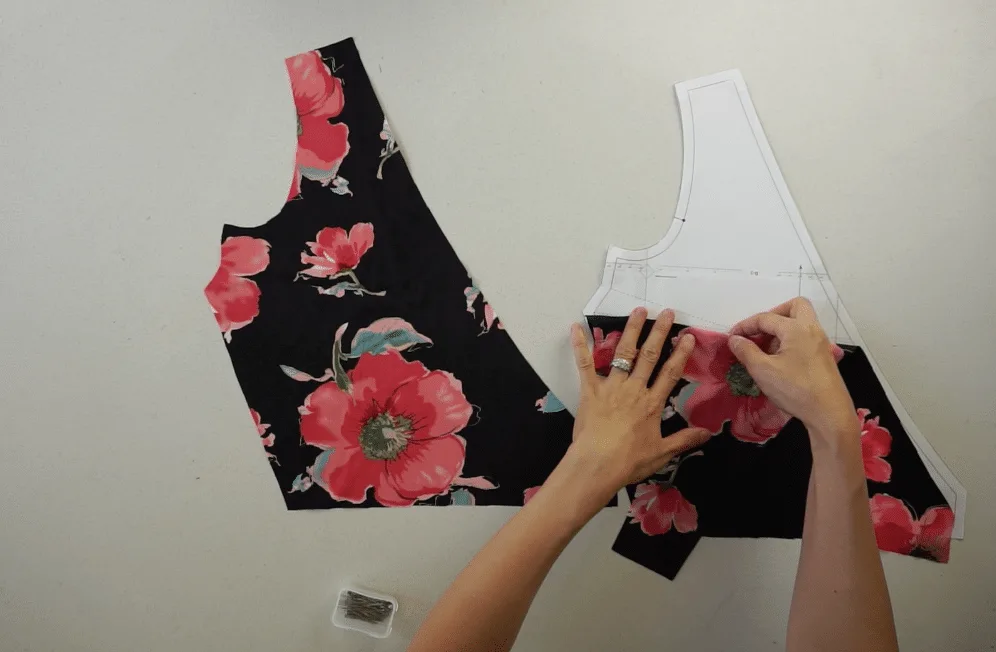
Copy the bust dart onto the other front bodice piece.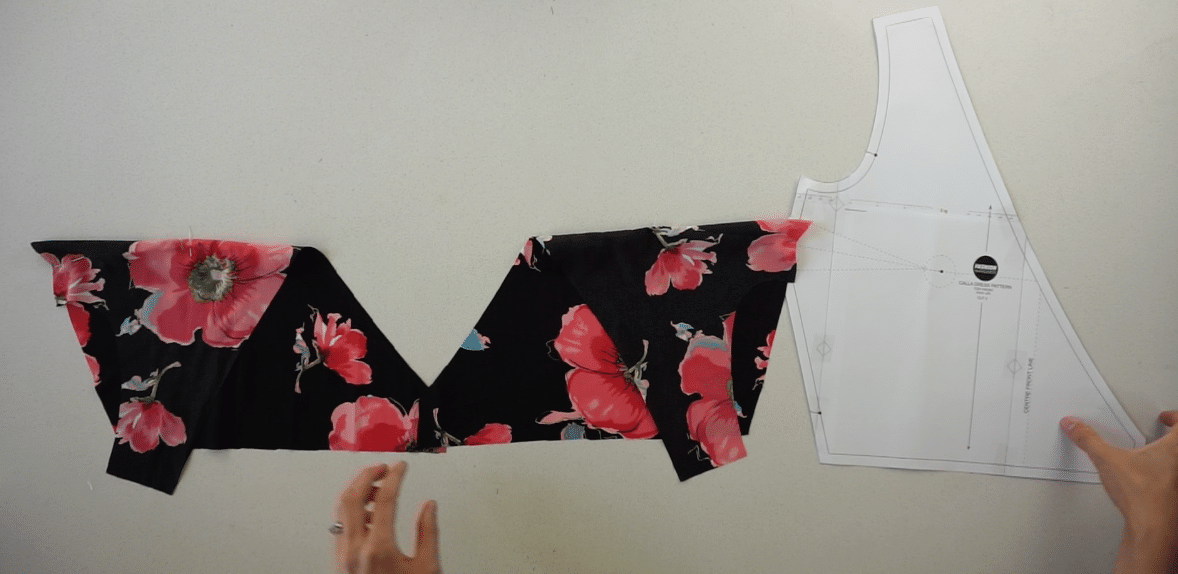

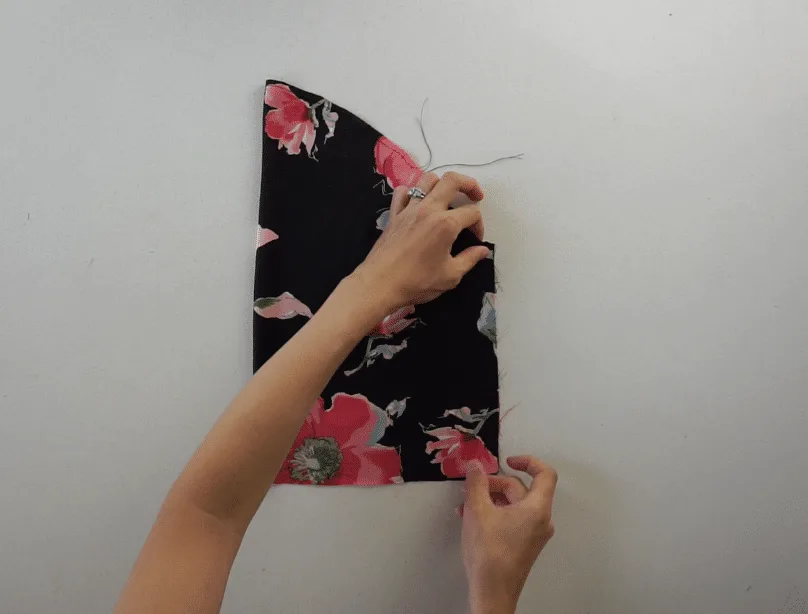
- To close the bust dart on the back bodice piece, locate the position of the dart on the pattern piece.
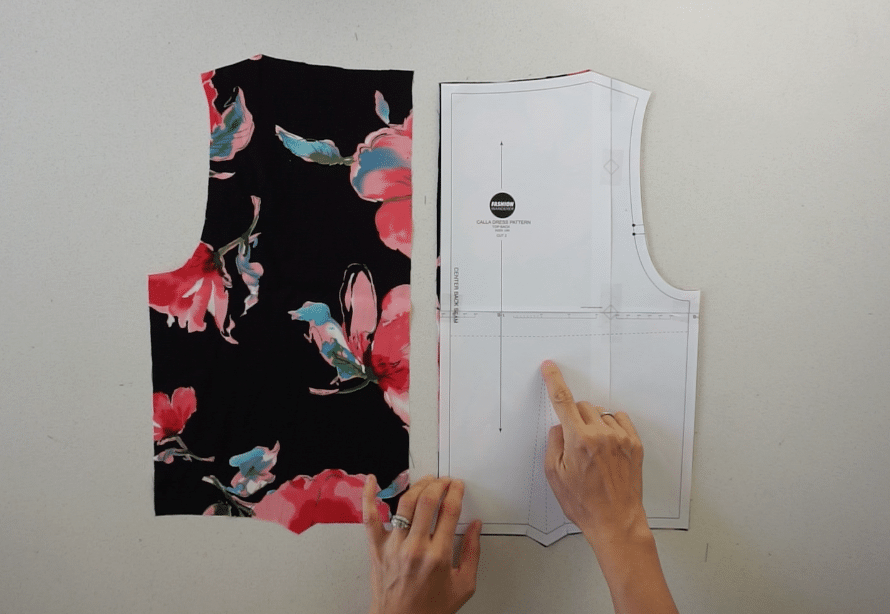
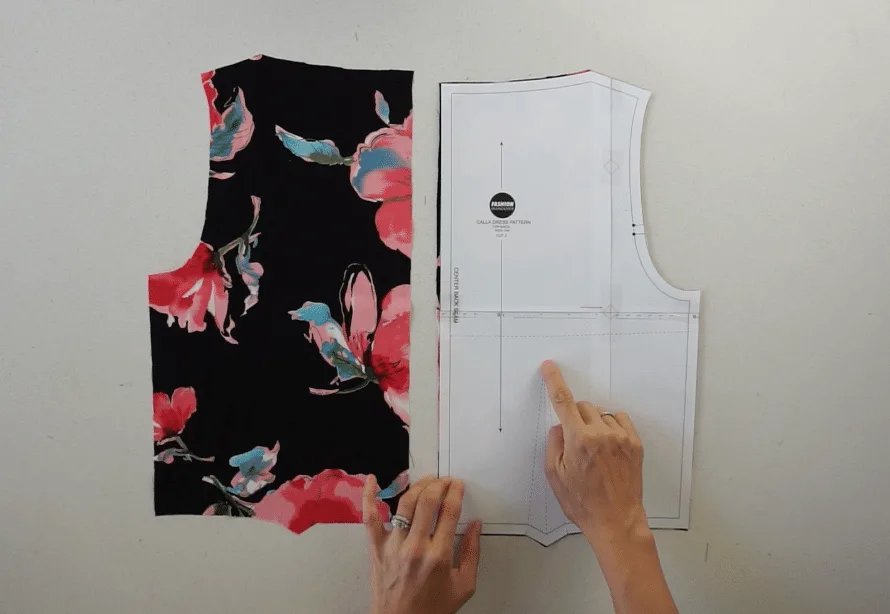
Line up the dart on the fabric and mark with chalk.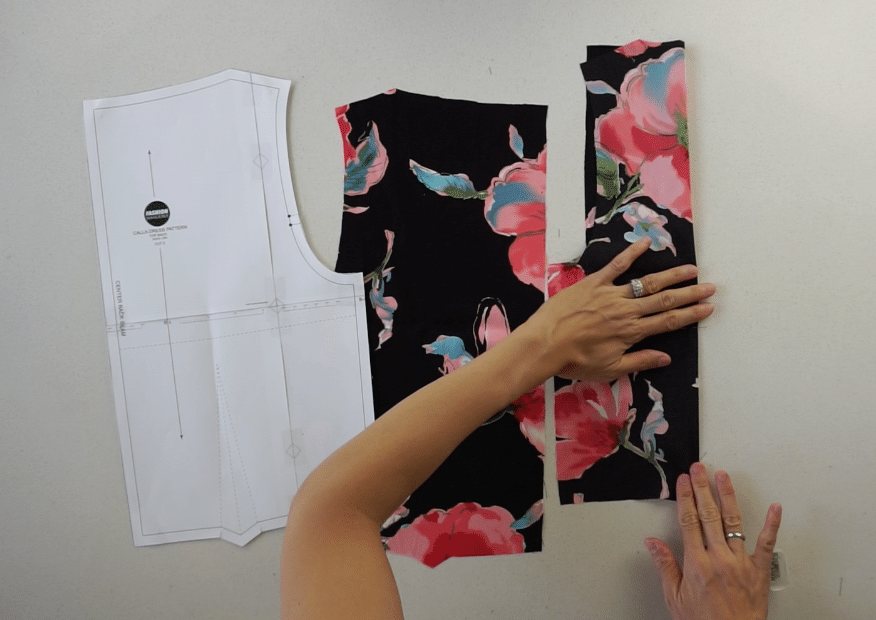

Fold the fabric along the back dart, pin to secure and close the back dart.
Copy the back dart onto the other back bodice piece.
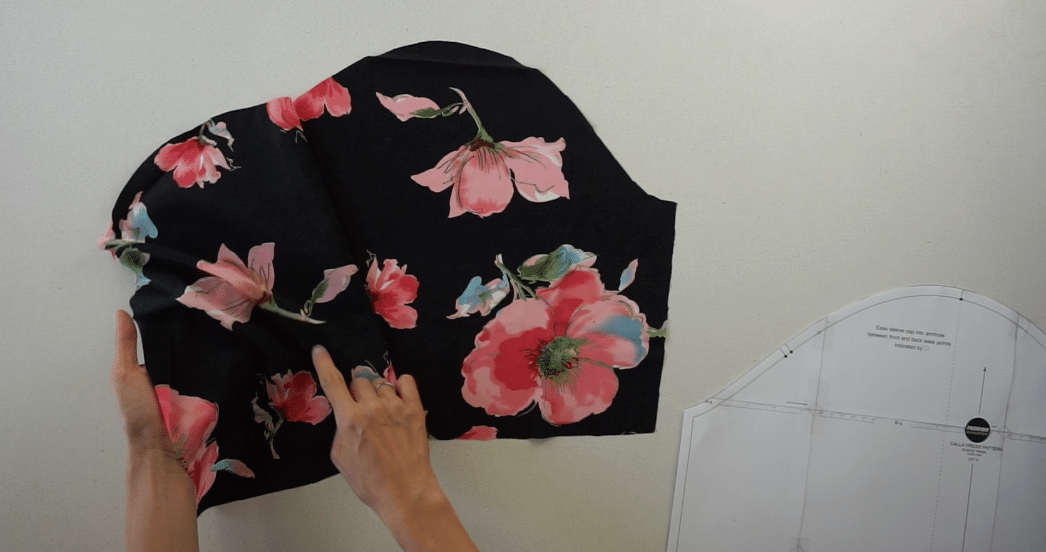
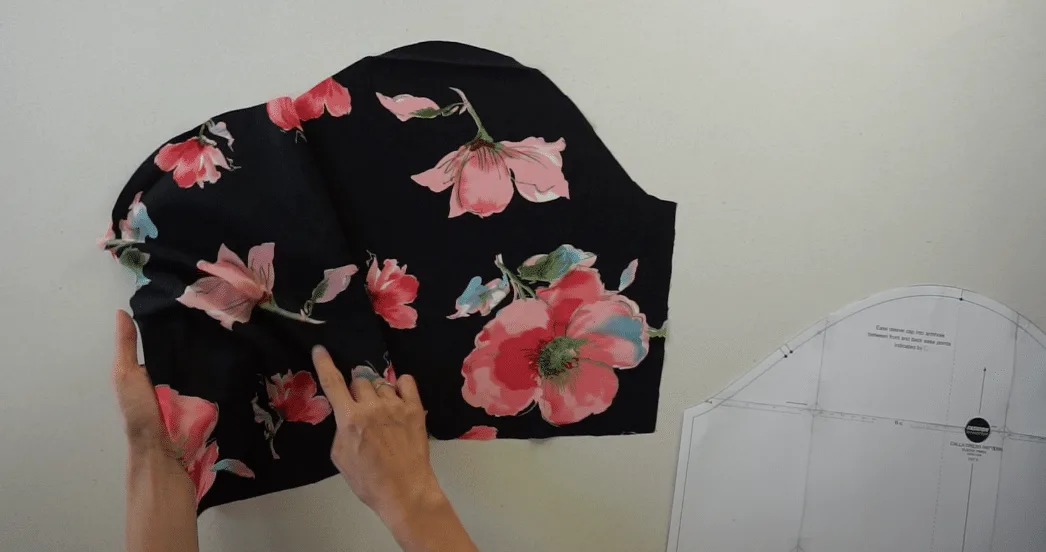
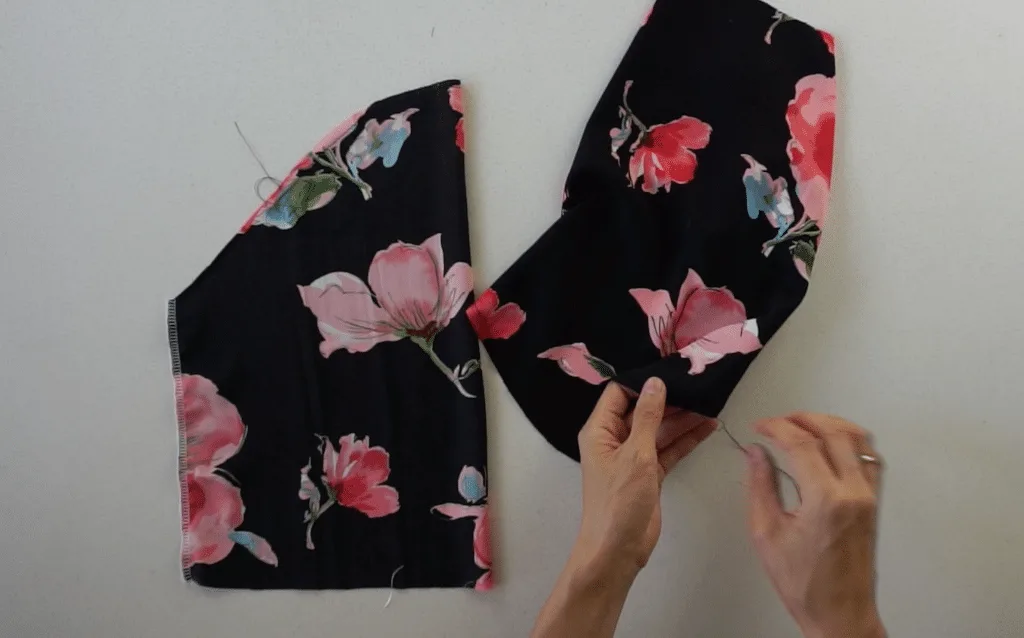
- To make the puff sleeves, use a wide stitch width and sew along the top edge of both sleeves.
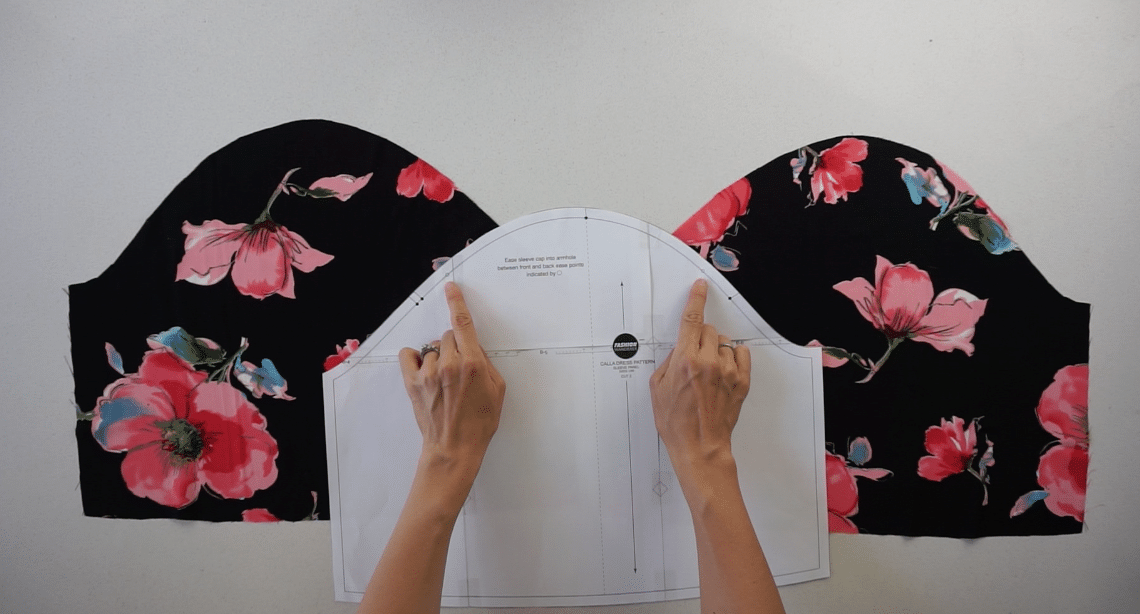
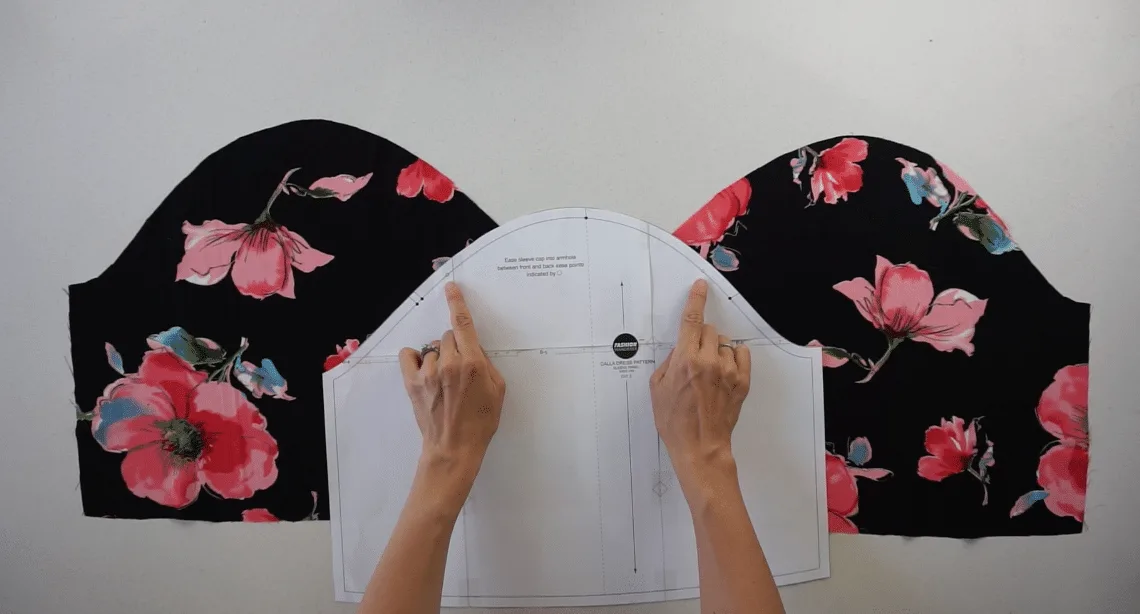
Next, fold the sleeve in half and join the sleeve seam with the right sides facing together.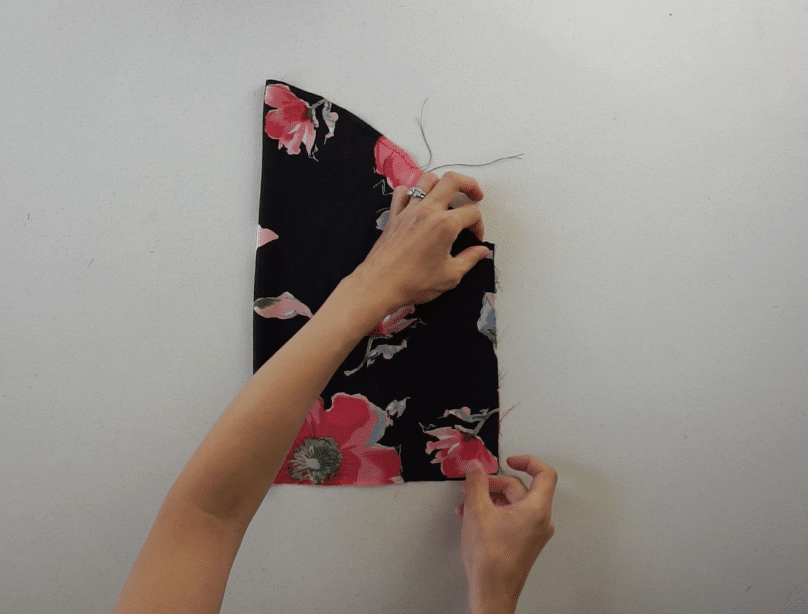
- To add shirring to the shoulder, flip the puff sleeve inside out and pull on the back thread to bunch the fabric.

- To complete the puff sleeve, overlock or zigzag stitch around the sleeve opening.
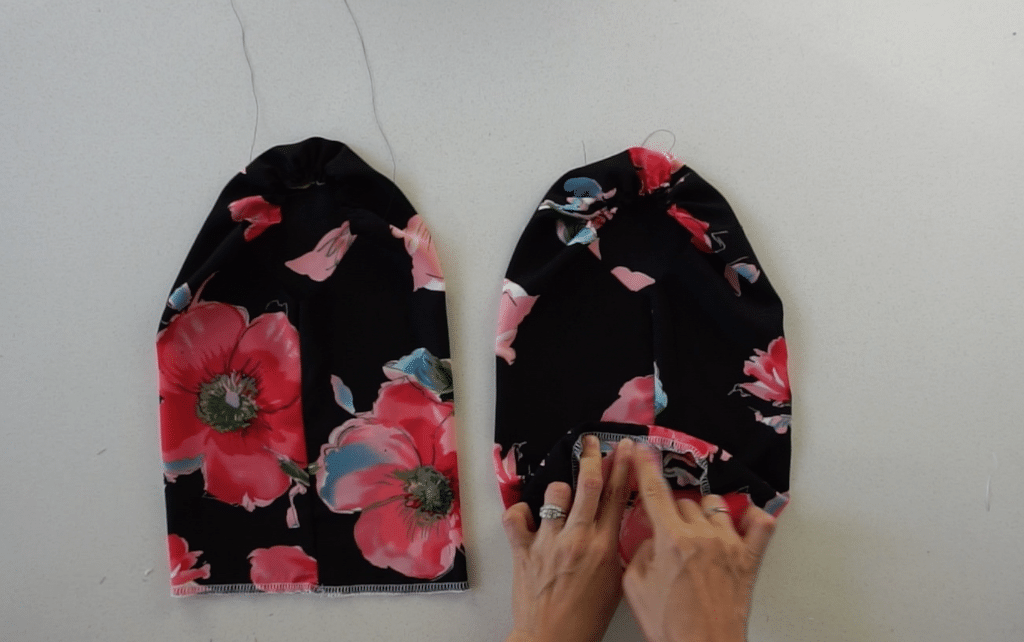

Then, fold the sleeve opening ½” and edge topstitch to make a tunnel.
Use a safety pin to slide a piece of ¼” elastic band through the tunnel.
Zigzag stitch to secure the ends of the elastic band, then close the tunnel to finish the puff sleeves.
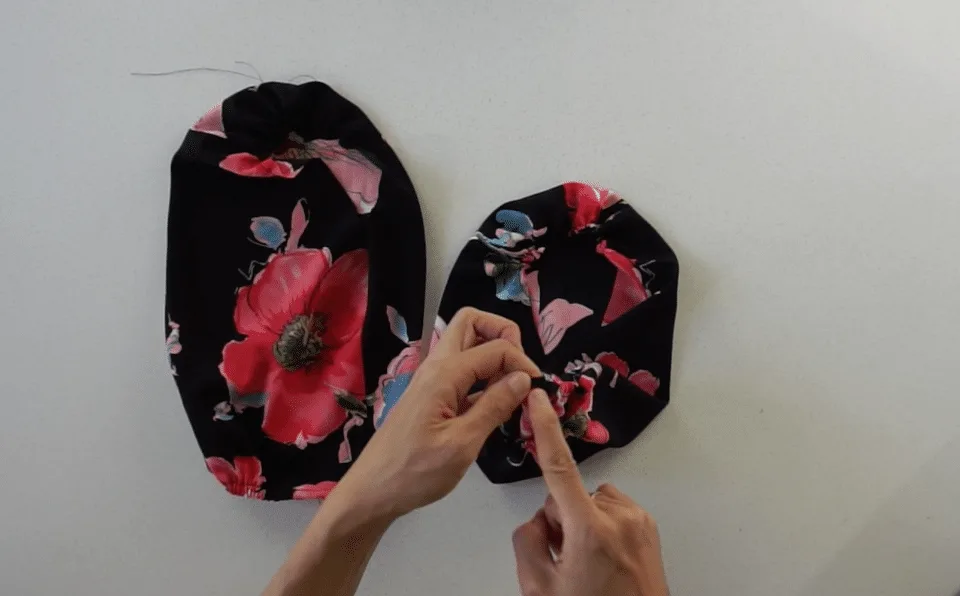
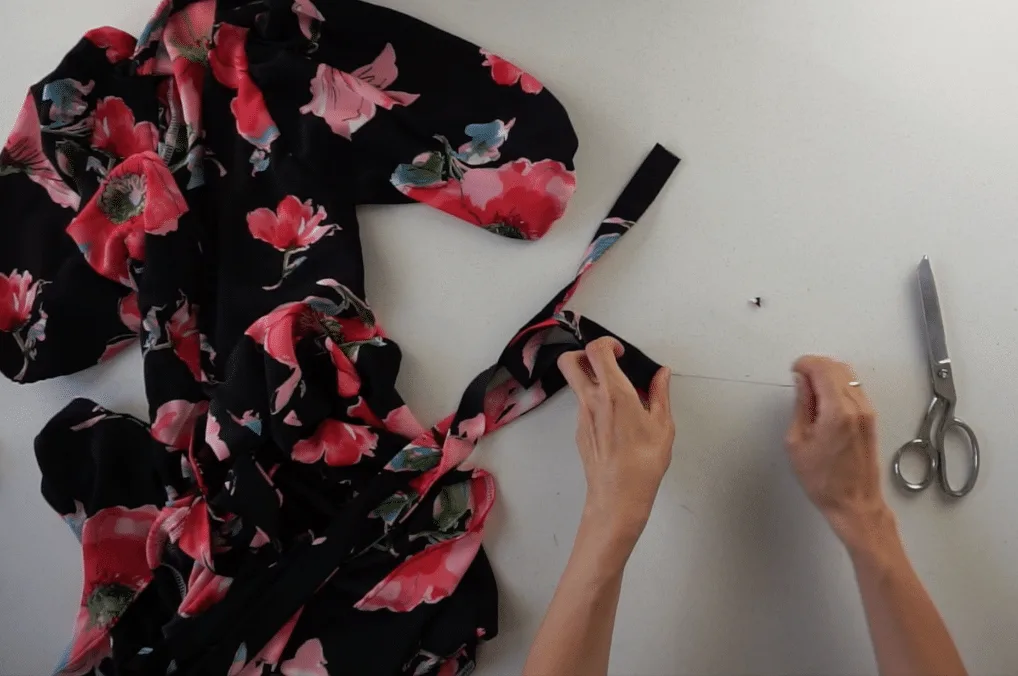
- To complete the waist straps, fold the pieces in half lengthwise and overlock or zigzag stitch along the edge.
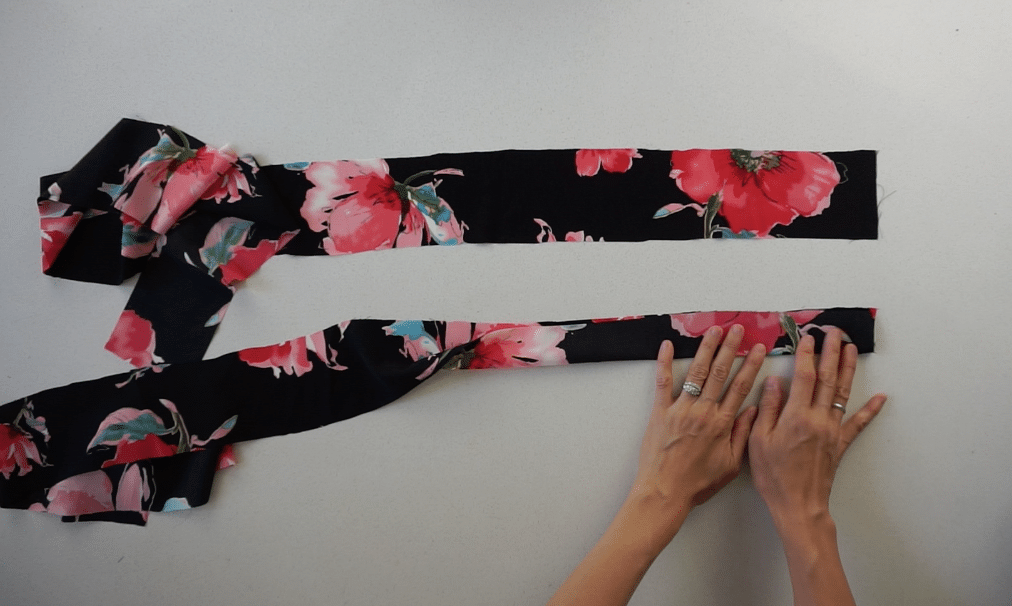

Use a loop turner to flip the waist straps inside out.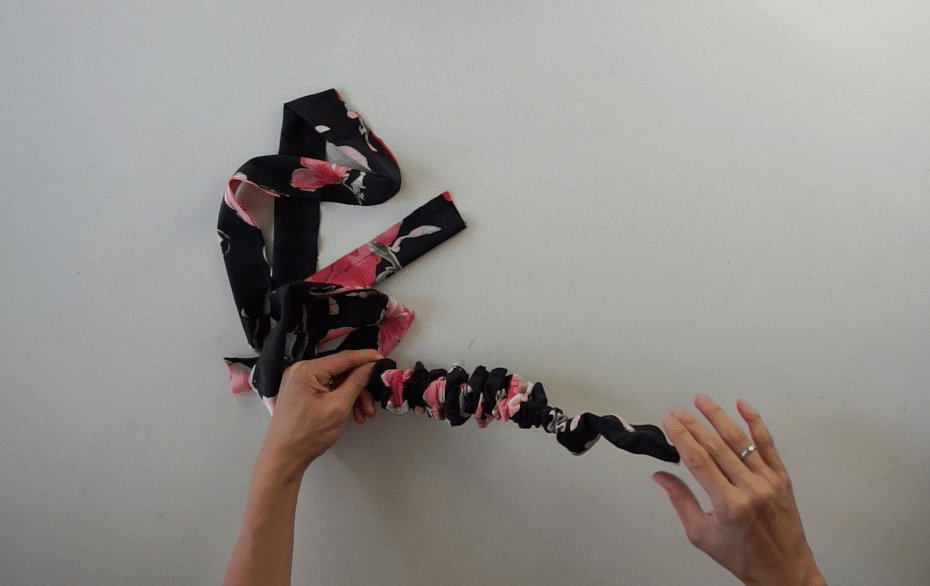

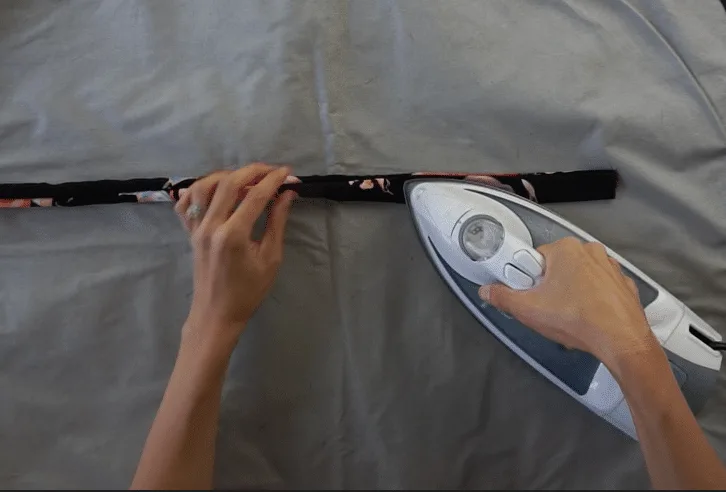
Iron both waist straps to hide the seam along the edge.
- To complete the back bodice, line up both pieces with the right side facing each other.
Sew the center seam to join the back bodice pieces.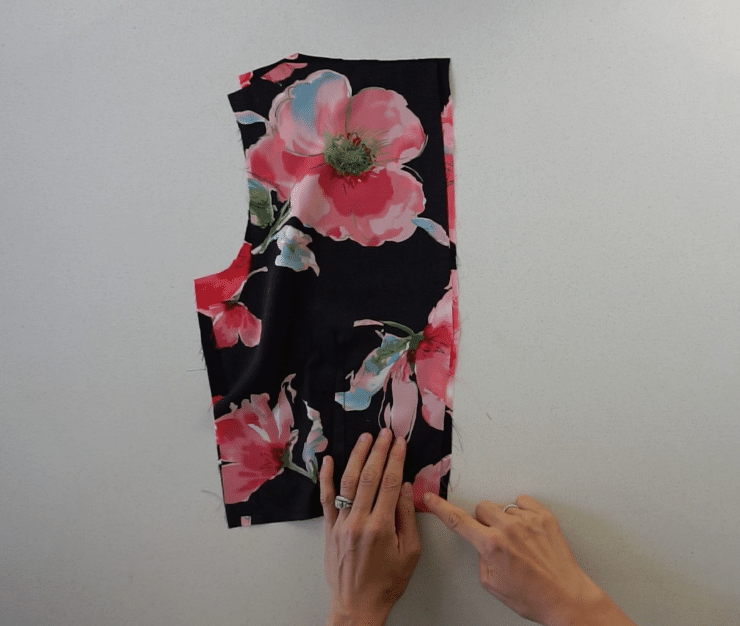

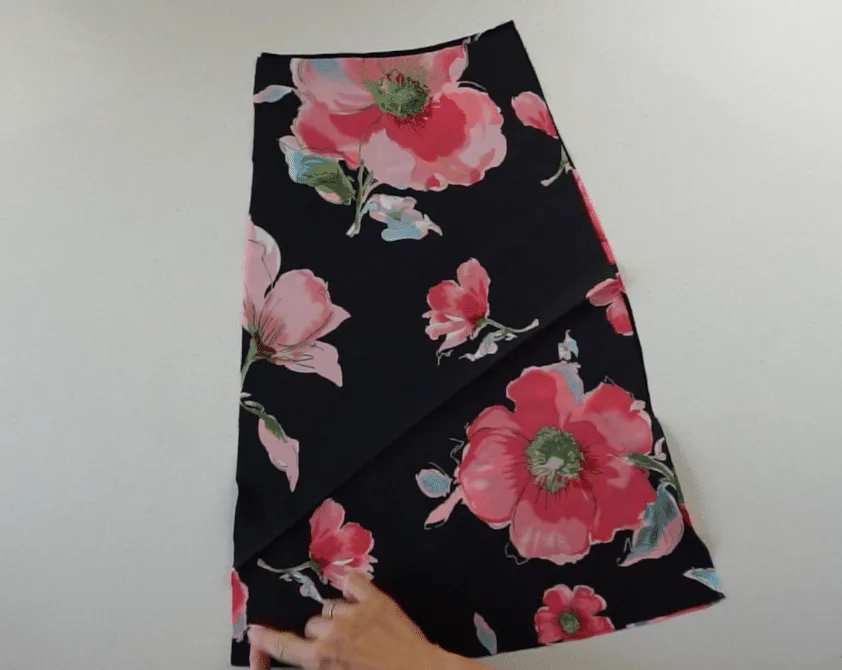
- To complete the back skirt, line up both pieces with the right side facing each other.
Sew the center seam to join the back skirt pieces.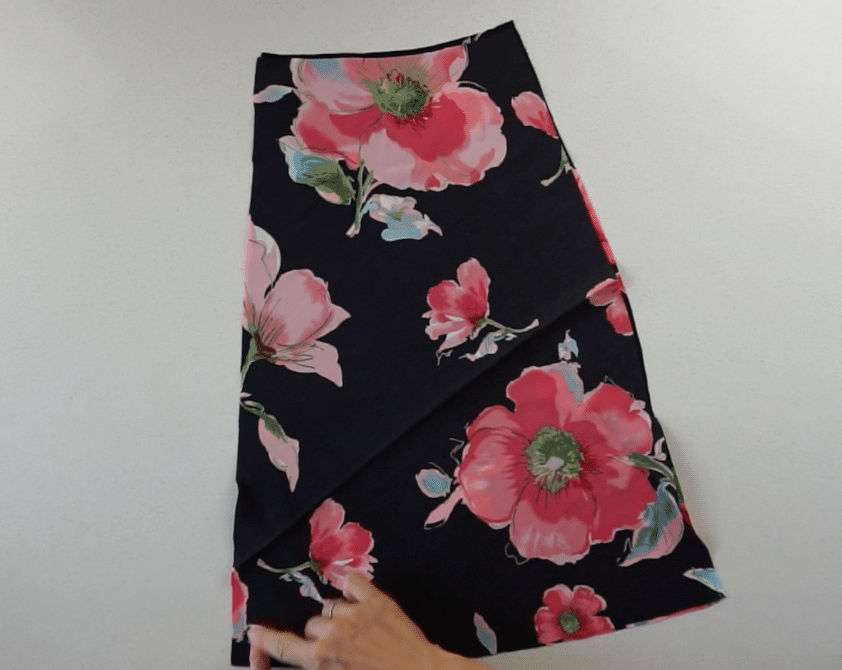
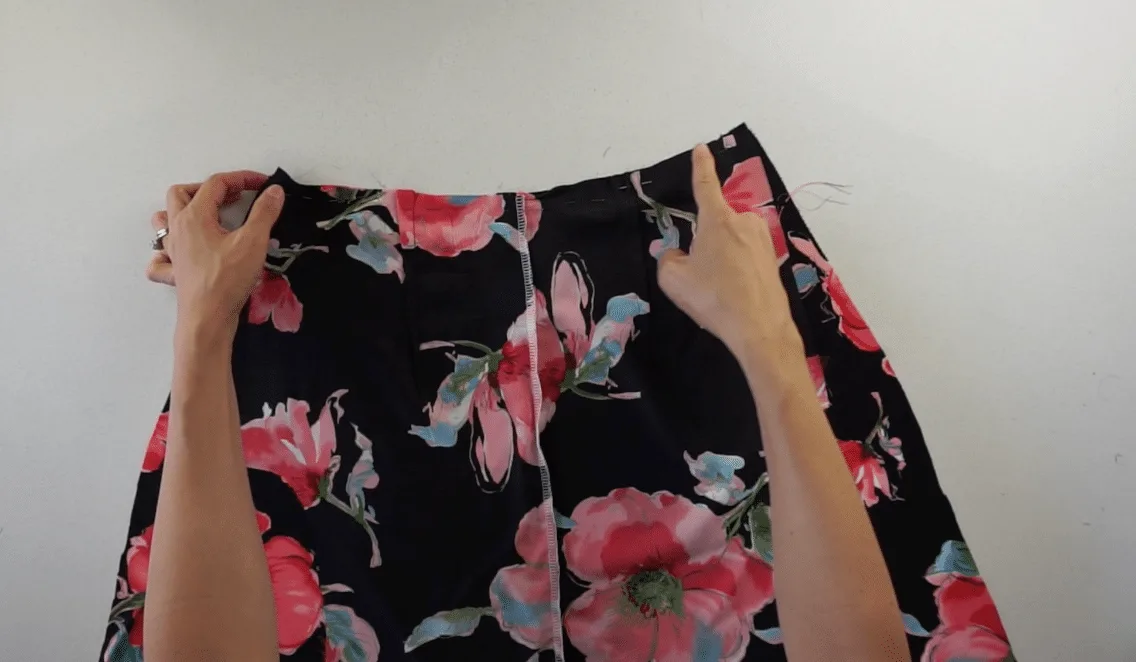
- To complete the back of the dress, line up the back bodice and back skirt pieces with the right side facing together.
Sew the waist seam to join the back pieces.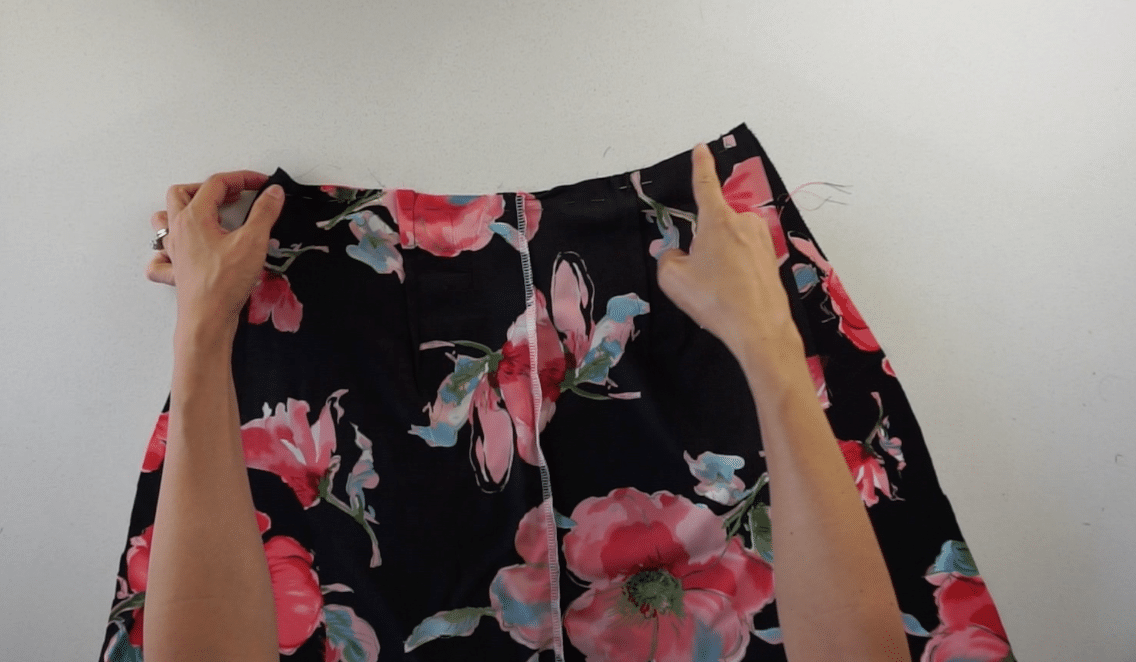
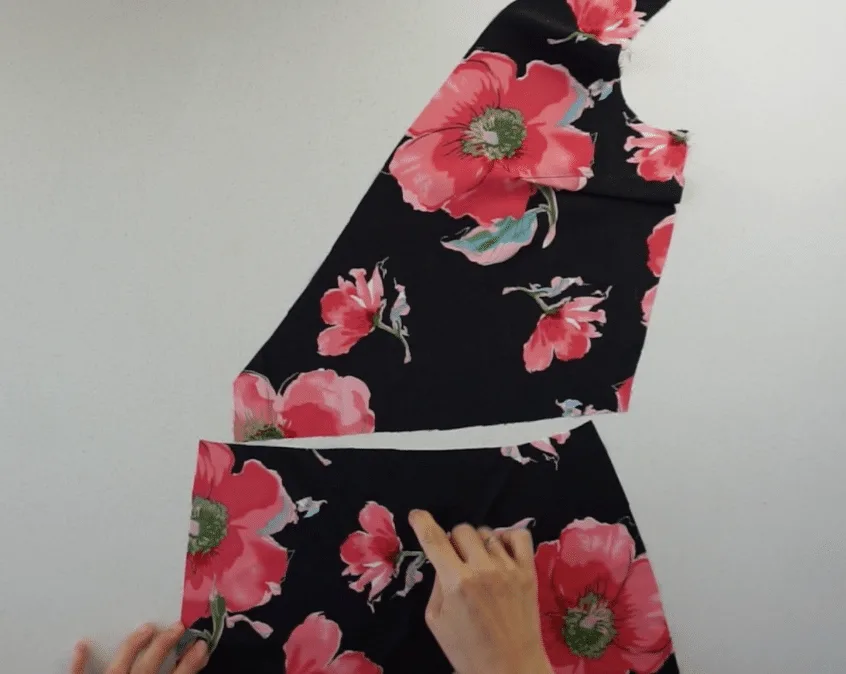
- To complete the front of the dress, line up a front bodice piece and a front skirt piece with the right side facing together.
Sew the waist seam to join the front pieces.
Iron the dress pieces so that the seams will match evenly.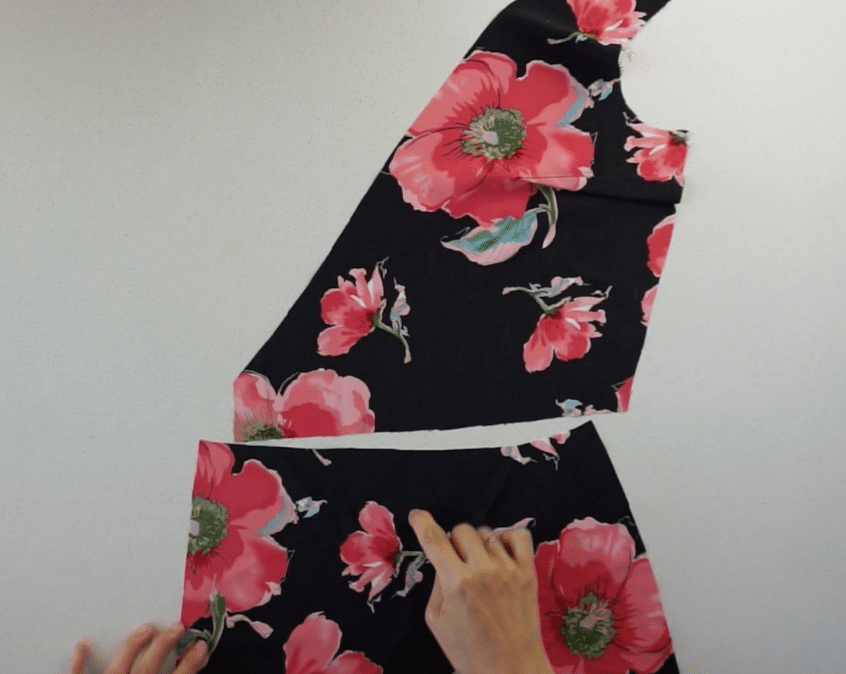
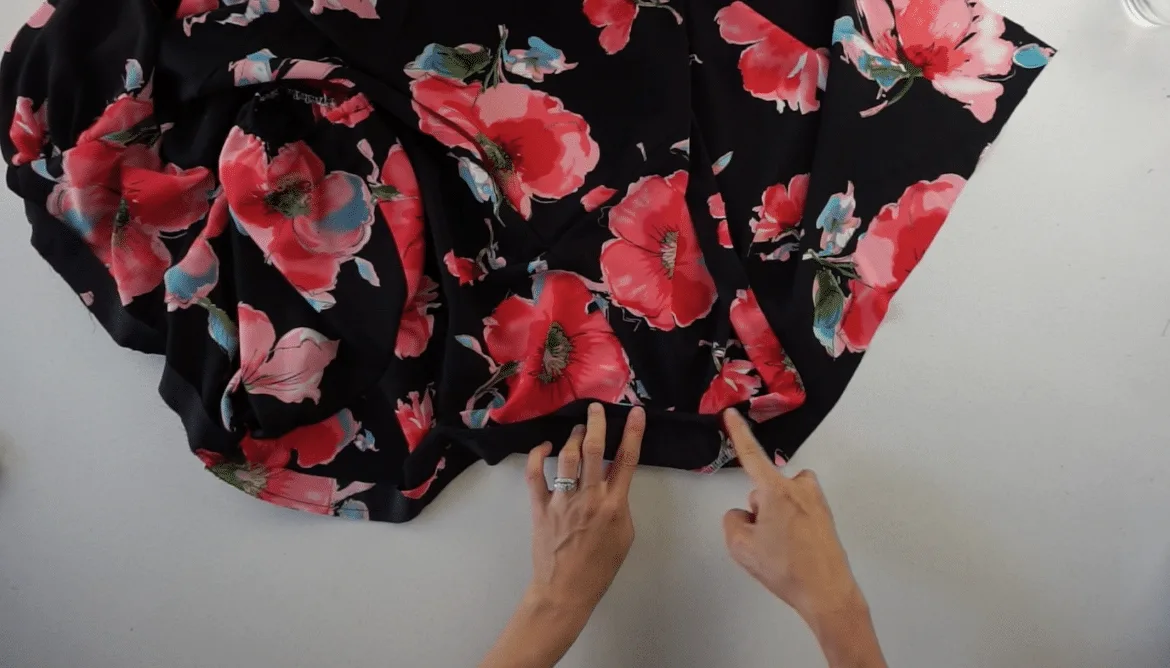
- To attach the dress pieces, line up the front dress and the back dress pieces.
Pin along the side seam and leave a gap on one side for the waist strap to slide through.
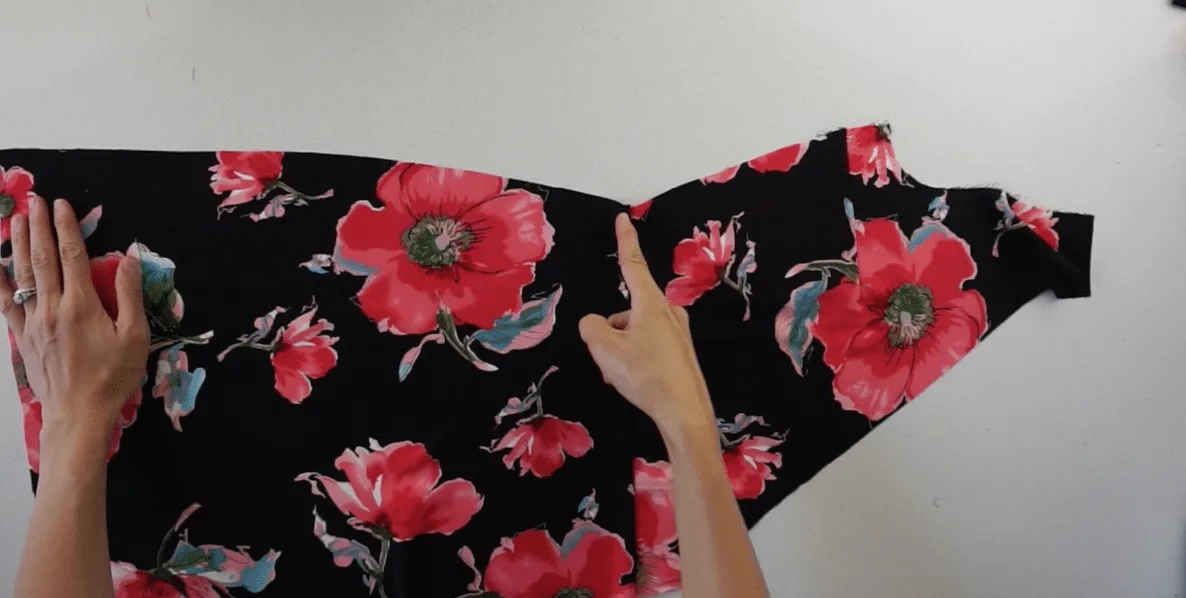
Sew the shoulder seam and side seam to join the dress pieces together.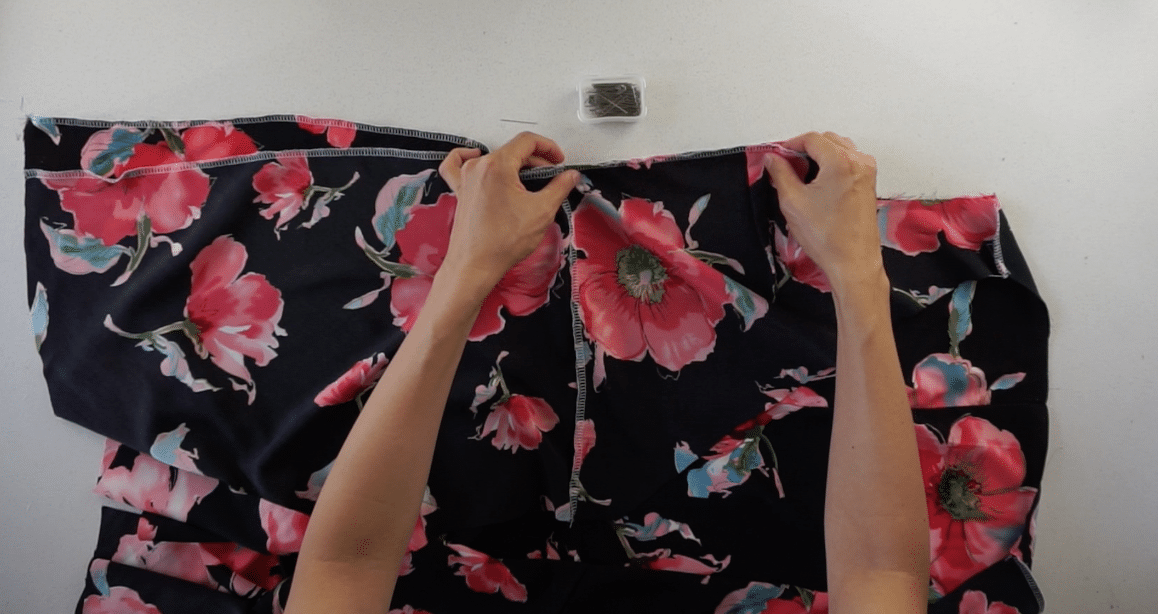

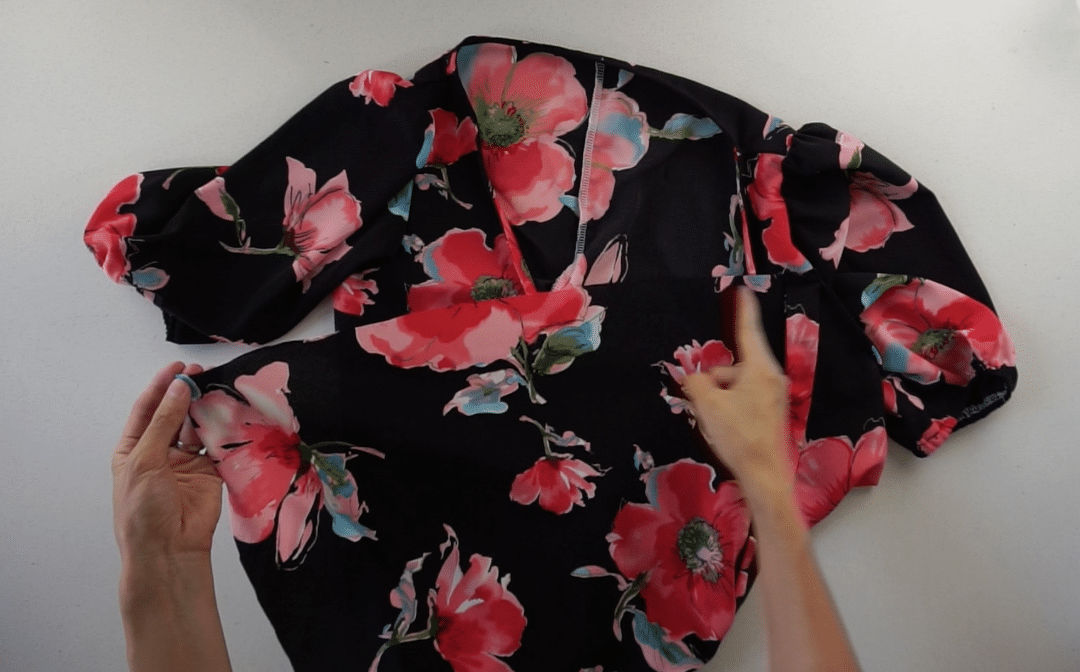
- To attach the puff sleeves to the bodice, pin the sleeves to the armhole opening with the right sides facing each other.

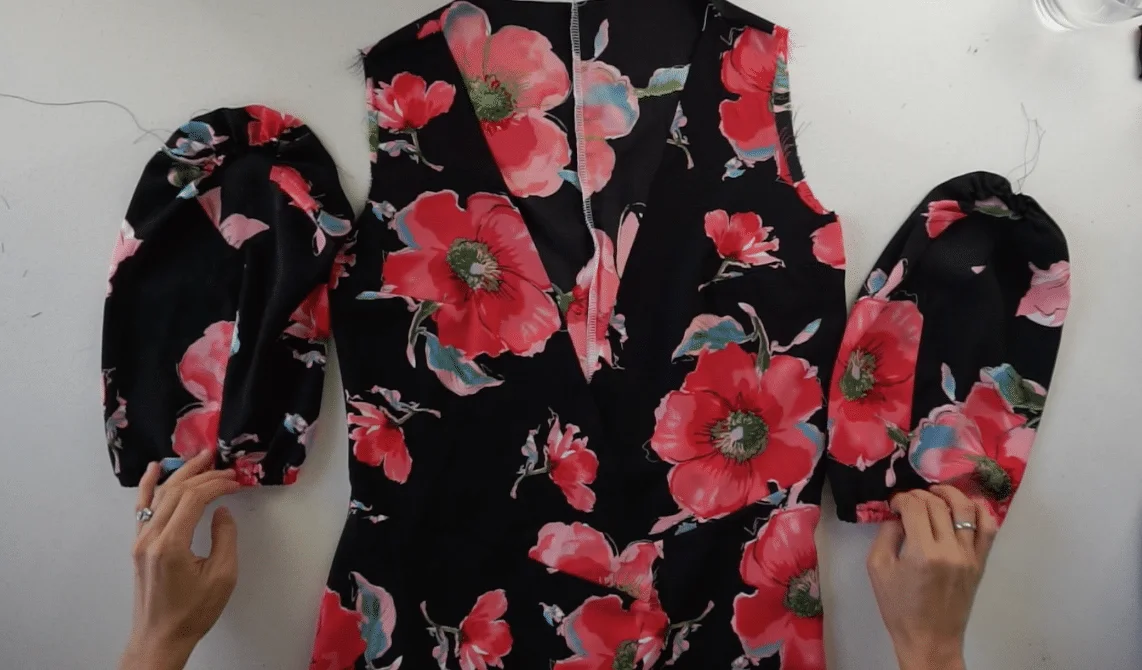
Sew around the armhole to join the puff sleeves to the wrap dress.

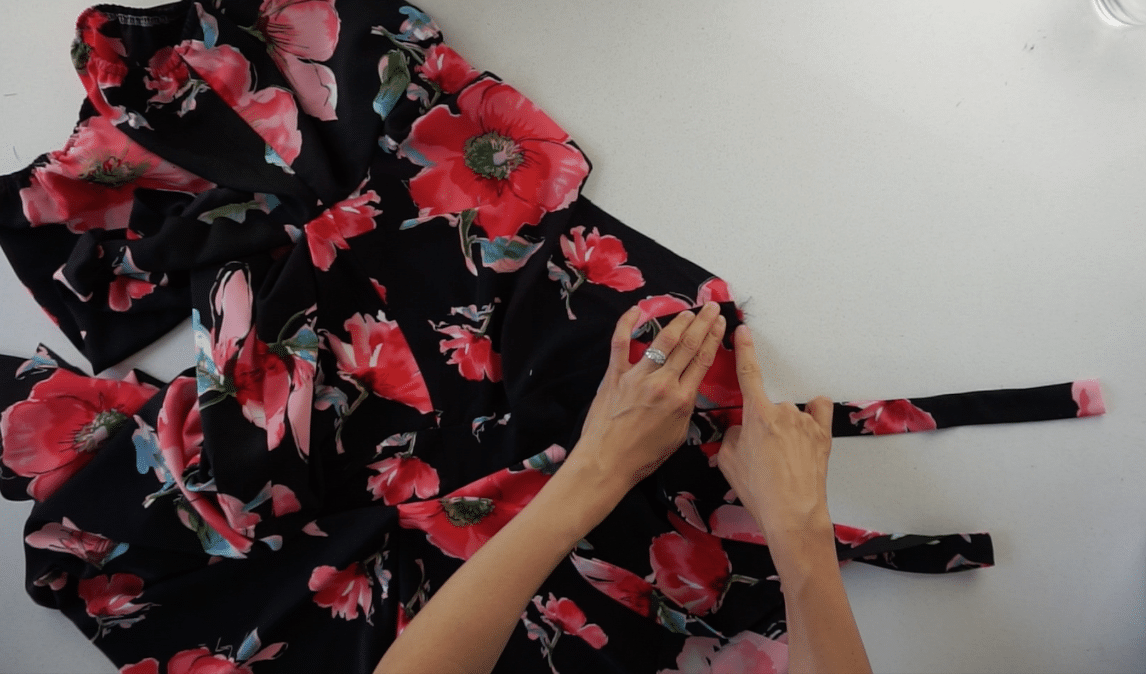
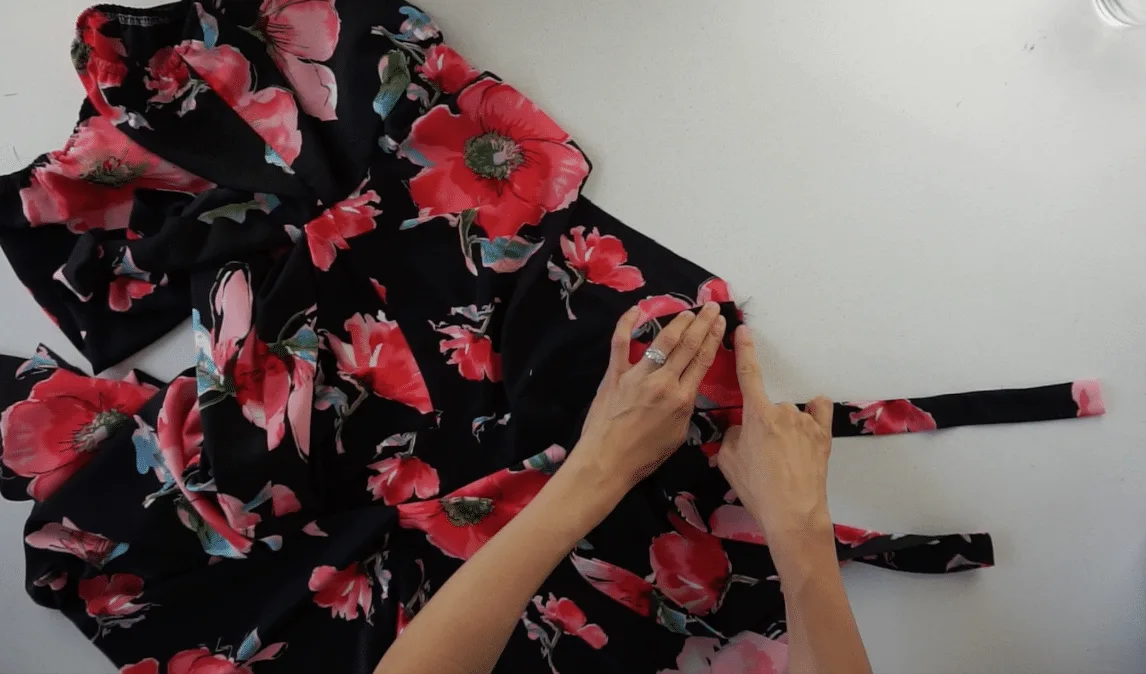
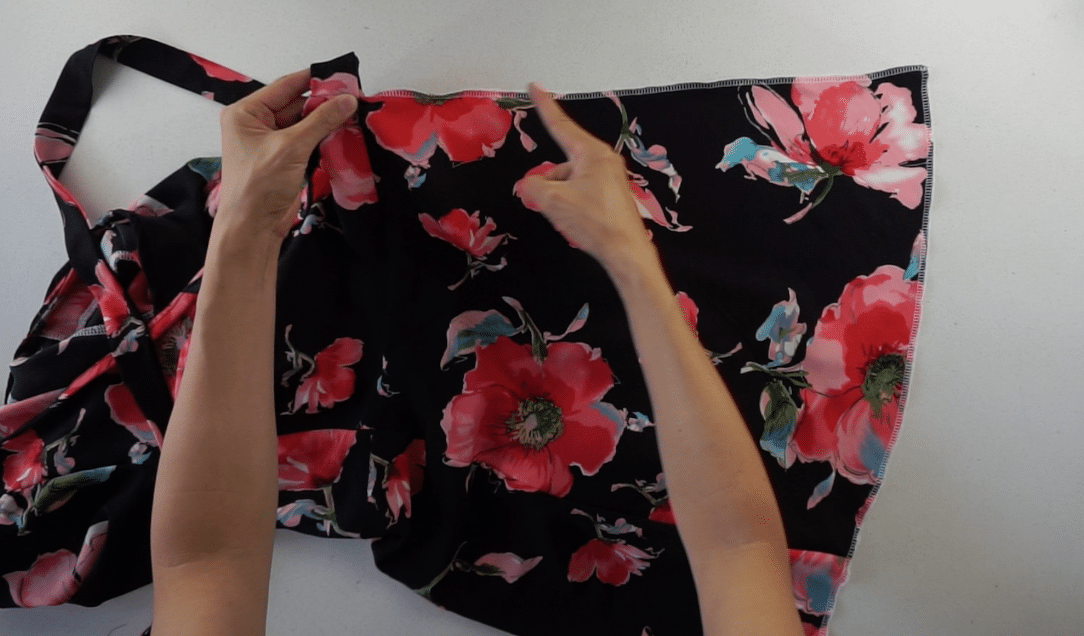
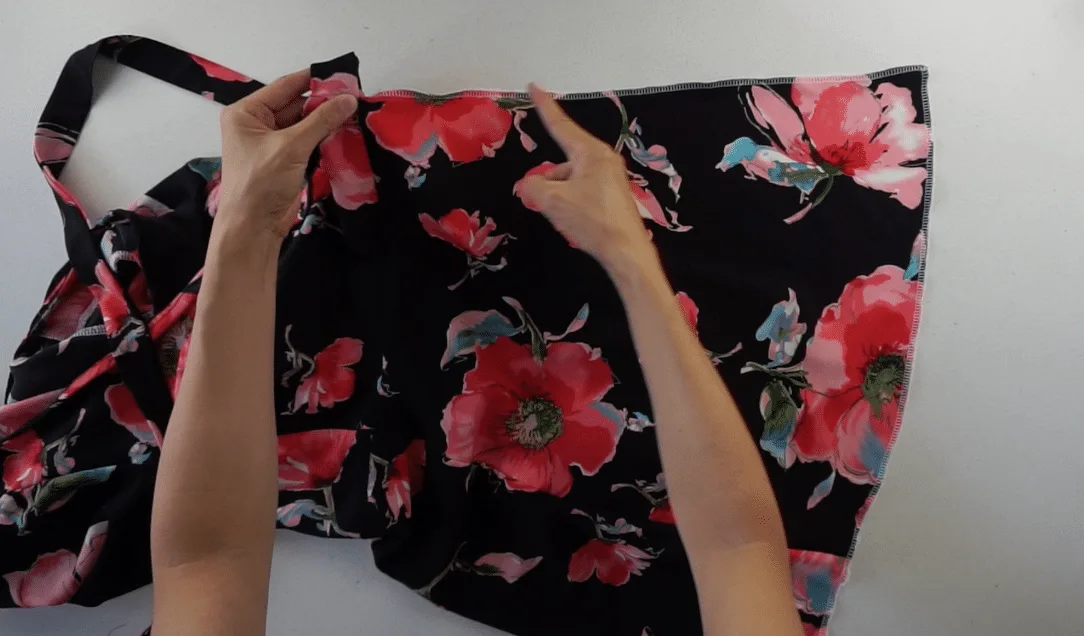
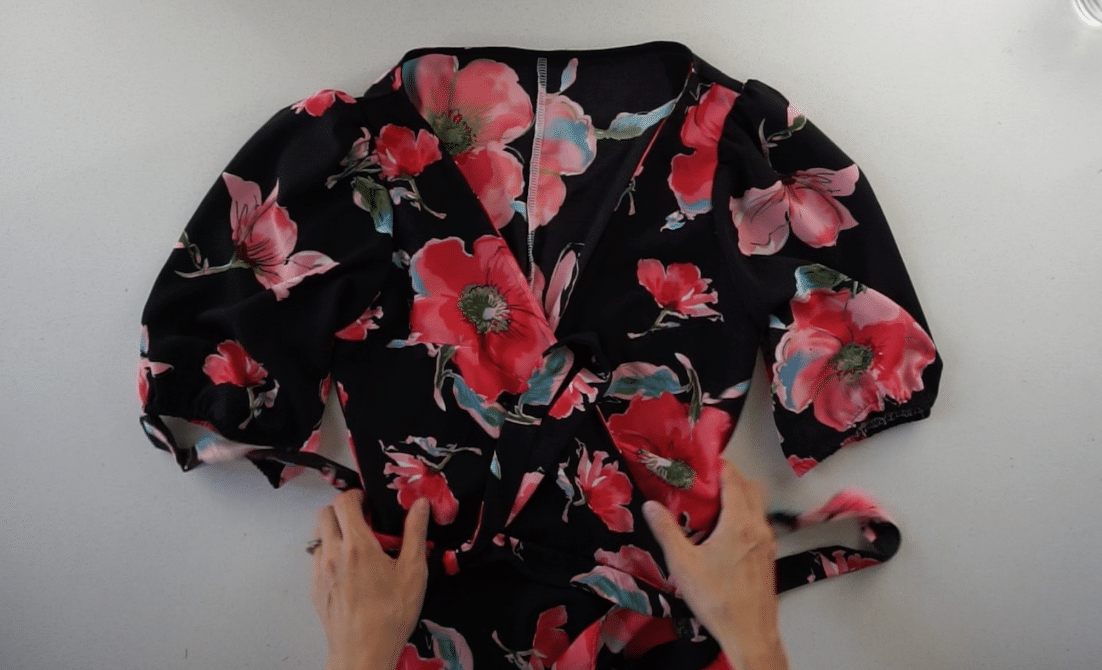
- To attach the waist strap, join along the waistline on the right side of the wrap dress.
- To clean finish the neckline, cut a ¾” wide bias strap of fabric.
Edge topstitch along the right side of the neck opening.
Fold the strap over the neck opening and edge topstitch.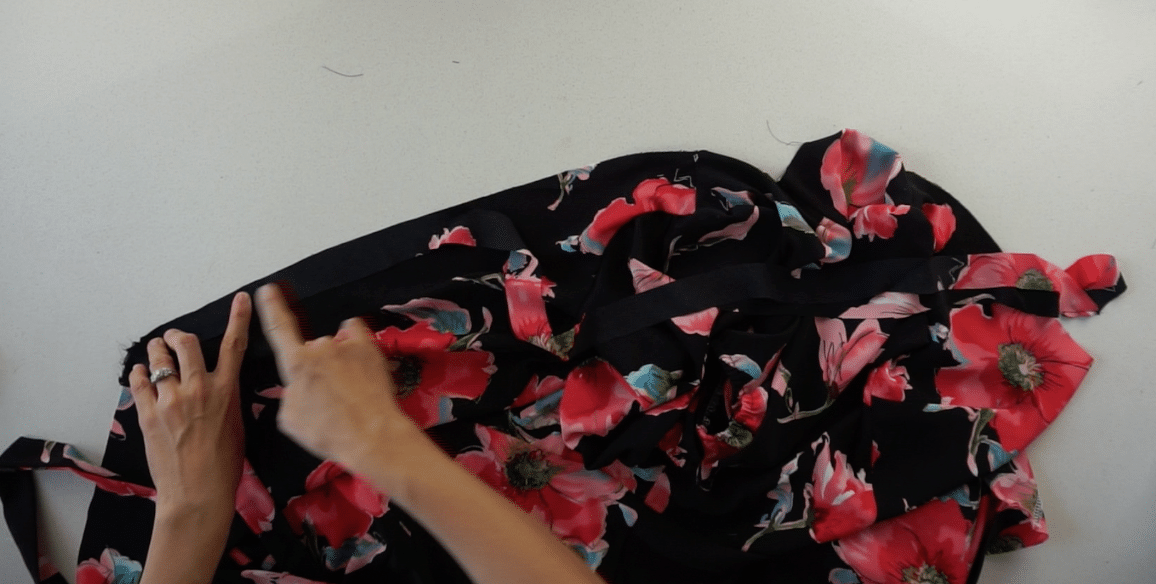

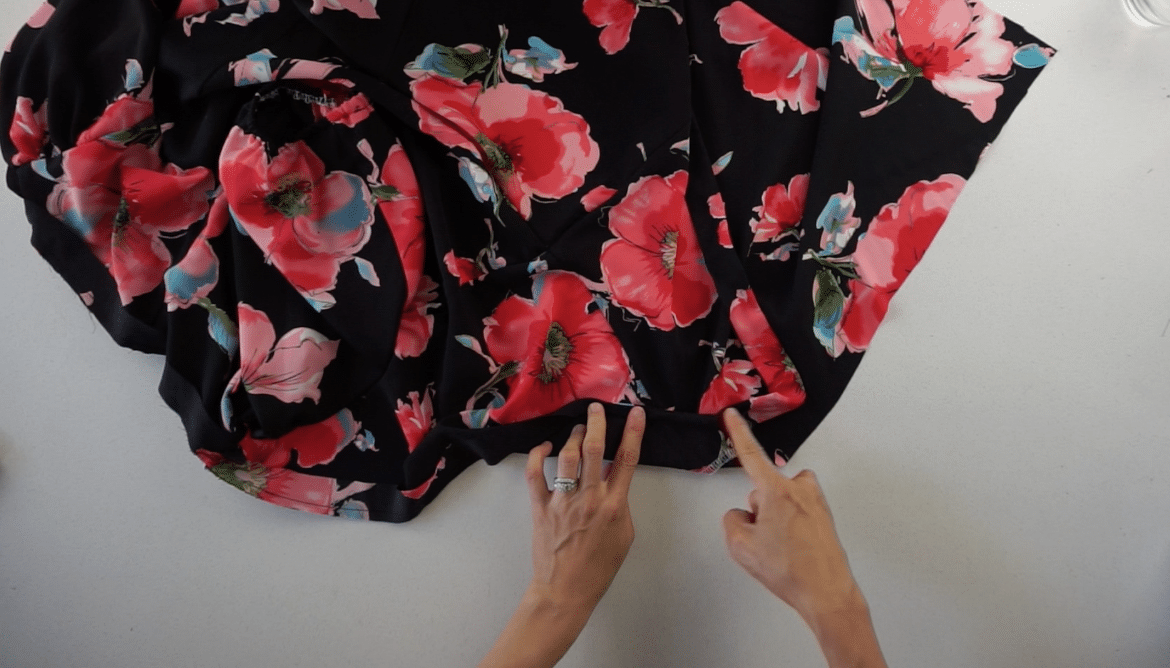
- To clean finish the edges, overlock or zigzag stitch along the front opening and hemline.
- To finish the wrap dress, fold the end of the waist straps inside the tunnel and hand sew along the edge.


Recommended Products
As an Amazon Associate and member of other affiliate programs, I earn from qualifying purchases.


Trendy, Affordable Sewing Patterns for All Sizes


Tie Shoulder Jumpsuit Pattern


Palazzo Pants Sewing Pattern


Pocket Overall Romper Pattern


Wrap Maxi Skirt Sewing Pattern


Tie Back Top Sewing Pattern
Sara
Wednesday 29th of June 2022
Love this free wrap dress sewing pattern. Thanks
Nancy Hammond
Wednesday 8th of December 2021
Hi, this dress looks fabulous- I would love to try it and have signed up to your newsletter but haven’t received the pattern - am I doing something wrong?
Soonjoo
Thursday 9th of December 2021
Hello Nancy, I have gone ahead and added you to the correct form, so you should receive instructions to access the free wrap dress sewing pattern.
For anyone else that is reading the comment section, the best way to immediately access the free sewing pattern is by filling out the contact form on the Free Sewing Patterns page.
Add your contact info to the form and you will receive a Welcome email with a password to enter the Free PDF Printables.
Bonnie
Saturday 7th of August 2021
Can the neck pattern be raised in order for it not being so low??
Soonjoo
Saturday 7th of August 2021
Hello Bonnie, Without drastically redesigning the wrap dress sewing pattern, you could add a snap button at the top to provide more coverage or you can raise the waistline so the strap connects higher on the side seam. Warmly, SoonJoo
Katharina Ganz
Thursday 5th of August 2021
Hi! I would really love to try making this dress. Thank you for providing the free wrap dress sewing pattern.
Leonie
Thursday 8th of July 2021
If I messure myself it looks like i have got to make size 12. normally I am a size 8-10 does this sound correct? Does the pattern run small?
Soonjoo
Thursday 8th of July 2021
Hello Leonie, Thank you very much for reaching out. In fact, many brands use slightly different scales to size clothing. As a result, you range from 8-10 depending on the brand. For this exact reason, we recommend using your current measurements when making DIY clothing. The last thing we would want is to go through all the effort and then the clothing not fit correctly. We provide a size chart and measuring guide so that you can get an accurate fit when following our sewing patterns. Don't hesitate to reach out if you have any further questions about the wrap dress sewing pattern. Kindly, SoonJoo