
Adding classic notions like buttons on front of your old tank top totally gives it an exciting new face lift! Not only are they super cute, but it also becomes a great layering piece to wear with any outerwear or bottoms.
Upgrade your old tank tops to give them new life! Furthermore, you may also be excited to try these easy ways to transform a tank top. Each project is easy to execute with basic sewing skills.
DIY clothing doesn’t always have to be an elaborate reconstruction. Learn how to upcycle clothes and you can also turn old clothes into brand new clothes that are on trend and exciting to wear.


If you don’t like the gaps between the button placket, this DIY button front tank top will solve your problem! Simply topstitch the placket and hand sew the buttons to create visual but non-functional element.
The 2-hole or 4-hole buttons create a casual and unique element that accentuates the front of your plain old tank top. However, this technique is only doable for knit clothing and doesn’t really work well on woven or non-stretchy garments.
You will love this button front tank top because…
- Learn how to make non-functional button placket.
- Master how to hand sew buttons correctly.
- Work with any color tank top.
- Adjust the length of the tank top.
- All you need are 7 buttons to make the button front placket.
Rib knit is great material to make non-functional button front tank top. When stitching down the placket, you don’t have to worry about how to wear them because the knit top can easily pop in and out.
When you are ready to accept some more challenges, start to upcycle old t-shirts. They are fun and easy ways to upgrade you old clothes into fashionable styles.
How to make DIY Button Front Tank Top?
Make the front button placket and hand sew the buttons to complete this cute tank top. The process start with accuracy when you take body measurements for clothes, so grab your measuring tape and get precise.
Plan your weekend project by preparing these materials from your basic sewing kit to refashion your wardrobe. Let’s dive into the process!
DIY Button Front Tank Top Materials:


- Tank Top
- Thread
- Chalk
- Scissor
- 7 Pieces of 2-Hole Buttons
- Straight Pins
- Ruler
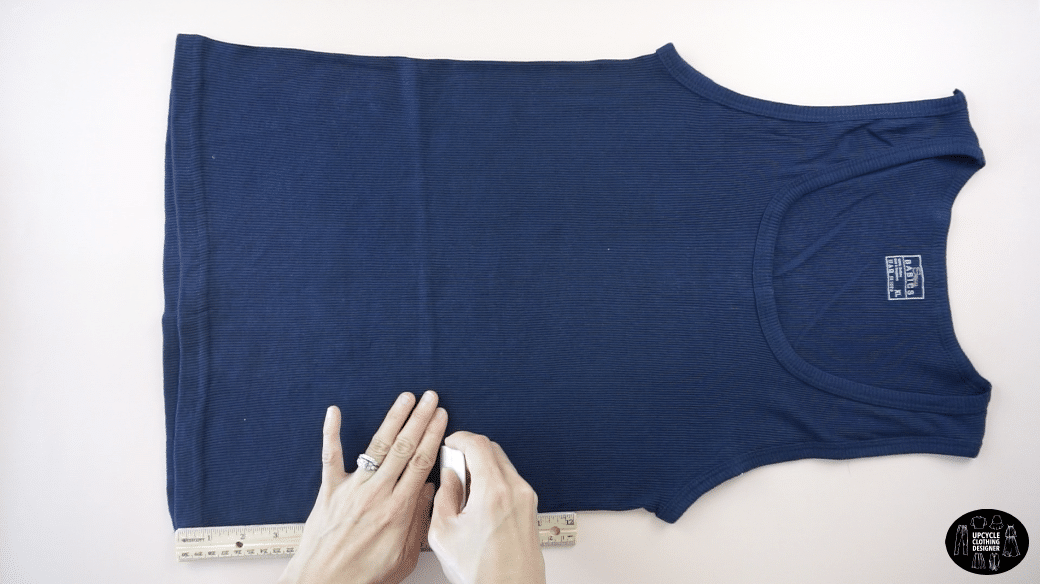
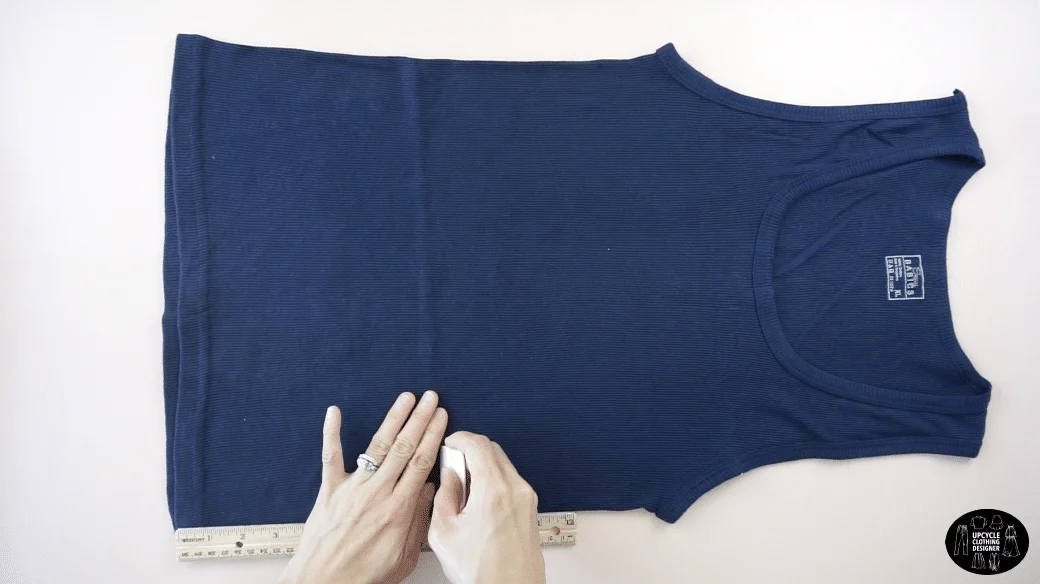
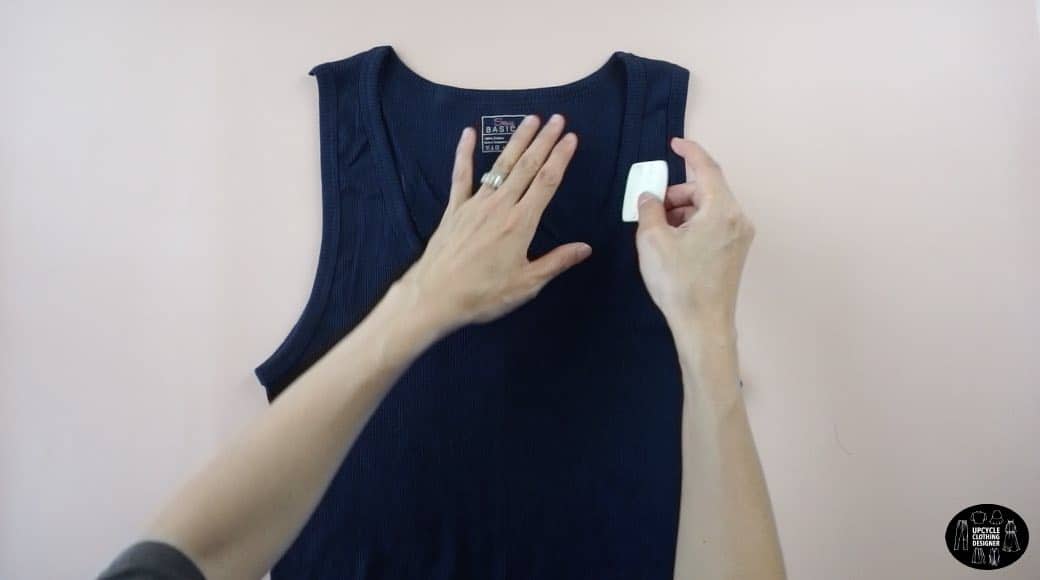
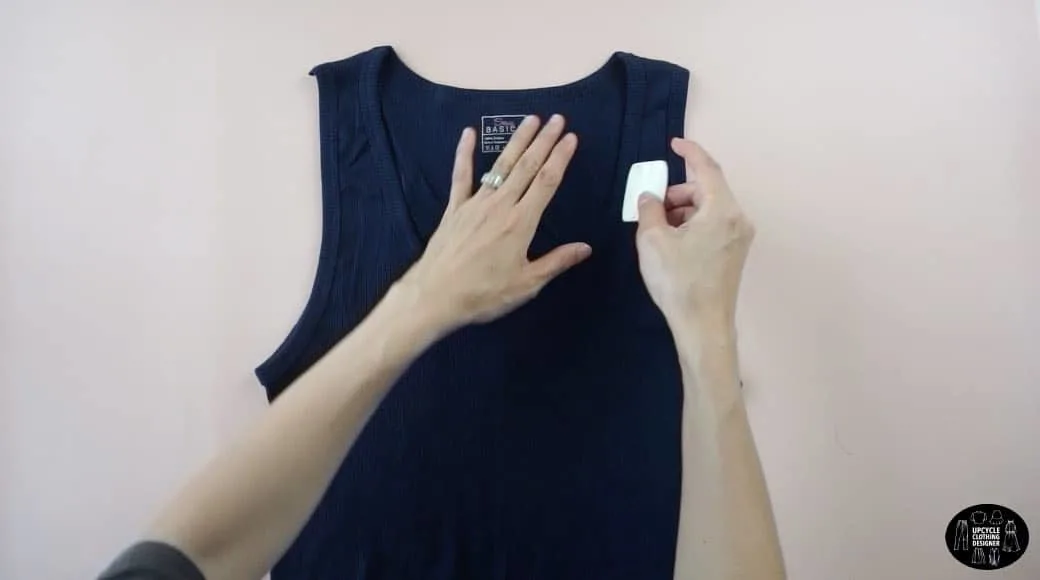
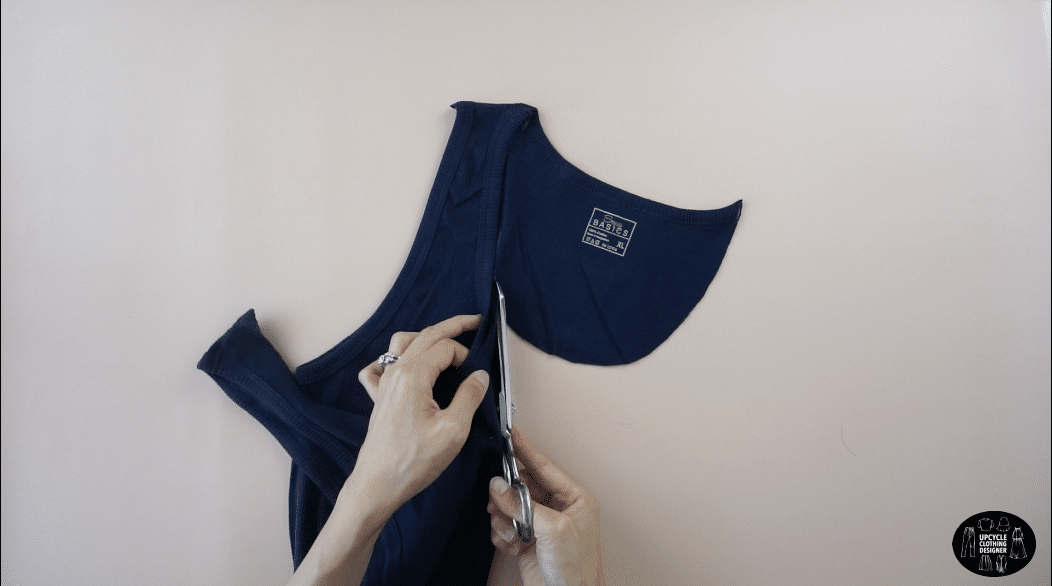
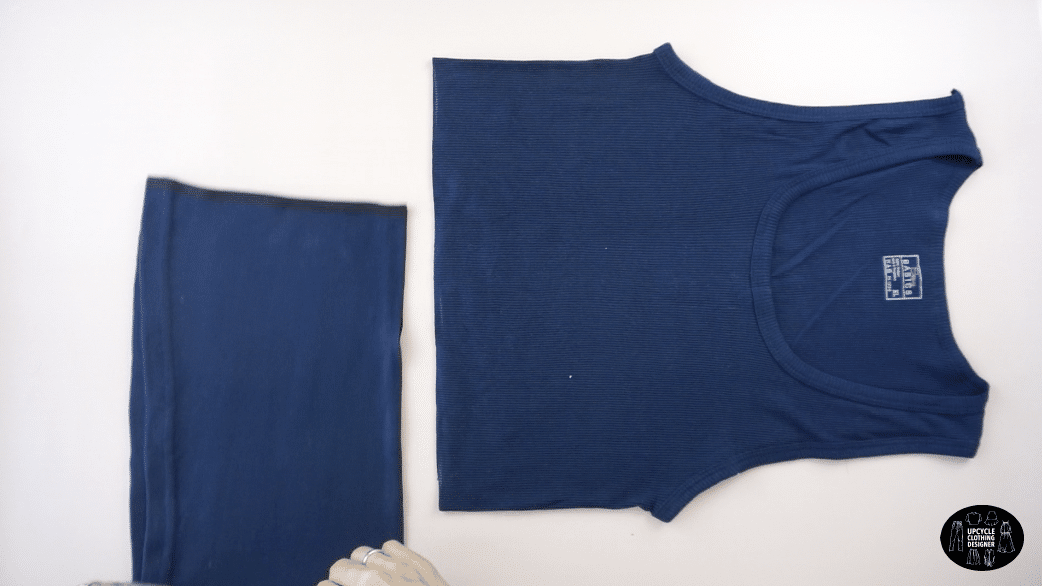
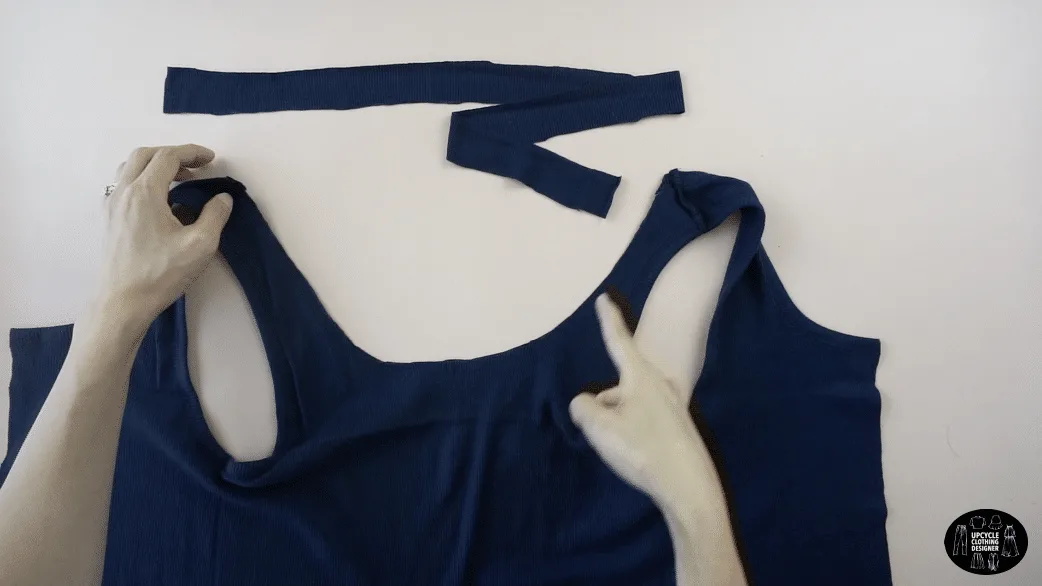
Mark 8” from the hemline, and cut across the line. Trace the front neck opening onto the back piece to match the front and back neckline.
Cut the new neckline on the back of the top.
Cut a vertical line in the center of the chest.
Use a 1” wide strap to make a clean finish along the neck opening. 1/4” topstitch around the neck opening, and then fold the strap over the other side and topstitch to finish the neckline.
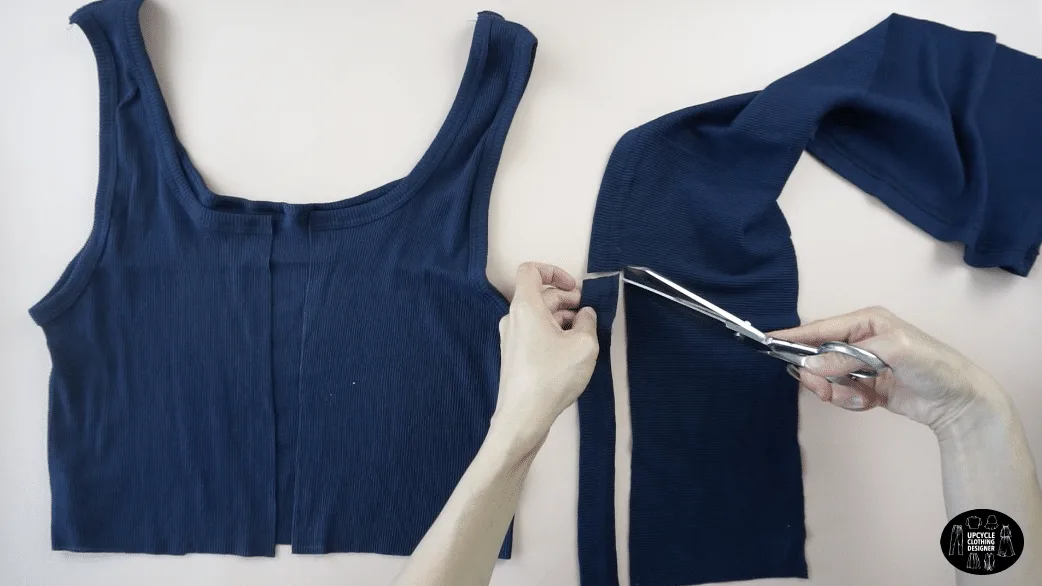
Cut a 1” wide strap to make the front button placket. Edge topstitch the button placket along the wrong side of the center chest opening.
Attach the button placket to other side of the front piece with edge topstitch. Mark the placement and then hand sew the buttons in place to complete this DIY button front tank top.
Below are detailed instructions along with step-by-step photos for you to easily follow along!


DIY Button Front Tank Top Sewing Tips
Enjoy your the results of your completed upcycle project by learning how to make this DIY button front tank top. While working on this tank top, I came across couple of sewing tips to help you easily create your own version of button front tank top without messing up.
- Test, Test, Test: Save the fabric scraps of the tank top to test your needle and sewing machine settings. Practice making sure the knit is not stretched out and the stitches don’t pucker.
- Press: If some stretch happens while sewing, hover your iron about 1” above the stretched seam and apply steam. The heat and moisture will help shrink the seam back to the intended size and shape.
- Pins: Use ballpoint pins to avoid damaging the knit fabric while cutting and sewing.
- Thread: Since, this project requires straight stitch, I recommend using regular polyester thread.
More tank top upcycle projects for your next DIY fashion:


DIY Button Front Tank Top
The DIY button front tank top is so easy to make. All you need is to create faux button placket and attach your favorite buttons to the front. Utilize these sewing tips and methods to revamp your old tank top into brand new clothes with on trend styles!
Materials
- Tank Top
- Thread
- 7 Pieces of 2-Hole Buttons
Tools
- Sewing Machine
- Fabric Chalk
- Ruler
- Scissors
- Straight Pins
Instructions
- For this DIY button front tank top tutorial, start by marking 8” from the hemline with fabric chalk, and then cut along the line.
- Use fabric chalk to trace the front neck opening onto the back piece, and then cut along the line to make a new neckline.

- Draw a vertical line in the center of the chest, and then cut to open.
- Cut a 1” wide strap from the excess fabric
- To finish the neckline, use the strap to complete a clean finish along the neck opening.
1/4” topstitch on the wrong side of the neck opening.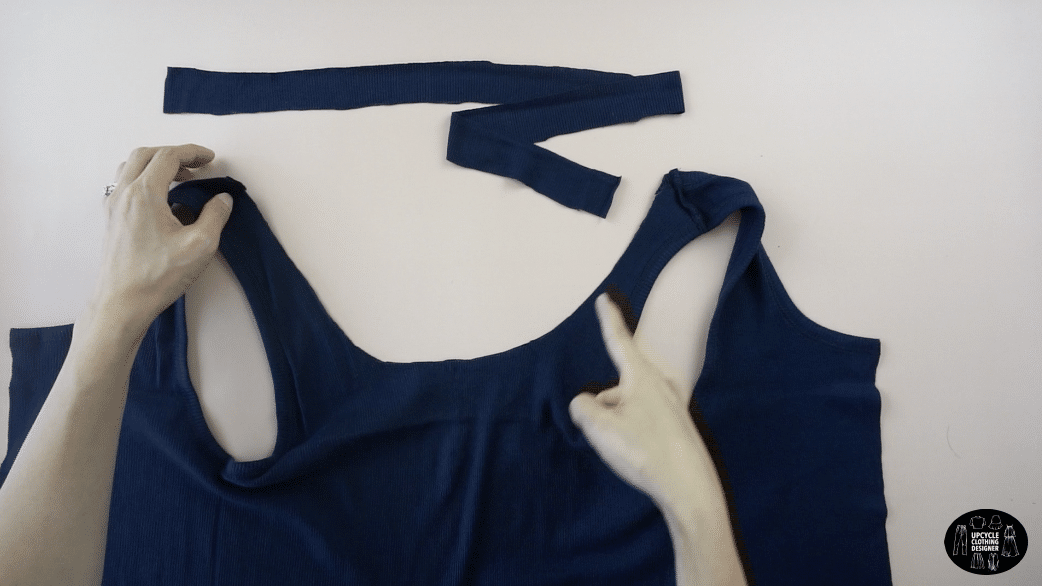
Fold the strap over to the other side and topstitch to finish the neckline.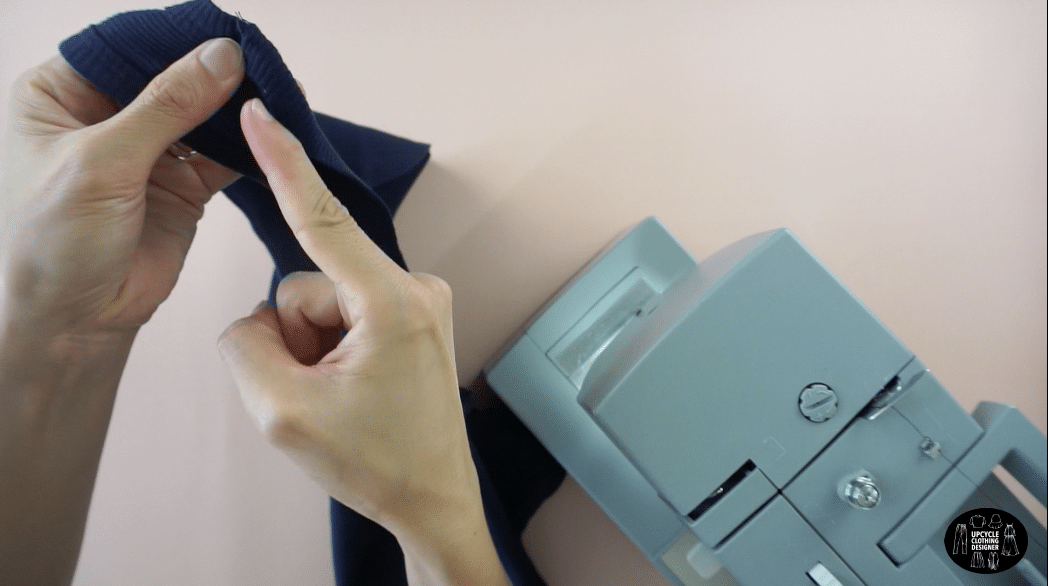

- To make the button placket, use the excess fabric to measure the vertical length of the center chest. Cut a 1” wide strap.

- To finish the button placket, edge topstitch the strap along the wrong side of the center chest opening.
Pin to secure, and then attach the other side of the button placket with edge topstitch.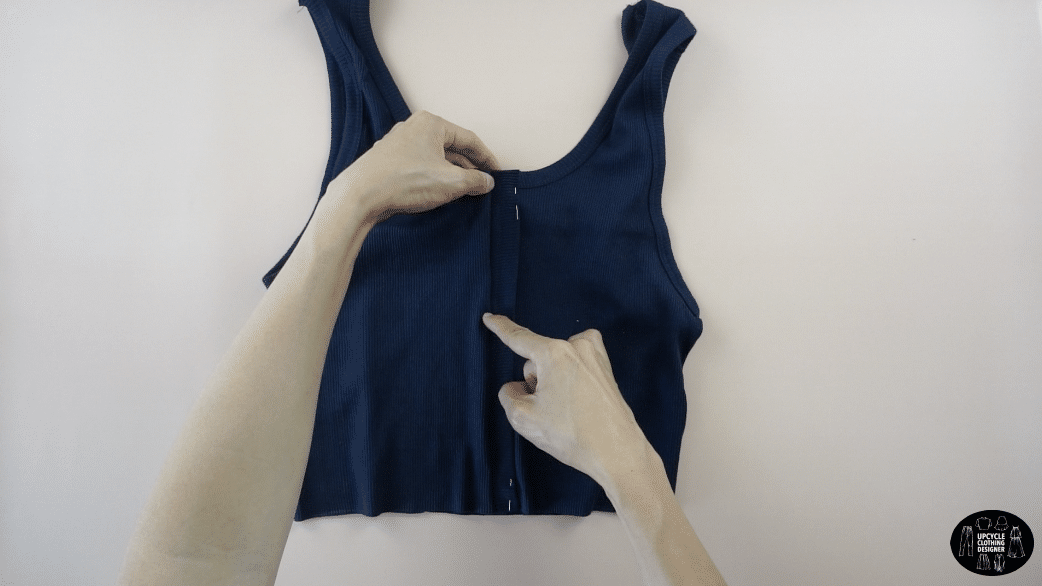

- To attach the buttons to the chest, lay the buttons along the button placket.
Mark with chalk to measure placement.
Hand sew the buttons in place to complete this diy button front tank top.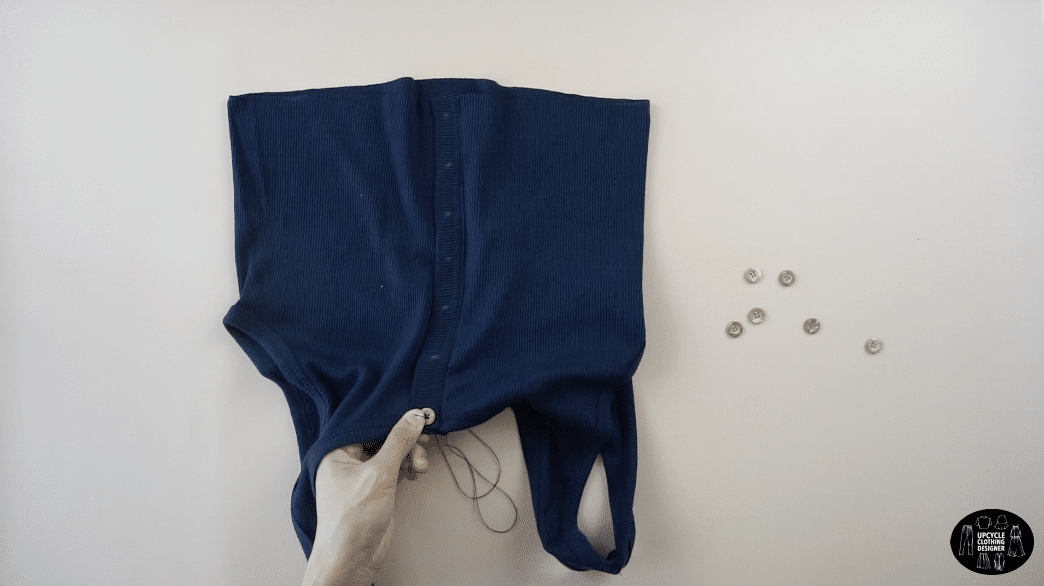

Recommended Products
As an Amazon Associate and member of other affiliate programs, I earn from qualifying purchases.


Trendy, Affordable Sewing Patterns for All Sizes


Tie Shoulder Jumpsuit Pattern


Palazzo Pants Sewing Pattern


Pocket Overall Romper Pattern


Wrap Maxi Skirt Sewing Pattern


Tie Back Top Sewing Pattern