
T-shirts are basically the little black dress of your casual wardrobe—versatile, comfy, and just begging for a glow-up. And what better way to spice things up than with a bit of chic snipping and edgy distressing? Whether you’re channeling cool-girl grunge or laid-back beach vibes, this DIY is your ticket to turning “meh” into major.
The best part? It’s fast, fun, and fabulously budget-friendly. With just a pair of scissors and a sprinkle of creativity, you can transform your tee into a cropped cutie, a shredded masterpiece, or a fringed fashion moment that screams you. No sewing machine, no stress—just instant style upgrades.
What is the easiest way to cut a shirt?
The easiest way to cut a shirt is by turning it into a trendy crop top or adding a few stylish slashes! All you need is a pair of sharp fabric scissors, a flat surface, and a little imagination.
Mark your cutting lines with tailor’s chalk, snip with confidence, and stretch the fabric edges for that effortlessly cool, lived-in vibe. Whether you’re going for flirty fringe, edgy cutouts, or a classic cropped hem, this DIY hack is beginner-friendly, no-sew, and totally Insta-worthy.
Do t-shirts fray if you cut them?

Most t-shirts made from knit fabrics like cotton jersey won’t fray when cut. That’s because knits are constructed in loops rather than woven threads, so they naturally resist unraveling. This makes them perfect for DIY no-sew projects like cropped tees, fringed hems, or off-shoulder styles.
However, some lightweight or loosely knit fabrics may curl at the edges, giving your shirt a rolled or distressed look. If you want a clean finish, you can hem the edges or use fabric glue or a serger. Whether you’re going for edgy and raw or polished and neat, cutting a t-shirt gives you stylish freedom with minimal fuss.
How to properly cut a t-shirt with scissors


Cutting a t-shirt with scissors is one of the easiest DIY upcycle upgrades you can do at home—no sewing required!
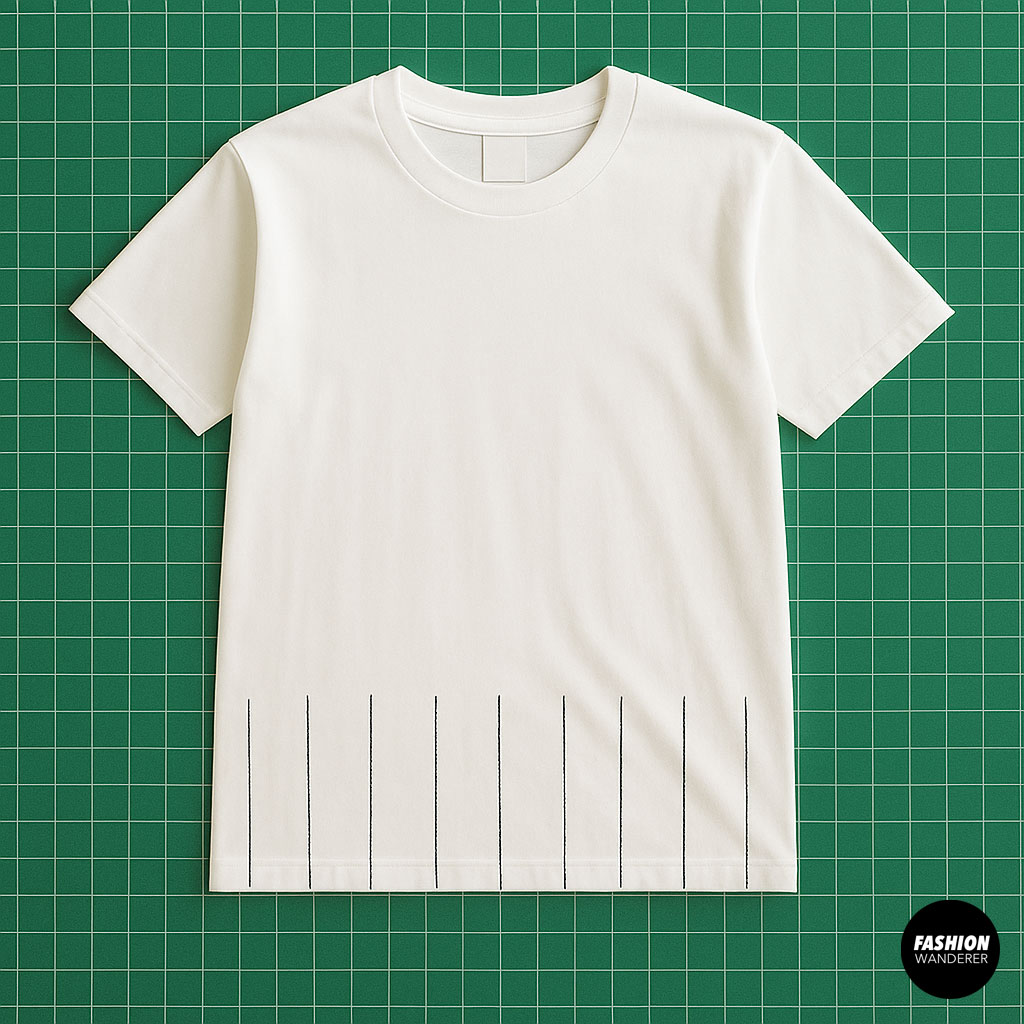
To get clean, professional-looking results, start by laying your shirt flat on a table or cutting mat. Smooth out all wrinkles and align the hems evenly. Use fabric chalk or a washable marker to draw your desired cutting line—whether you’re cropping the hem, removing sleeves, or making fringe.
Make sure to try the shirt on and double-check the markings before cutting! Use sharp fabric scissors for smooth, snag-free cuts and follow your lines slowly and steadily. Don’t forget to slightly stretch the edges after cutting if you want that trendy rolled hem look.
Whether you’re creating a cropped tee, fringe detail, or off-the-shoulder neckline, a simple scissor transformation can give your old shirt a fresh new vibe.
This T-shirt cutting hack is all about expression and experimentation. It’s beginner-friendly, low-commitment, and totally customizable. So if you’ve got an old shirt lying around and a fashionista’s heart ready to play, let’s get to it.
Keep reading for step-by-step inspiration, photo ideas, and tips to give your tee a second life!
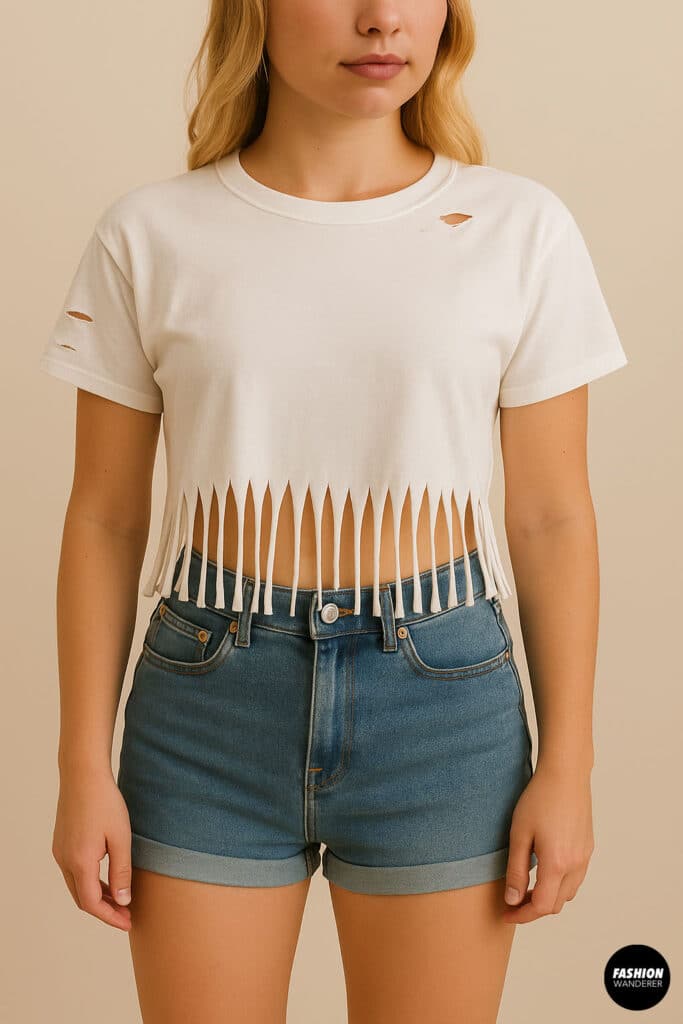
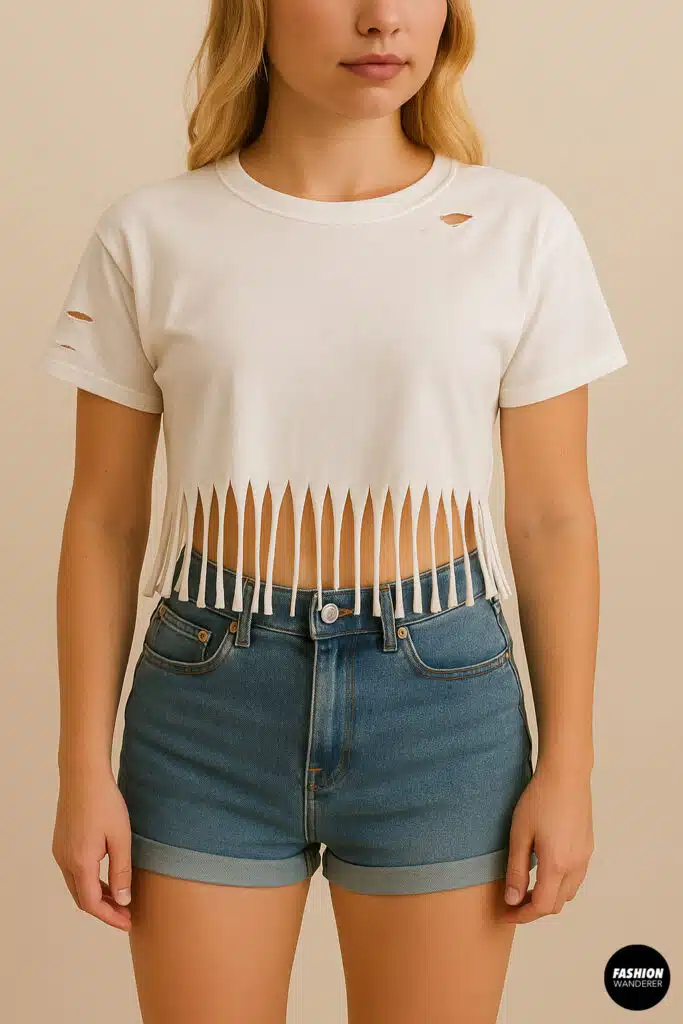
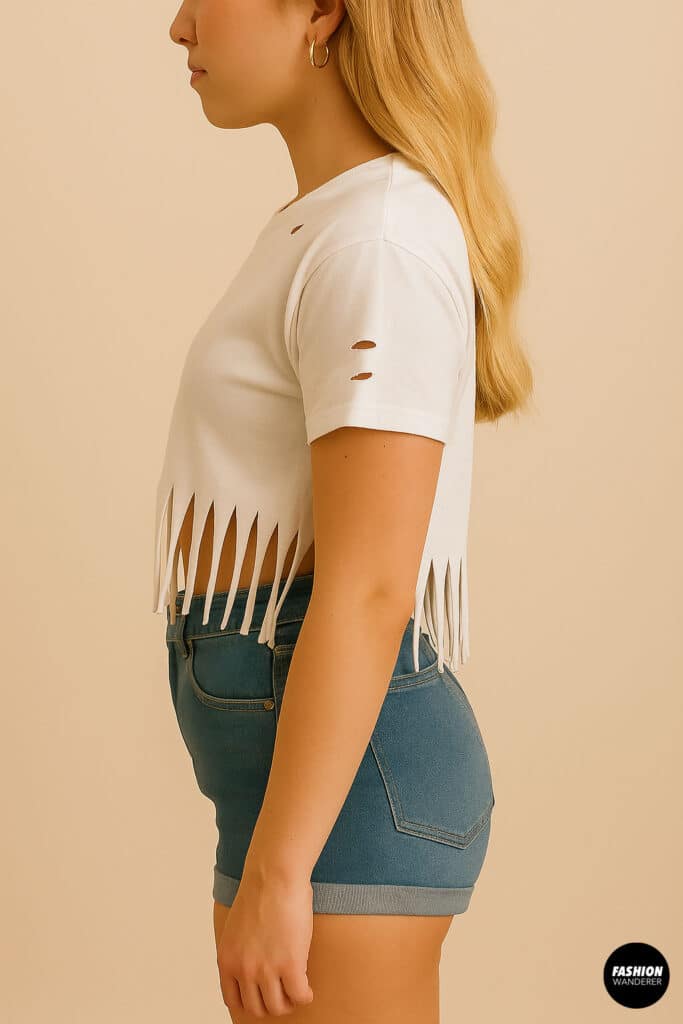
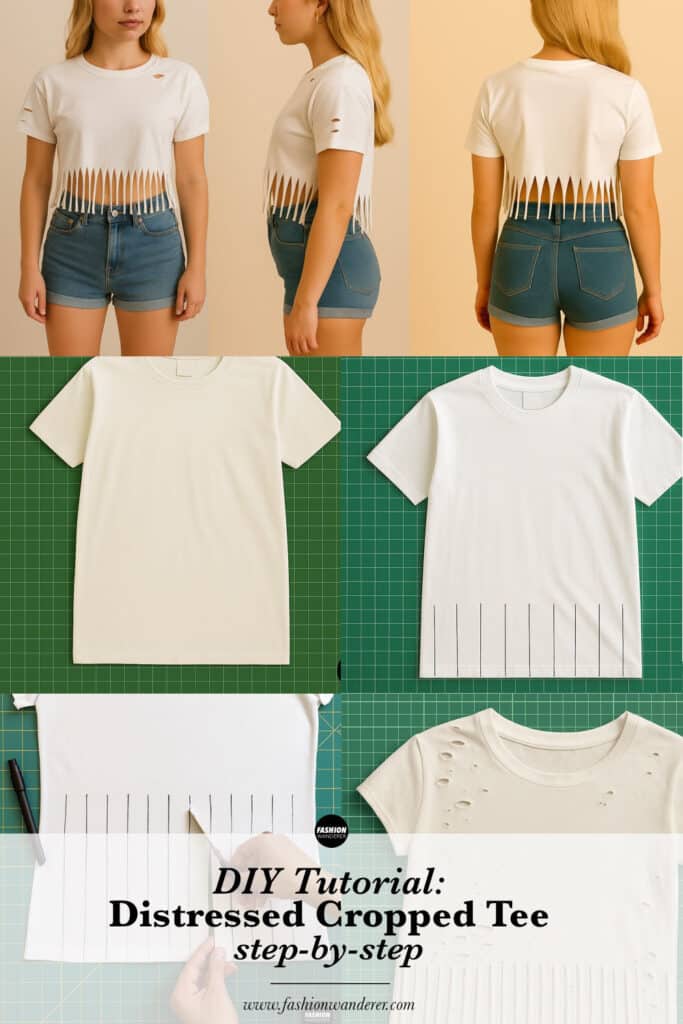
T-Shirt Cutting Hack: The Distressed Cropped Tee
Ready to give your old tee a catwalk-worthy refresh? Let’s turn that basic cotton classic into a custom-cropped, street-style star—no needle, no thread, all flair.
Materials Needed:
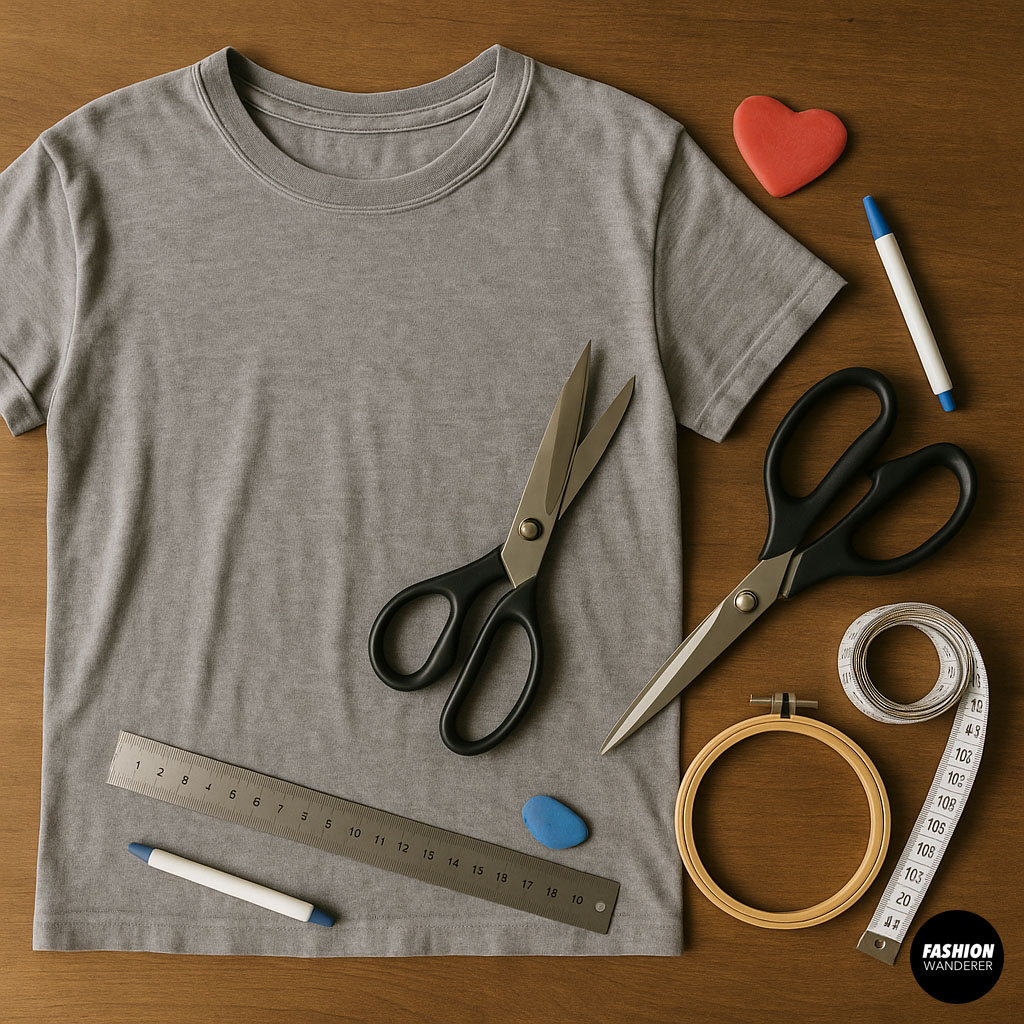

- Old T-shirt (preferably a basic, oversized one for best results)
- Scissors (fabric or sharp crafting scissors work best)
- Tailor’s chalk or a fabric marker (optional, for marking)
- Ruler (optional, for precision)
Step-by-Step Guide:
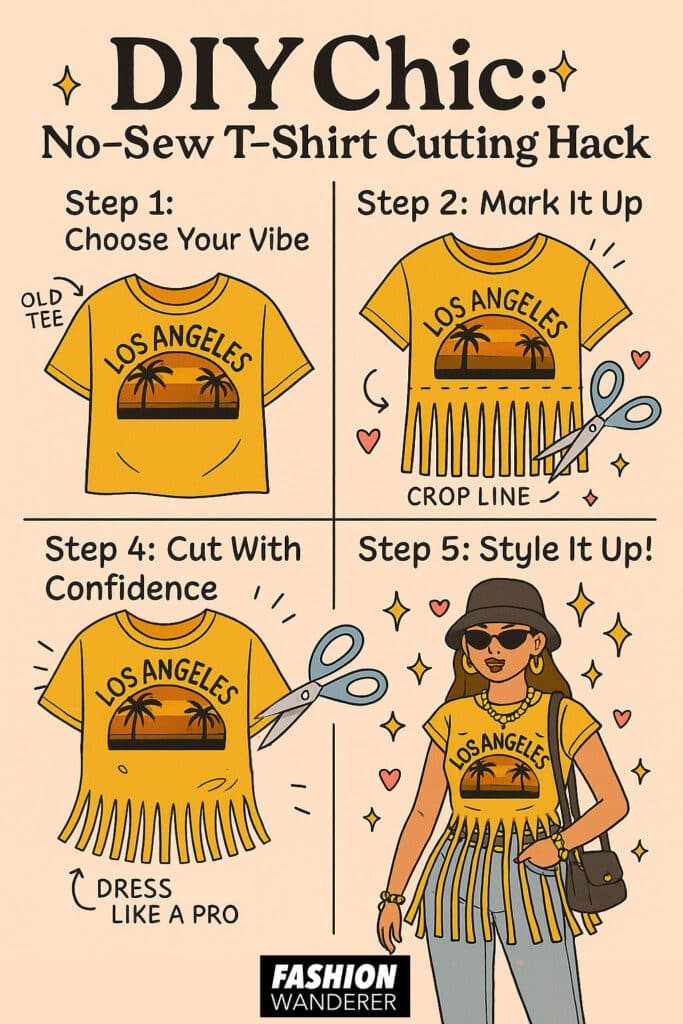
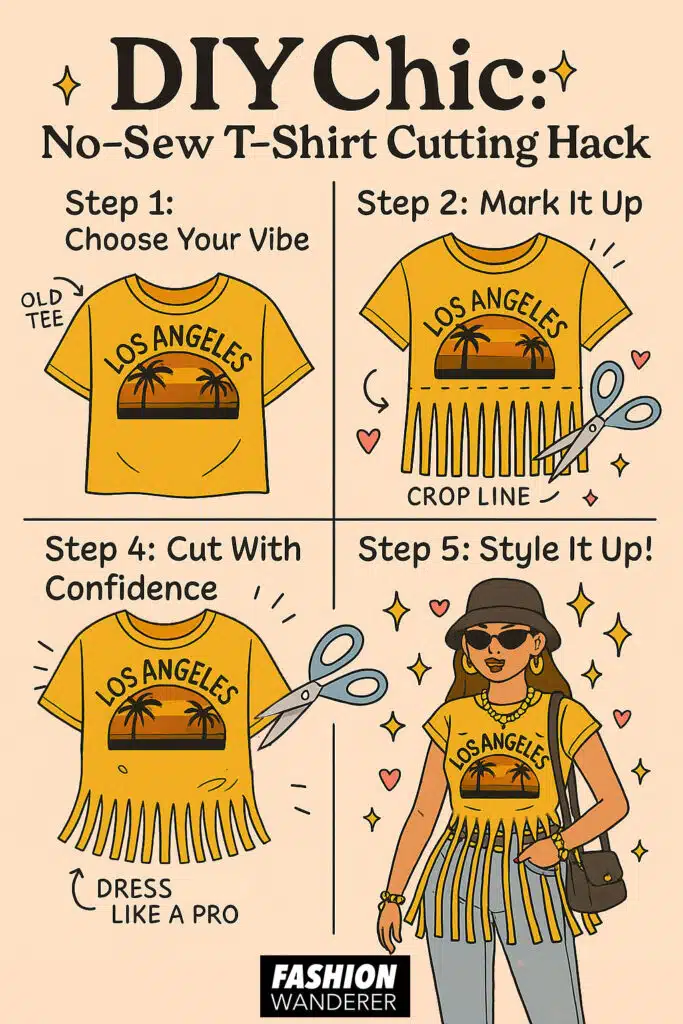
1. Choose Your T-Shirt

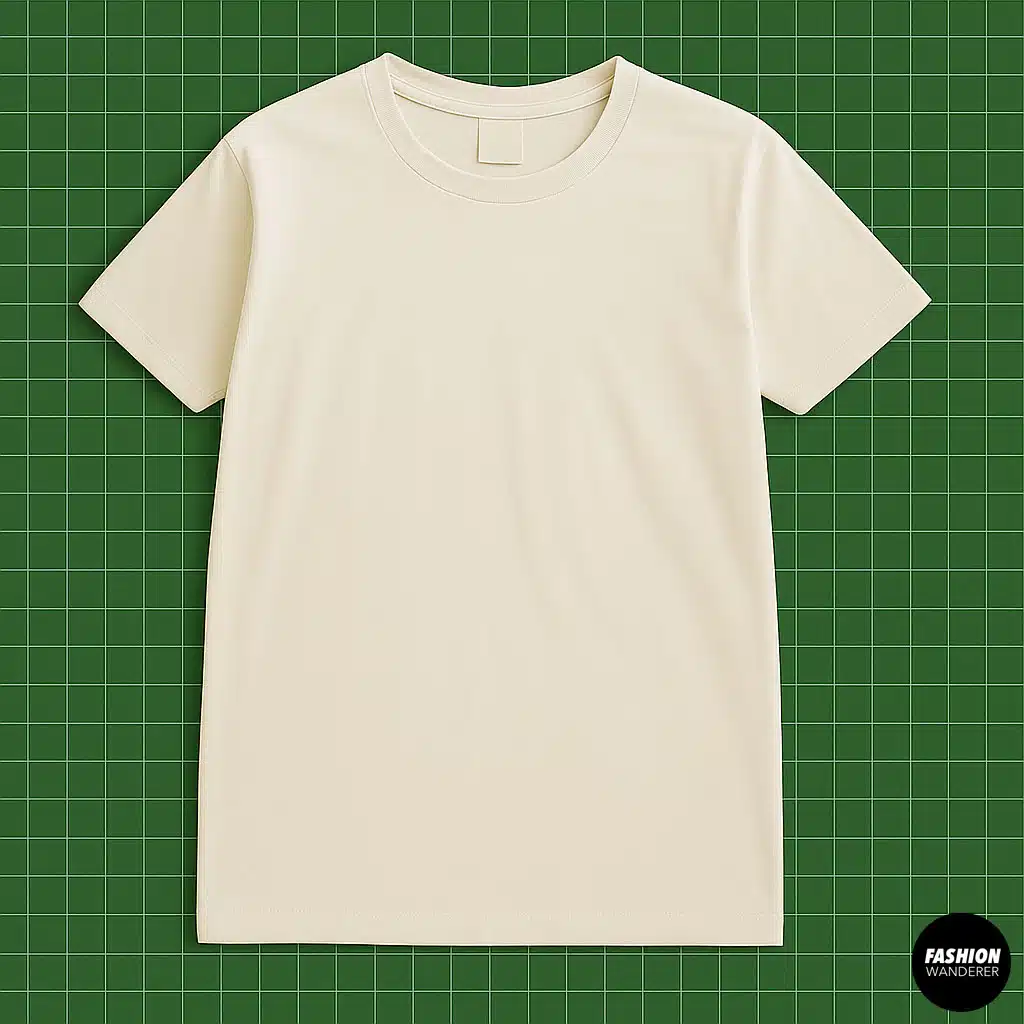
Select an old t-shirt that you don’t mind cutting up. For this hack, an oversized tee works well because it provides extra fabric to work with.
2. Decide on the Cut
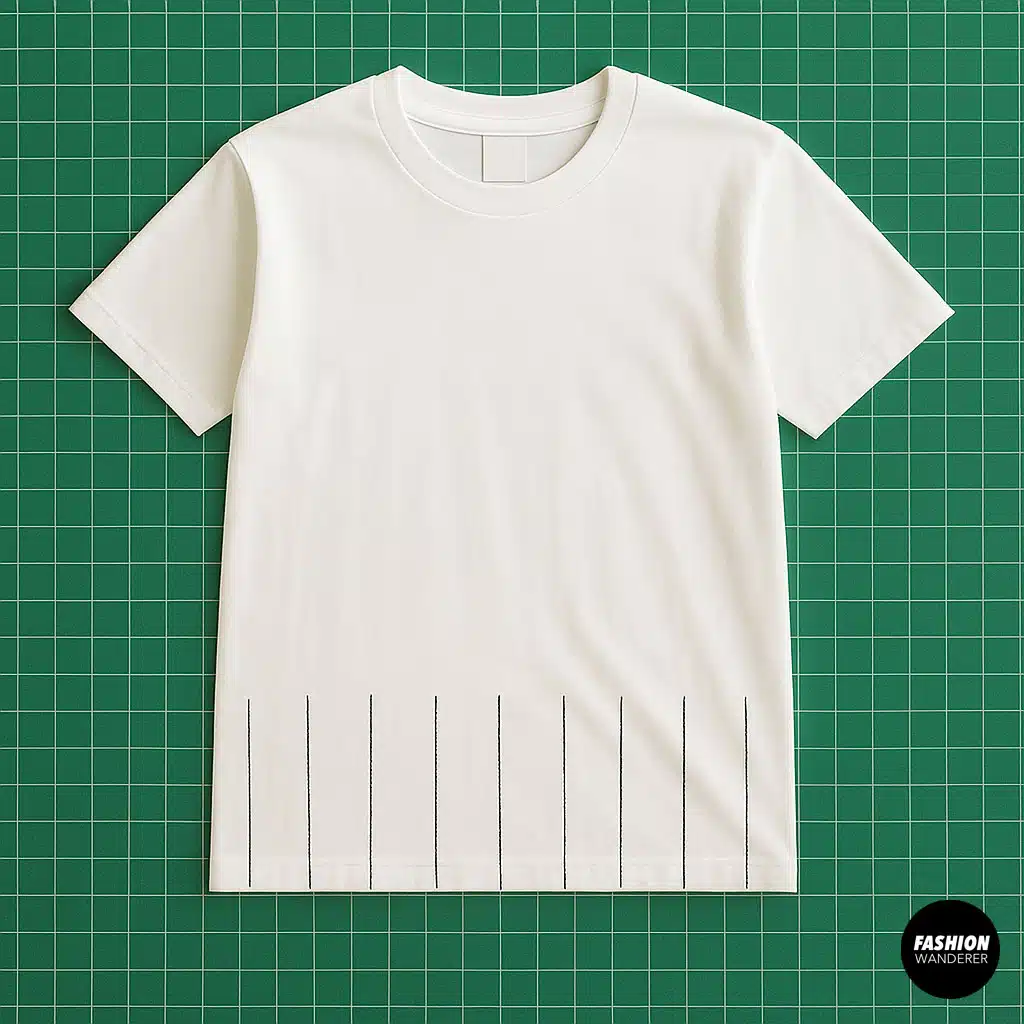
Decide how cropped and distressed you want your tee to be. A classic style is to crop the shirt just above the waistline and add distressing.
3. Cut the T-Shirt

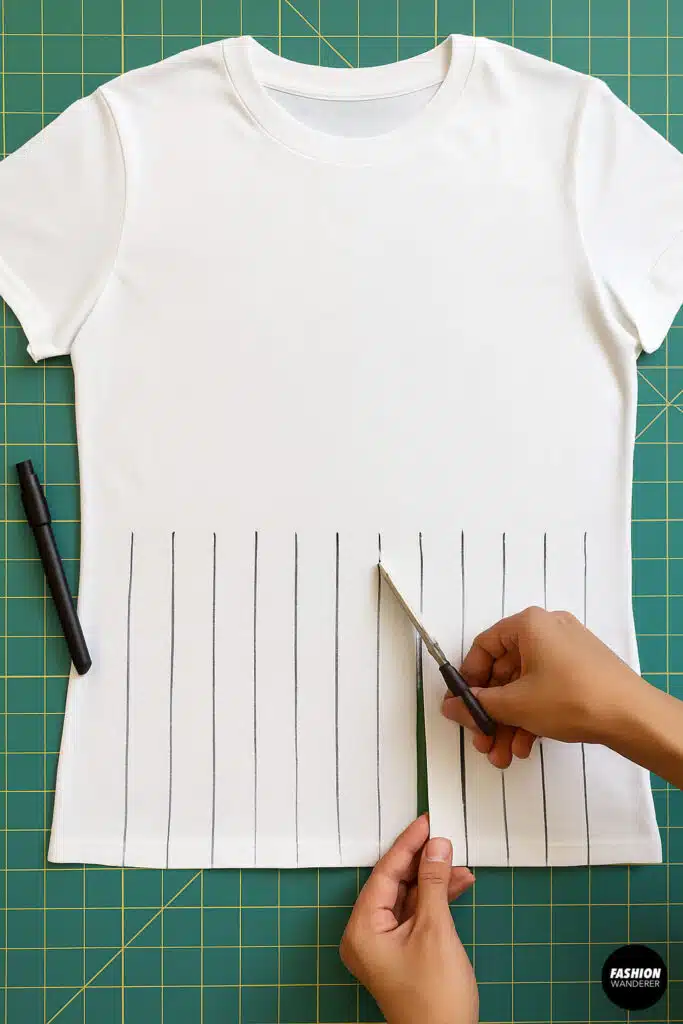
Start by cutting off the bottom hem of the shirt to create a raw edge. Then, use your scissors to cut the t-shirt to your desired cropped length. Make sure to cut in a straight line or slightly angled for a more relaxed look.
4. Add Distressing
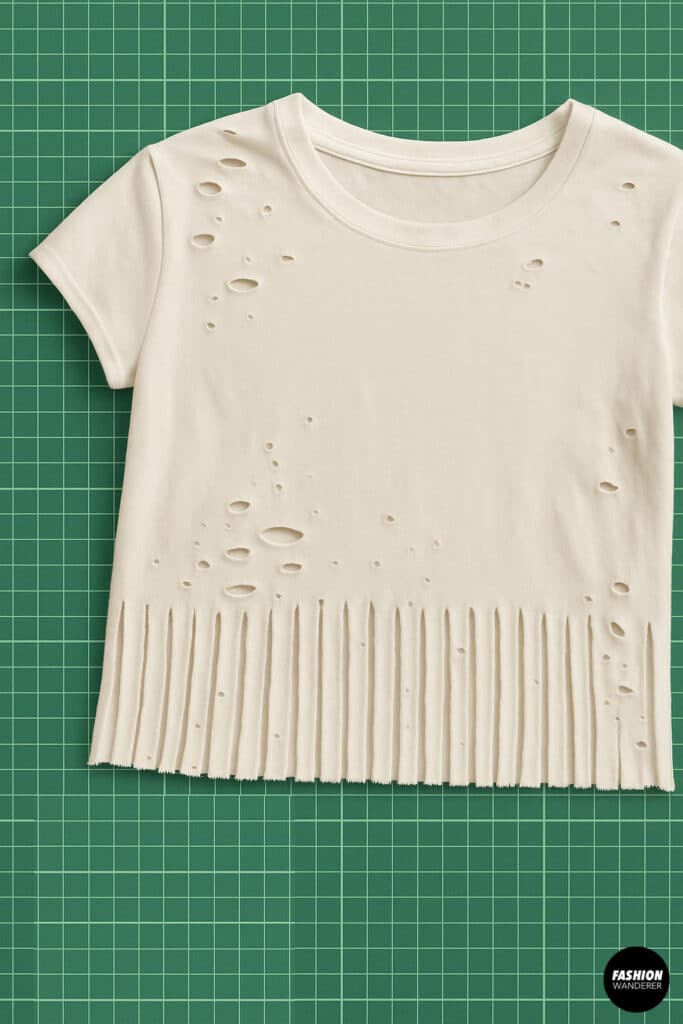
To achieve a distressed look, use the scissors to make small cuts or snips around the neckline, hem, and sleeves. You can also pull at the fabric gently to create frayed edges.
5. Style and Wear
Once you’ve finished cutting and distressing, try on your new cropped, distressed tee. Adjust any areas as needed, and make sure the fit is comfortable.
Additional Tips:
Experiment with Different Cuts: You can try different styles like off-the-shoulder, deep v-neck, or side slits.
Use a Ruler for Precision: If you want straight lines, use a ruler or measuring tape to guide your cuts.
Wash Before Cutting: Pre-wash your t-shirt to prevent any shrinkage after you cut it.
Customize Further: Add patches, fabric paint, or embellishments to make your t-shirt even more unique.

This is another t-shirt cutting hack that is perfect for refreshing old clothes and creating new, trendy pieces without spending a lot. Have fun with your DIY project and experiment with different styles to find what suits you best!
Trendy, Affordable Sewing Patterns for All Sizes


Tie Shoulder Jumpsuit Pattern


Palazzo Pants Sewing Pattern


Pocket Overall Romper Pattern


Wrap Maxi Skirt Sewing Pattern


Tie Back Top Sewing Pattern