
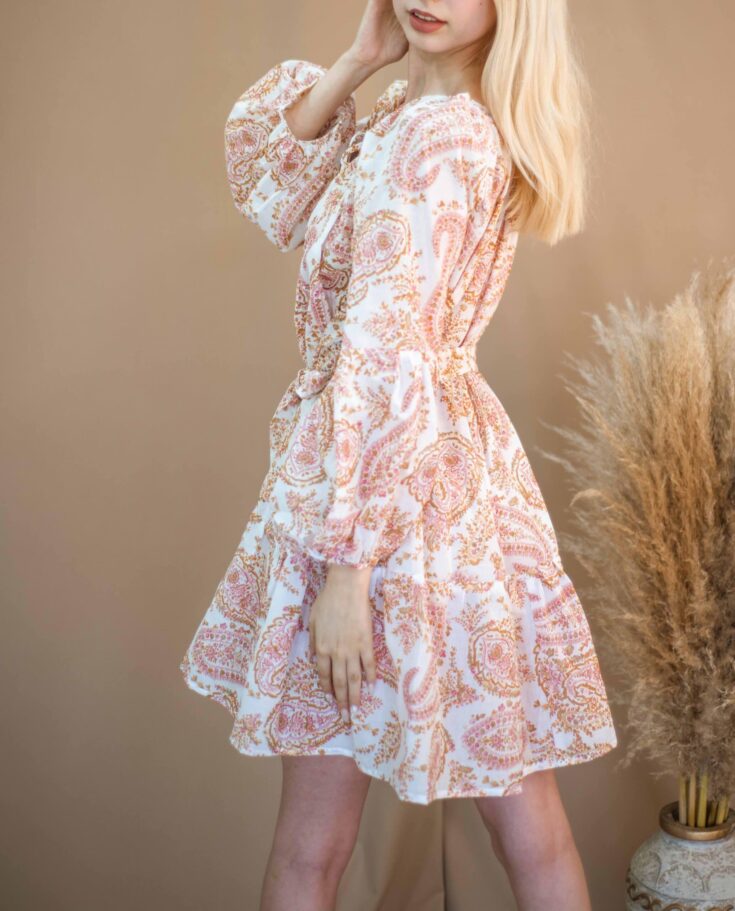
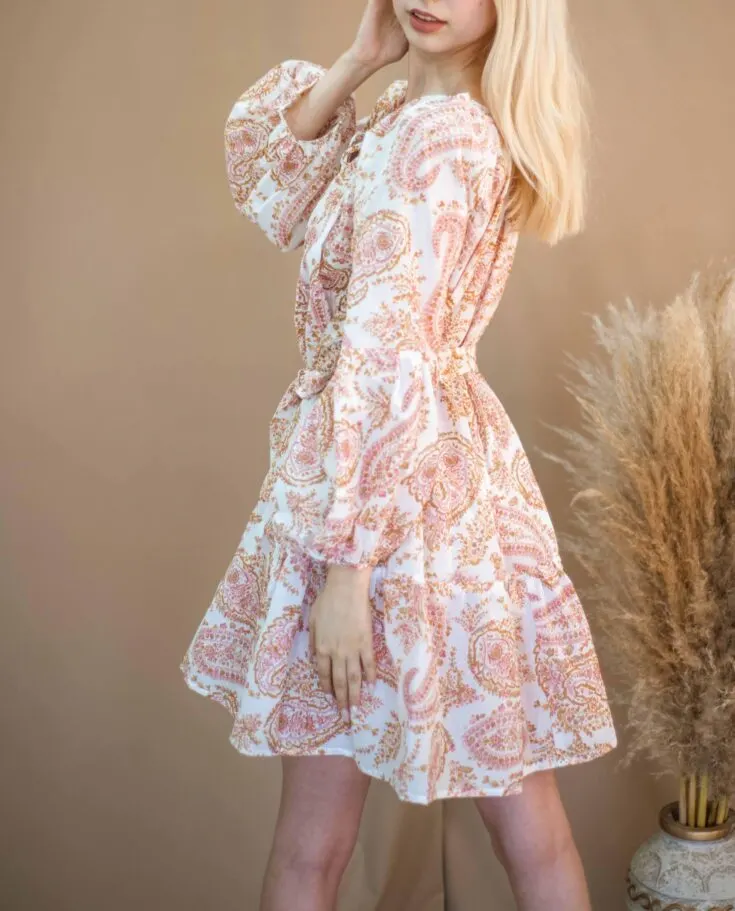
Are you looking for relaxed casual tunic dress for the summer season? This Maisey dress features three tiered ruffles for a loose fit with adjustable spaghetti strap neckline and sleeve cuff.
Ideal to slip on over your swimwear for brunch or charming addition to your summer vacation. Grab the pattern and follow these easy instructions.
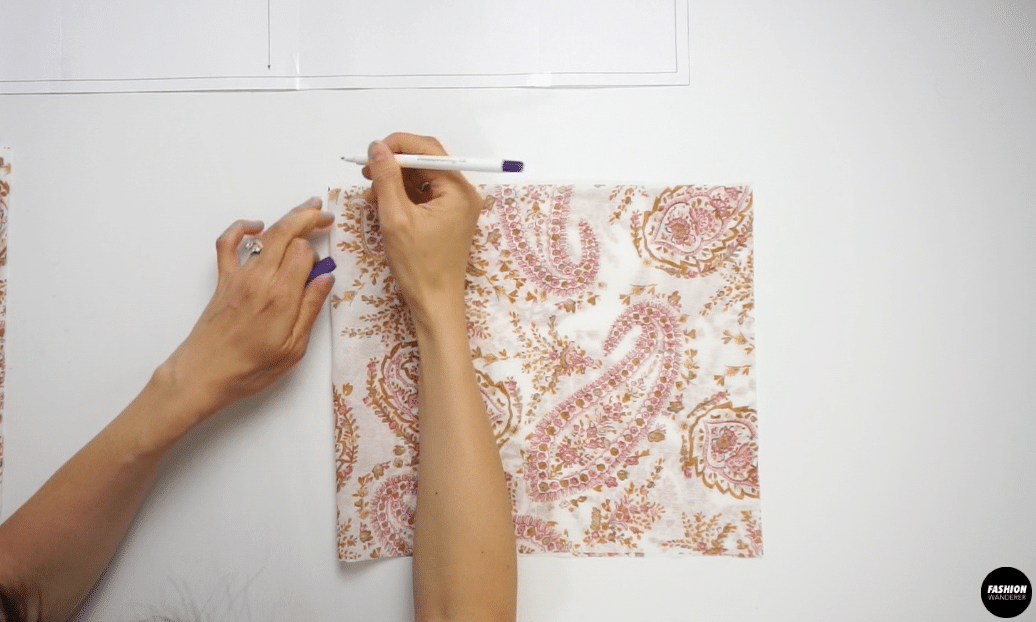
How to make a tiered peasant boho tunic dress? Prepare the voile fabric by hand washing on a delicate cycle and give a nice press before cutting the fabric.
Each pattern pieces already includes ⅜” seam allowance all around. Simply cut out the pattern and follow the sewing tutorial to put together the tunic style peasant dress.
The gathering on each tier can be done with wide stitch length and manually distribute. Otherwise, use gathering foot instead of regular sewing foot to accomplish evenly distribute the gathering front, back, and along the sleeves.
Compared to any other Fashion Wanderer sewing pattern, this Maisey dress pattern has different size division ranges including Small, Medium, Large due to relaxed oversized silhouette. So, if you download this pattern, review the size guide and measurement on the sewing pattern before cutting out the fabric.


DIY Peasant Boho Tunic Dress Sewing Pattern


You will love this DIY Peasant tunic dress because…
- The Maisey dress sewing pattern ranges from small to medium and large.
- Learn to sew binding around neckline, keyhole, and sleeve cuff.
- Sew overlock stitch on all internal seams to create clean finish and avoid unraveling.
- Perfect beginner level sewing project to learn how to sew cotton fabric.
- Easy to read sewing pattern with notches and included seam allowance.
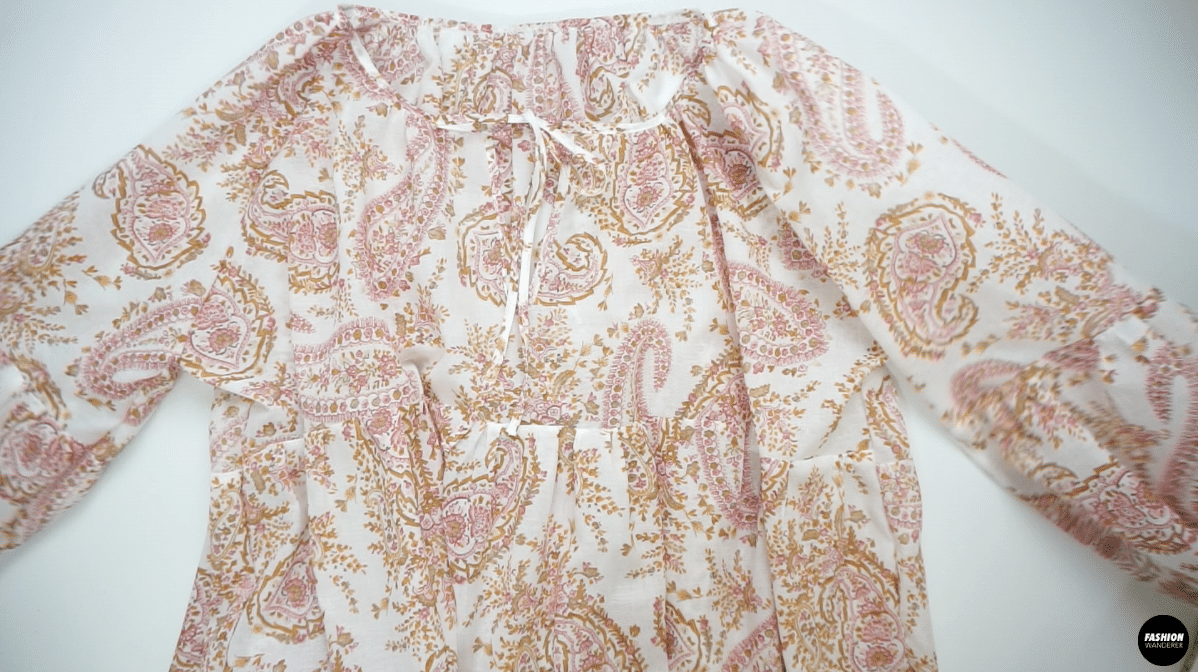
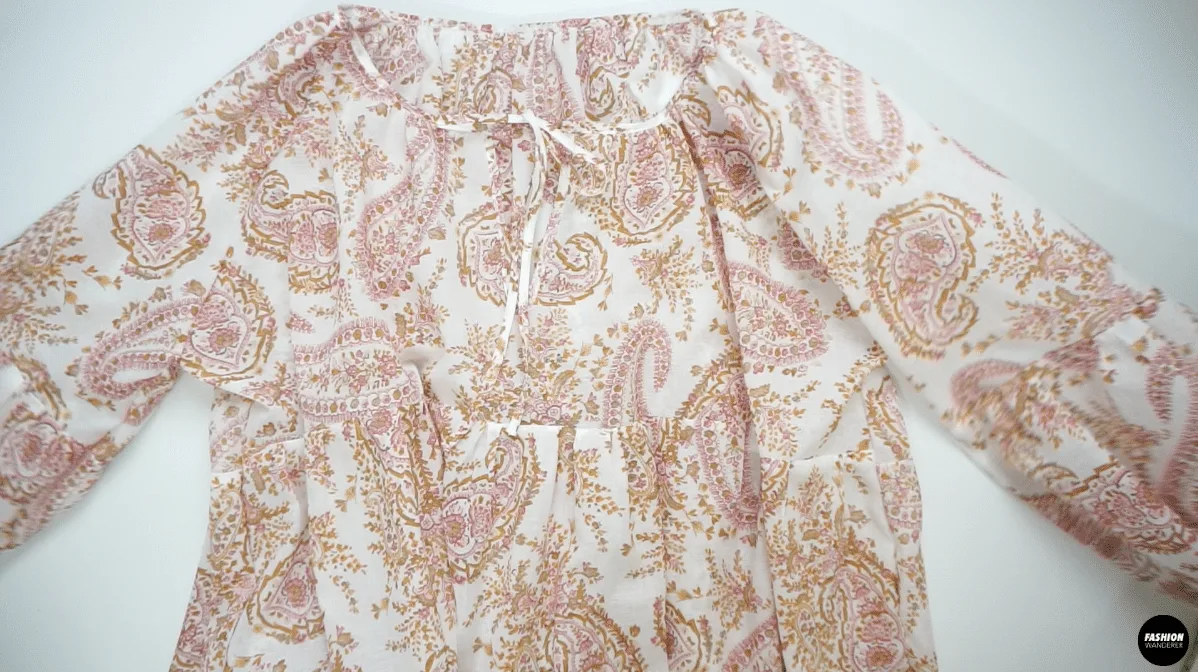
This modern boho style dress features three tiered ruffle hems on front and back with light gathering along the neckline to create a smooth transition from top to bottom. The tie waistband gives a nice cinch to the mid point to accentuate your waistline.
It is perfect dress to wear over your swimsuit or wear as is with cute gladiator sandals or white sneakers for any occasion.
Use this DIY peasant tunic dress sewing pattern and tutorial to lengthen to floor length or ankle length of your choice.


How to make a peasant boho tunic dress

Prepare your sewing station by printing out and assemble the pdf sewing pattern to get a full picture of the dimensions. In addition, for this dress, you need chest, waist, and hip body measurements to determine the correct sizing.
It’s crucial to understand this information beforehand so that you can run to the store to buy correct amount of fabric for this project. Prevent having issues later with a shortage on fabric.
In this tutorial, we are using cotton and polyester blend printed voile fabric. It is lightweight, but does not require lining.
If you are using similar fabric, use high quality all-purpose thread and sewing needle size 70/10. The sharp pointed needle will help you to create small holes while sewing the voile or lawn fabric.
Identifying the correct sewing tool is important and leads to properly thread the sewing machine. As a results, you won’t have to deal with unwanted issue while you sew.
However, if you are faced with stitches skipping or having difficult time to sew straight with lightweight fabric, always practice on a scrap of fabric, adjust tension and analyze the condition of the sewing machine.
DIY Peasant Boho Tunic Dress Tutorial Material:
- Maisey Dress Sewing Pattern
- Voile 2¾ yards for 60” width or 3½ yards for 45” width
- Loop Turner
- Measuring Tape
- Disappearing Fabric Pen
- Pins


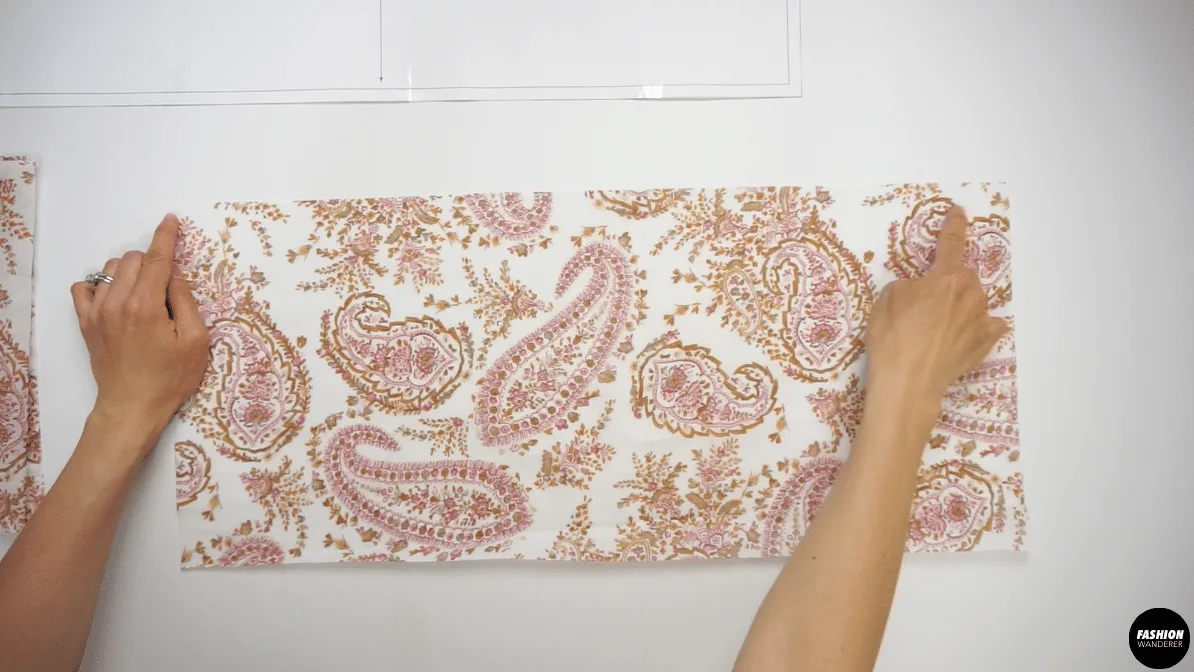
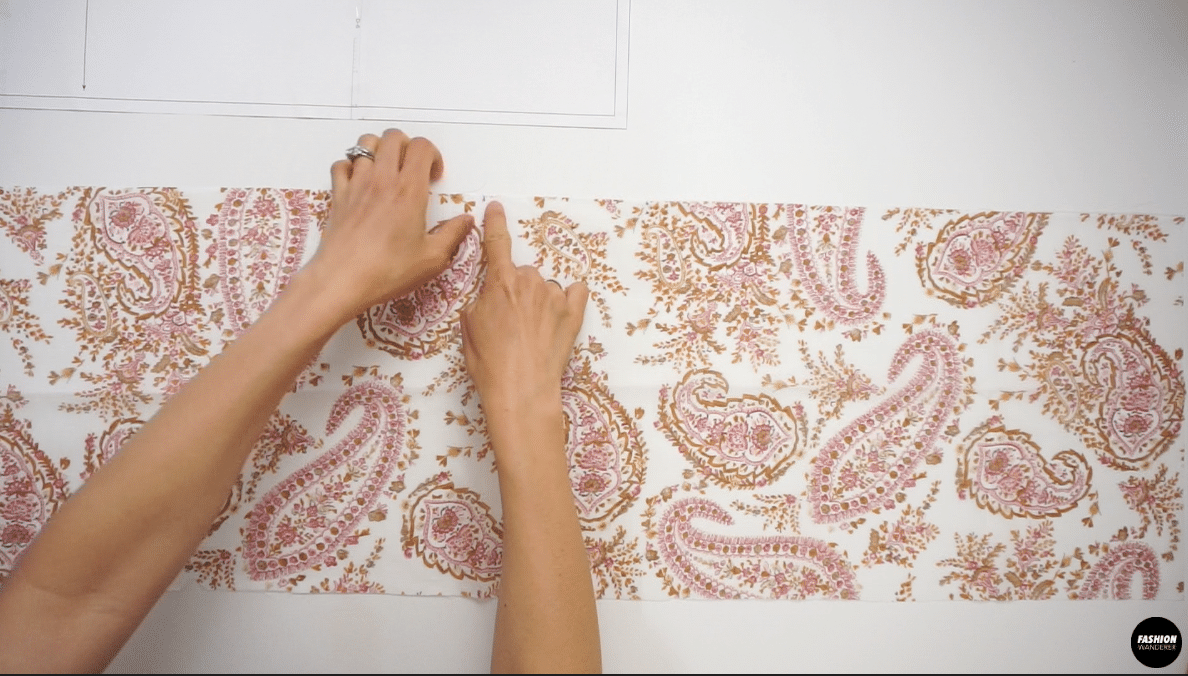
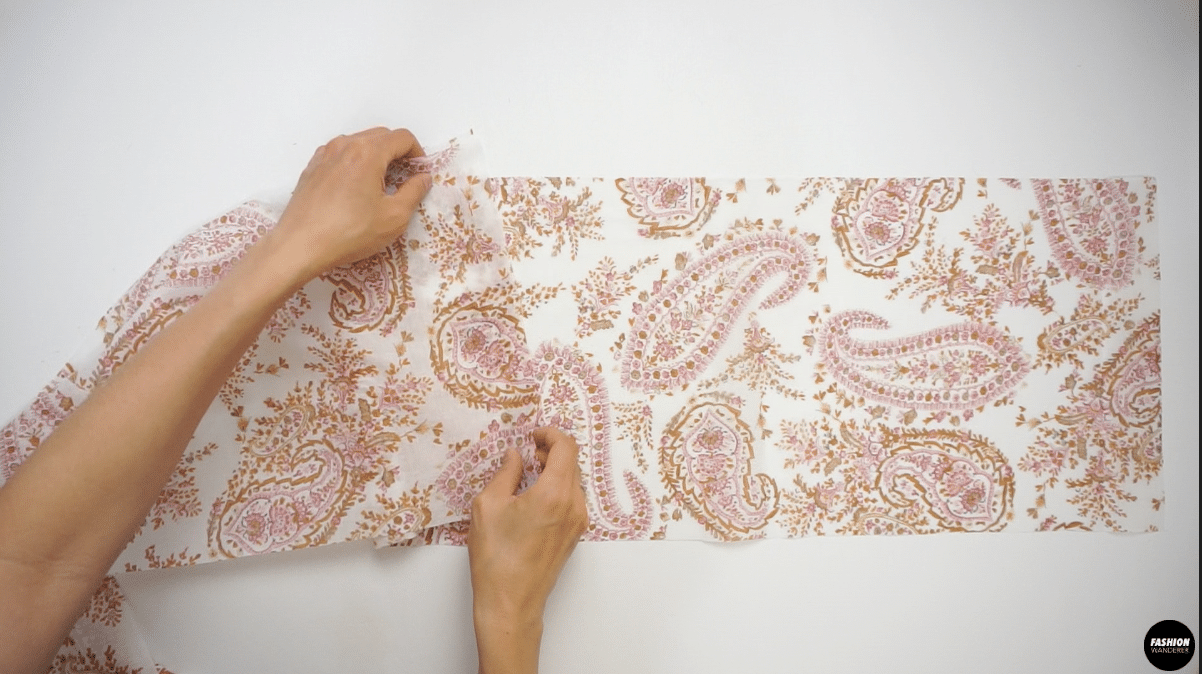
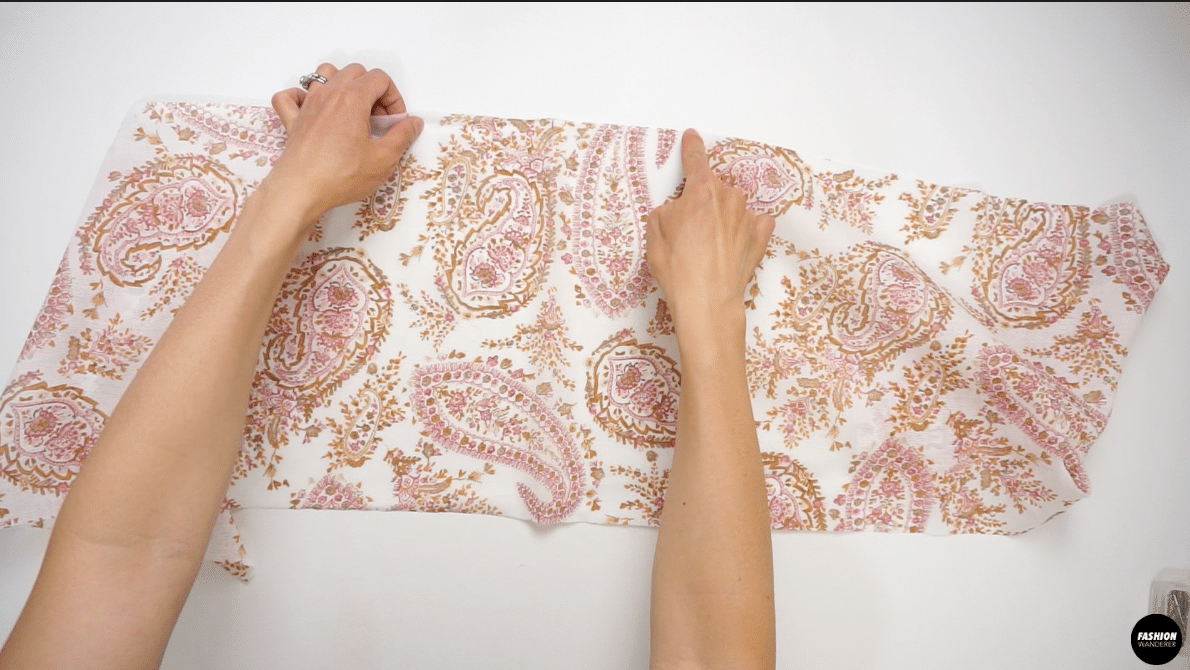
Mark the center of Bottom Sleeve, Front Top Skirt, Front Bottom Skirt, Back Top Skirt, and Back Bottom Skirt pattern pieces in half with water erasable pen. Adjust the stitch length to 3.5 or 4 based on fabric to manually gather evenly.
The center mark point on each gathering pieces will help you to match the center on the previous pattern and be able to distribute the gathering from the center to the side more evenly.


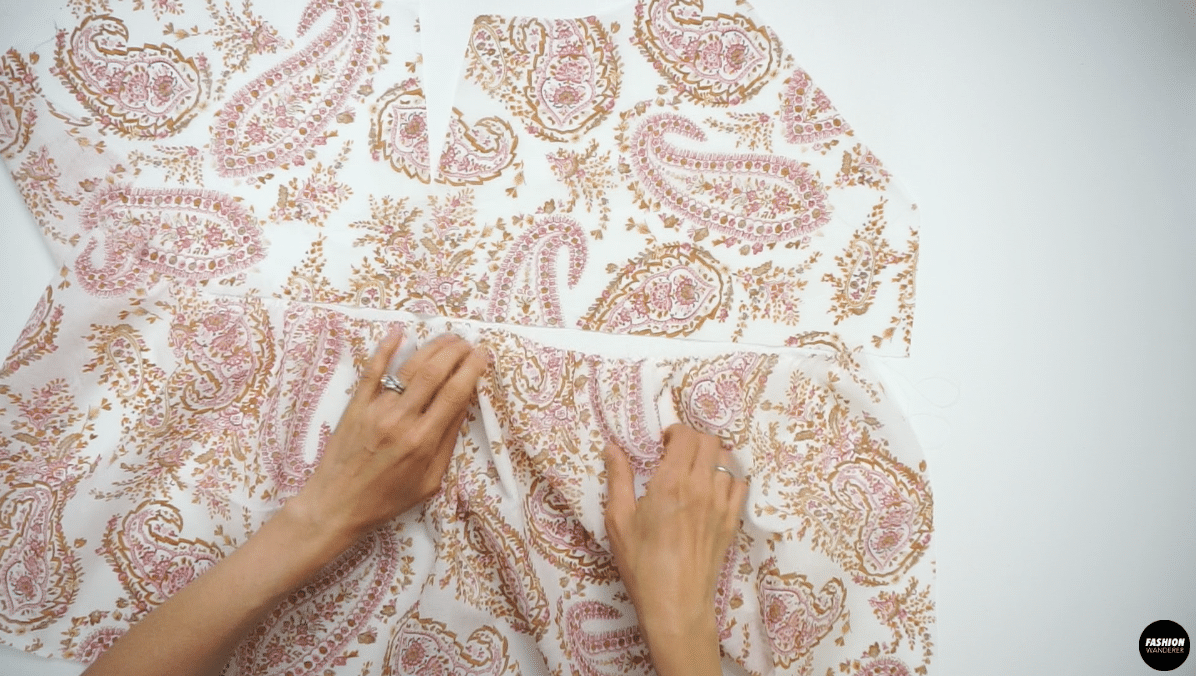
Attach the Bottom Sleeve to the Sleeve pattern facing each other and join with ⅜” seam allowance and finish with overlock stitch. Use the manual gathering method to assemble the tiers on front and back of the dress by repeating the same procedures for each tier.
Attach the sleeve to the dress by aligning the single and double notches of the Sleeve, Front Top and Back Top pattern facing each other to sew ⅜” and overlock to finish. Press the seams by facing the seams away from center front and center back.
Use bias strap to create V-neck keyhole, neckline, and sleeve opening to finish with binding. Depending on the size the length, binding will vary so please refer to the sewing instruction on video and picture step by step instructions.


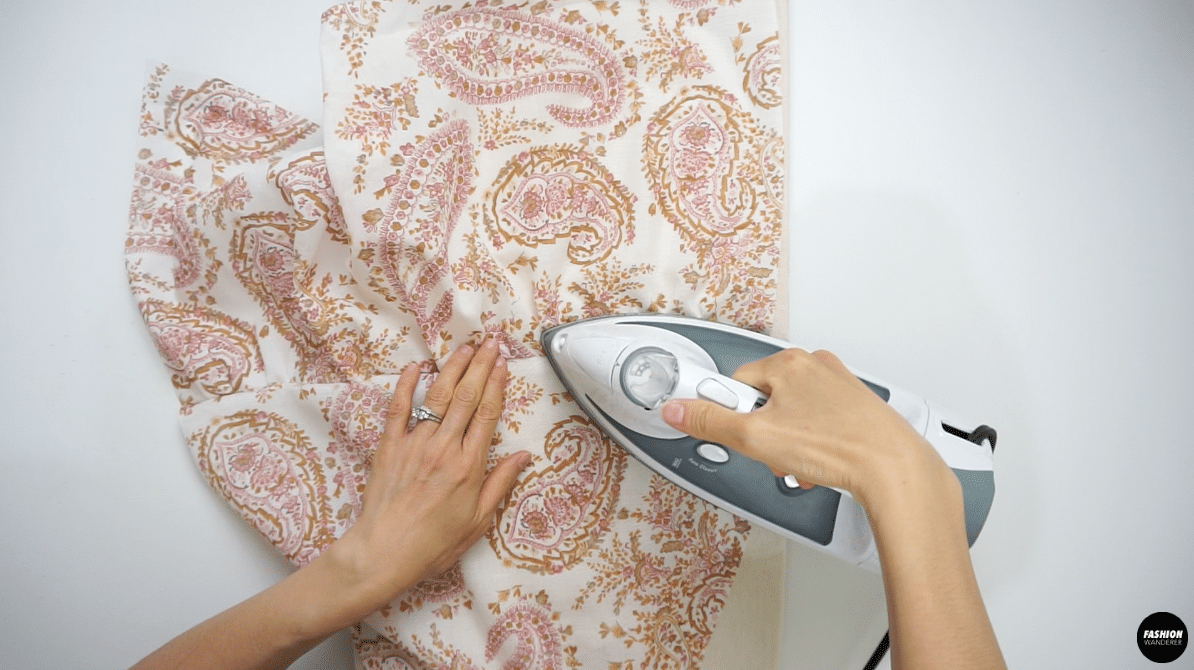
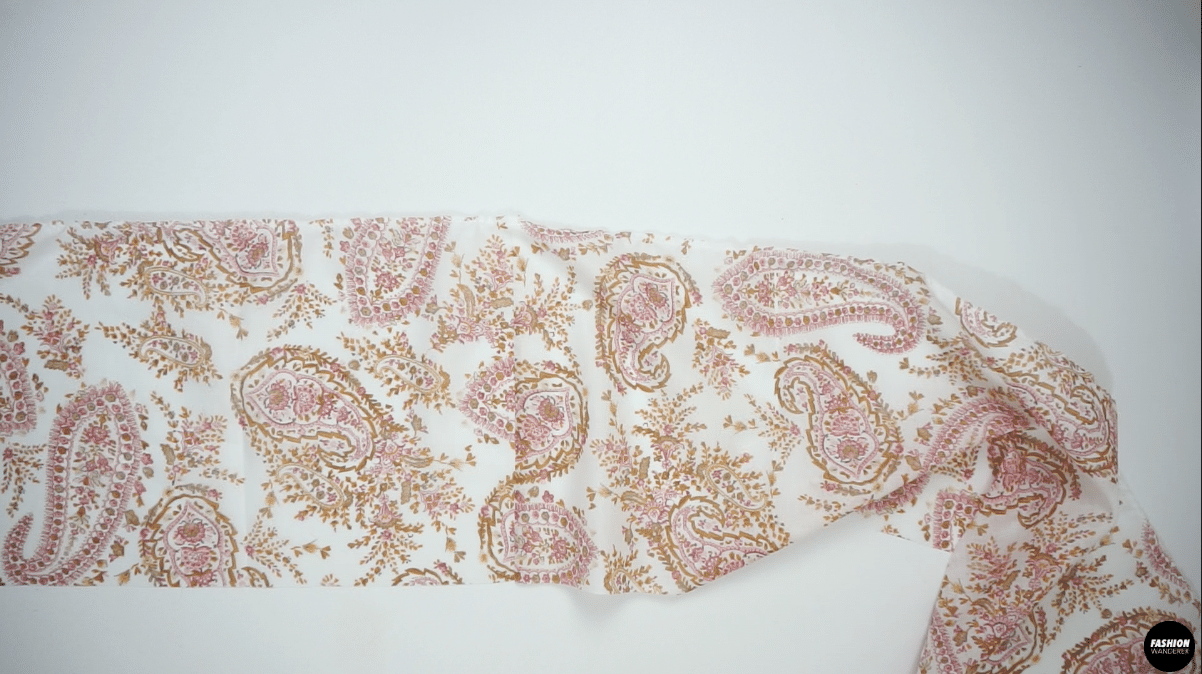
Finish the dress with narrow hemming method by double folding ¼” and straight stitch around the hemline. Give a nice press along the hem and ruffle tiers to give a professional finish to the garment.


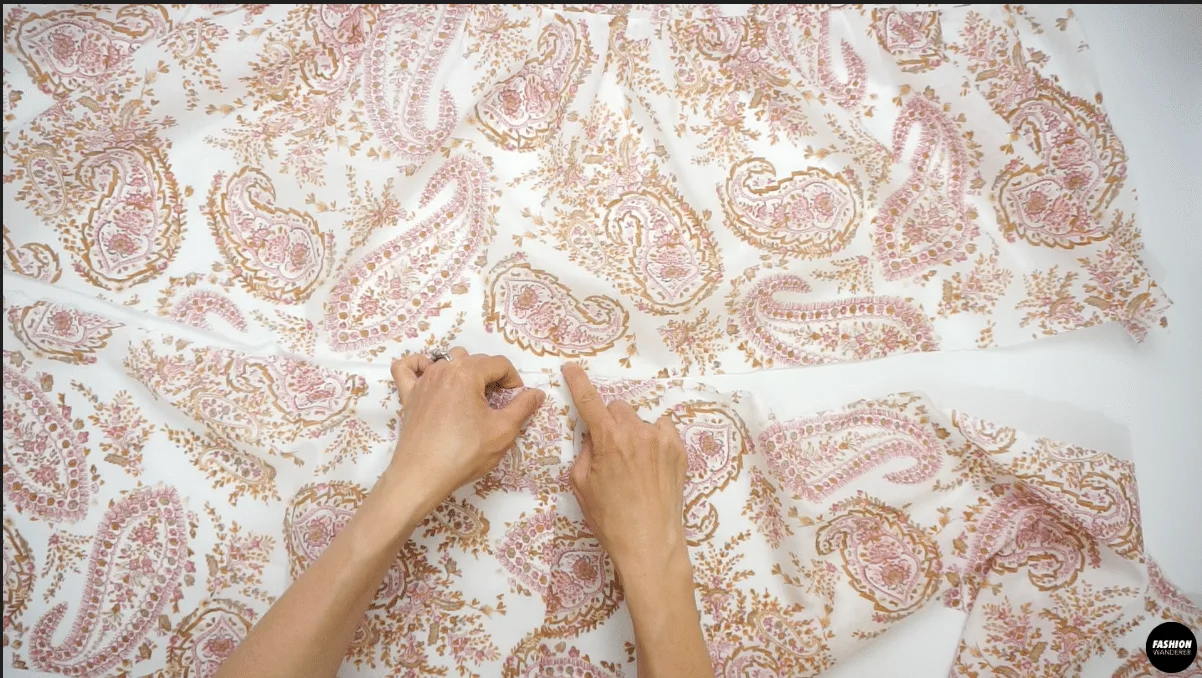
Sewing gathering manually by hand looks intimidating to achieve evenly distribute gathering on each tiers. However, this step by step tutorial teaches you to creat notches or marking to even out the gathering by hand without using a special sewing foot.
The three tiers are similar to sewing ruffles. Each tier is already calculated with correct ratio that you only need to mark the middle point sew the bodice and ruffle together.
The more marks you create the more control you have to evenly distribute the fabric bunching.
When sewing this dress, we recommend to use an iron to press seams in between stitching. For example, press the tier seam toward the hemline, side seams towards the back and armhole seams away from center front.
These are the recommended sewing tips that you need while you sew this Maisey dress. Review the additional sewing tips to guide you in accomplishing the garment without mistakes.
- Sewing Needle: Always choose needle size based on the type and weight of thread as well as fabric. If you are sewing voile, challis, or lawn for this dress, select a fine sewing machine needle size 70/10 or 60/8 smallest Universal needle. These works best with light to mid-range lightweight fabric.
- Thread: When sewing light to mid-range cotton or poly blend fabric, use 60wt cotton or polyester thread instead of standard 50wt thread. The lighter thread matches with lightweight fabric will help to prevent from puckering. If you see slight puckering on the seams, then loosen up the tension on both upper and lower thread.
- Stitches: For any regular seams, use 2.5 or 3.0 stitch length. To create manual gathering, adjust the stitch length to 3.5-4.0 to be able to pull gently on long pieces. Always test the stitches and tension before sewing as voile has a tendency to pucker.
- Binding: For neckline, keyhole, and sleeve opening, you will use bias binding method to wrap the raw edges. Always cut the fabric on bias so when you sew, the neckline will sit on your body smoothly. Fold each side ¼” on both edge lengthwise with an iron to make it easy when you sew. Use pins to sew over when sewing binding to secure the position and the gathering in place.
- Finishes: A Serger is best to overlock the seams in this dress. If your fabric is too thin, use French Seam or binding method on all seams. Make sure to iron on low heat and cover with a press cloth if needed to press on the finished seams at the end.
There are two ways to create gathering: manually or with gathering foot. In this tutorial, we will learn to sew Maisey dress with manual method.
Simply download the sewing pattern and take time to sew wide length straight stitch and gently pull the thread. Mark many notches to distribute the gathering evenly.
Follow these sewing techniques and tips so you can complete Maisley dress without any sewing issue.
How to make a Maisey peasant boho tunic dress with sewing pattern
Looking to add a loose fitting dress to your DIY wardrobe? If you are searching for an easy to wear tunic dress for warm weather, this Maisey sewing pattern is perfect for you.
It features three tiered ruffles with adjustable spaghetti neckline and sleeve cuff. Cinch your waist with a delicate waist tie to create modern bohemian look.
The sewing tutorial comes with step by step detailed pictures and video instruction that are easy to follow and execute. Sew along with us to make this adorable peasant style tunic dress.
Materials
- Maisey Dress Sewing Pattern
- Voile 2¾ yards for 60” width or 3½ yards for 45” width
Tools
- Sewing Machine
- Serger
- Straight Pins
- Loop Turner
- Erasable Pen
- Fabric Scissors
- Measuring Tape
Instructions
For this Maisey tunic dress tutorial, start by assembling the pattern pieces:
1 piece of Front Top
1 piece of Front Top Skirt
2 pieces of Front Bottom Skirt
1 piece of Back Top
1 piece of Back Top Skirt
2 pieces of Back Bottom Skirt
2 pieces of Sleeve
2 pieces of Bottom Sleeve
1 piece of Waist Tie
How to Sew Gathering On Sleeve Piece
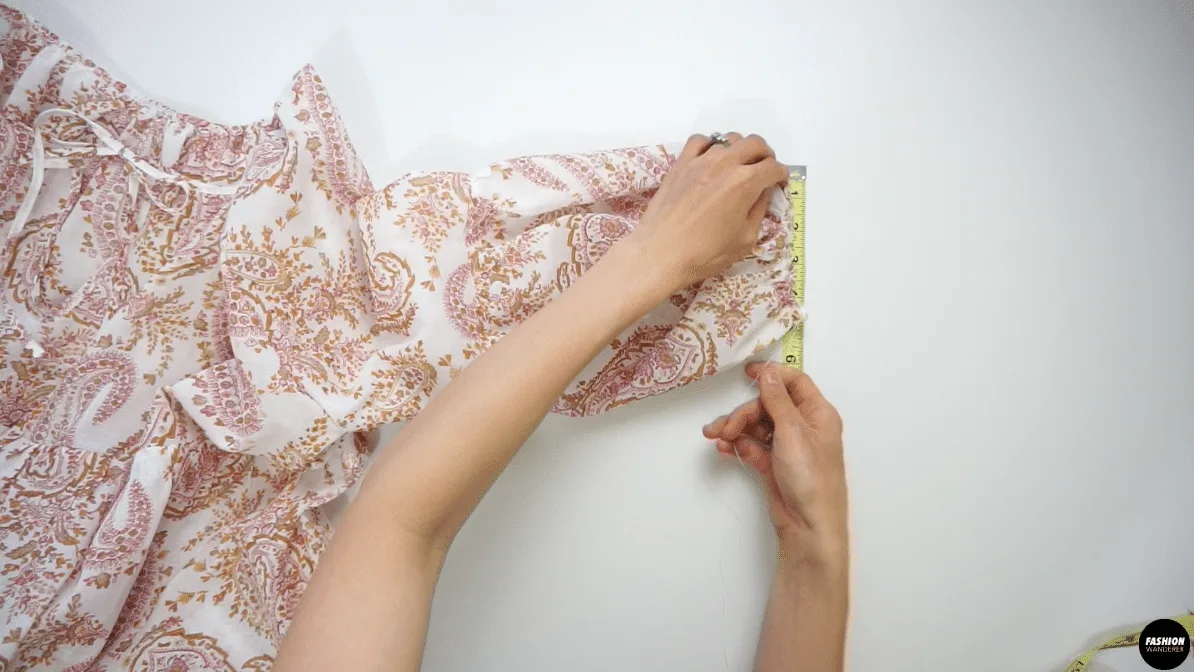
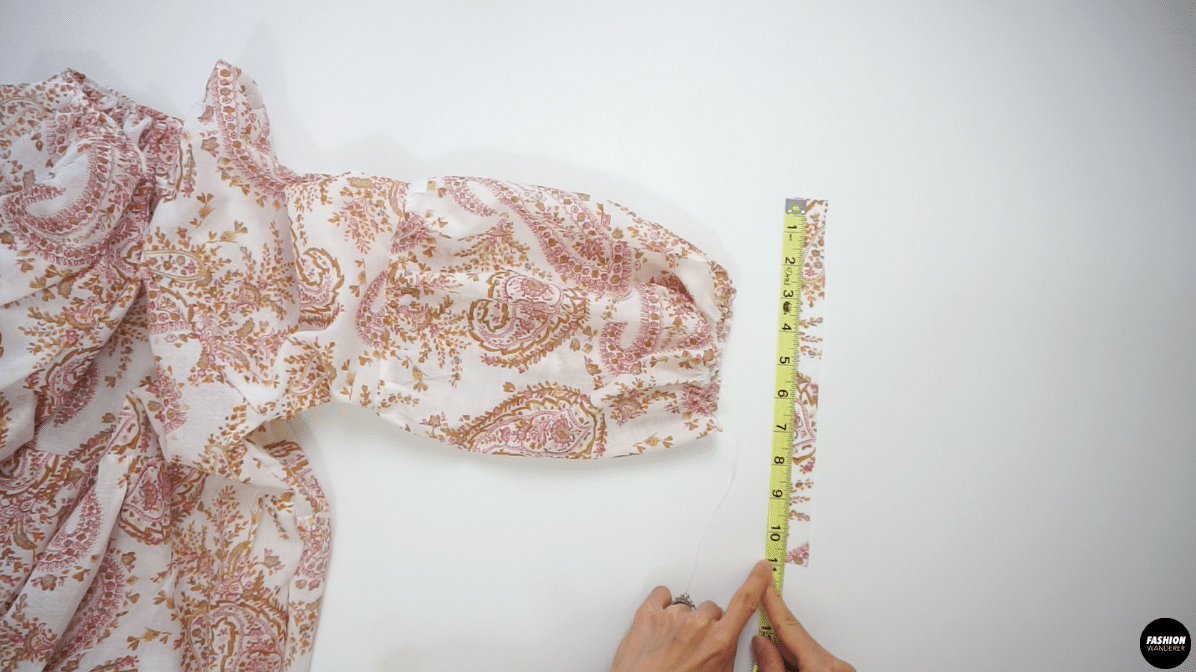
- Fold the Bottom Sleeve piece in half and mark the center on both top and bottom with water erasable pen.

- Adjust the stitch length to 3.5 and wide straight stitch lengthwise ¼” away from the cut edge.

- Gently pull the back thread and evenly distribute the gathering.

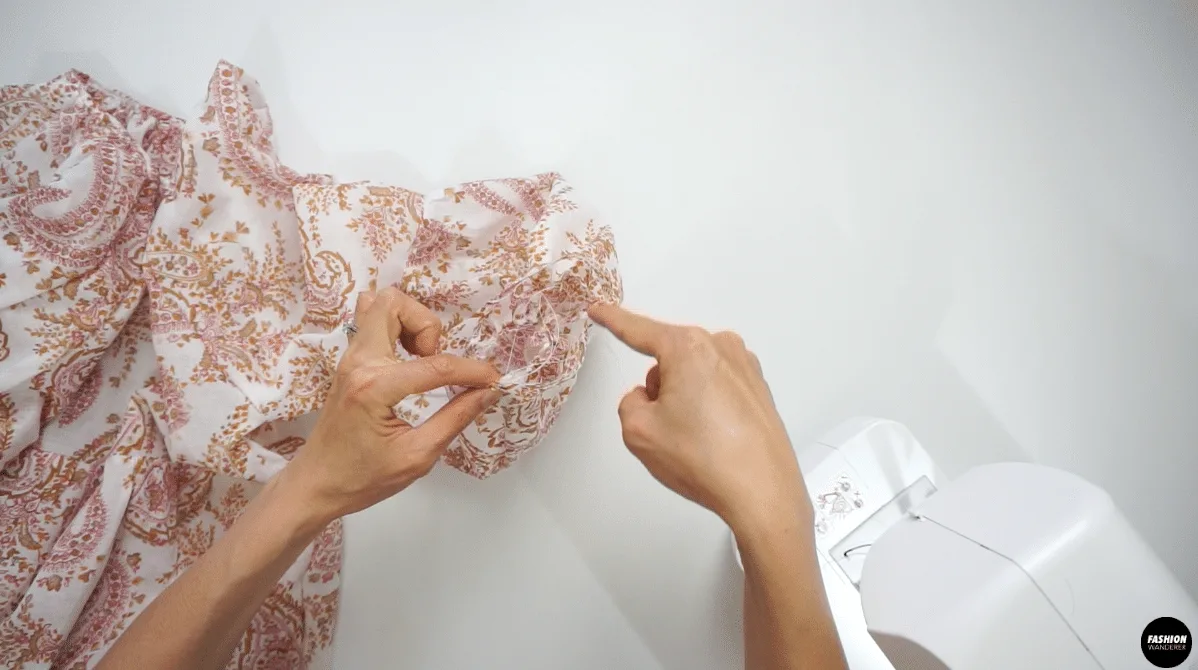
- Place right side of Sleeve pattern and right side of the Bottom Sleeve piece together and pin on the center mark and distribute the gathering and stitch ⅜” seam allowance and overlock stitch to finish.


- Press the seam with iron and ensure that seam allowance is facing toward the opening of the sleeve.

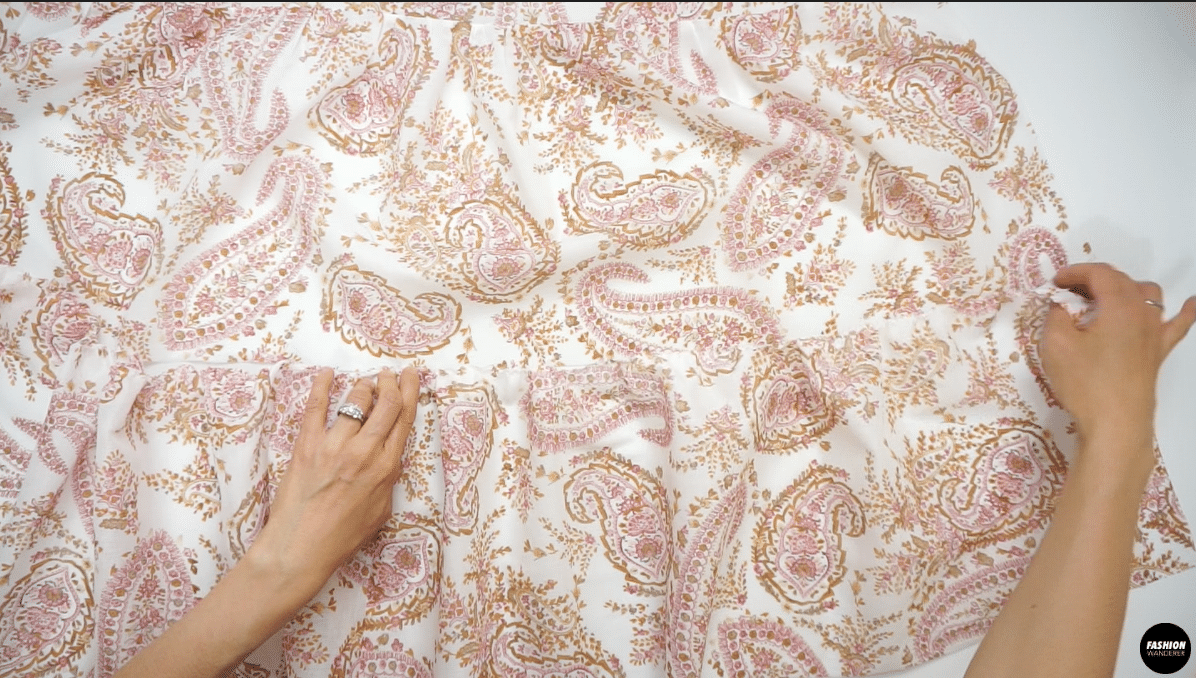
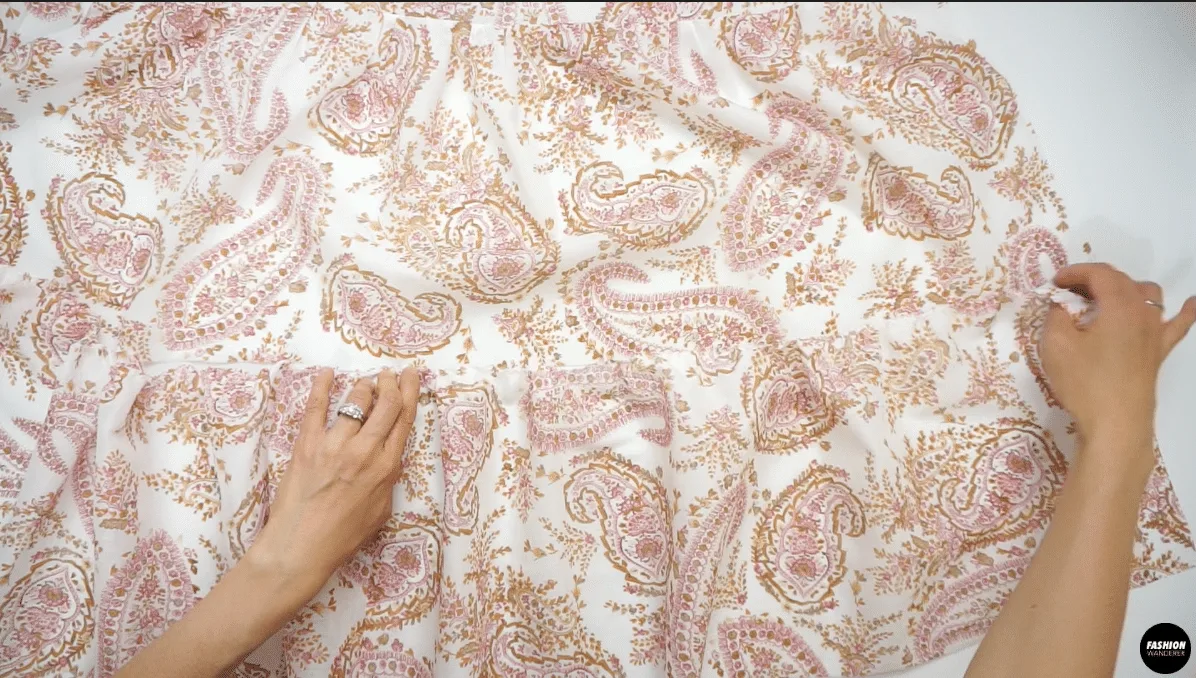
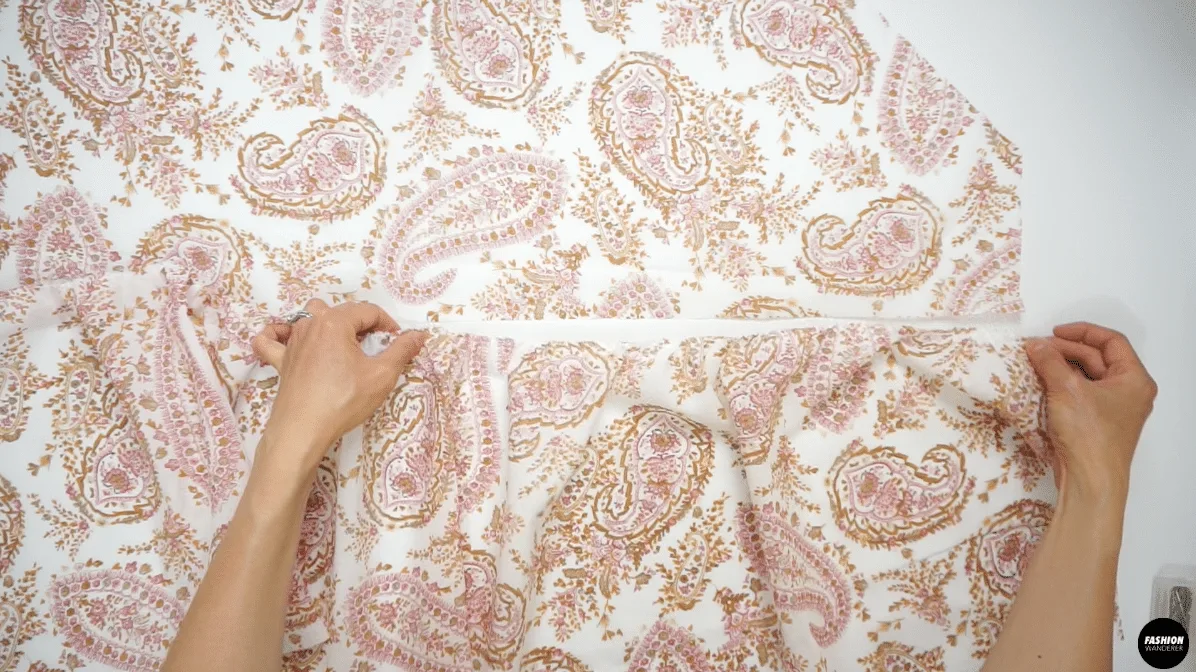
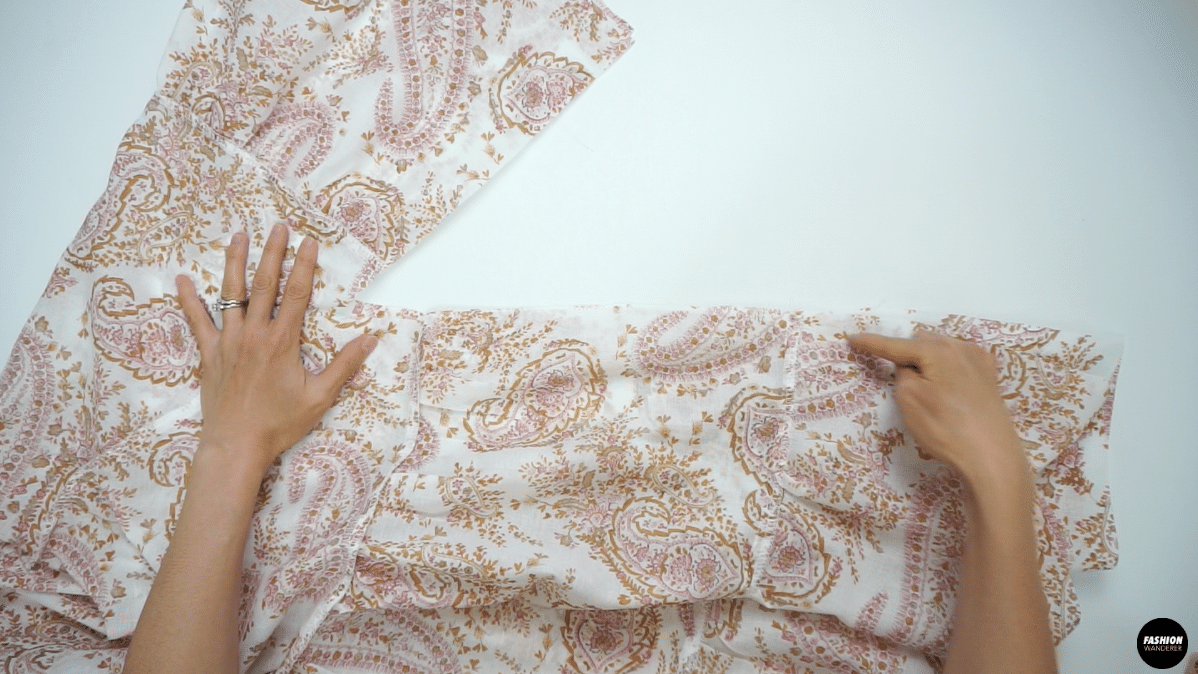
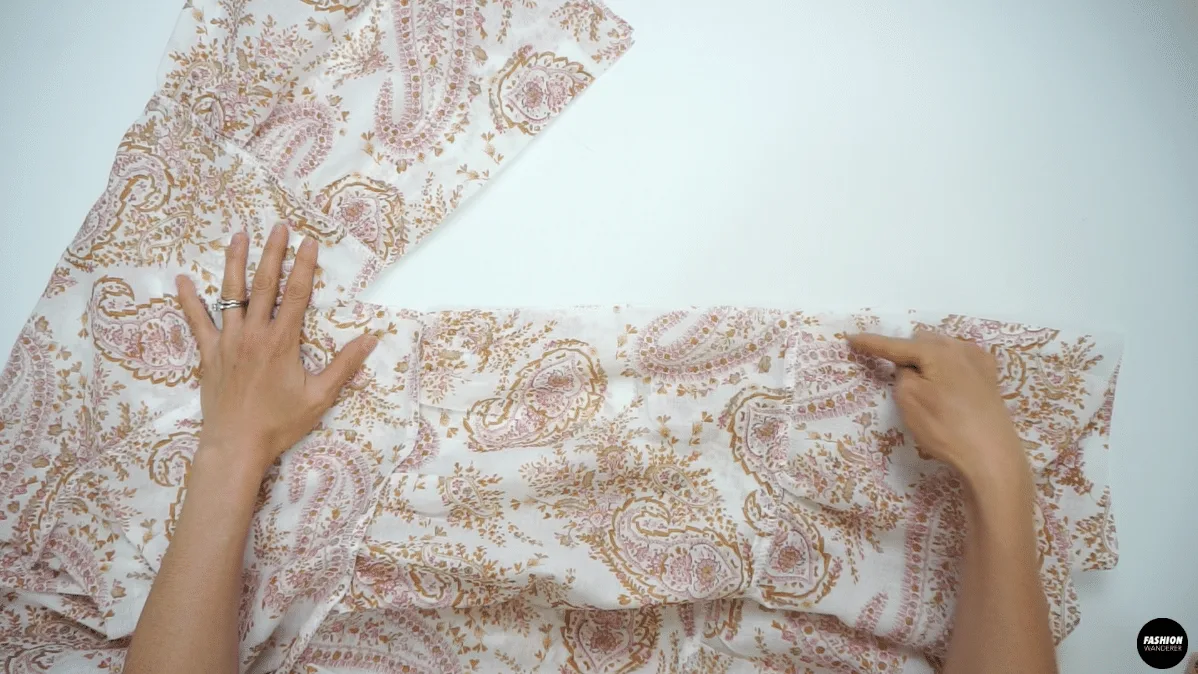
How to Sew Gathering On Skirt Tiers
- Fold the Front Top Skirt pattern piece in half and mark the center on top and bottom with erasable pen.

- Also, mark the center front of the Front Top piece with erasable pen. This will be the notch to match with the first tier.
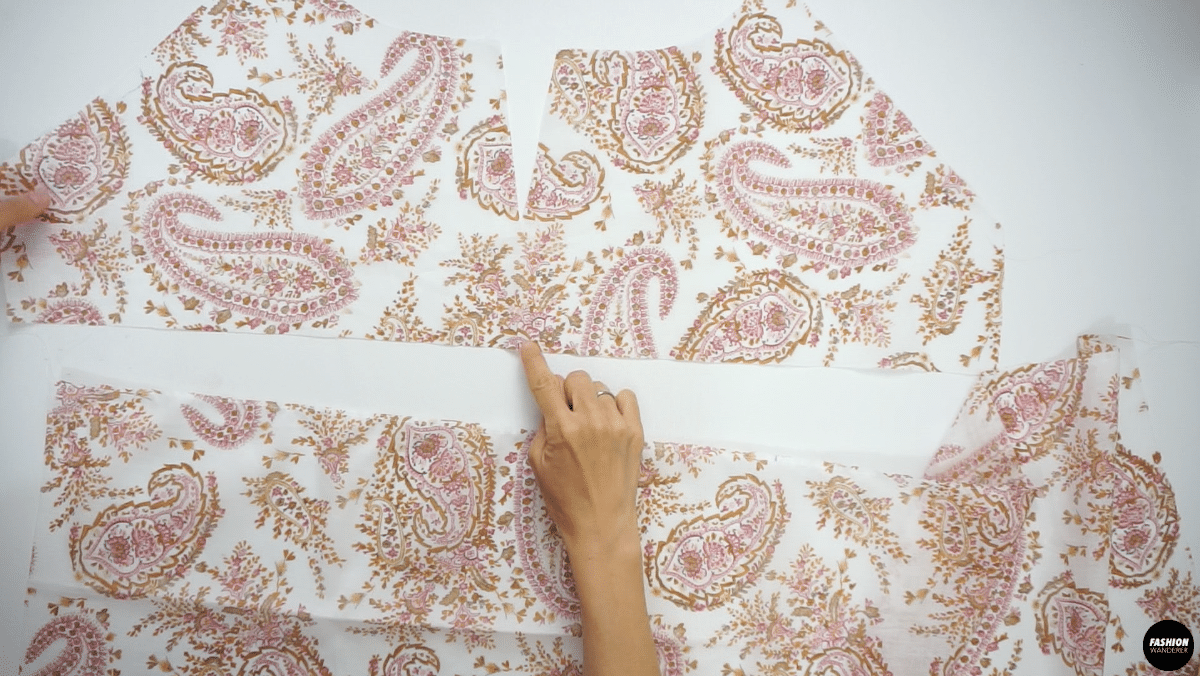

- Place the two pieces of Front Top Skirt facing each other, join with ⅜” seam allowance and overlock to finish.

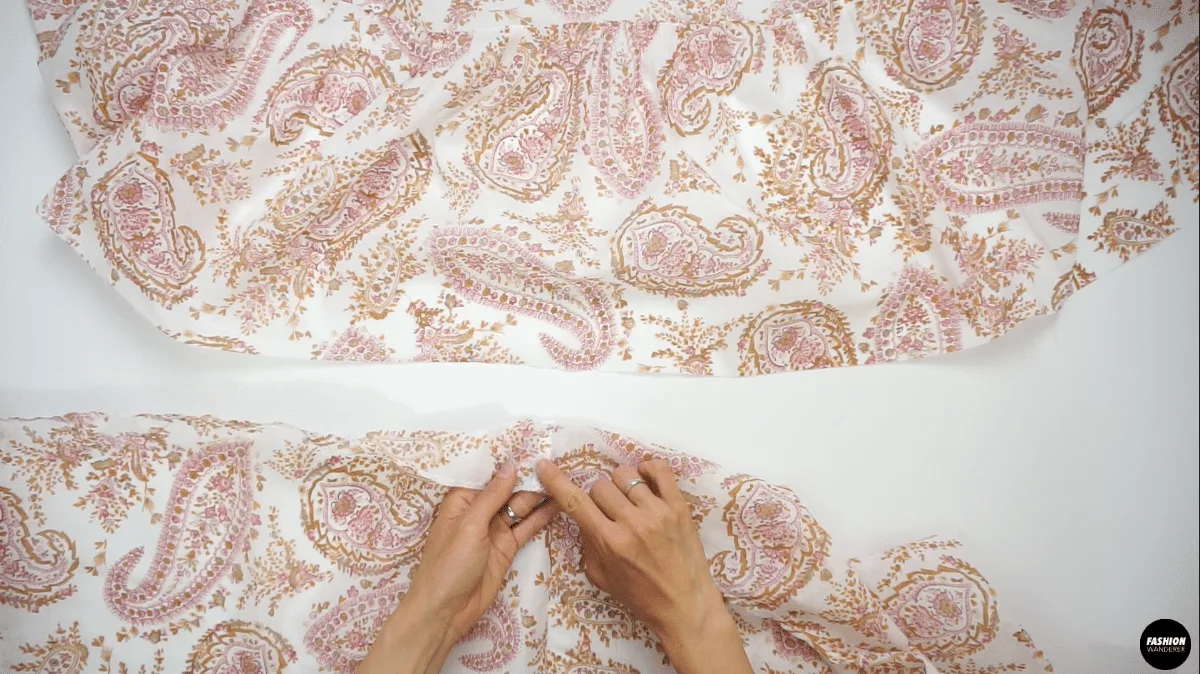
- Straight stitch with 3.5 stitch length ¼” away from the top edge and gently pull the back thread to create even gathering. Place the two pieces of Front Bottom Skirt facing each other, join with ⅜” seam allowance and overlock to finish.

- Press the seam towards the side and with 3.5 stitch length sew straight stitch for gathering.

- Match the mark on Top Skirt and Bottom Skirt pieces.

- Pull the thread gently to create gathering, so from mark point to side seam you have even gathers on both sides. Pin to secure and ⅜” stitch along seam allowance and overlock stitch to finish.
- Fold the Back Top Skirt piece in half and mark the center on top and bottom with pen.

- Also, mark the center back of Back Top piece on the bottom edge.

- Apply ¼” away from top edge, 3.5 straight stitch for gathering. Start at the marked point and slowly pull the back thread to gather until it matches the length of side seam on both sides. Place the two pieces of Back Top Skirt facing each other, join with ⅜” seam allowance and overlock to finish.

- Lastly, repeat the center marking on Back Bottom Skirt piece and add 3.5 wide straight stitch for gathering that matches the length of Back Top Skirt.

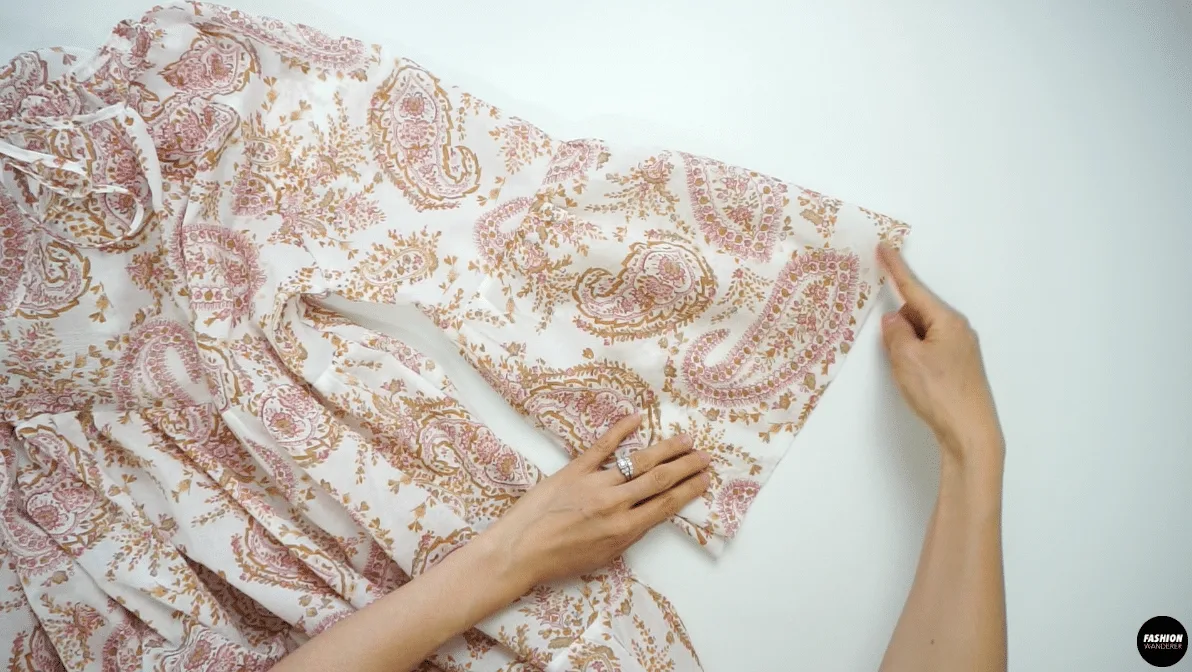
How to Attach Sleeve to the Dress
- Match the single notch from Front Sleeve piece and Front Top piece right side facing each other and pin. Sew ⅜” seam allowance and finish with overlock on both front sleeves.

- Now, match the double notch from Back Sleeve piece and Back Top piece right side facing each other and pin to secure. Straight stitch along the raglan seam ⅜” and overlock to finish. Press the seam on front and back away from center.

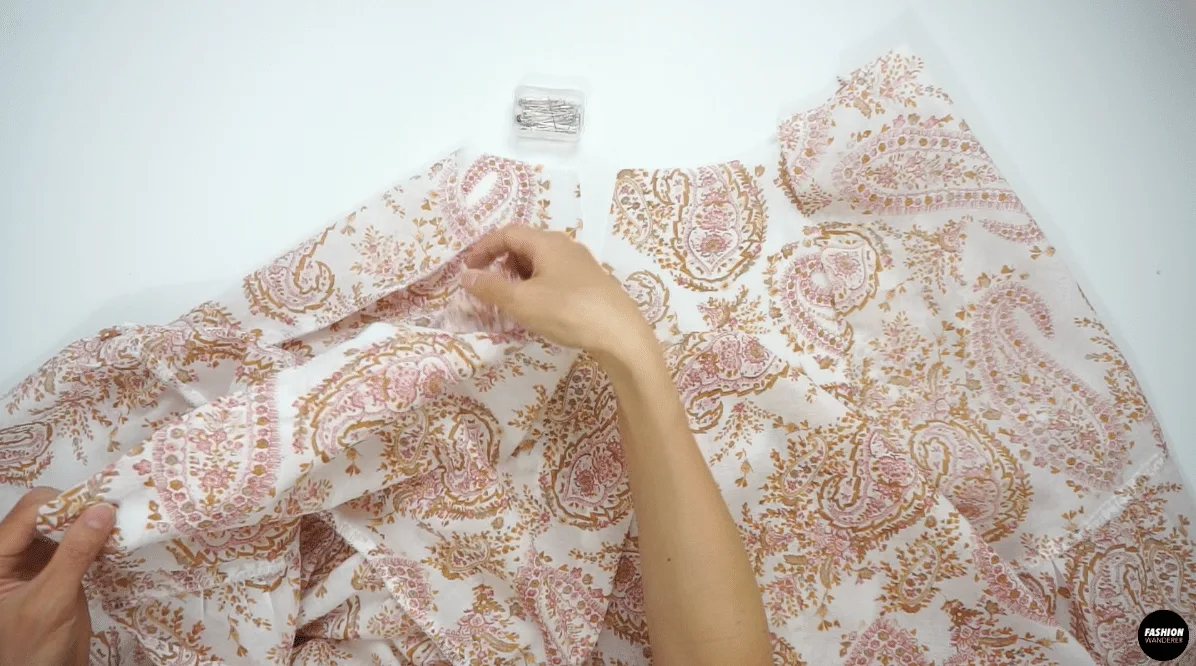
- We will use flat sew sleeve method in this tutorial where you will place right side of front and back facing each other and sew ⅜” seam allowance from sleeve opening, under the sleeve to the side seam of the dress. It’s quite simple and easy to attach sleeve to the dress. Don’t forget to finish the edges with overlock stitch.
How to Assemble The Tunic Dress
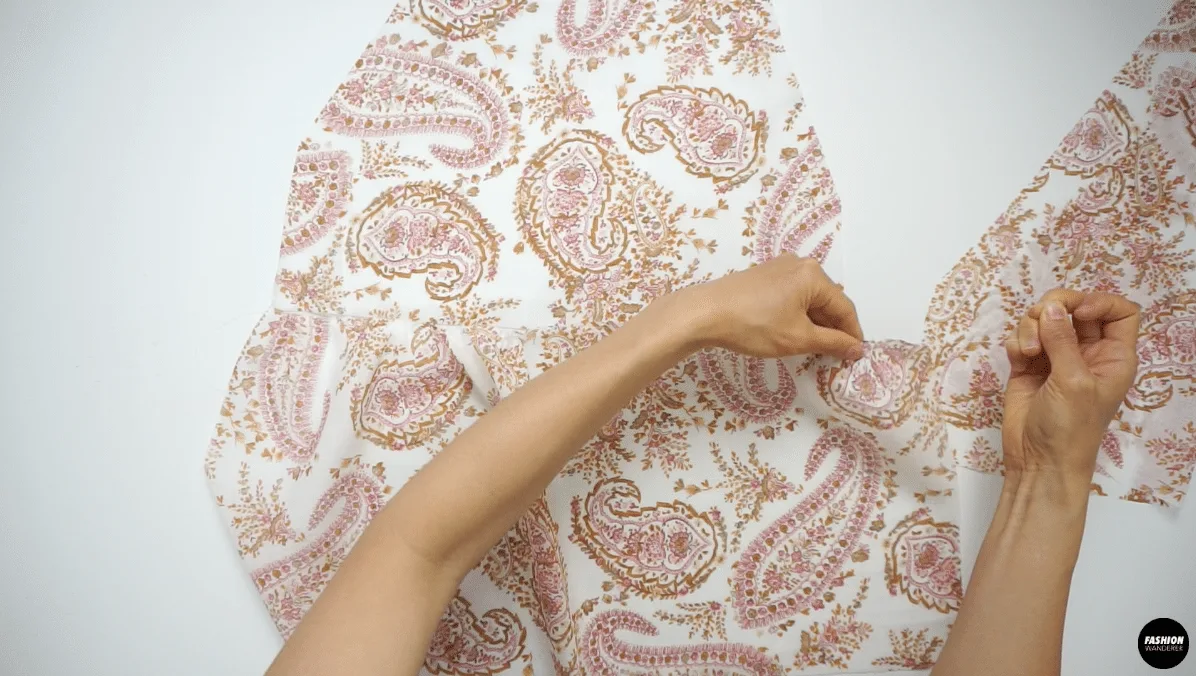
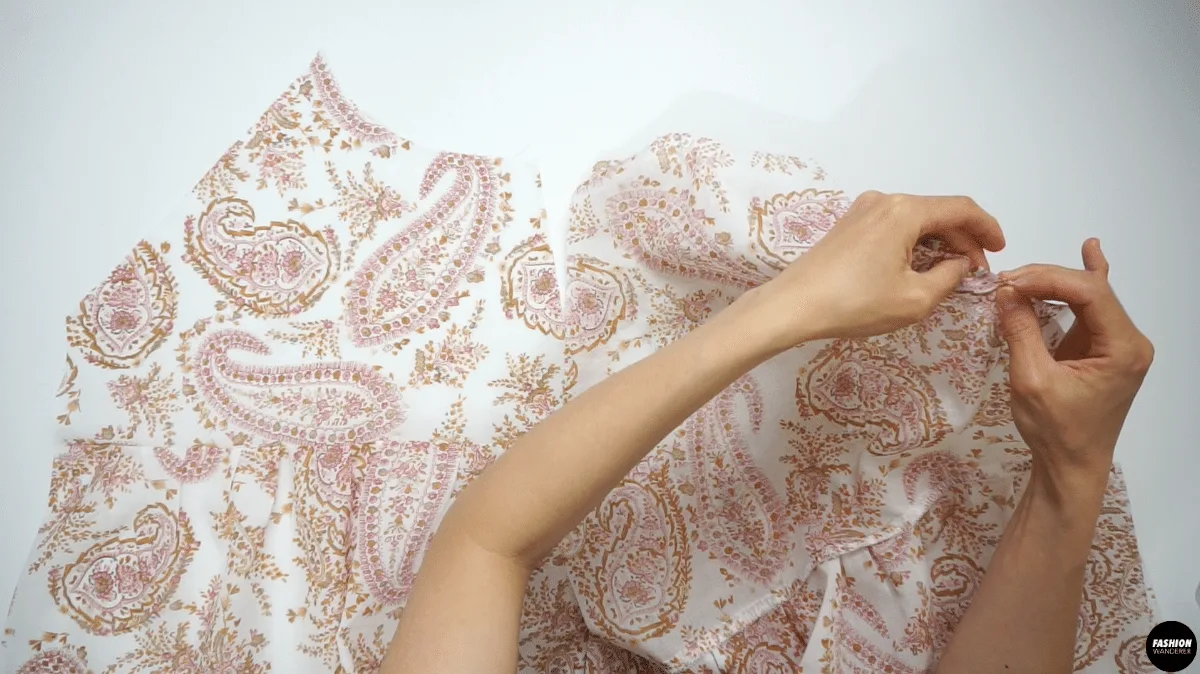
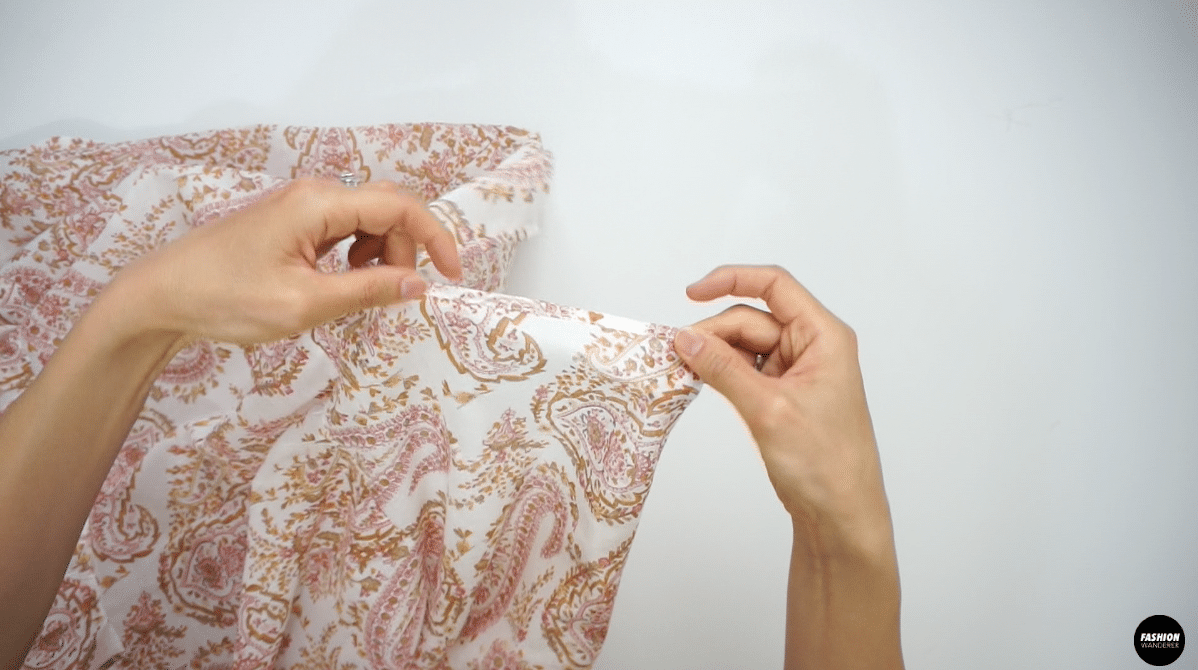
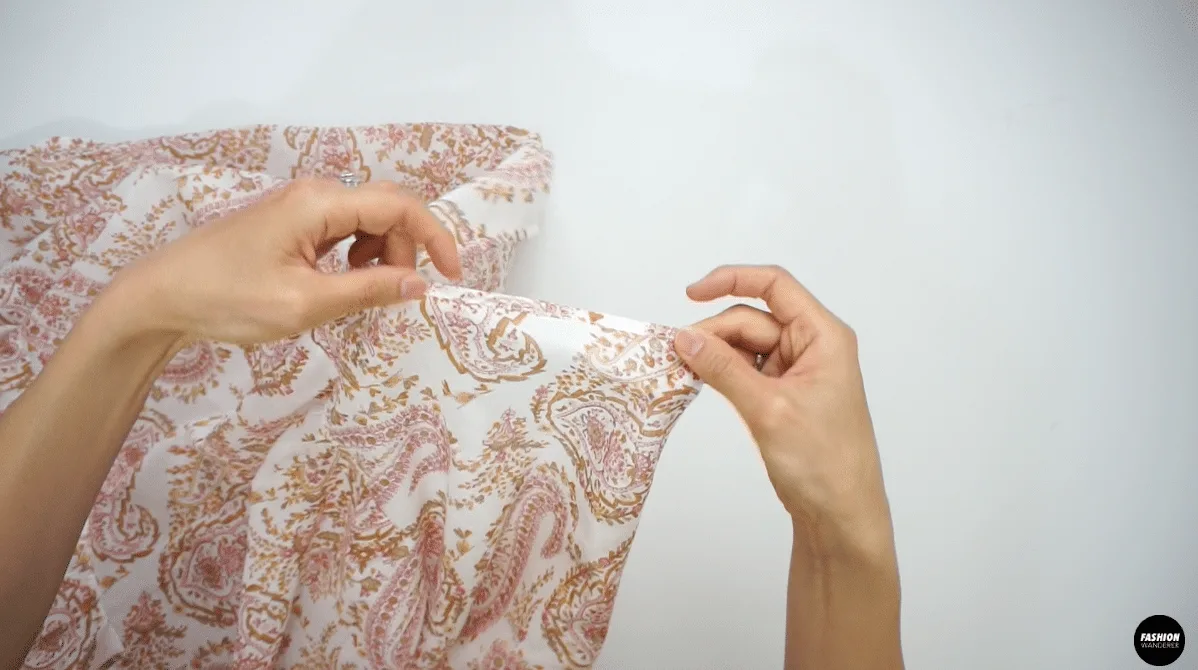
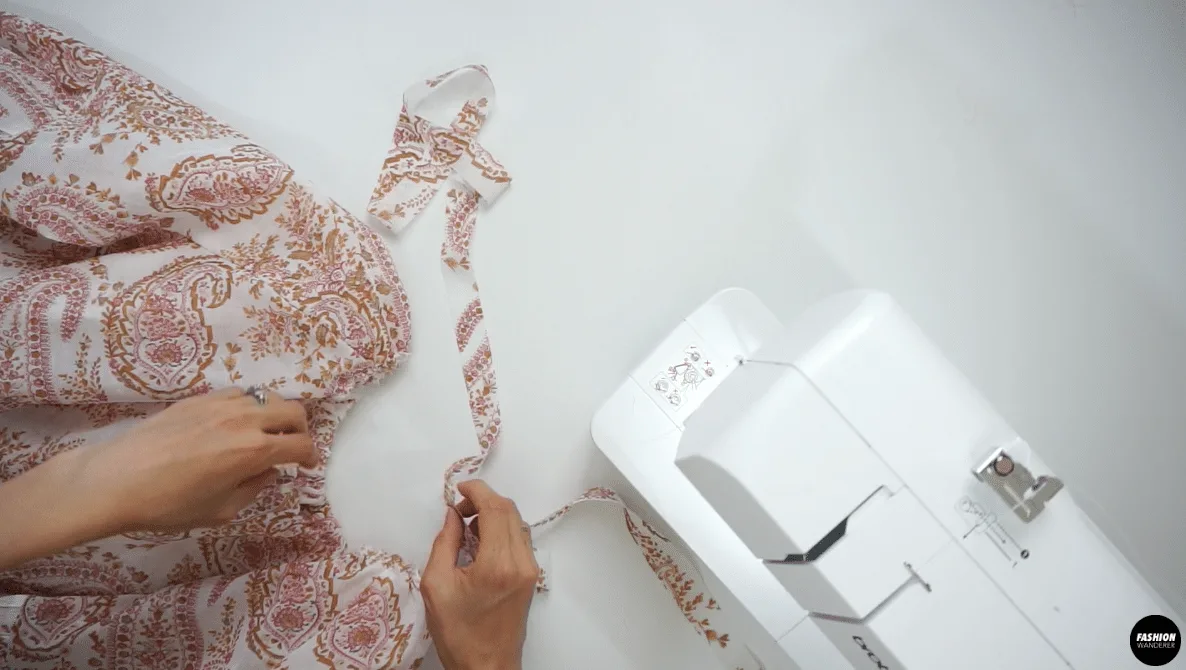
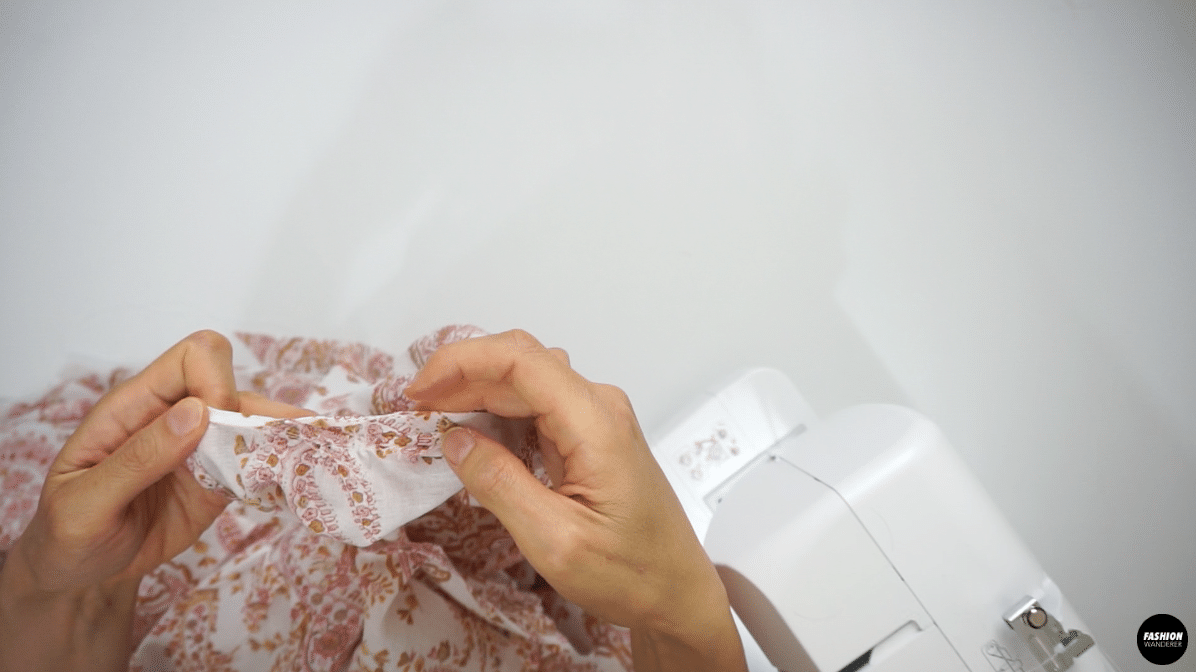
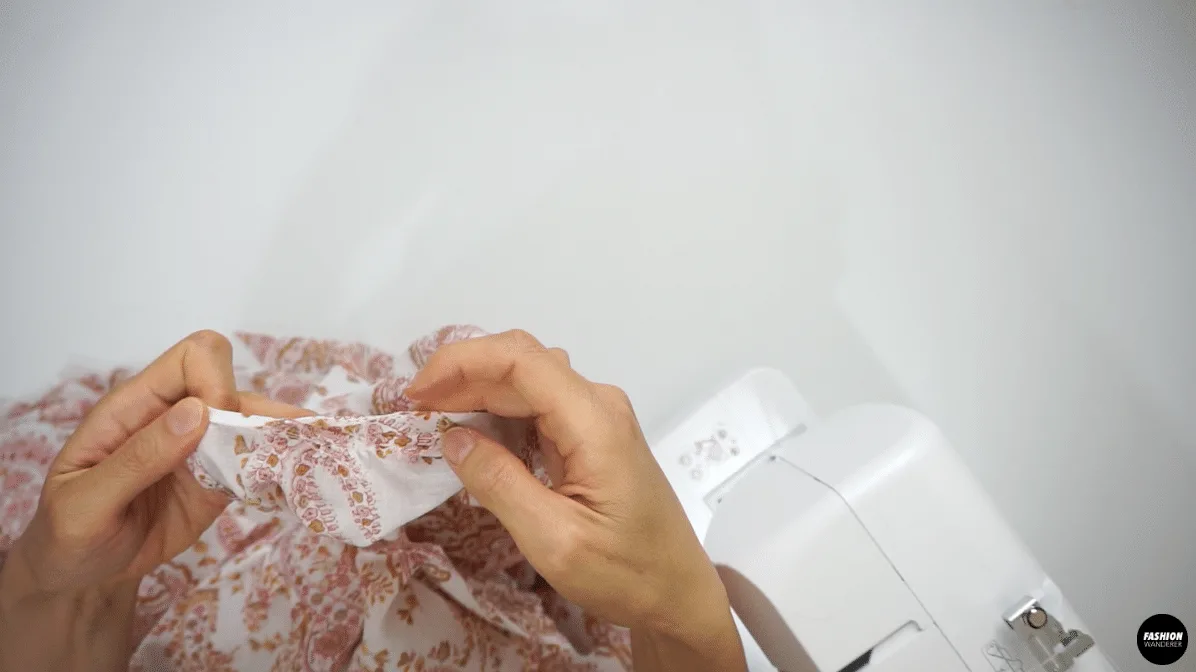
- Clip the V-point about ¼” with scissors, and place 1” width by 7” long bias cut strap to finish the binding around the keyhole. Place right side of the strap on top of right side of the Front Top and ¼” topstitch.
- Fold over the strap to the wrong side of the neck and double fold again to edge topstitch and secure. If you are new to sewing binding on neckline, I’ll link to the tutorial where you can learn more about how to make and sew bias binding.
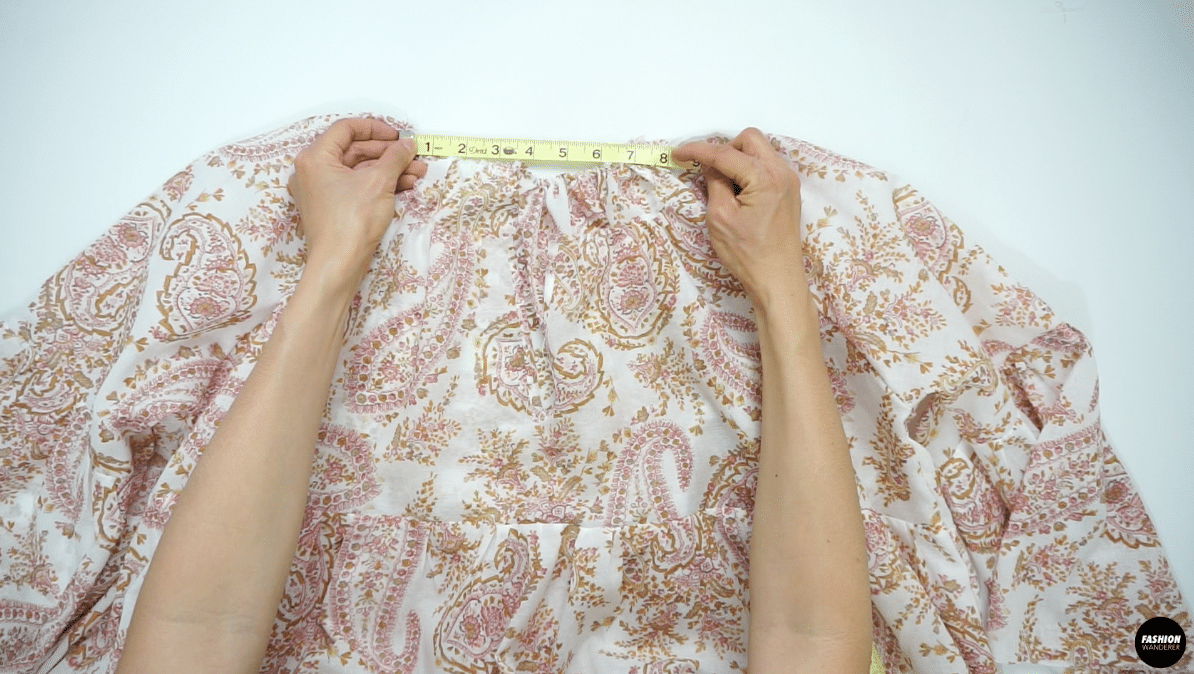
- Adjust your sewing machine to 3.5 stitch length and start straight stitching ¼” away from edge and binding.

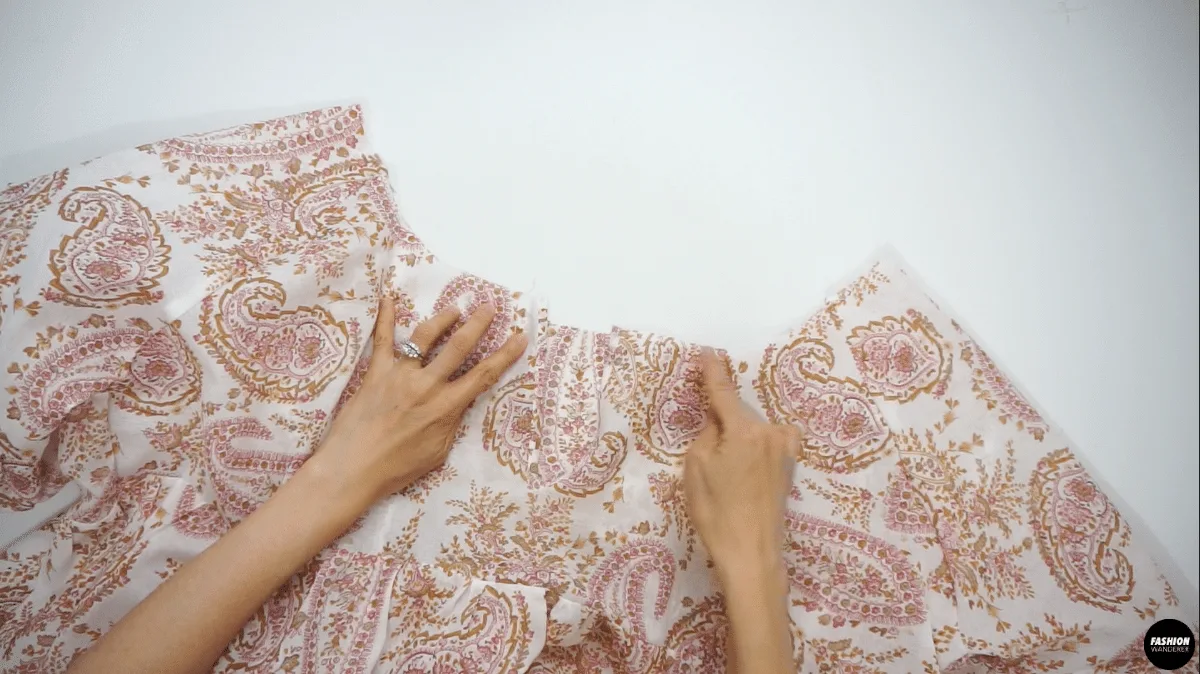
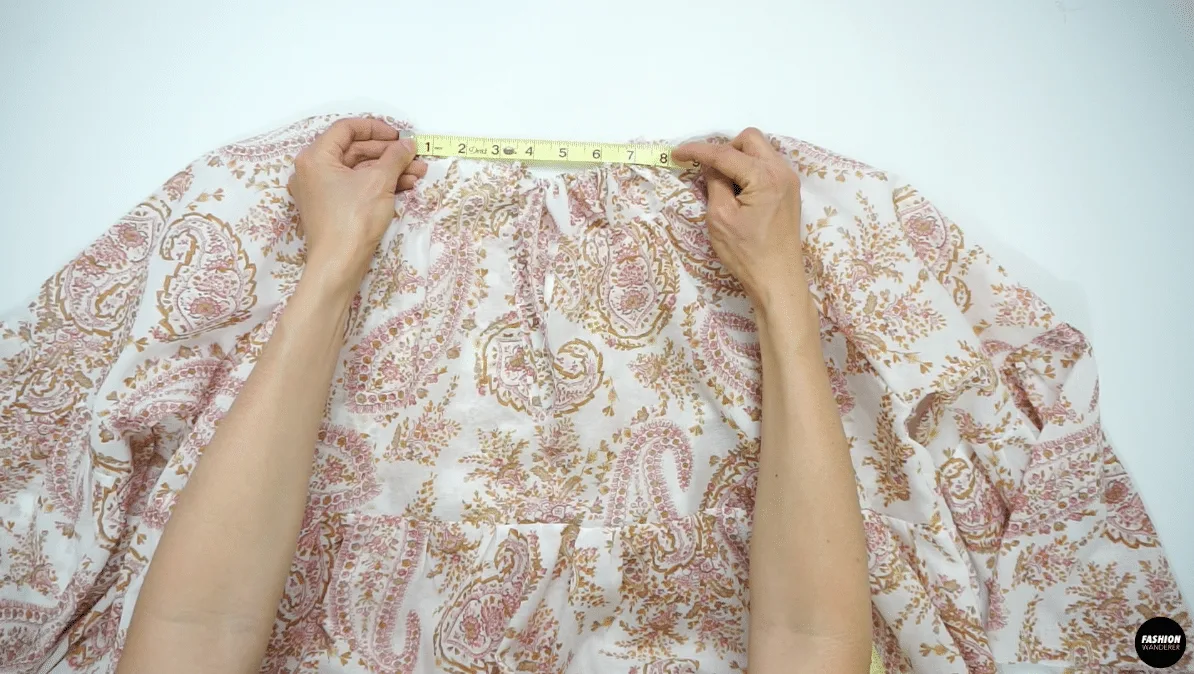
- Gently pull the back thread to evenly distribute the gathering along the front and back neckline. Ensure that the neck opening is about 8” when measured straight. This dress that I’m making is using Medium size sewing pattern so if you choose size Small, go with 7½” neck opening and for size Large go with 9” for neck opening.
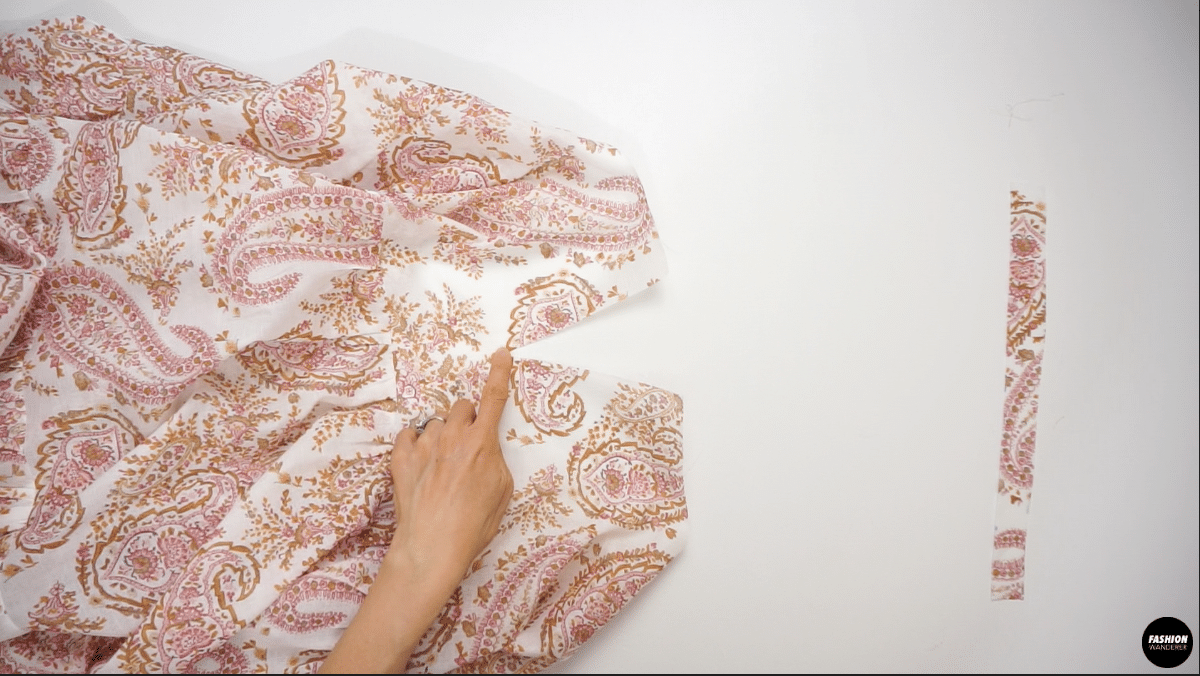
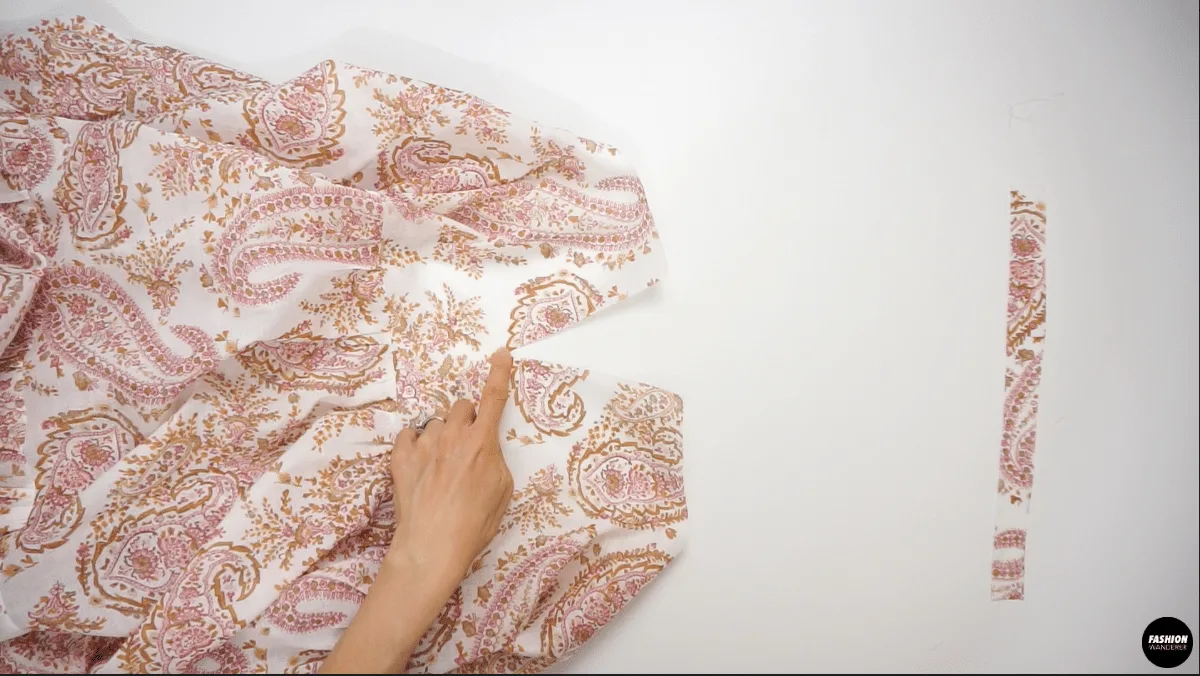
- Next, cut 1” width by 62” long bias cut binding and place right side facing each other, then pin to sew ¼” seam allowance.

- Fold over the bias binding to the wrong side of the fabric and double fold to topstitch.
- ¼” away from the sleeve opening, straight stitch with 3.5 stitch length for gathering.

- Pull the back thread to create gathering so the opening of the sleeve is about 5” flat and 10” total. For size Small, is 4½” and for Large I recommend about 5½”.

- Prepare two pieces of bias binding strap for sleeve opening that are 1” width by 10½” long for Medium. For small size 9½” and for Large will be 11½” long.

- Join the ends of strap with ¼” seam allowance stitch and slide through on the right side of the sleeve facing each other and ¼” stitch around the sleeve. For best practices, match the seam of binding and sleeve seam allowance so it is easy to sew around. Fold the binding to the wrong side to double fold and edge topstitch to finish.

- To finish the hem of the dress, narrow double fold the hem ¼” width and straight stitch the hemline.

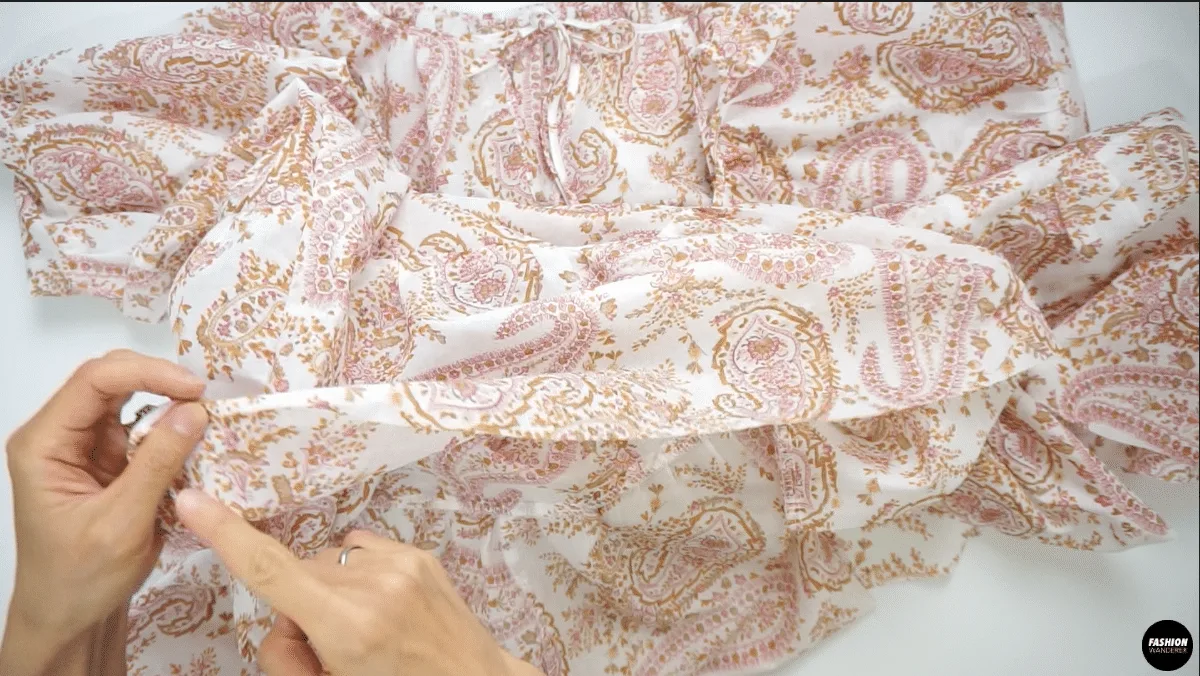
- Lastly, I added a self waist tie. Fold the strap in half and ¼” seam allowance stitch.
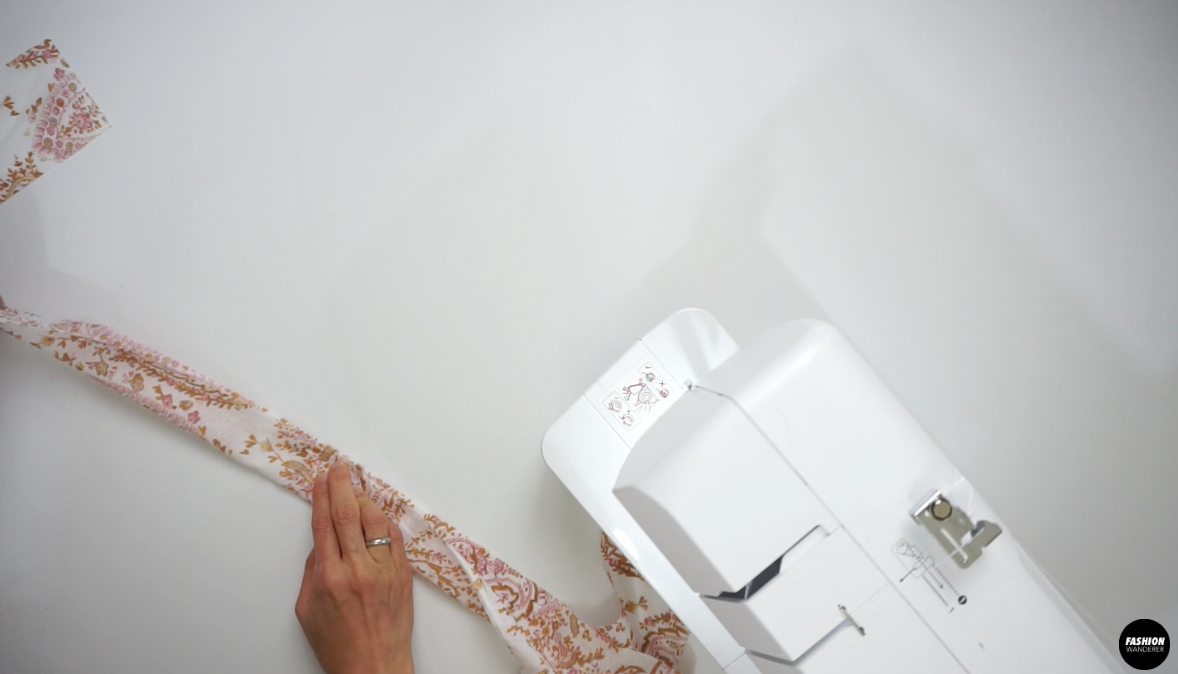

- Use loop turner to flip the strap inside out, and finish both ends with double fold and straight stitch or push inside to hand baste the opening for a clean finish.


- Give a nice press throughout the dress and all the seam allowances facing correct direction to finalize this beautiful peasant inspired boho tunic dress.
Recommended Products
As an Amazon Associate and member of other affiliate programs, I earn from qualifying purchases.


Trendy, Affordable Sewing Patterns for All Sizes


Tie Shoulder Jumpsuit Pattern


Palazzo Pants Sewing Pattern


Pocket Overall Romper Pattern


Wrap Maxi Skirt Sewing Pattern


Tie Back Top Sewing Pattern