
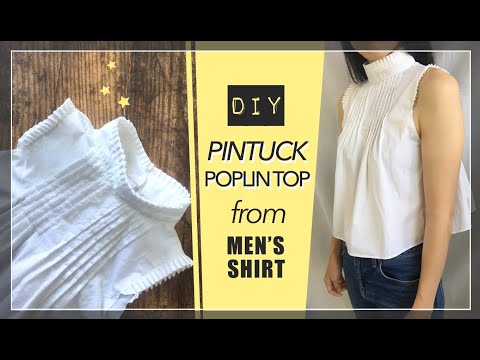
Upgrade your sewing skills by learning how to make a pintuck poplin top from a men’s dress shirt! From knife pleats to mini pintucks, this adorable sleeveless top is both work and date night friendly.
If you have plenty of men’s dress shirt to choose from, go with solid color for this pintuck blouse, and keep the stripe shirt to make another women’s blouse from men’s shirt for next time.
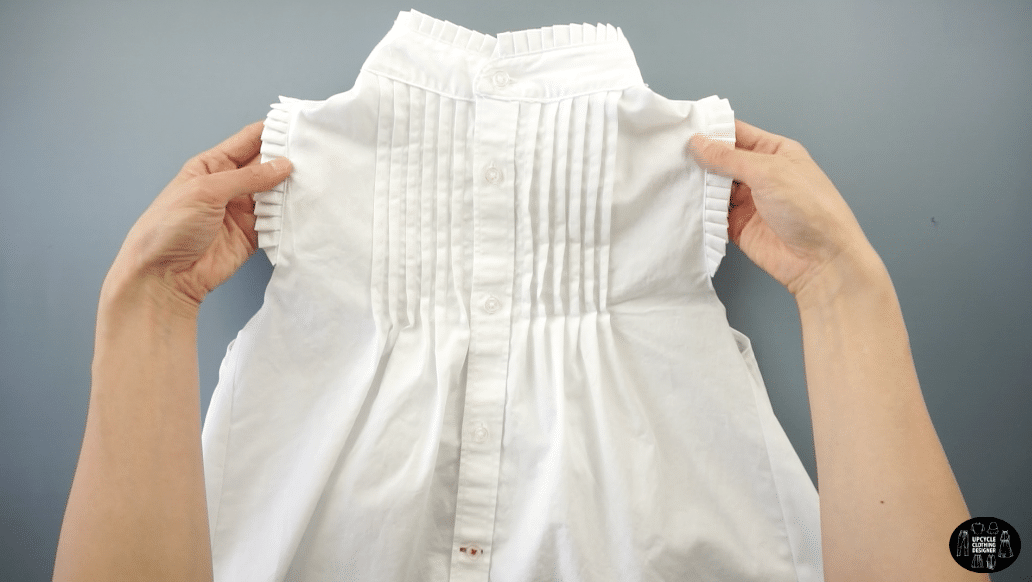
The pintuck detail and knife pleats around the mock neck and armhole make this blouse a must-have men’s dress shirt upcycle idea. Choose a solid colored dress shirt to make this piece look unique and personalized.
The button down shirt that I used for this upcycled clothing project is 100% cotton poplin fabrication and slightly lightweight. You may think the fabric is too sheer, but the collection of pintucks in the front and back helps to give it texture and bunch up the material around the torso. So, don’t worry!


You will love this mock neck pintuck poplin top from men’s shirt because…
- No sewing pattern is required.
- Learn how to make pintucks and mini pleats.
- Fun beginner sewing project that looks advanced.
- Practice sewing straight stitching with evenly spaced pintucks.
- Adjust the armhole and side seams by adding extra fabric piece to widen the chest width.


Using a men’s dress shirt for this zero waste tutorial allows you to use the original button placket and move it to the back opening on this blouse. The backside buttons creates an elegant look and keeps the focus on the high neckline. As a result, there is no need to make keyhole or add zipper closure.
I put together a fun step by step tutorial with video instructions so that you are easily able to transform a plain men’s shirt into a pintuck poplin top. Be creative and modify the length to make it tunic length or even a dress version to add to your spring and summer wardrobe.


How to make a pintuck poplin top out of men’s dress shirt?
To make this pintuck poplin top out of men’s dress shirt, all you need is piece of paper to guide the width of each pintuck. I recommend ¼” depth instead of going wider or too skinny.
It will either consume too much fabric or be too narrow which makes the pintucks are very hard to sew if you are new to this technique. Therefore it’s extra important to take body measurements for clothing so that you make sure to start with enough material to complete the pintuck pattern.
You will need a basic sewing kit, and use the sewing tips and techniques to give your top a clean finish and durable quality that will last long. Grab any men’s shirt and let’s get started!
DIY Pintuck Poplin Top Materials:


- Men’s dress shirt
- Sewing machine
- Fabric chalk
- Measuring tape
- Ruler
- Scissors
- Straight pins
- ¼” width 4” long piece of paper
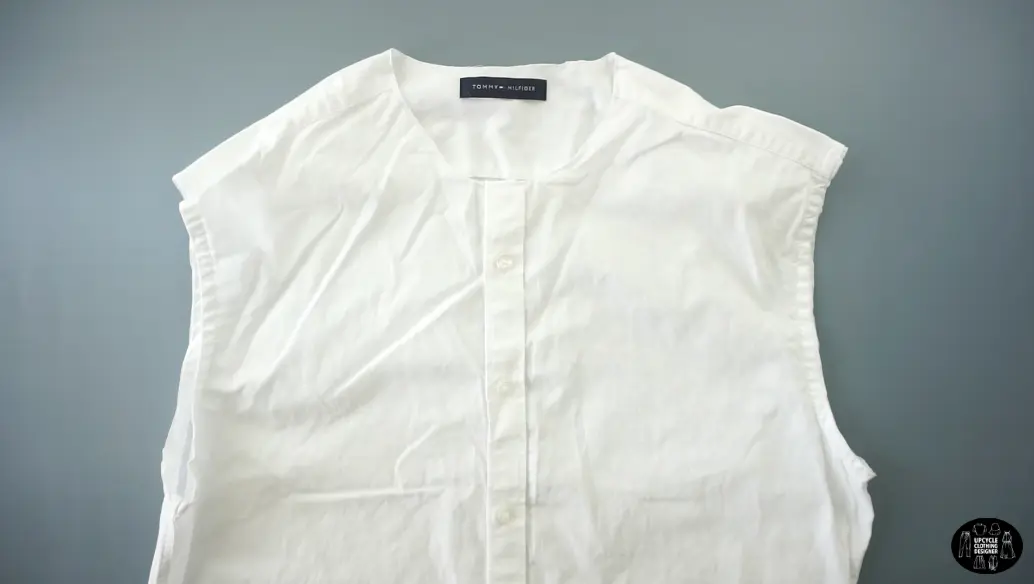
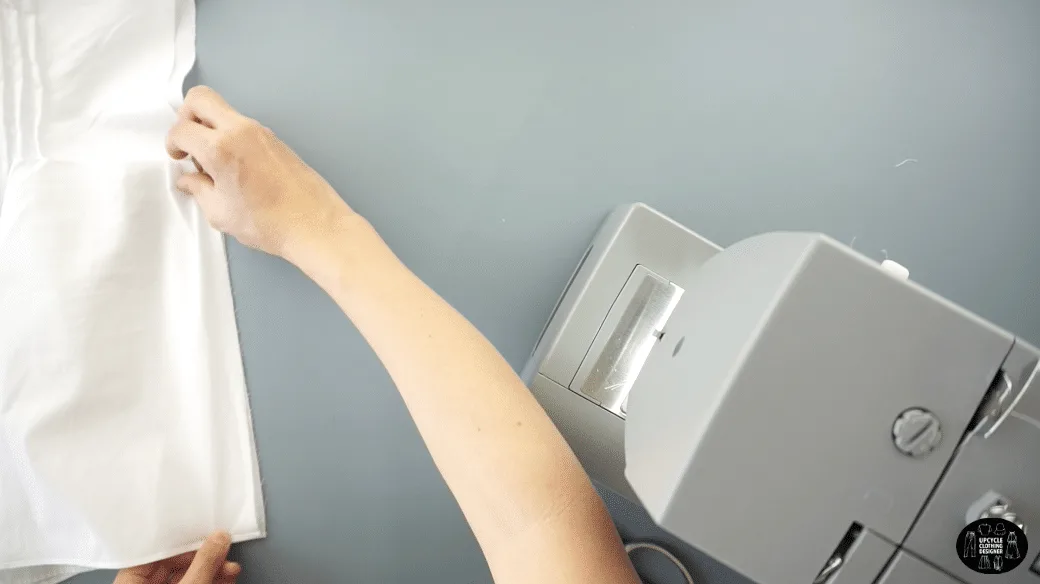
Start pintuck top upcycle by deconstructing the original men’s shirt. Cut off the collar, neckband and detach both sleeves.
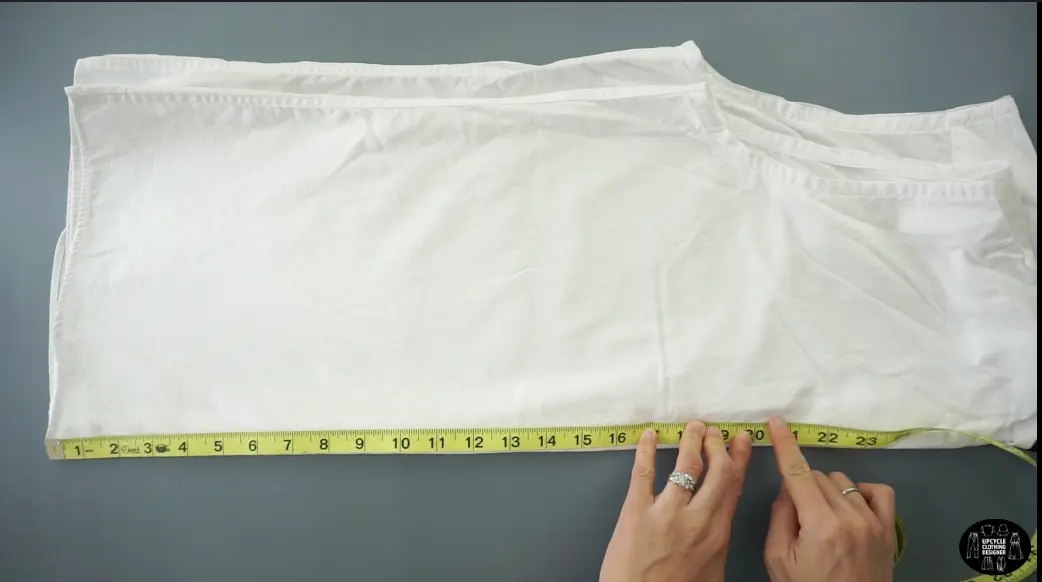
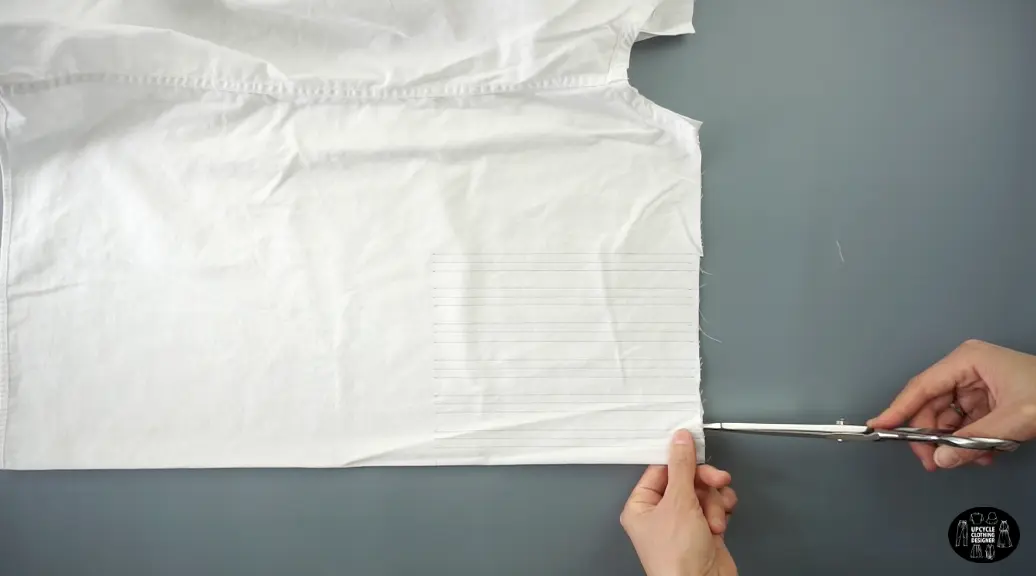
Fold the dress shirt in half lengthwise, measure 20” up from the hemline and cut a straight line across to make the top piece.
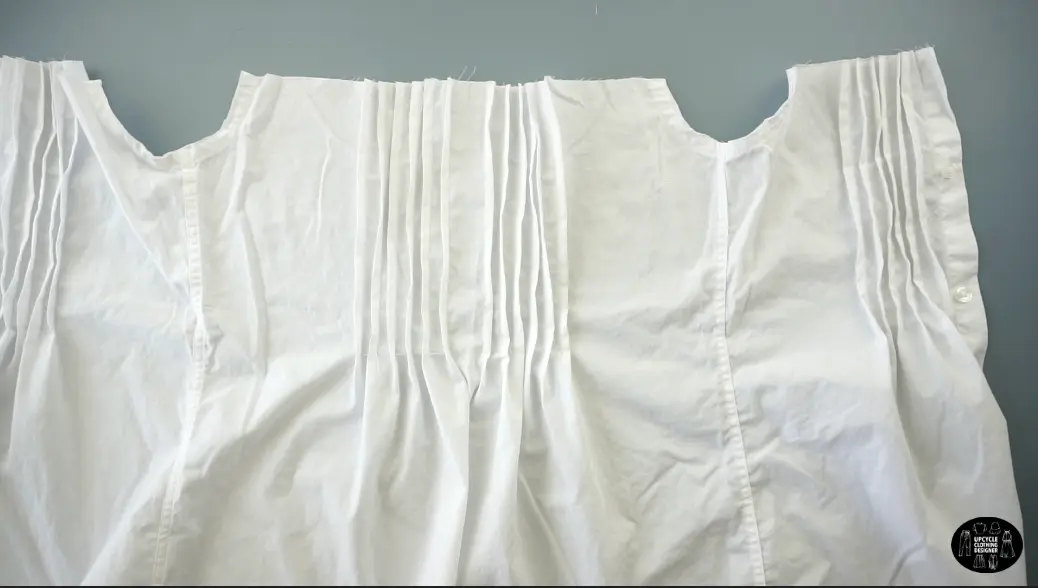
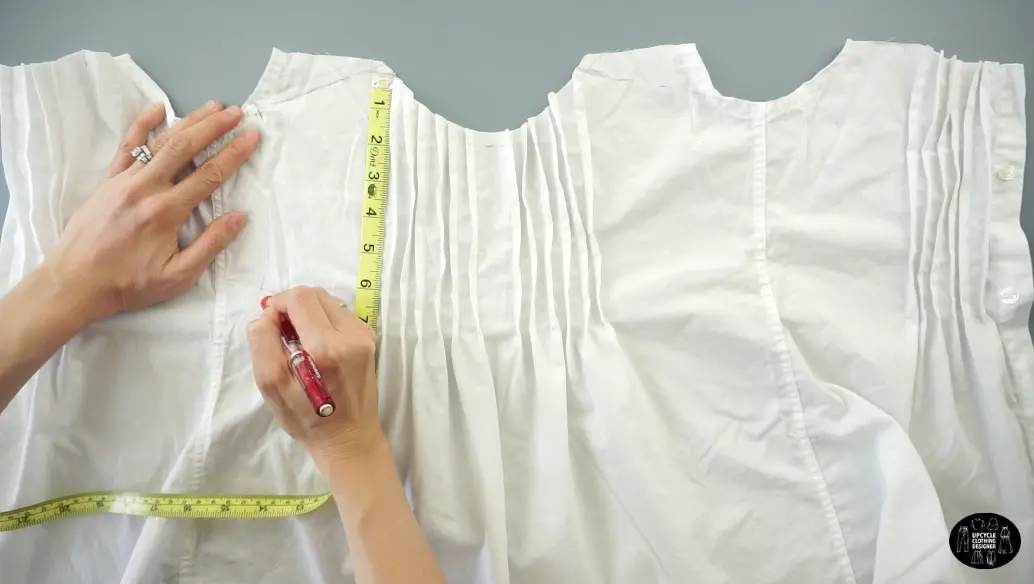
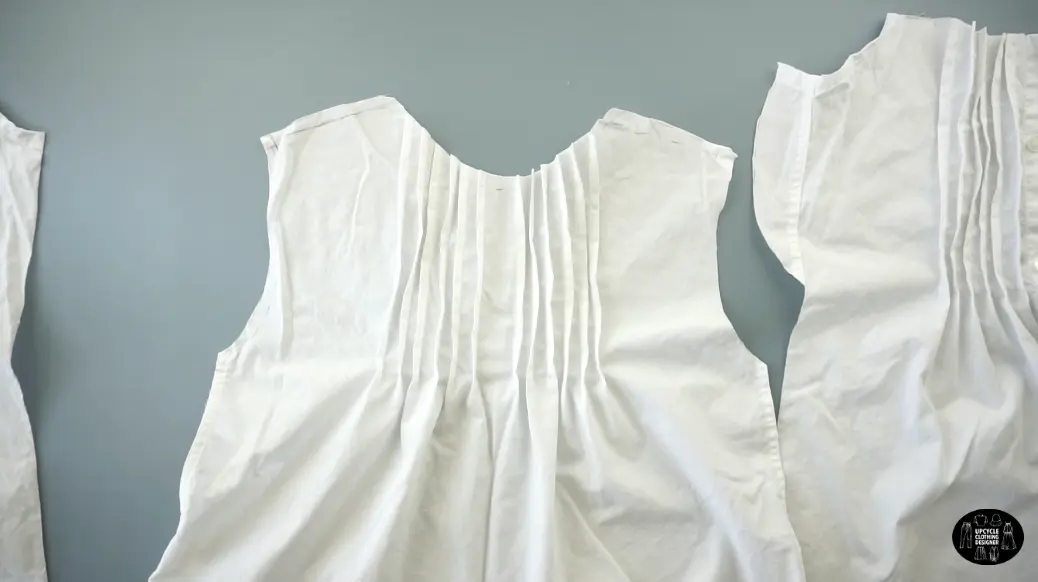
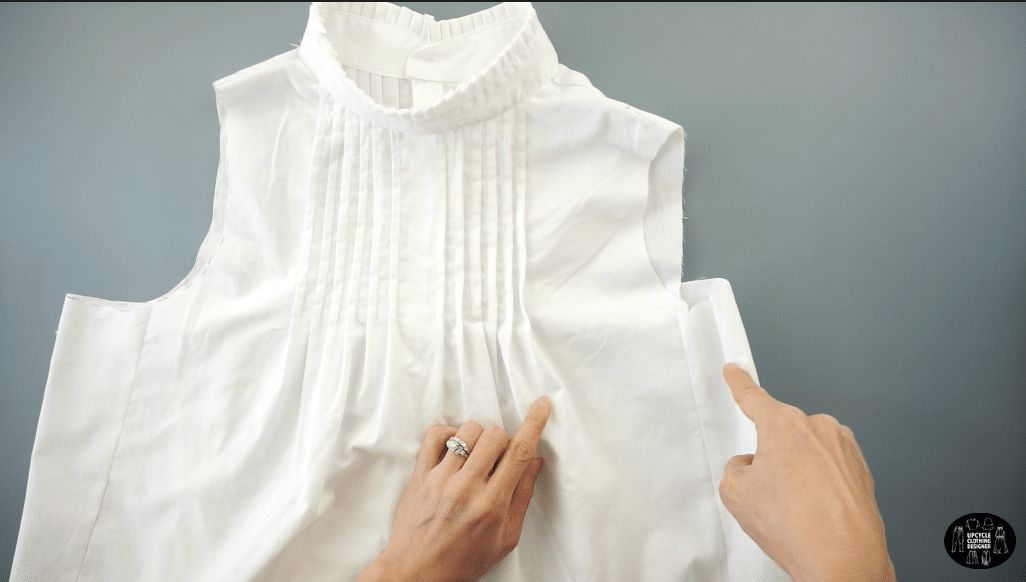
Use a pencil and ruler to mark the pintuck pattern along the top edge of the neckline on the front and backside of the top.
Fold the fabric and topstitch to make each pintuck.
Repeat this pattern to make twenty four pintucks in total, twelve pintucks on the front and twelve pintucks on the back.
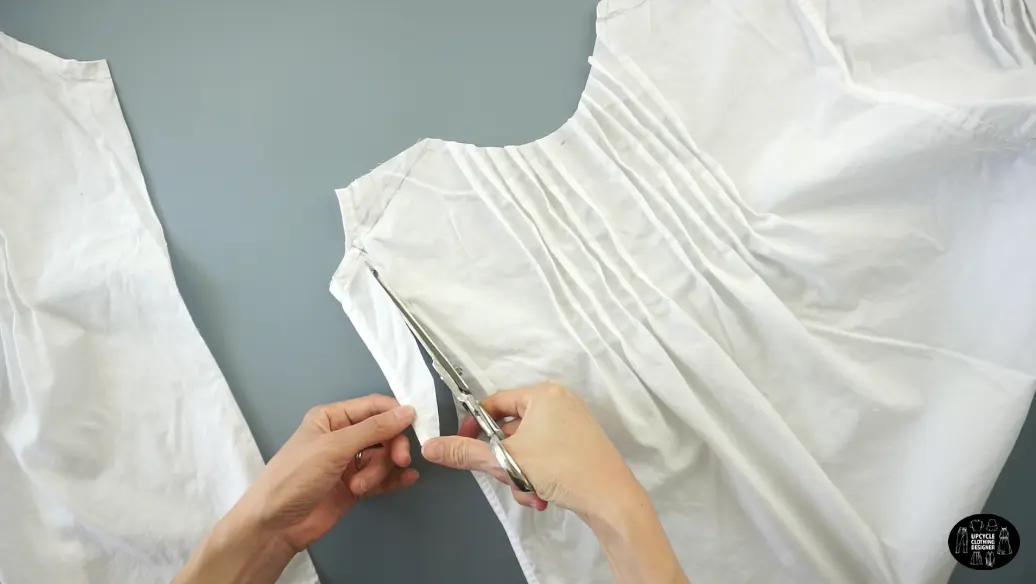
Measure the width of the new neckband and draw a smooth curved line along the shoulder seam. Cut out the new neck opening.
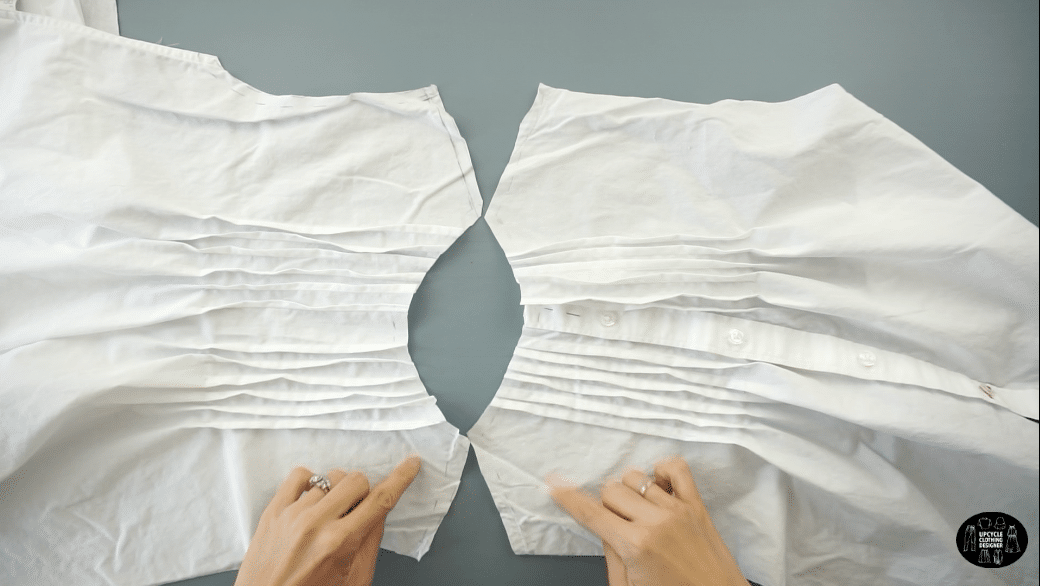
Draw a curved line that attaches the shoulder seam to the new armhole and side seam on both sides.
Sew the top piece together by joining the shoulder seams and put the side panels in place.
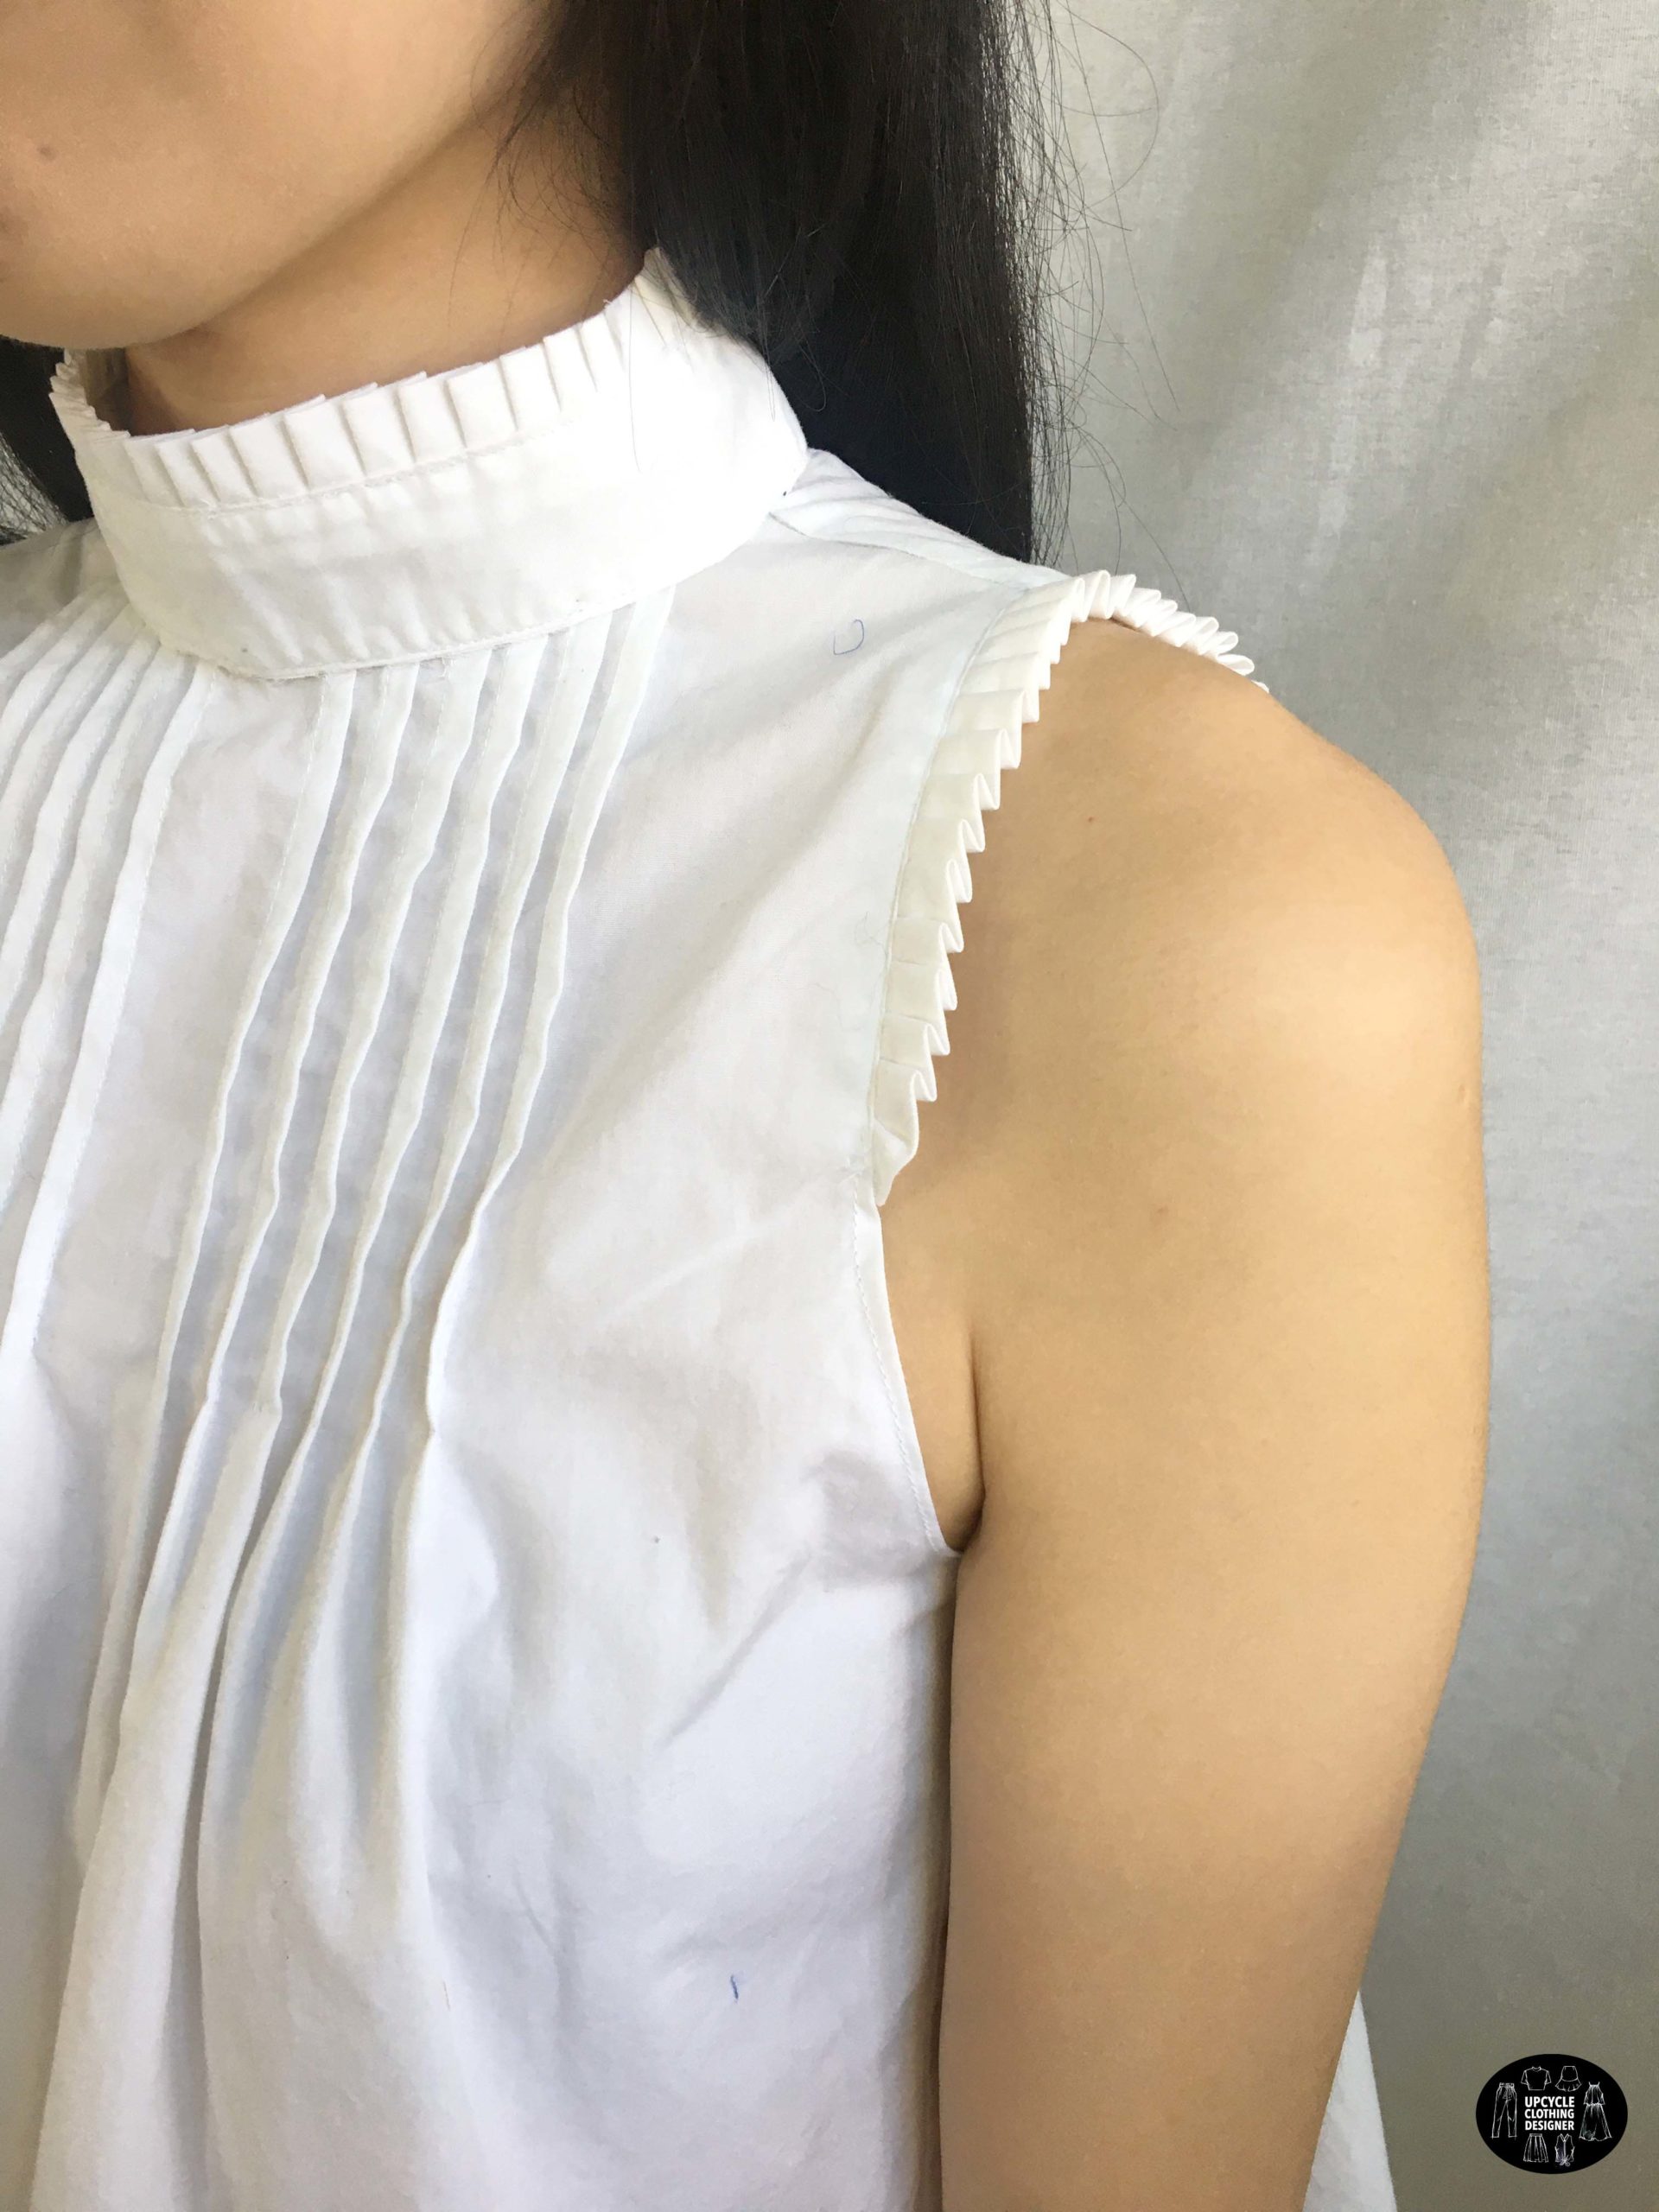
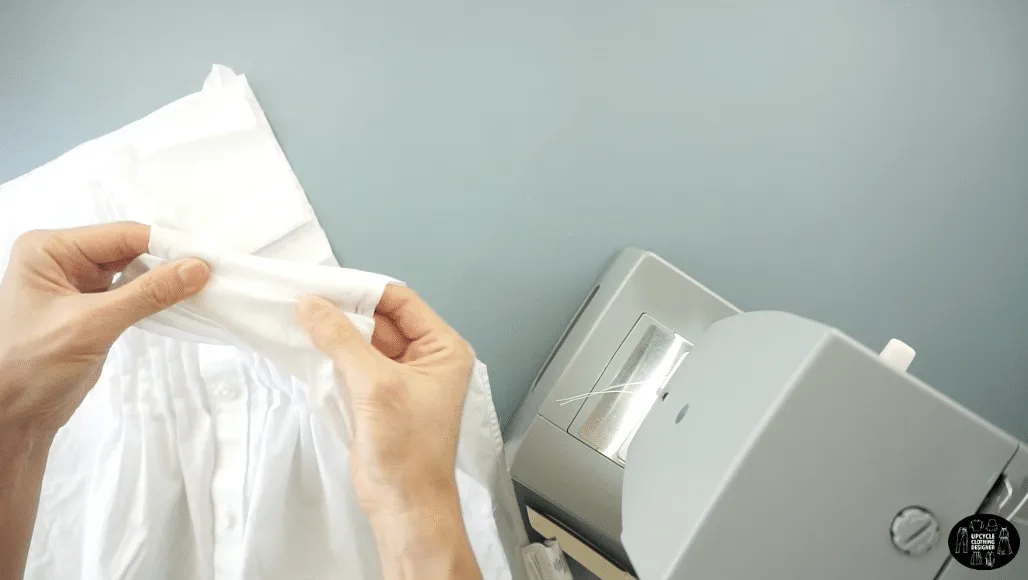
Use the original neckband from the men’s dress shirt.
Make the knife pleat detail to add to the neckband.
Then, attach the knife pleats to the neckband, and the neckband to the neck opening.
Confirm the armhole by measuring the width of your shoulders. Then, draw a curved line that attaches the new shoulder to the bottom of the armhole opening on both sides of the blouse.
Make the knife pleated detail to go around the top of both armholes.
Pin the pleated detail around the top of the armhole and topstitch to join.
Hem the bottom of the armhole to complete this pintuck top from men’s dress shirt.


Upcycle Pintuck Poplin Top Sewing Tips:
Prepare your men’s dress shirt by pre-washing before you start designing, cutting, and sewing this pintuck poplin top. By doing so, it’s actually easy to sew straight lines on a clean and pressed garment.
Here are the sewing tips I learned while doing this upcycle poplin top project:
- Sewing Tips: To make the stitching detail on the poplin material, make sure to press all parts with an iron for a wrinkle-free finish. By doing so, you will have clean stitching with straight lines for cutting and sewing.
- Pintucks: Always draw a line with a washable marker. Clip the ends of the fabric to determine pintuck placement and help to fold the fabric easier.
- Pleats: When sewing knife pleats, use the same ¼” width paper strip to make even pleats with each fold facing the same direction.
- Pintuck Foot: If you are using a special pintuck foot for this tutorial, you need a double or twin needle. With this tool, you can create narrow width pintucks. The pintuck foot is much faster and makes evenly distributed tucks.
- Thread: For this upcycle poplin top tutorial, I used regular cotton thread. You can use any thread that is cotton or cotton/polyester blend. Always test the stitching detail on a scrap piece of fabric so that you can evaluate the results.
More men’s shirt into women’s blouses upcycle designs:

How To Make A Pintuck Poplin Top From Men’s Dress Shirt
This upcycle tutorial demonstrates how to transform a men’s dress shirt into a pintuck top. Take time and enjoy making each pintuck. In addition, follow the paper guidelines on the knife pleats to create beautiful stitching from start to finish.
Input the sewing tips and suggestions so you know how to make the pintucks on a poplin top. Add this cute sleeveless poplin top into your classic upcycled wardrobe, its an adorable piece to wear this spring and summer season.
Materials
- Men’s dress shirt
Tools
- Sewing machine
- Fabric chalk
- Measuring tape
- Ruler
- Scissors
- Straight pins
- ¼” width 4” long piece of paper
Instructions
- For this pintuck top from dress shirt tutorial, start by deconstructing the original dress shirt.
- Use scissors to detach the collar and neckband;
also cut along the arm seam to detach both sleeves.
- To make the top piece, fold the dress shirt in half lengthwise.
Measure 20” up from the bottom hemline;
draw a straight line across and cut.
- To make the pintucks on the back left side, unbutton the shirt and fold the dress shirt in half lengthwise with the inside facing outwards.
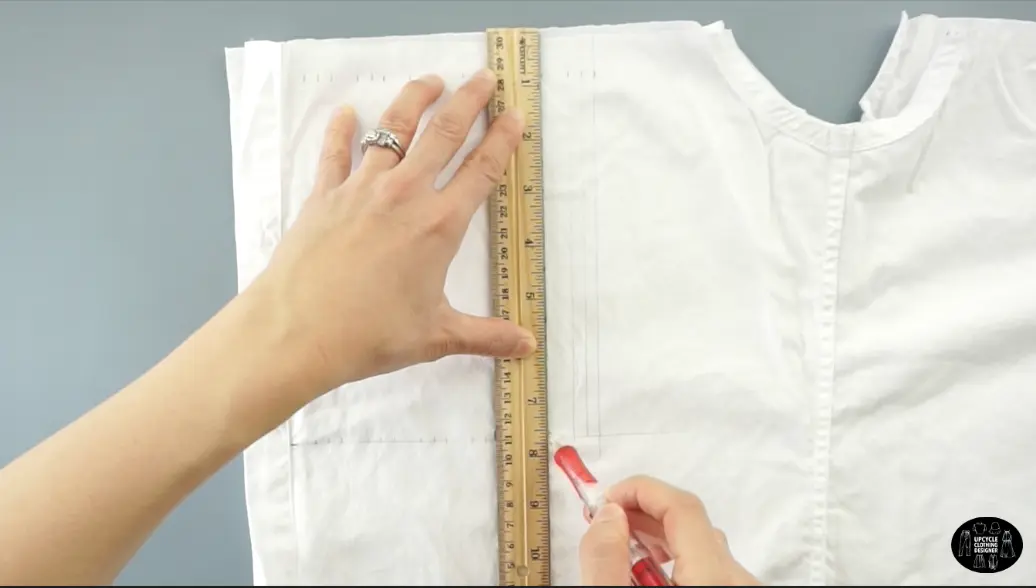
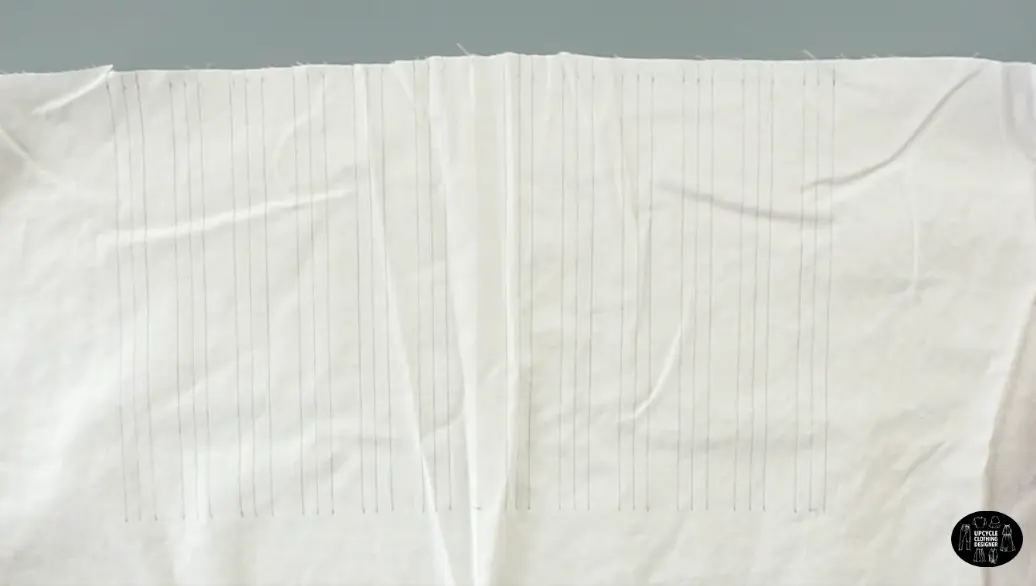
Use a pencil and ruler to mark ½”, ¾” and 1” along the top edge of the neckline.
Then, mark 1½, 1¾” and 2”.
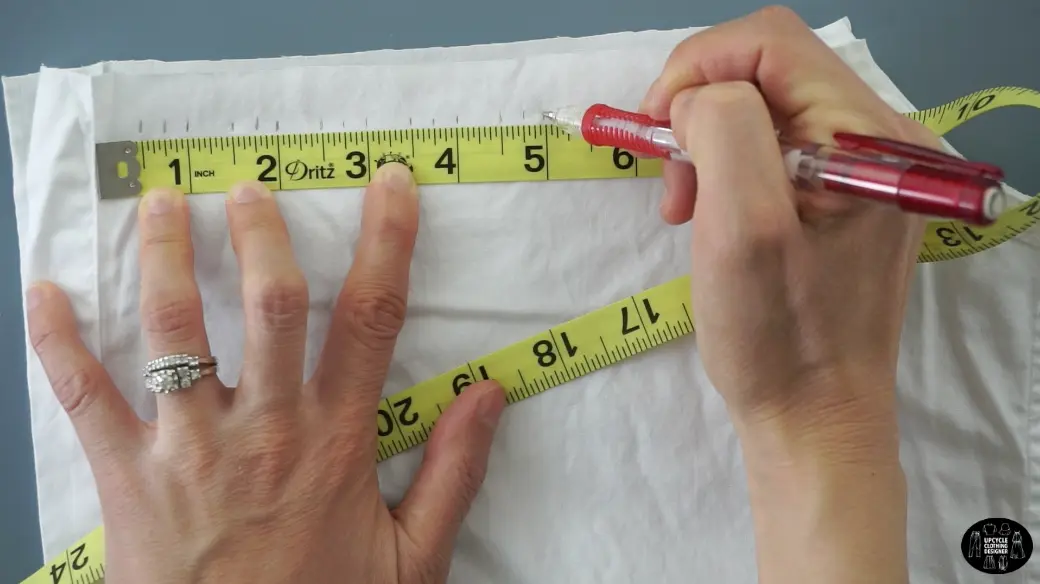
Repeat this pintuck pattern until you reach the 6” mark. - Next, measure 8” along the button placket and draw a straight line across.

Use a ruler along the line to mark ½”, ¾” and 1”.
Then, mark 1½, 1¾” and 2”.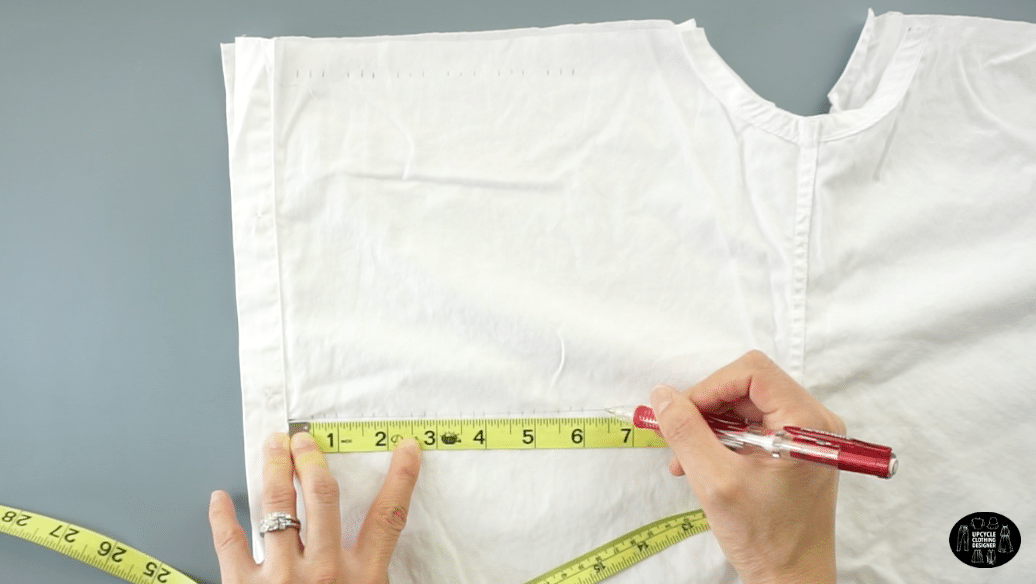

Again, repeat this pintuck pattern until you reach the 6” mark. - Draw a vertical line to connect each of the pintuck marks on the back left side.
Use scissors to snip the ends of the fabric at each pintuck mark.
This will make it easier to match the folding line on the fabric at the specific placements.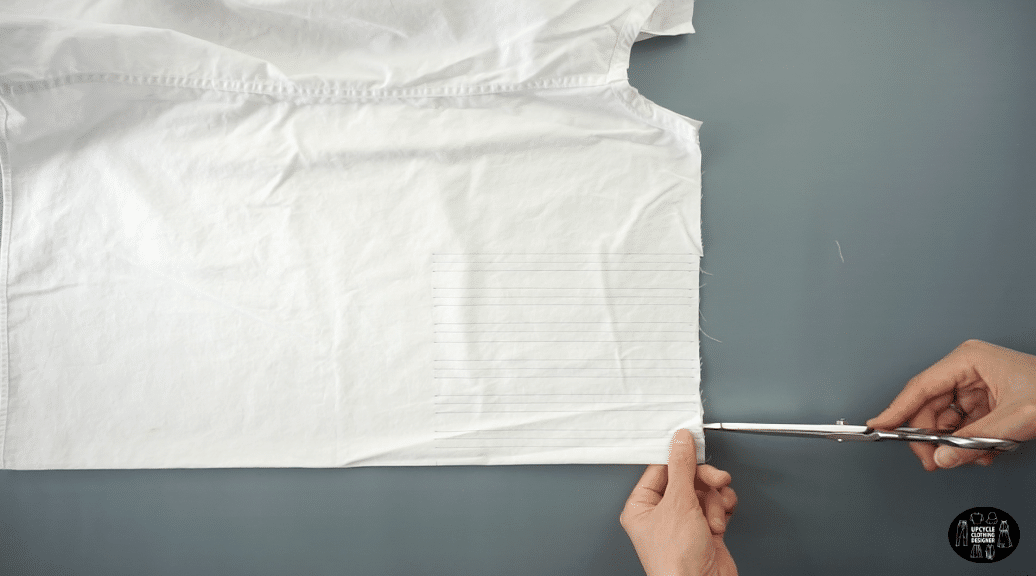
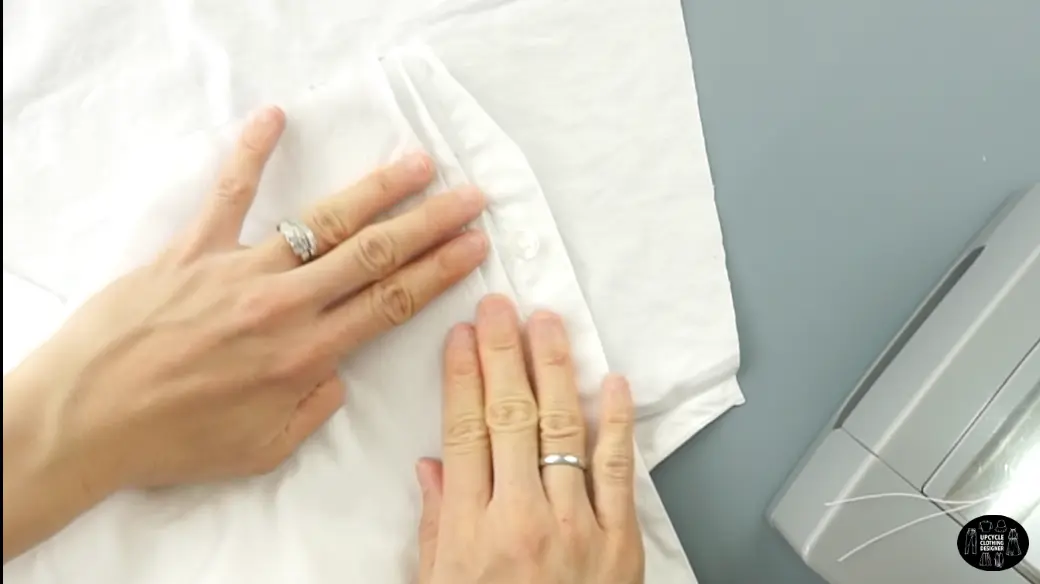
- To make the first pintuck, fold the fabric along the ¾” line.
Then, topstitch along the 1” line.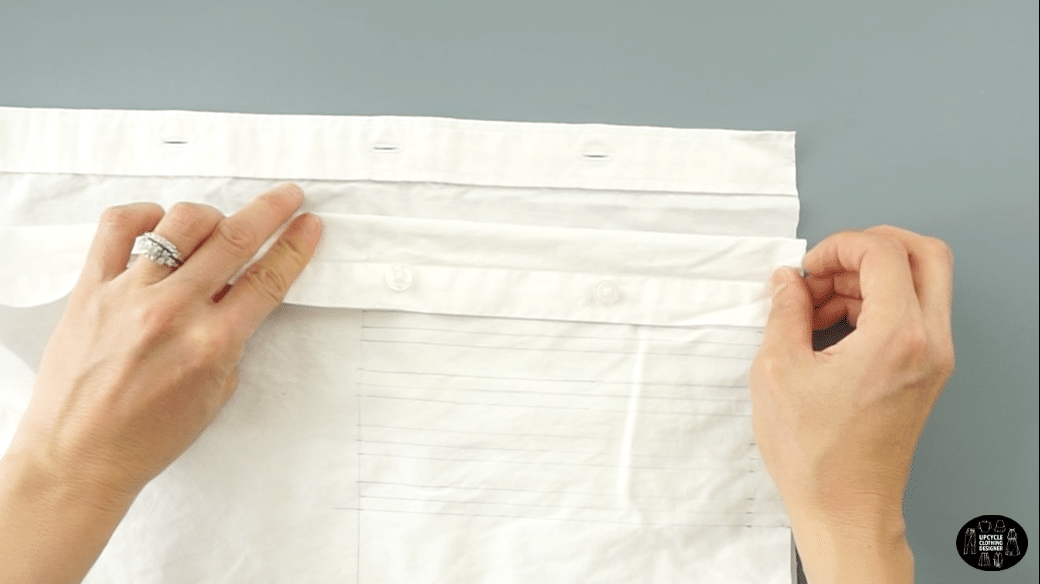

Repeat this pattern to make six pintucks on the back left side.
- To make the pintucks on the back right side, repeat the pintuck steps on the opposite side of the back piece.
Make six pintucks starting at the buttonhole placket.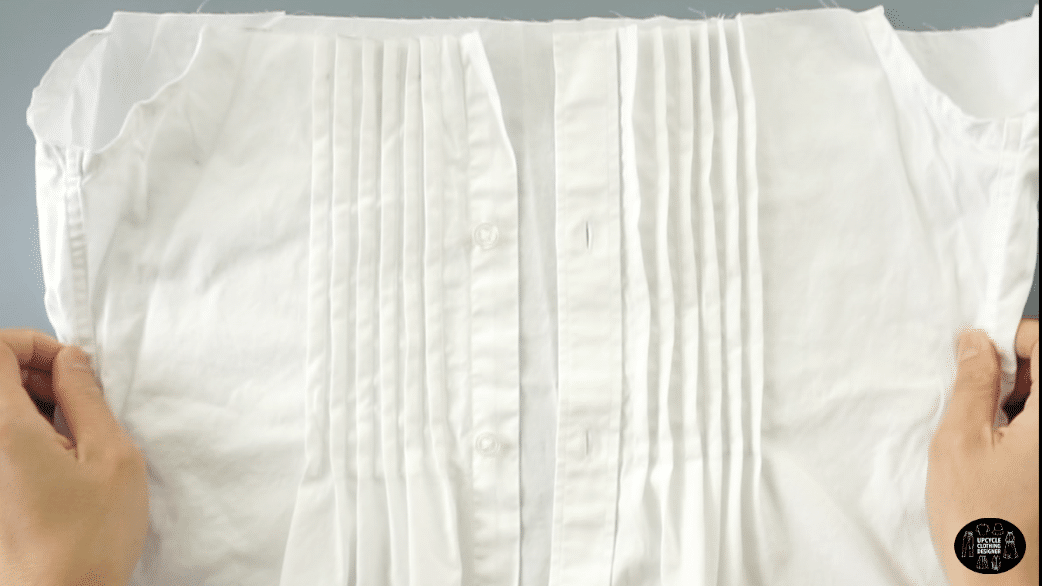

- To make the pintucks on the front left side, fold back piece of the original dress shirt in half lengthwise.
Use a ruler along the new front neckline to mark ½”, ¾” and 1”.
Then, mark 1½, 1¾” and 2”.
Repeat this pintuck pattern until you reach the 6” mark. - Next, measure 8” along the folded front center and draw a straight line across.
Use a ruler along the line to mark ½”, ¾” and 1”.
Then, mark 1½, 1¾” and 2”.
Again, repeat this pintuck pattern until you reach the 6” mark. - Draw a vertical line to connect each of the pintuck marks on the front left side.

Use scissors to snip the ends of the fabric at each pintuck mark. - Fold the fabric along the ¾” line.
Then, topstitch along the 1” line.
Repeat this pattern to make six pintucks on the front left side.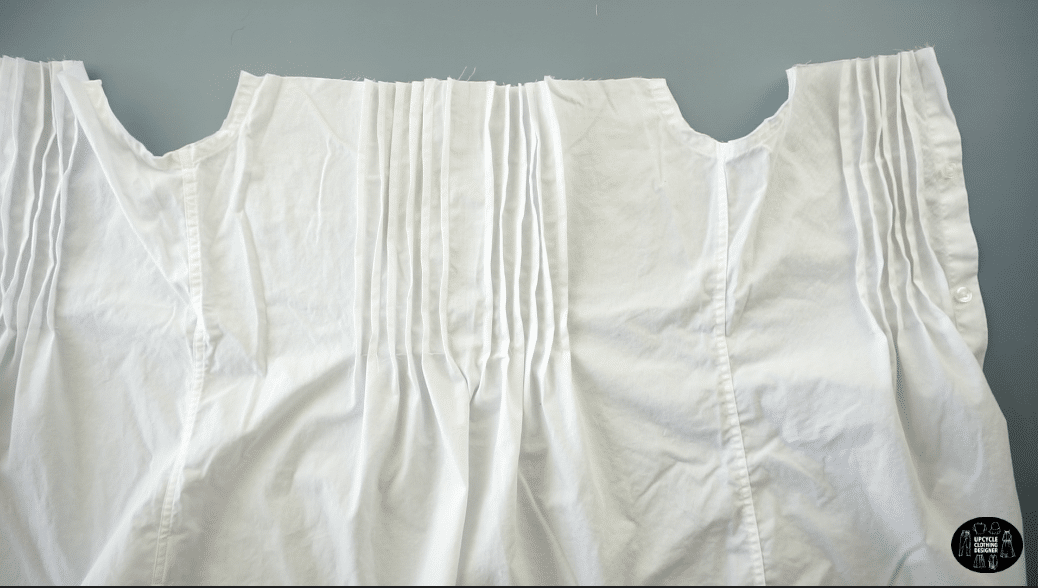
- To make the pintucks on the front right side, repeat the pintuck steps on the opposite side of the front piece.
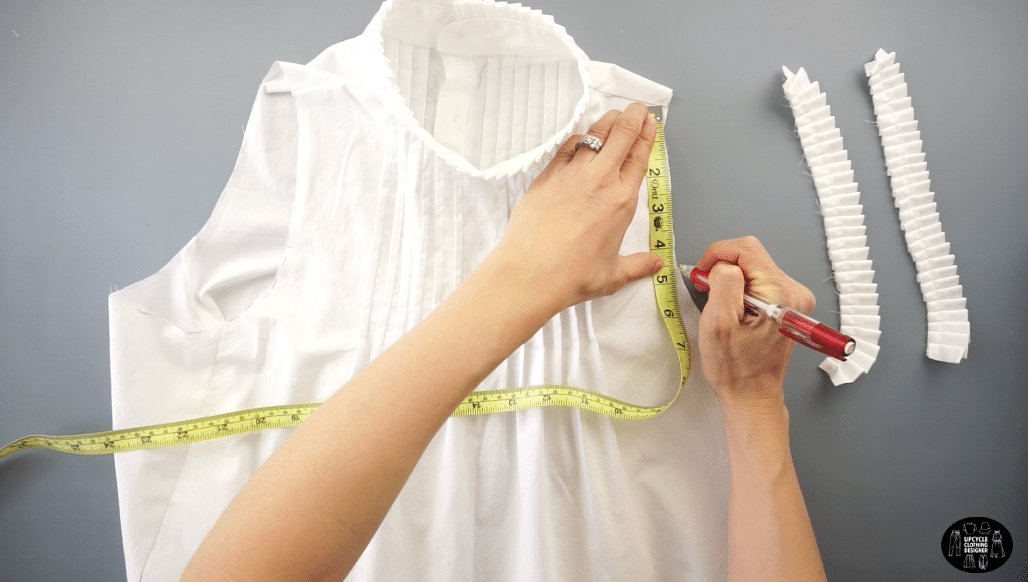
Make six pintucks starting at the front center. - To make the new neckline, measure the width of the original neckband
Match the shape of the neckline by dropping 1” in the back,
and 2” in the front neck opening.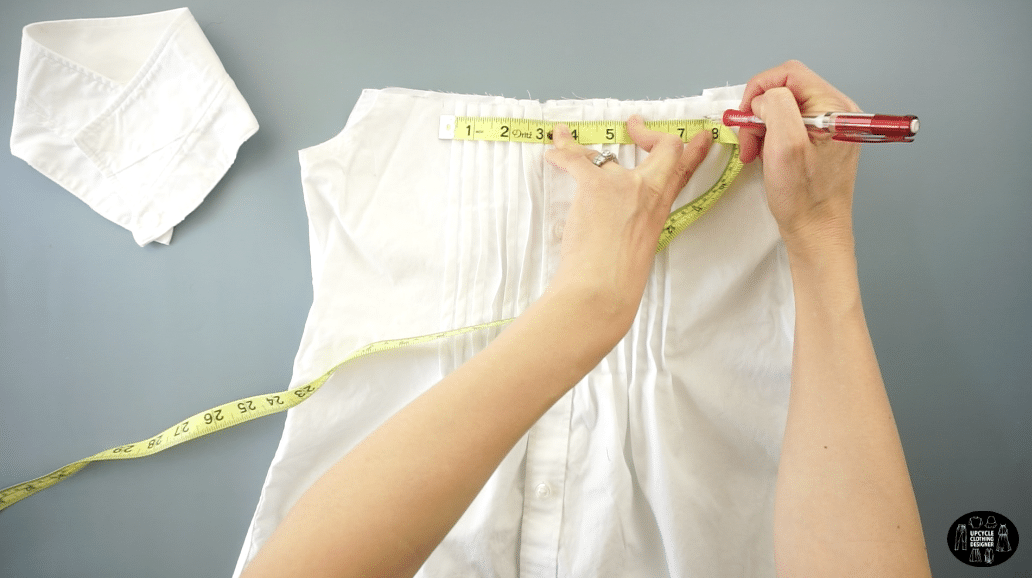

Draw a smooth curved line to the shoulder seam.
Cut along the line to make the new neck opening.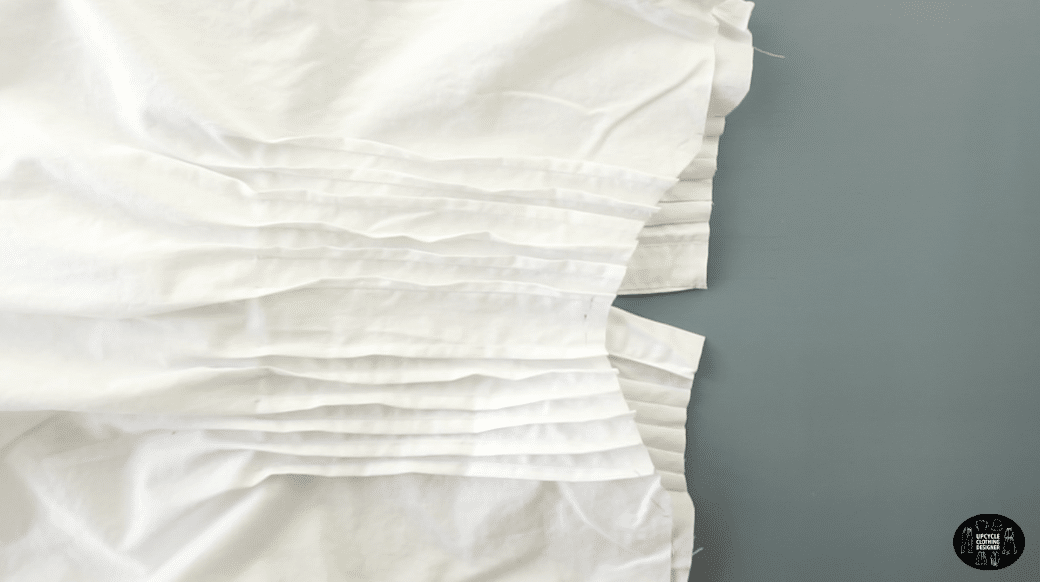

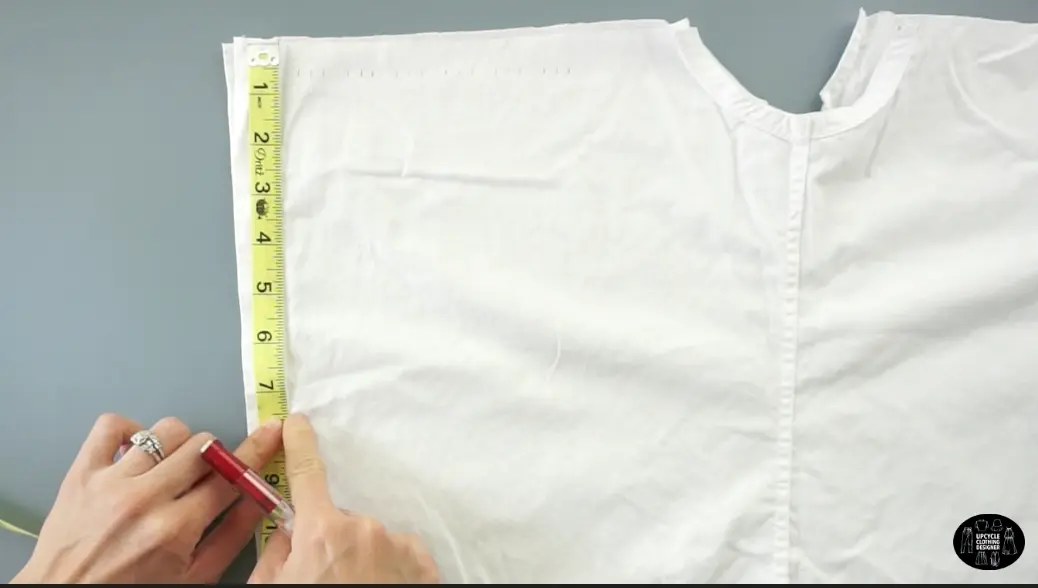
- To make the new armhole, measure 8” down from the high point on the shoulder seam.
Draw a curved line that attaches the shoulder seam to the armhole opening on the side seam.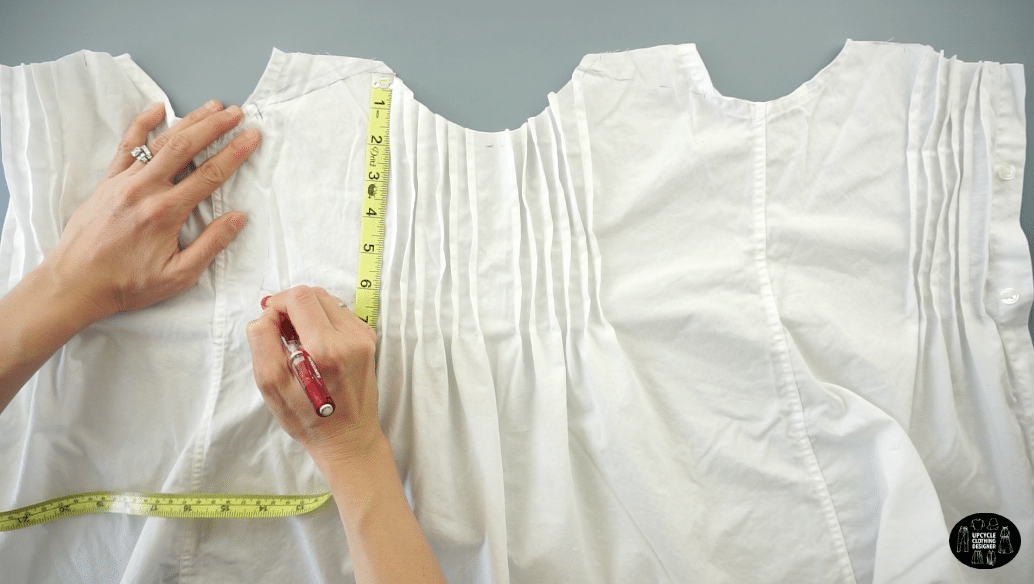
Cut along the side seam, armhole and shoulder.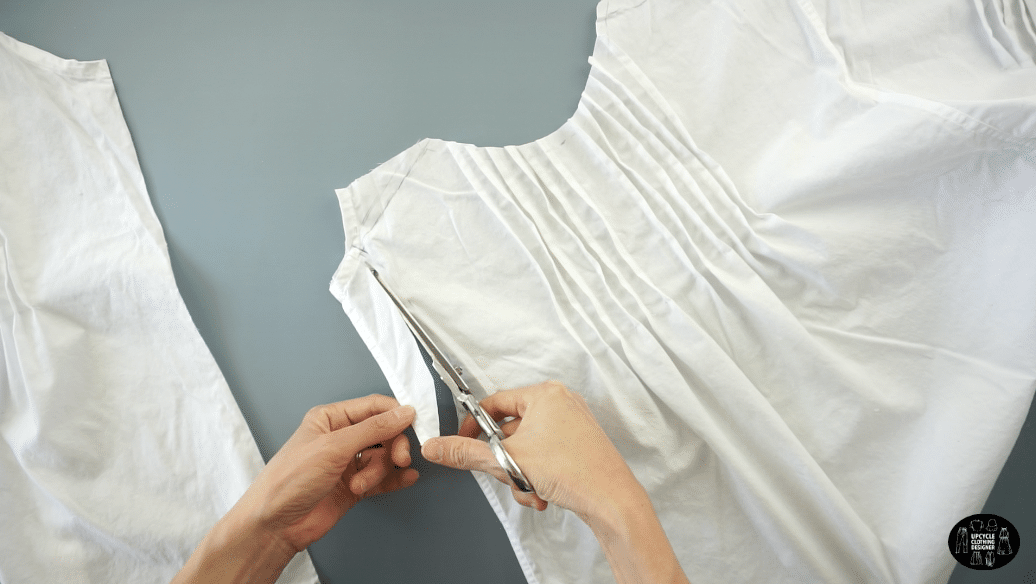
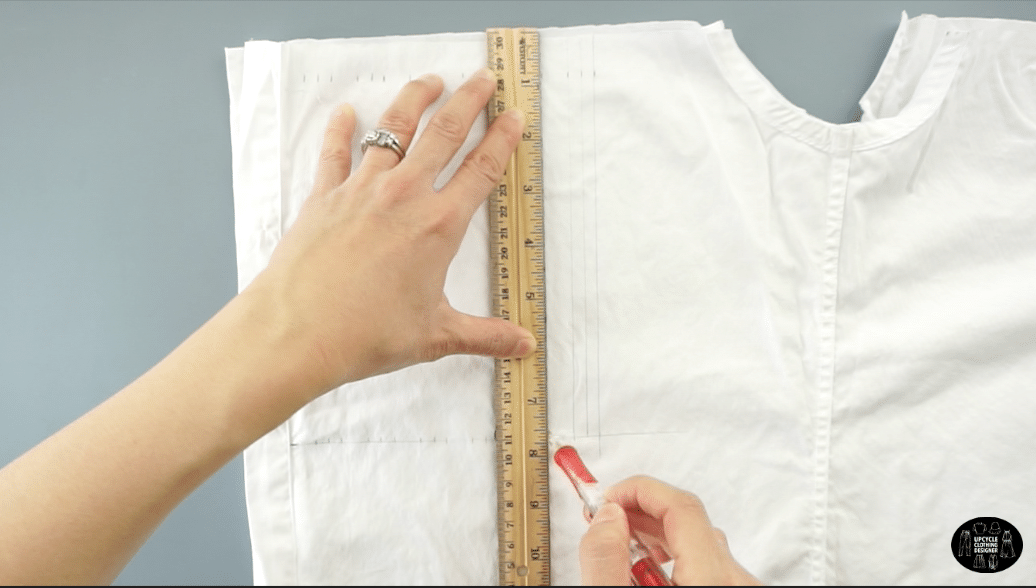
- Fold the chest piece in half lengthwise and copy the armhole pattern onto the opposite side.
Cut along the line to complete the front piece of the top.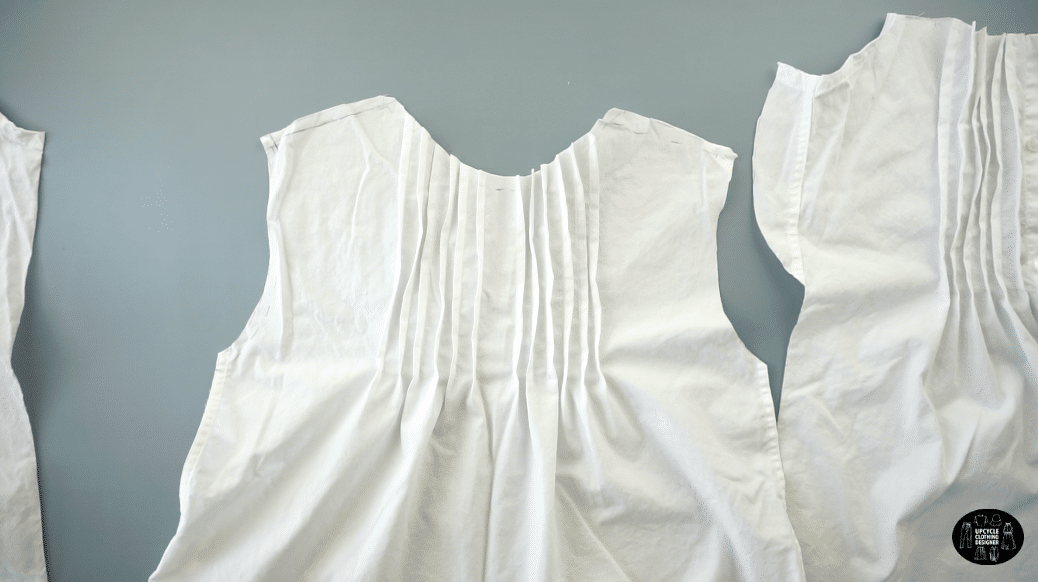
- Copy the side seam, armhole and shoulder of the front piece pattern onto the back piece.
Cut along the line to complete the back piece of the top. - To sew the top piece together, topstitch both shoulder seams with the right sides facing together.

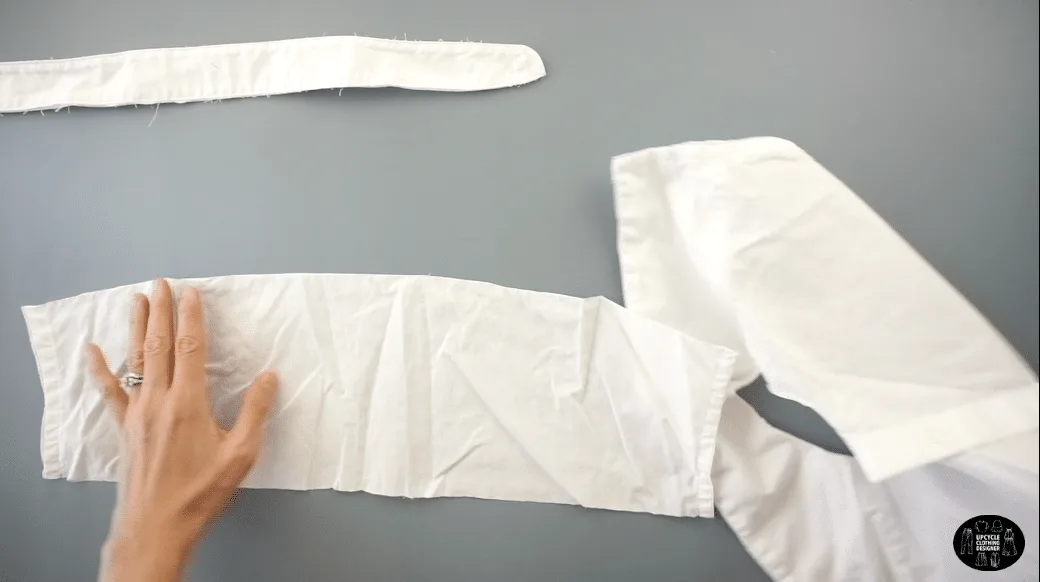
- The pintucks use up lots of fabric, therefore I needed to add a few extra inches to both side seams.
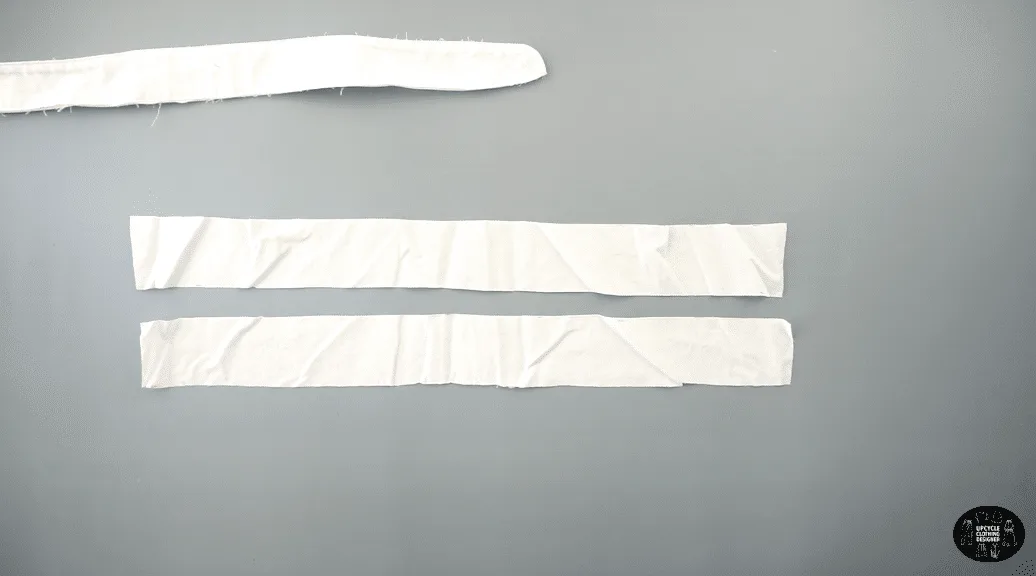
To make side panels for the top, use one sleeve from the men’s shirt.

Cut off the cuff and open the sleeve by cutting along the underarm seam. - Fold the sleeve in half lengthwise.
Measure 11” along the folded line, and 6” away from the folded line.
Cut along the lines; then cut along the folded line to make two separate 11” x 6” rectangles.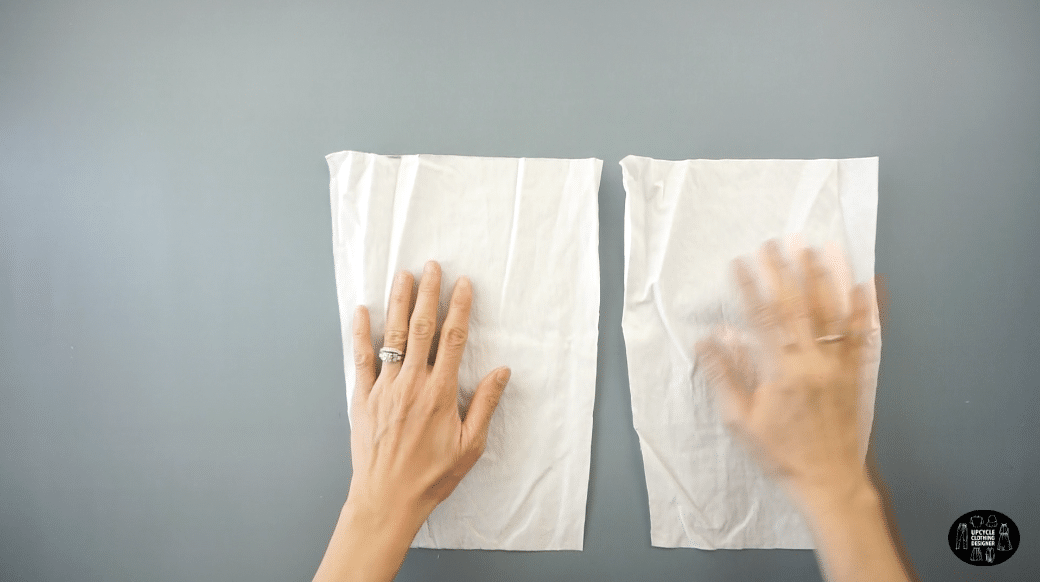

- Double fold the hem along the bottom of the side panels and topstitch for a clean finish.
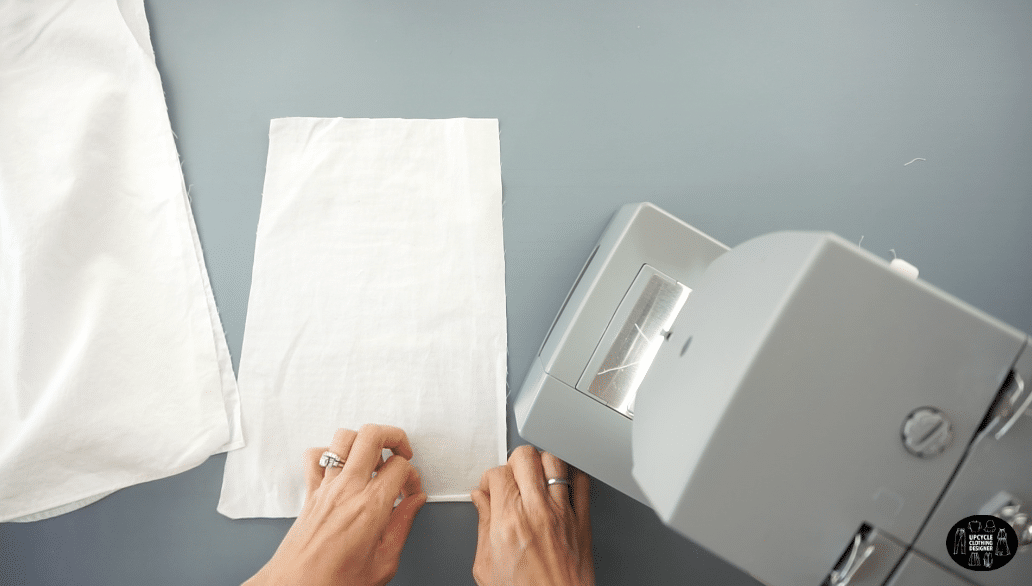
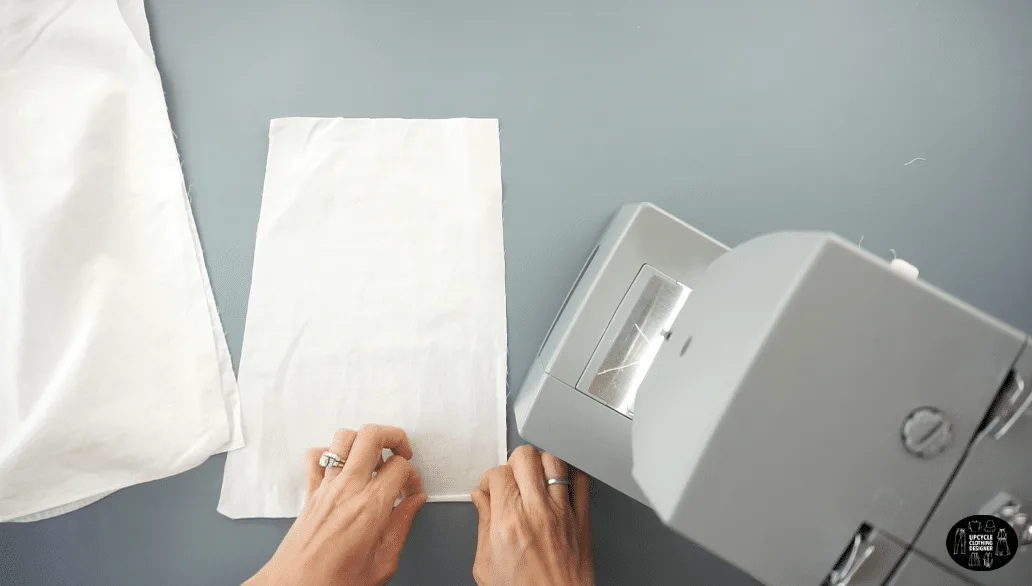
Attach the side panels to the side seam with topstitch.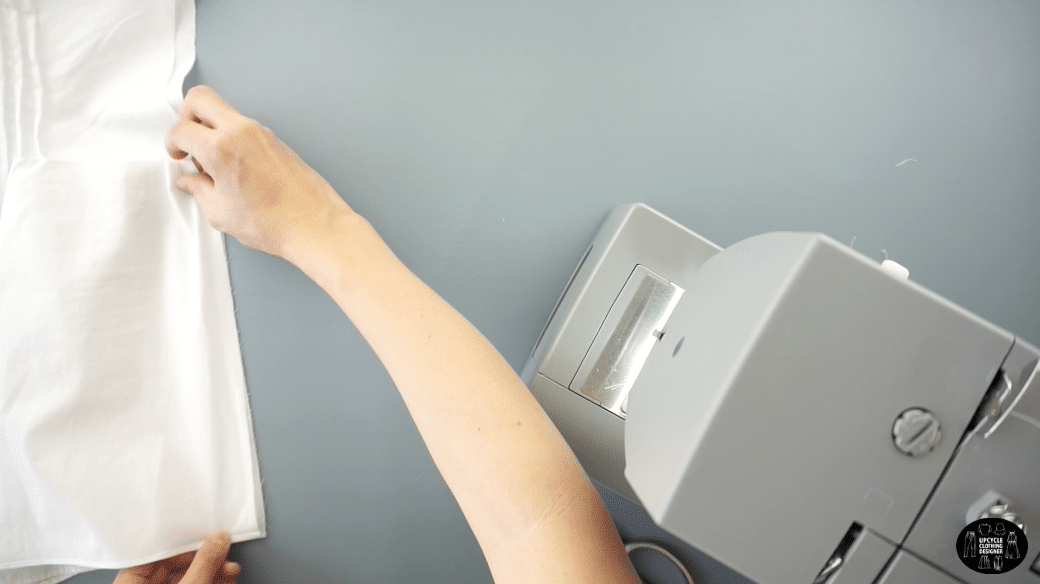
- To make the new neckband, use the original neckband from the men’s dress shirt.
Use a seam ripper to open the seams on the top and bottom of the collar.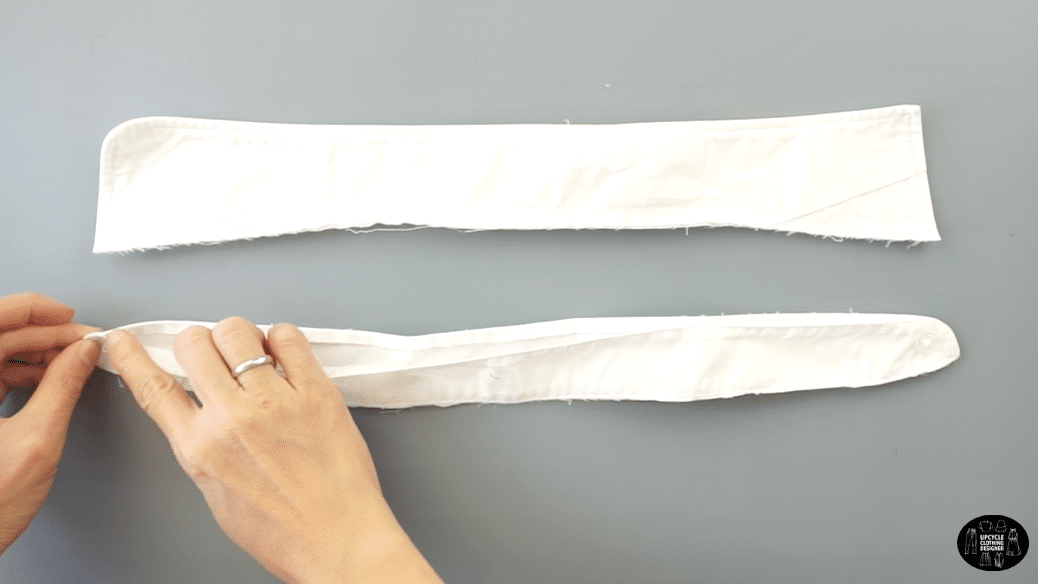
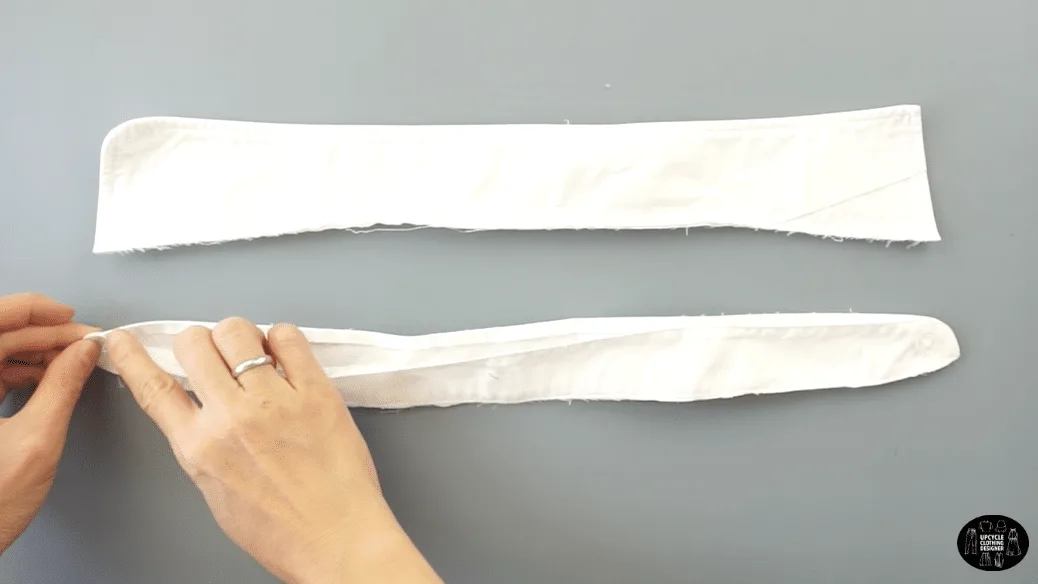
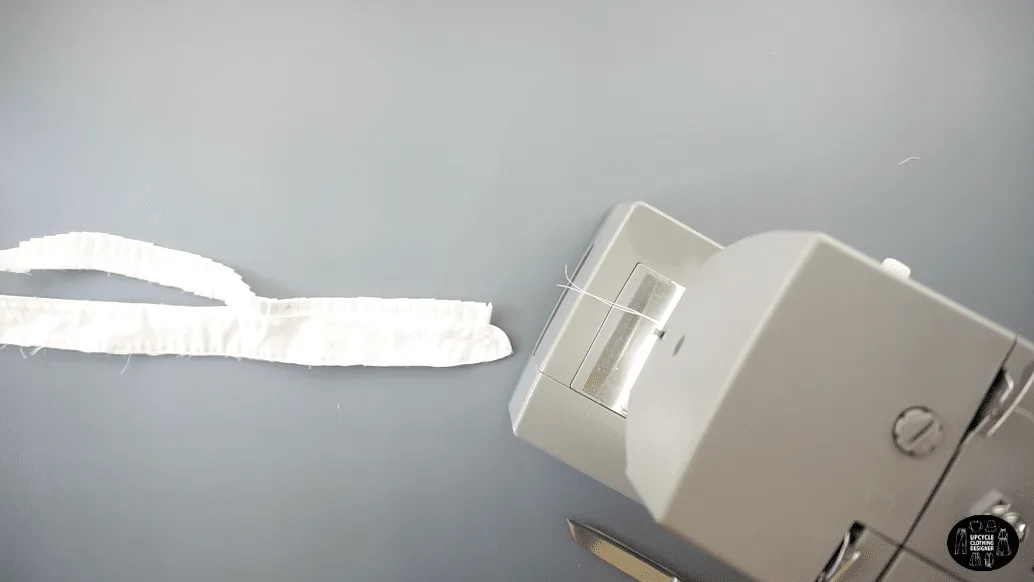
- To make the knife pleated detail for the neckband, use the back yoke from the original mens dress shirt.

Cut two separate 2” wide straps.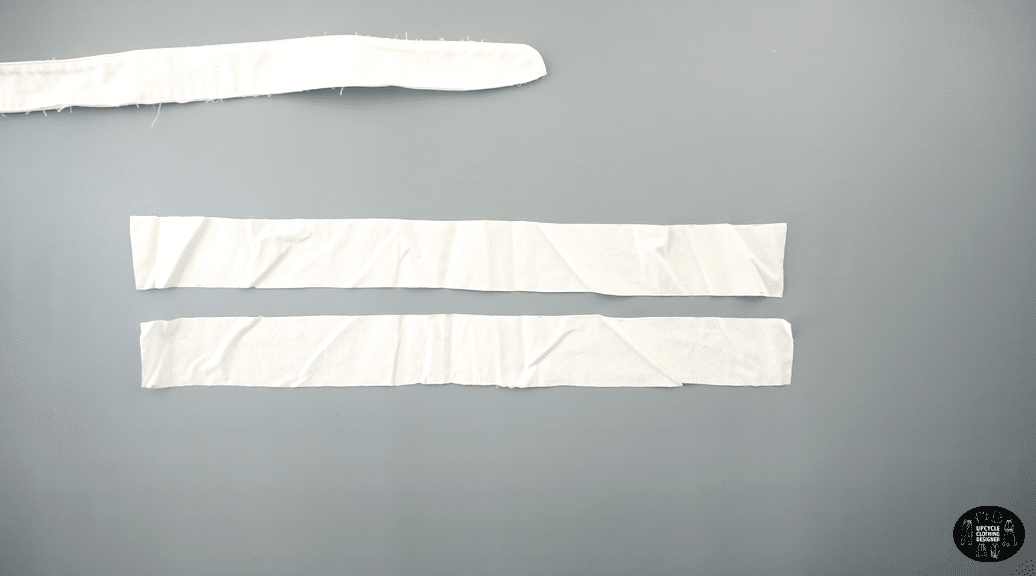
Attach the straps together with topstitch.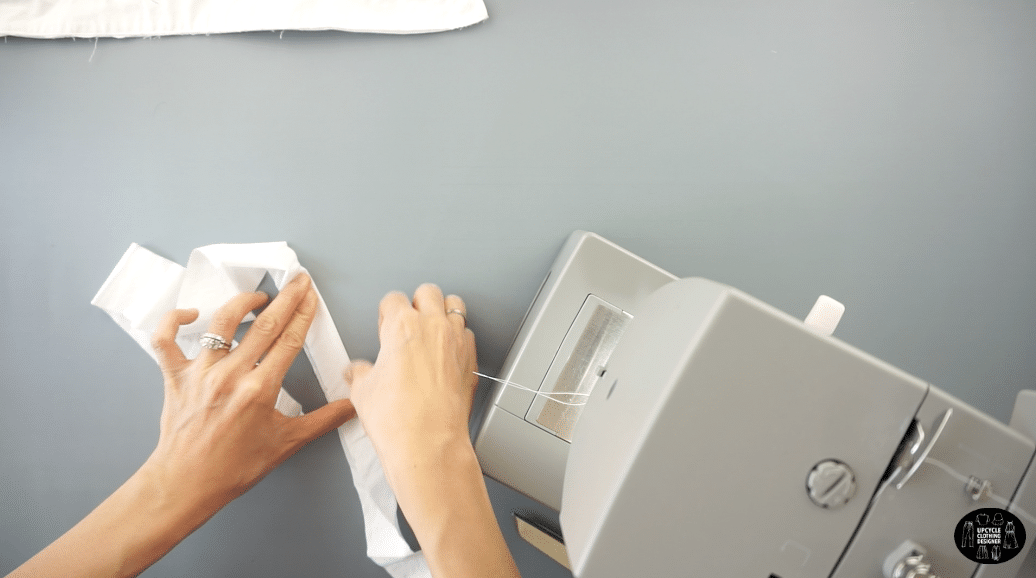
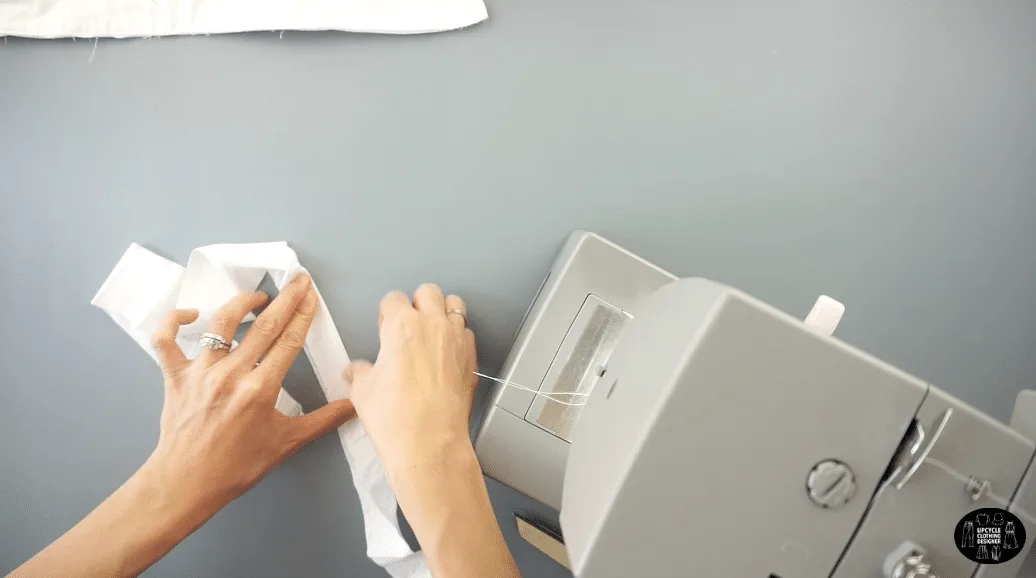
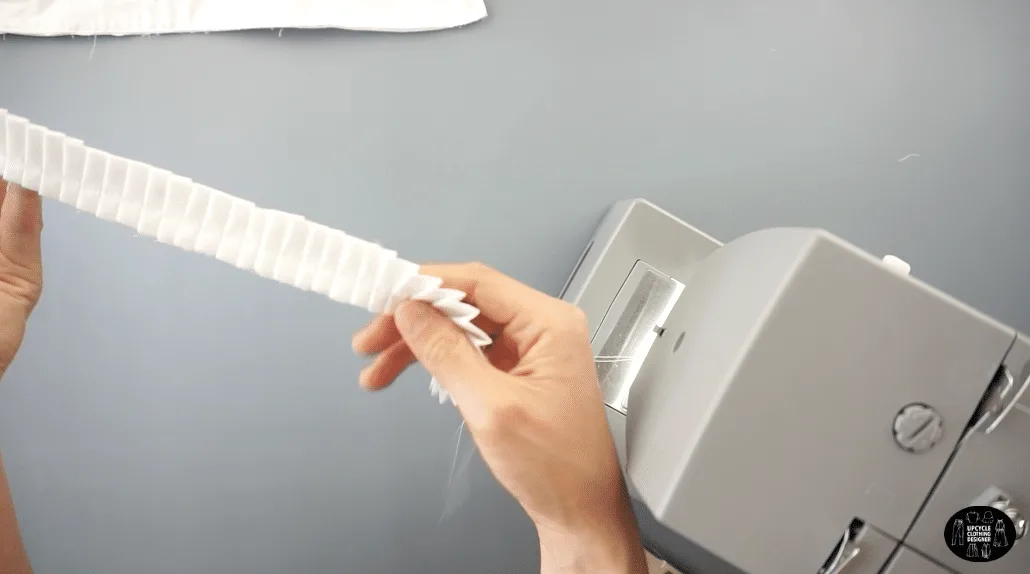
Fold the long strap in half lengthwise. - To make even knife pleats, use a ¼” wide placement marker.
Place the marker on top of the folded strap, and tuck the fabric over the guide.
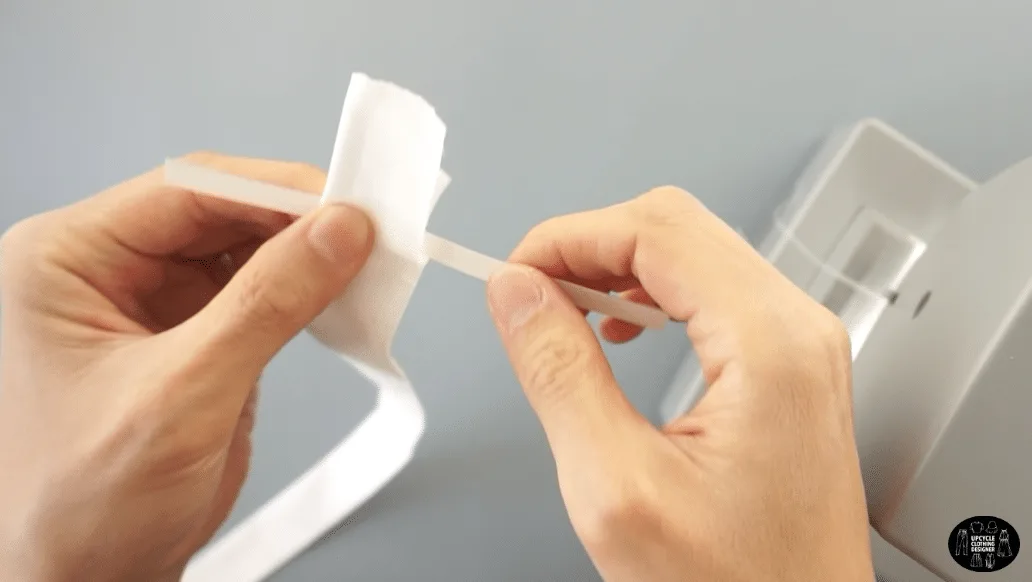
Remove the placement marker and topstitch over the pleat.
Again, use the placement marker and tuck the fabric over the guide piece.
Repeat this process until you reach the length of the neckband.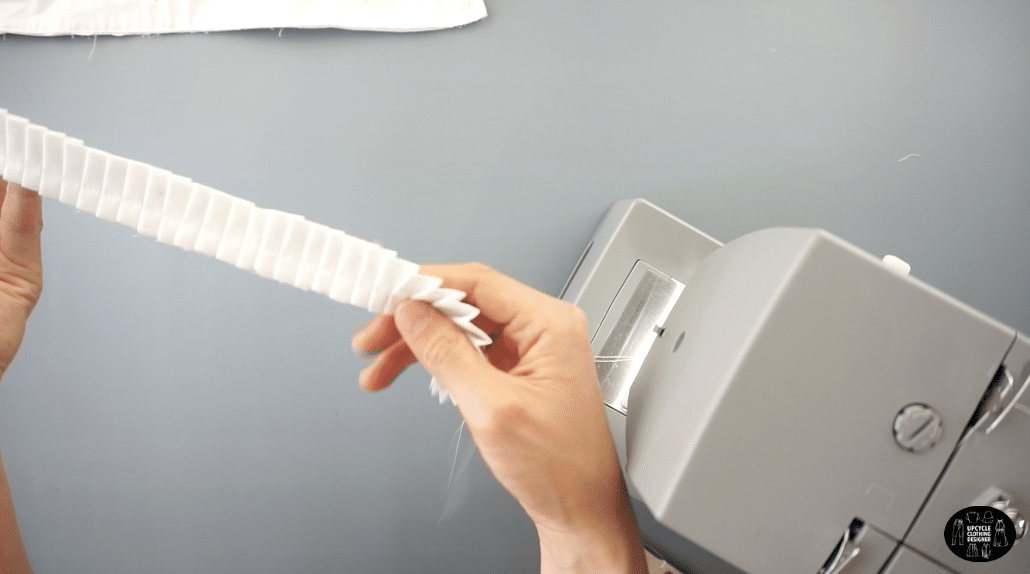
- To finish the knife pleated neckband, insert the knife pleated strap into the top seam of the neckband.
Pin to secure and topstitch.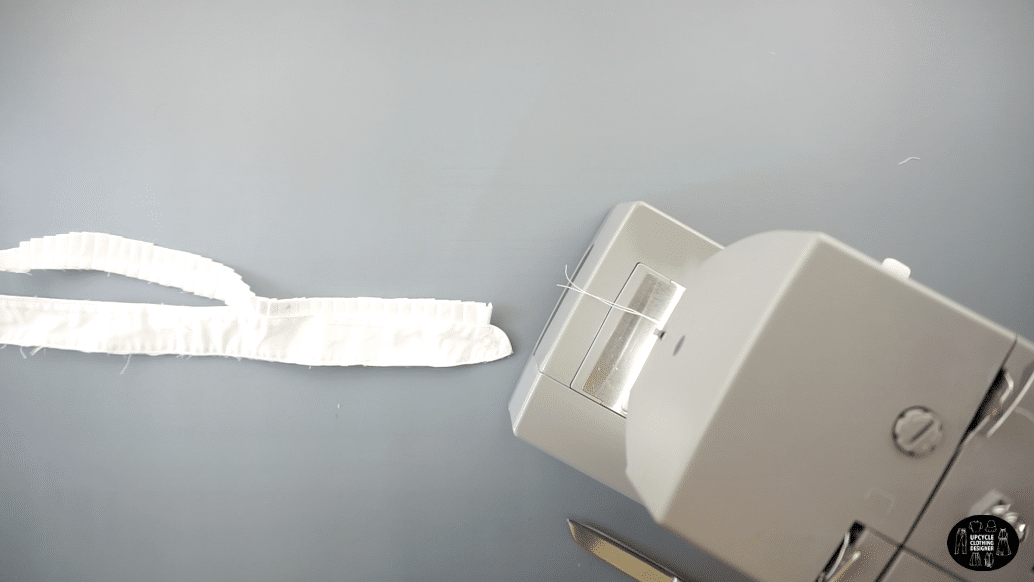
- To attach the pleated neckband to the top piece, insert the bottom seam of the neckband into the new neckline.
Pin to secure and topstitch.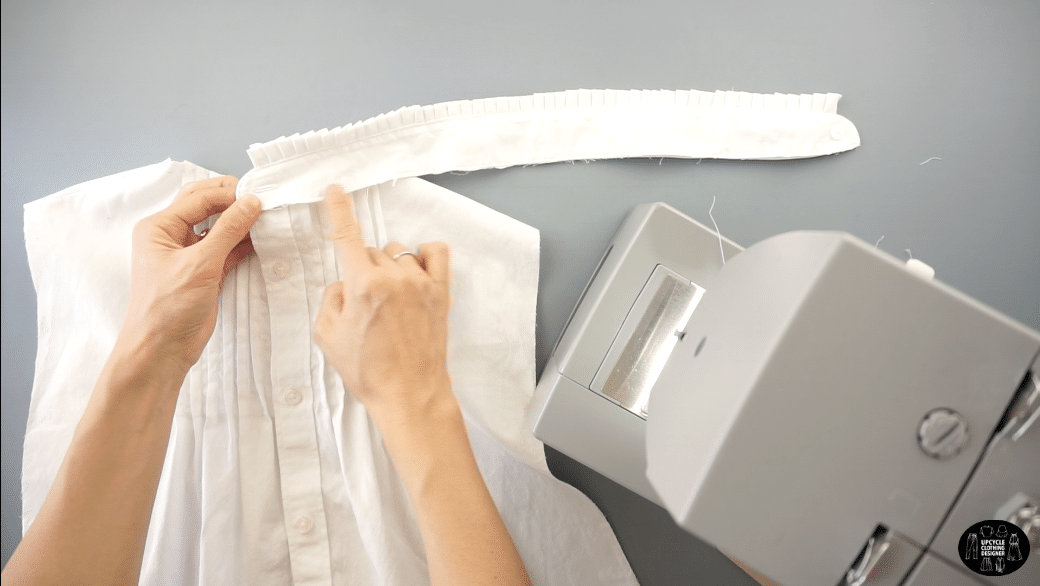

- To complete the new armhole, measure the width of your shoulders.
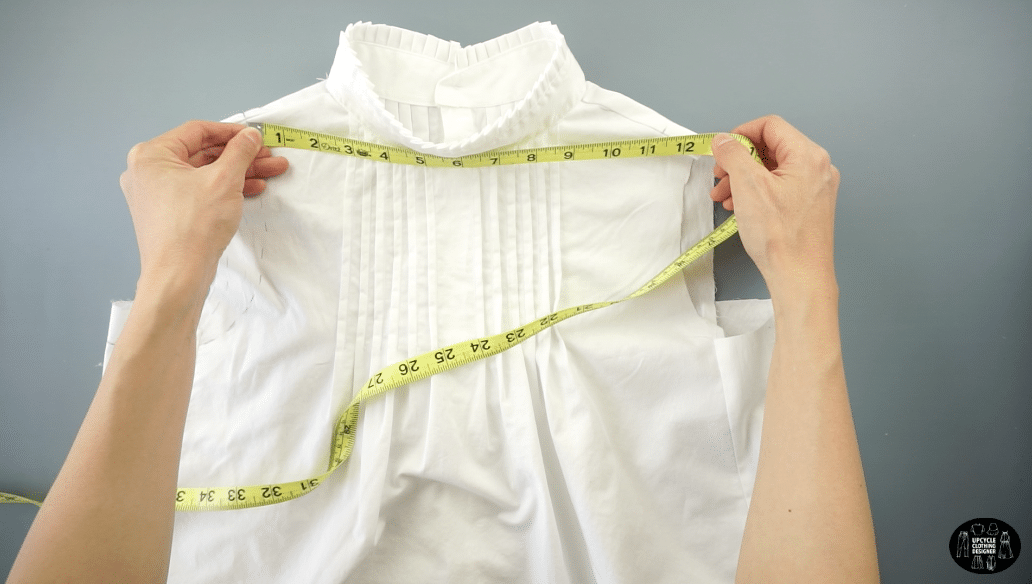

Mark both sides of the 11” shoulder width.
Then, measure 8” down from the high point on the shoulder seam.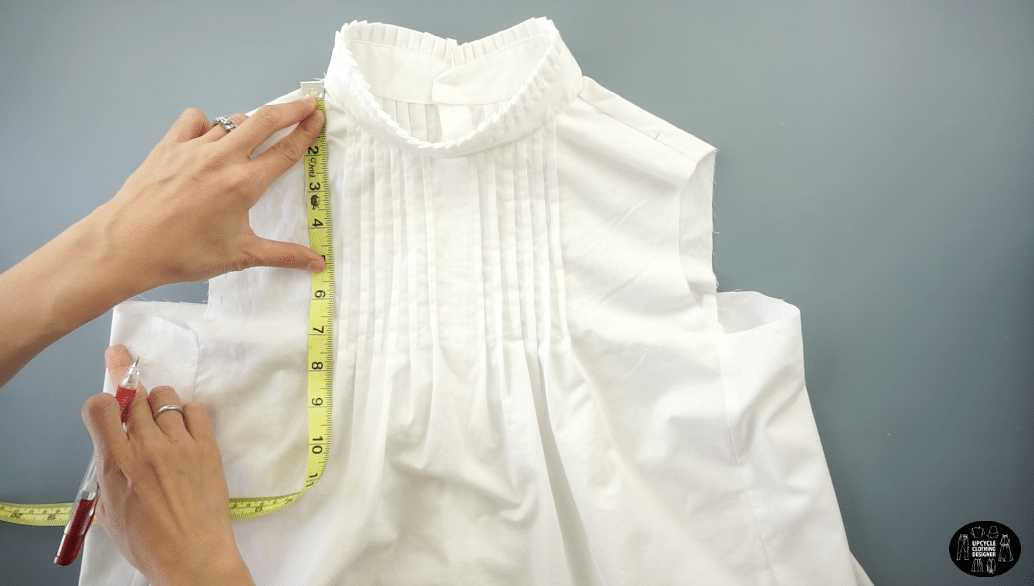
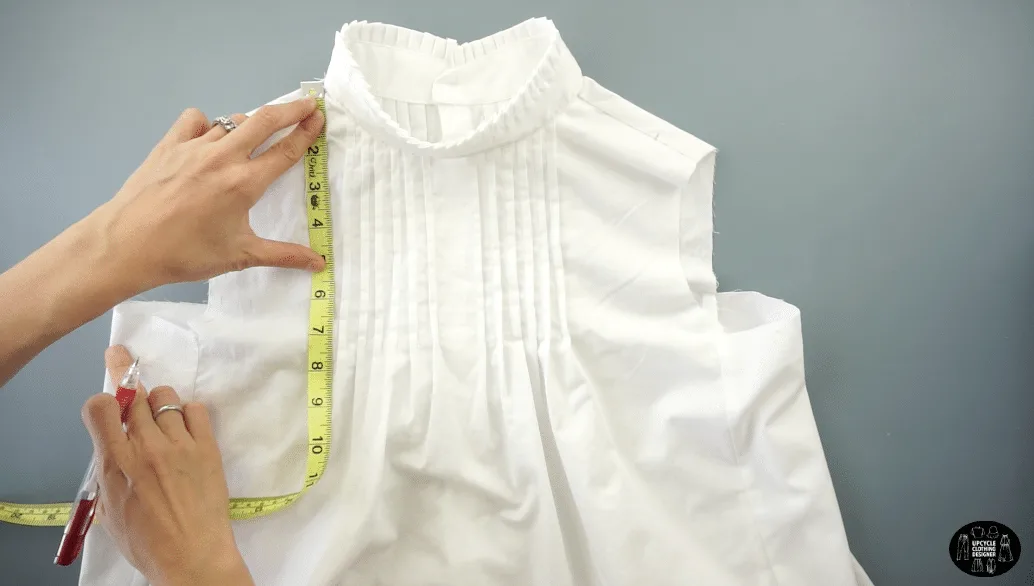
Draw a curved line that attaches the new shoulder to the bottom of the armhole opening.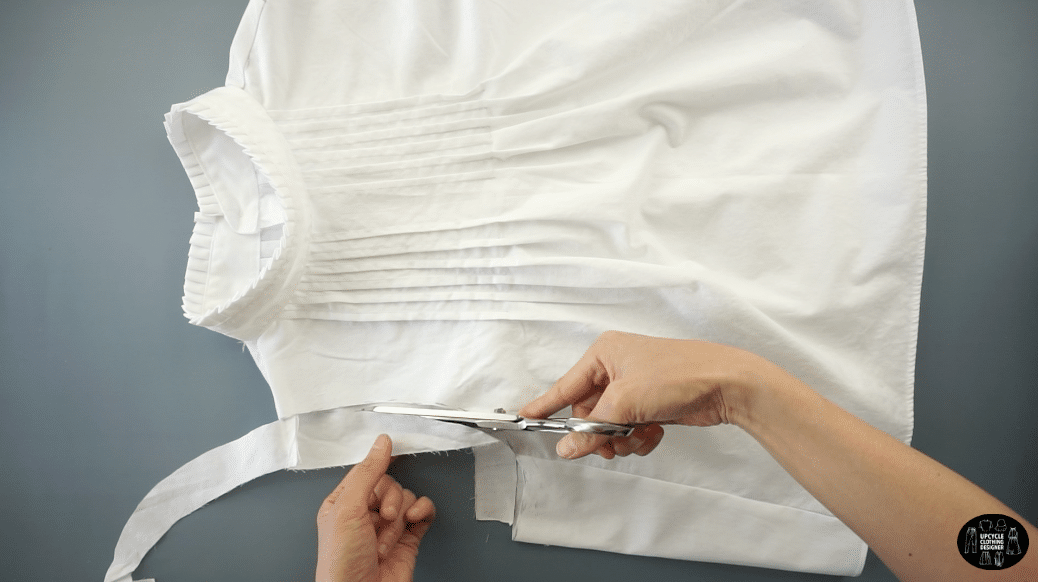

Cut from the under armhole to the top of the shoulder. - Copy the armhole and shoulder onto the opposite side of the top.

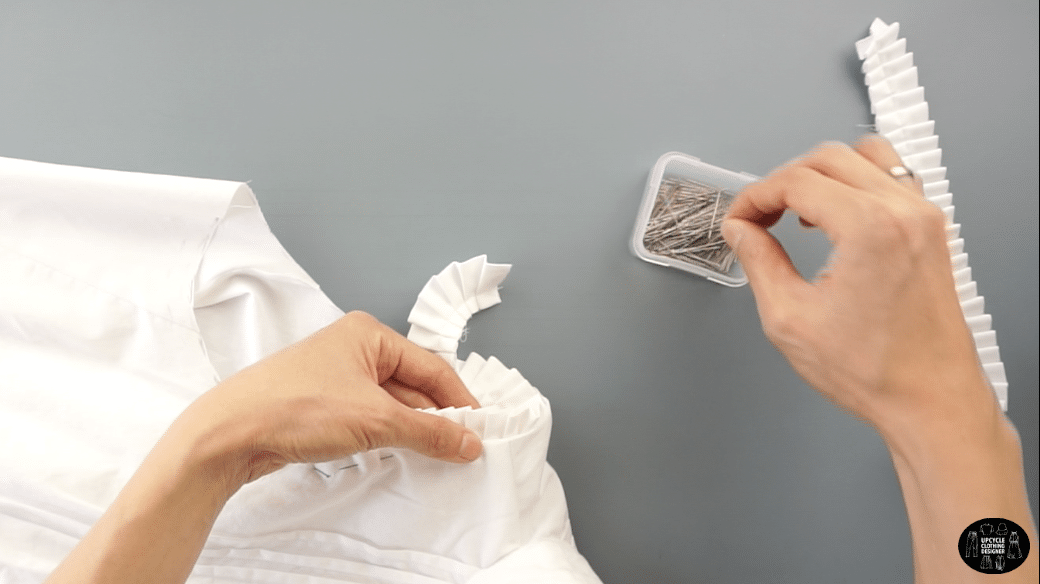
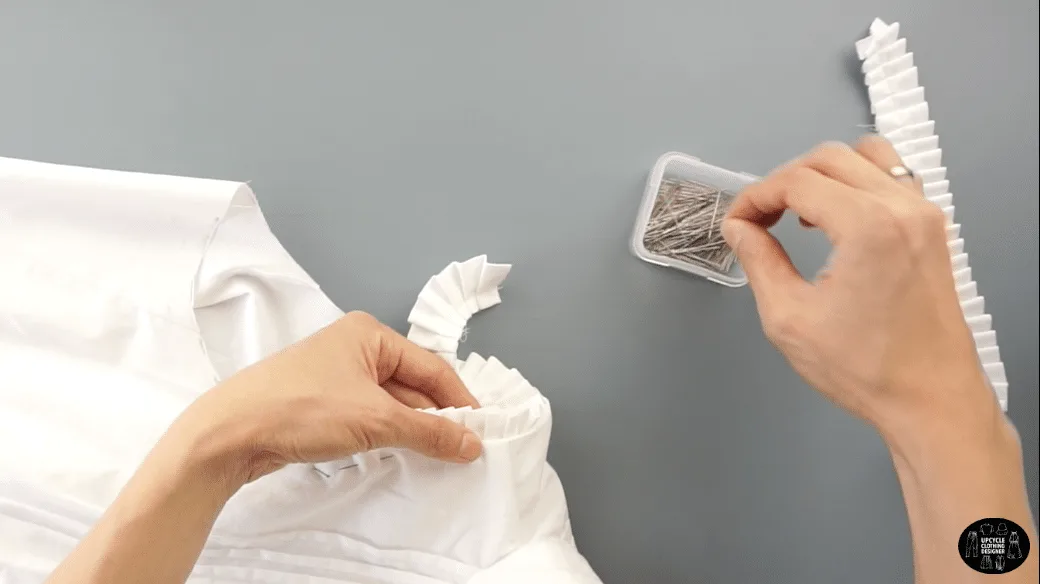
- To make the knife pleated detail for the armhole, use the other sleeve from the original mens dress shirt.
Cut off the cuff and open the sleeve by cutting along the underarm seam.
Fold the sleeve in half lengthwise.

Measure 2” away from the folded line on both sides.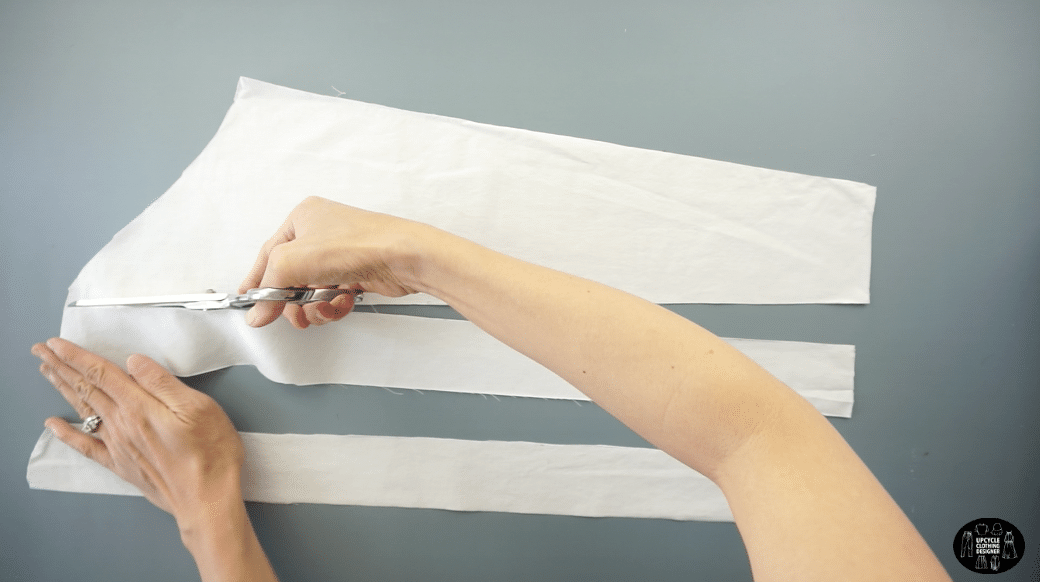

Cut along the lines to make two separate 2” wide straps. - Fold each strap in half lengthwise.
Use a ¼” wide placement marker to make even knife pleats.

Place the marker on top of the folded strap, and tuck the fabric over guide.
Remove the placement marker and topstitch over the pleat.
Again, use the placement marker and tuck the fabric over guide piece.
Repeat this process until you reach the end of the strap. - Duplicate the knife pleat steps on the second strap.

- To finish the new armhole, pin the pleated detail around the top of the armhole and topstitch.
- Double fold the hem around the bottom of the armhole and topstitch to complete this pintuck top from men’s dress shirt.

Recommended Products
As an Amazon Associate and member of other affiliate programs, I earn from qualifying purchases.


Trendy, Affordable Sewing Patterns for All Sizes


Tie Shoulder Jumpsuit Pattern


Palazzo Pants Sewing Pattern


Pocket Overall Romper Pattern


Wrap Maxi Skirt Sewing Pattern


Tie Back Top Sewing Pattern