
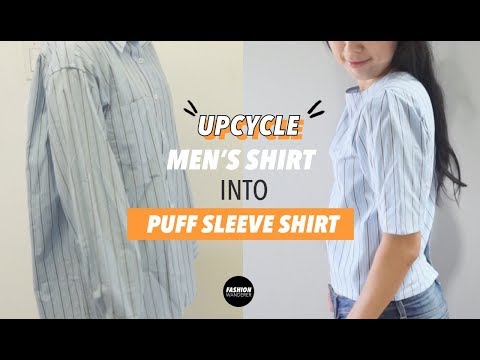
Let’s learn how to make a puff sleeve blouse from men’s dress shirt. The folded sleeve detail creates elegant volume and the button closure on the backside adds a classic touch.
Whether you pick a pin-stripe pattern or solid men’s dress shirt, every blouse will look pretty and personalized. For more fun inspirations, sift through the men’s dress shirt upcycle ideas that I have successfully accomplished.
The classic poplin top recently got a puff sleeve update according to the latest runways trends, so we’re going to add the feature to upcycled clothing projects. Yes, this statement sleeve trend is everywhere from social media to retail stores.
In order to make puff sleeve detail on a women’s blouse from men’s shirt, all you need is sewing machine and know couple of basic stitches. I recommend using straight and overlock stitch for this tutorial.


You will love this puff sleeve blouse from men’s dress shirt because…
- Learn how to copy clothes to transform into new wearable styles.
- Create puff sleeve detail without a sewing pattern.
- Fun beginner sewing project to start upcycling.
- Practice sewing straight stitches and hemming detail.
- Adjust the armhole and sleeve length based on your silhouette.
Sewing and making clothes from scratch sounds like a lot of work; but this simple tutorial shows exactly how to easily transform a puff sleeve blouse from men’s dress shirt.
Becoming familiar with how to upcycle clothes will give you an increased advantage in the DIY fashion niche. As a result, you can always be on trend and do a little recycling while you’re at it!
How to make a puff sleeve blouse from men’s dress shirt?
Practice on a few pieces of scrap fabric before diving into the steps of the project. Carefully plan and prepare each element.
The first step is to take body measurements for clothing. After you have accurately sized the fit, then you can move onto the making.
Grab the essential tools from your basic sewing kit, and then let’s dive into the refashion tutorial!
DIY Puff Sleeve Blouse Materials:
- Men’s Button Down Shirt
- ¾” Elastic Band
- Sewing Machine
- Fabric Chalk
- Measuring Tape
- Ruler
- Scissors
- Seam Ripper
- Pins
To make a puff sleeve blouse from men’s shirt, start by deconstructing the original garment. Cut off both sleeves and collar.
Also cut along the back yoke, both side seams and shoulder seams.
Use the back piece of the original men’s shirt to make the new front piece.
Use the front piece of the original men’s shirt to make the new back piece.
Use the original sleeves to make the puff sleeves with a pleated fold on the shoulder.
Attach the puff sleeve to the bodice and finish the neckline to complete the puff sleeve blouse from men’s dress shirt.


DIY Puff Sleeve Blouse Sewing Tips:
Before we start making this DIY puff sleeve blouse, pre-wash the men’s dress shirt and give a little extra love to the material by ironing. It will help you to easily draw, cut, and sew straight lines which ultimately benefits the end result.
Use the sewing tips and techniques as guidelines to help you complete the darling blouse. The methods described below will help you to achieve store-quality with professional finishing detail.
- Sewing Tips: When sewing poplin fabric, make sure to check the tension of your machine. Based on the weight, you’ll need to adjust the settings to a moderate tension. Test on a scrap to evaluate the proper tension for the material.
- Needle: In general, I recommend 80/12 needle size when sewing poplin. But, if your shirt is a heavier weight than go with 90/14.
- Thread: For this project, I use cotton thread. I always check the label inside the garment to get the right material content in order to match with the right thread blend. You can go with cotton, cotton/polyester, or polyester, choice is yours.
- Elastic: When sewing elastic, always temporarily pin the fabric to the elastic to keep it from shifting over the ends of the elastic. I mark the half point of elastic with fabric chalk to match the seams so I can stretch the ends to meet the point in the middle. Pin the elastic at four equally spaced points so that you can scratch the band as you sew.
- Seam Ripper: Upcycling clothes requires a lots of seam ripper use. It might take more time to rip open seams than the actual sewing. It’s easier to slide the seam ripper between two layers of fabric when opening a seam or hem.
More men’s shirt into women’s blouses upcycle designs:


Puff Sleeve Blouse From Men's Dress Shirt Tutorial
For this upcycled men's dress shirt tutorial, I made the puff sleeves without a paper pattern .
Most of the time, sleeve details need a paper pattern in order to fold and sew properly. But in this step-by-step refashion tutorial, I’ll show you how to make puff sleeve shirt the easy way.
Materials
- Men's Button Down Shirt
- ¾” Elastic Band
Tools
- Sewing Machine
- Fabric Chalk
- Measuring Tape
- Ruler
- Scissors
- Seam Ripper
- Straight Pins
Instructions
- Remove the pocket using a seam ripper.
- Detach both sleeves by cutting along the seam using scissors.
- Disconnect the collar by cutting the collar band.
- Cut across the yoke seam in the back.
- Cut down both side seams and then detach the shoulder seam.
- To make the new front piece, start by folding the original back piece in half. Pin it securely along the armhole and side seams so that it doesn’t move when you are drawing a new shape or begin cutting.
- Copy the front neckline, shoulder seam and armhole by tracing the outline with fabric chalk.
- Measure 23” down from the highest point of the shoulder seam and mark.
- Then, measure 10” away from the folded center front, draw a straight line to connect and cut along the chalk mark to complete the front piece.
- To make the back piece, unbutton the shirt, lay the wrong sides together and then pin it to secure.
- Use your favorite t-shirt to copy the back neckline with fabric chalk. Then, use your new front piece to copy the shoulder seam, armhole, side seam, and hemline.
- Cut along the chalk mark to complete the back piece.
How To Make Puff Sleeves Without Pattern
- To make the puff sleeves, remove both cuffs and then split open each sleeve by cutting along the seam. Open each sleeve and lay them flat with the right side up.
- From the center of the sleeve piece, measure 13” down, make a straight line across and then cut to create the new sleeve length.
- Remove any sleeve seam so that you are left with a smooth piece of fabric, and measure the hem of the sleeve. Mine is 16” across and I will reduce it to 10” by removing 3” on each side. Draw a new seam line with fabric chalk and trim along both sides of each sleeve.
- Double fold the sleeve hem ¼”, pin it to secure and sew edge top stitch.
- For the pleated fold on each sleeve, begin by folding both sides about ½” from the center of the sleeve and pin to secure.
- Then, fold again about ½” on each side and pin to secure.
Sewing tip: You want to make sure the new sleeve line matches your armhole so double check before your sew them together - Sew about ⅛” along the folded tucks to secure the pleats and then cut a smooth line along the armhole.
- Next, place the wrong side of the front and back piece together. Sew ½” seam allowance along the shoulder seam.
- To attach the sleeve to the bodice, pin to secure and then sew ½” seam allowance.
- To finish the neckline, I chose to make inbinding with a ¾” width elastic strap that is about 24”.
- Begin by laying the right side of the strap against the right side of the bodice, pin to secure and sew ⅛” along the neckline.
Pro tip: Use scissors to clip along the neckline without cutting through the thread. This method will help you curve it more smoothly. - Cover the seam with a ¼” double fold, pin to secure and sew edge topstitch along the neckline.
- Double fold the hemline ¼”, pin to secure and edge topstitch along the hem to finish cleanly.
Notes
If you have any questions about the instructions, send me an email or leave a comment below. I’m here to help out as best as possible!
Recommended Products
As an Amazon Associate and member of other affiliate programs, I earn from qualifying purchases.


Do you have creative ways to upcycle men’s dress shirts?
Share your puff sleeve blouse with me!
#FashionWanderer
Trendy, Affordable Sewing Patterns for All Sizes


Tie Shoulder Jumpsuit Pattern


Palazzo Pants Sewing Pattern


Pocket Overall Romper Pattern


Wrap Maxi Skirt Sewing Pattern


Tie Back Top Sewing Pattern
Mechelle
Sunday 8th of May 2022
So happy to have found this! I've been wanting to make a puff shoulder sleeve shirt dress & just couldn't find a pattern for the puff shoulder I invisioned. This is making my dream come true! Thank you!
Soonjoo
Monday 9th of May 2022
Thank you so much! please share the completed top with me when you finish! I would love to see how it turns out
Barbara Harris
Tuesday 20th of October 2020
Really thanks for this!! Was very useful. i’ll make a cosplay and I don’t knew how to do puffed sleeves, your tutorial is great!
Soonjoo
Wednesday 21st of October 2020
Thank you so much Barbara! Glad that you found the tutorial to be useful>
Naomi
Tuesday 1st of September 2020
Hi where is the elastic used I did not see that?
Soonjoo
Tuesday 1st of September 2020
Hello Naomi, Yes you are correct, I ended using tucks around the sleeve opening instead of elastic. If you don't feel comfortable sewing elastic, then you can use tucks. However, either method will produce the puff sleeve detail around the sleeve opening.