
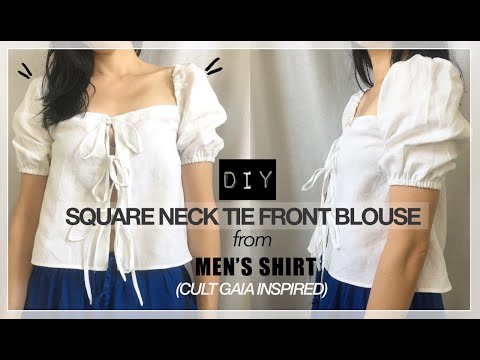
Are you obsessed with Cult Gaia tops? Welcome to another upcycle men’s dress shirt tutorial where I teach how to make a square neck tie front blouse with puff sleeves.
This refashion transformation makes a flattering neckline and shoulder silhouette. There are countless variations to transform a women’s blouse from men’s shirt, search through the upcycle projects for the design inspiration that peaks your interest.
If you have a men’s shirt that is linen or gauze fabrication, this is perfect to make a square neck blouse. This tutorial demonstrates a different technique to clean finish the edges instead of the double fold hemming method.
There are different ways to clean finish a neckline, and it’s important to understand advanced techniques as you progress into upcycled clothing. Here is another opportunity to learn a new neckline finish to further grow your library of sewing skills!


You will love this square neck tie front blouse from men’s shirt because…
- Beginner level sewing project to learn basic stitching and clean finishes.
- Learn how to sew self facing around the neckline and center front opening.
- Easy method to sew elastic using the casing technique.
- No sewing pattern is needed to make this blouse.
- Create multiple drawstrings for the front closure.
For this men’s shirt transformation, The material was 100% linen with a light-medium weight. Because the fabric wrinkles easily, use an iron to maintain crisp surface as I move along.
Linen is great fabrication for spring and summer because it is a breathable material and sustainable piece to add to your wardrobe. So, if you have a white or pretty colored linen shirt, just go with it!
I’ve put together an informational video tutorial and step-by-step instructions for you to execute this Cult Gaia inspired square neck tie front blouse. Be creative and lengthen the sleeve or make the length meet-and-greet length or crop top, choice is yours!


How to make square neck tie front blouse from shirt?
If you have slightly stiff linen shirt, prepare the garment by washing it to make the fabric softer and more absorbent. Make sure to wash in cold water and use a mild detergent to protect the fibers.
After wash and care your shirt, estimate the measurement of each piece that you need to accomplish the upcycled blouse. Take body measurements for clothes and apply your measurements to the steps demonstrated in this tutorial.
The supplies and tools needs for this project should be part of your basic sewing kit. Gather the essentials and setup your sewing station, let’s get started!
DIY Square Neck Tie Front Blouse From Men’s Shirt Materials:


- Men’s Dress Shirt
- ¼” Elastic Band
- Sewing Machine
- Fabric Chalk
- Loop Turner
- Measuring Tape
- Ruler
- Straight Pins
- Scissors
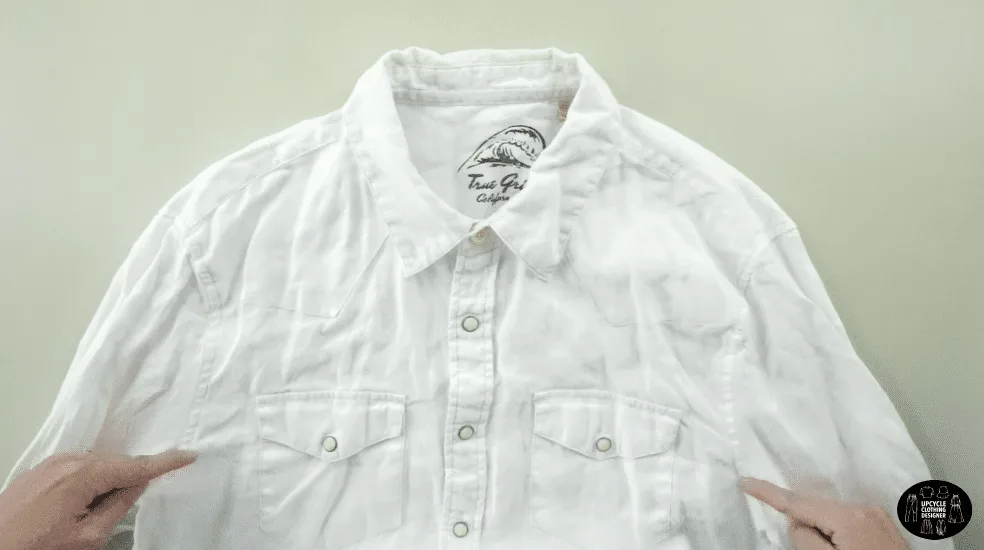
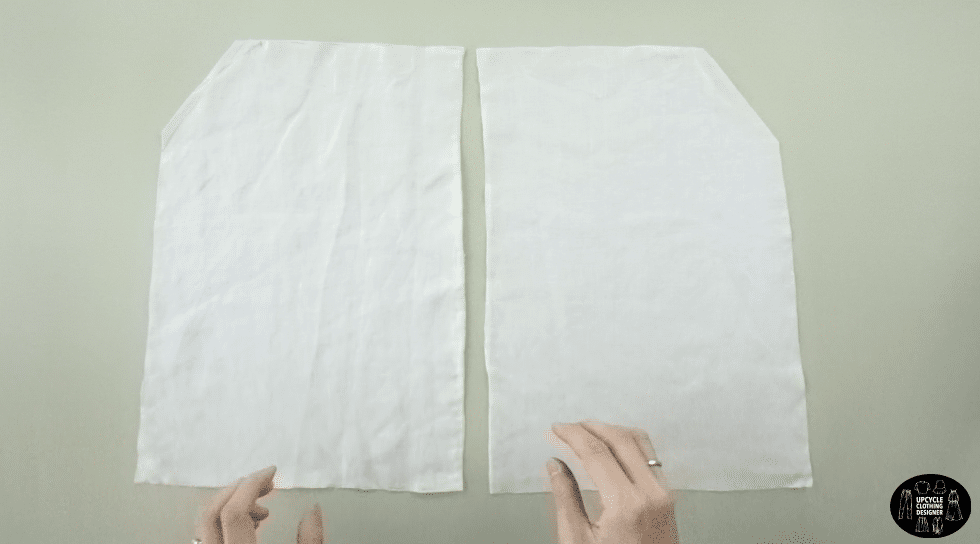
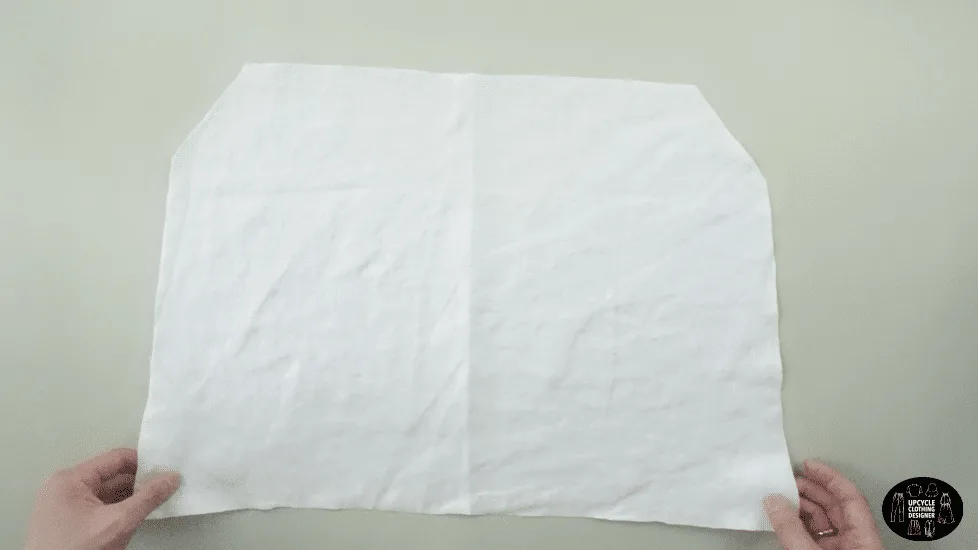
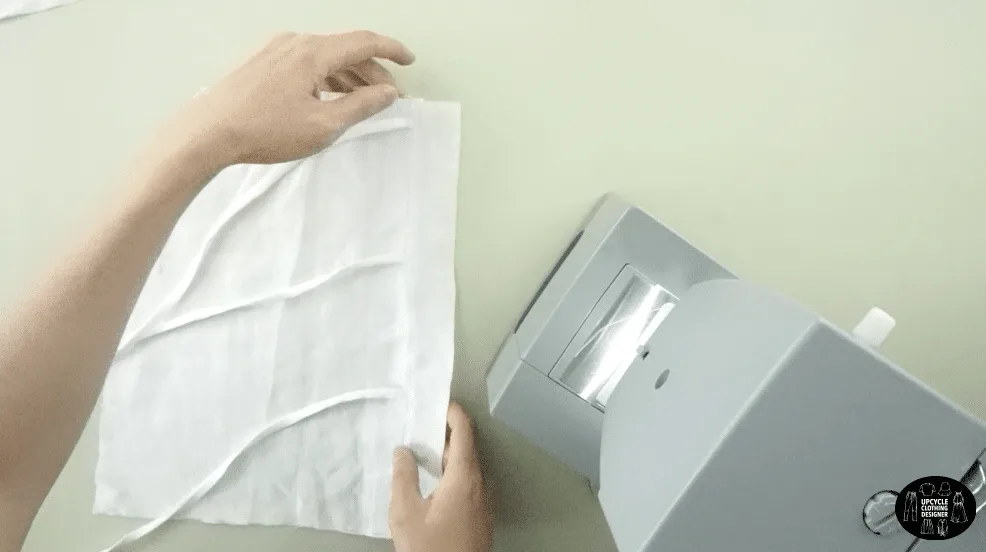
To make this Cult Gaia inspired blouse from men’s shirt, begin with deconstructing the original button down shirt.
To separate the front from the back of the original men’s shirt, cut off the collar and neckband, both sleeves, button and buttonhole placket, both shoulder seams, back yoke and both side seams.
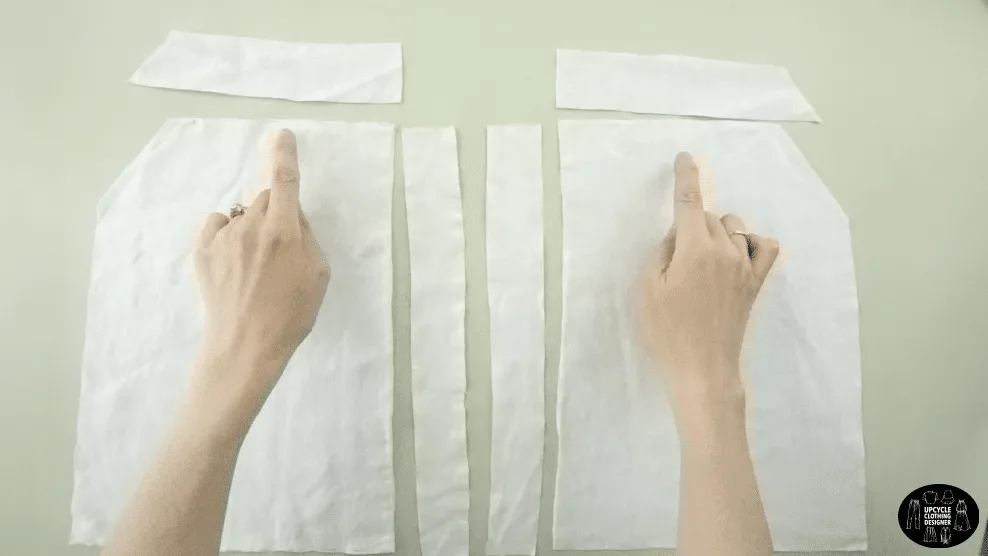
Use the front piece of the original men’s shirt to make the square neck blouse pattern.
Copy the pattern to make the matching piece for the front and also the back piece of the blouse.
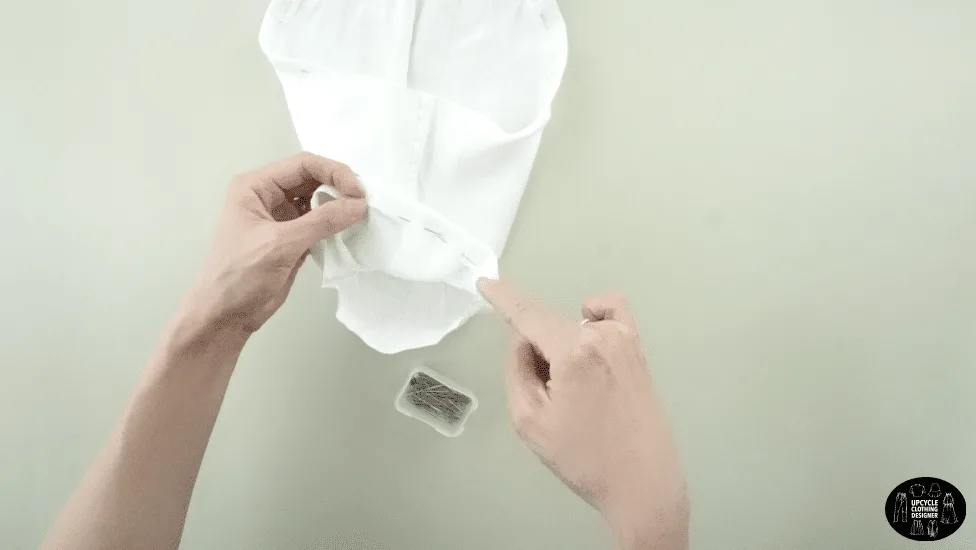
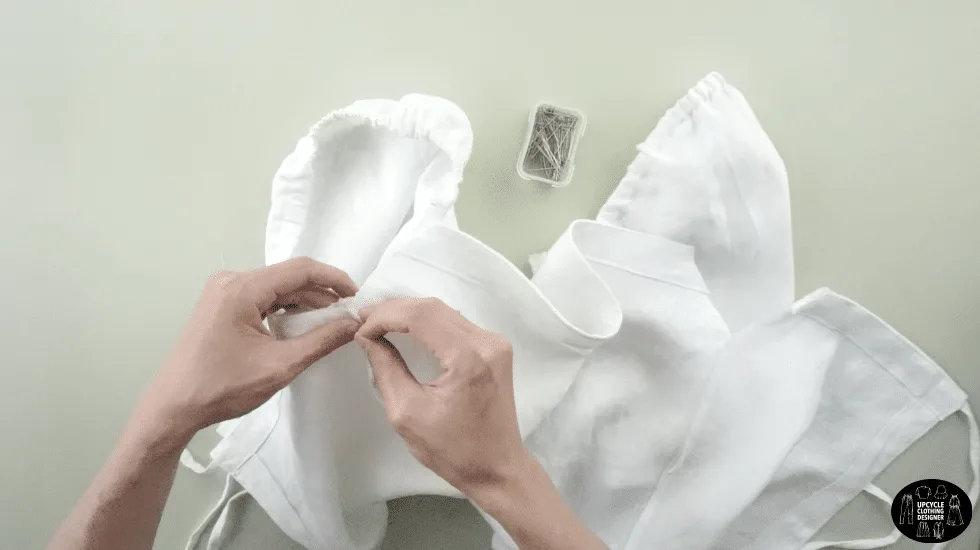
Make the facing for the back neckline, front neckline and center chest opening.
Attach the facing to the back neckline with the right sides together.
Flip the facing over the edge, ⅛” fold and edge topstitch.
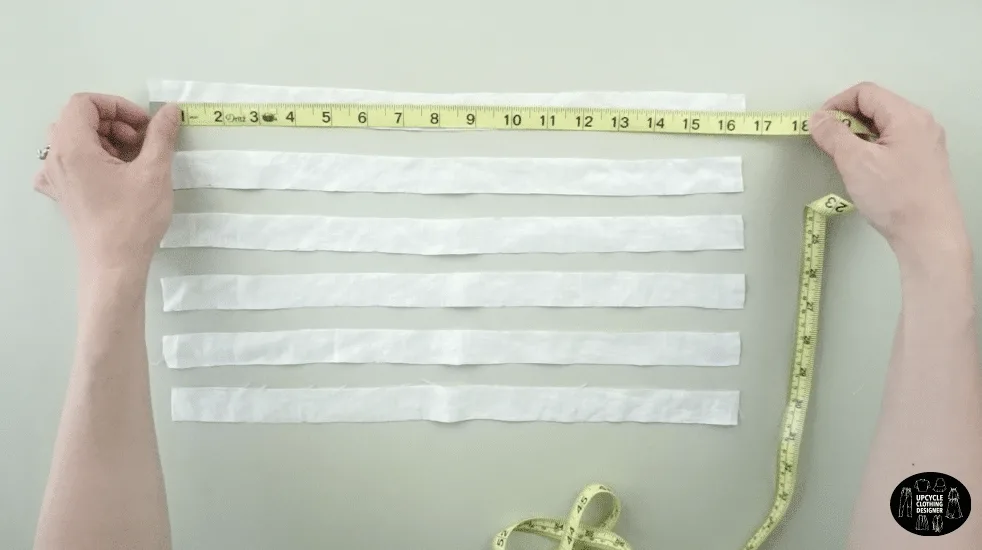
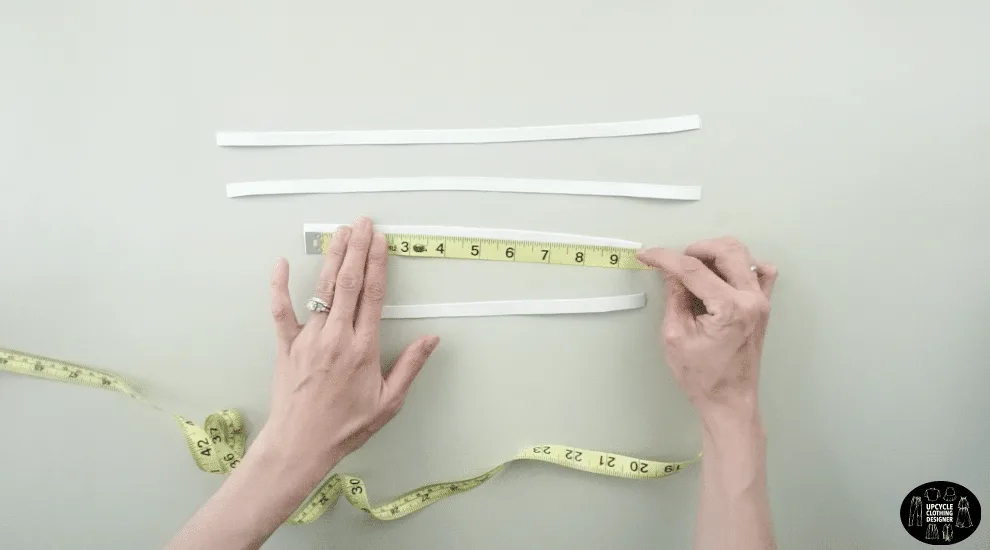
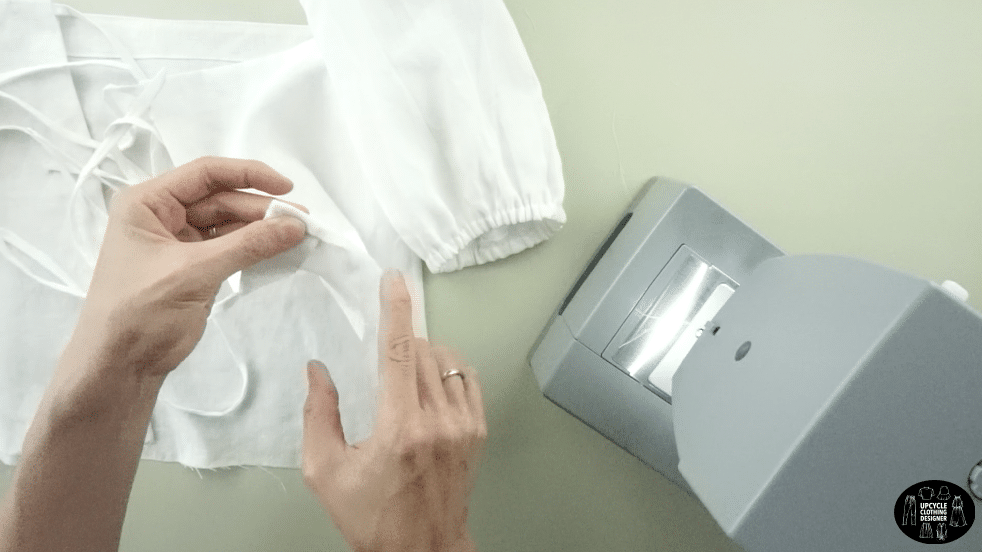
Make six 1” x 16” drawstring straps with the excess fabric.
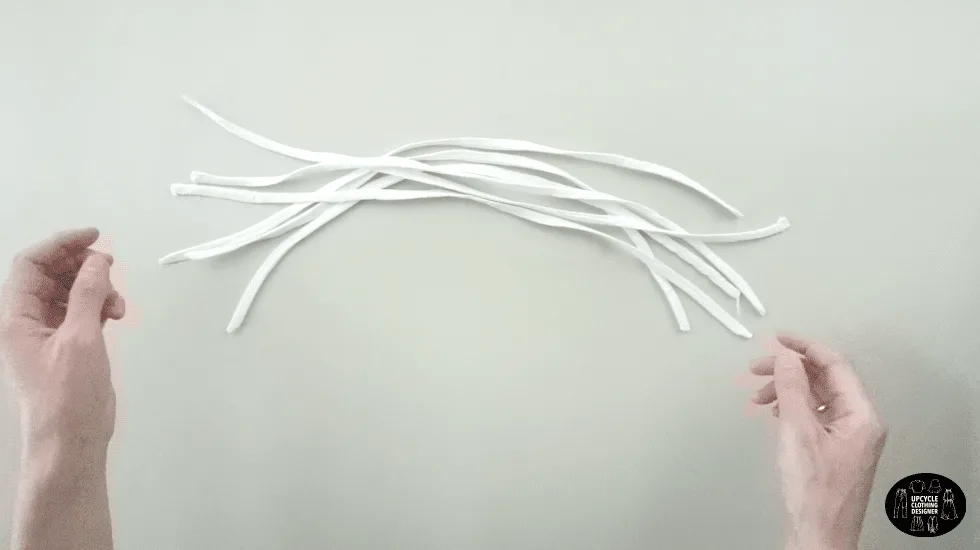
Fold each strap in half, sew the edge and use a loop turner to flip the drawstring inside out.
Attach the tie front drawstring to the center chest opening, then join the facing on top of the chest opening and front neckline with the right sides together.
Join the front to the back of the blouse by sewing along the side seams with the right sides facing together.
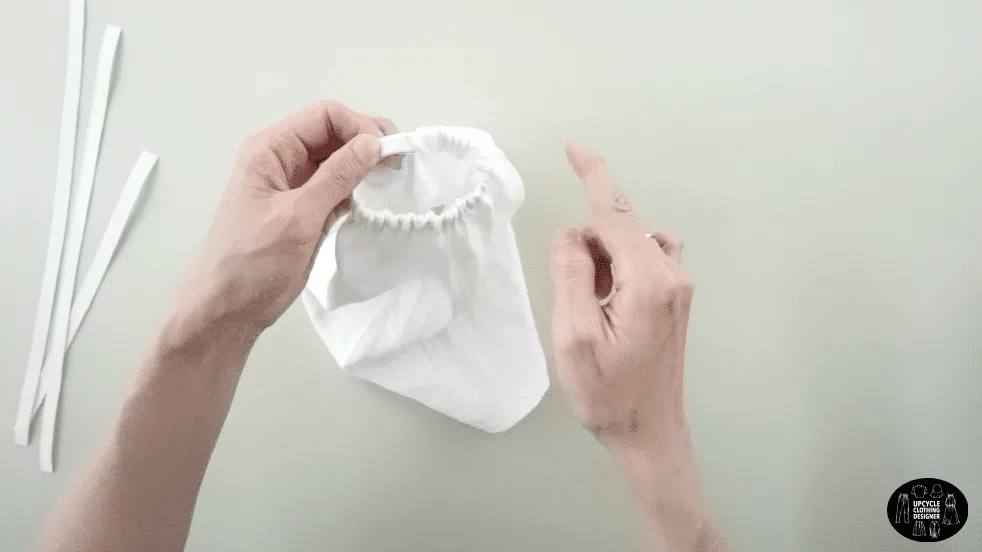
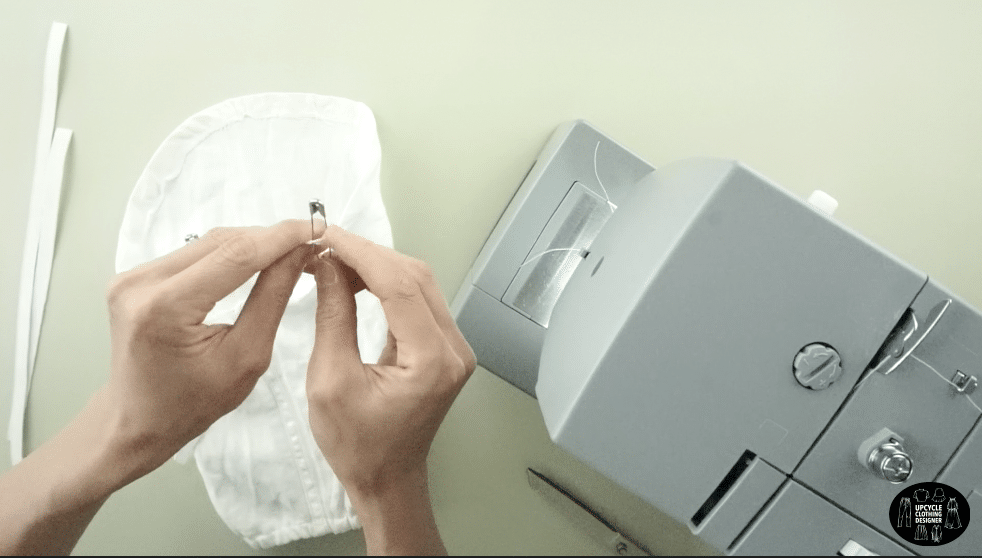
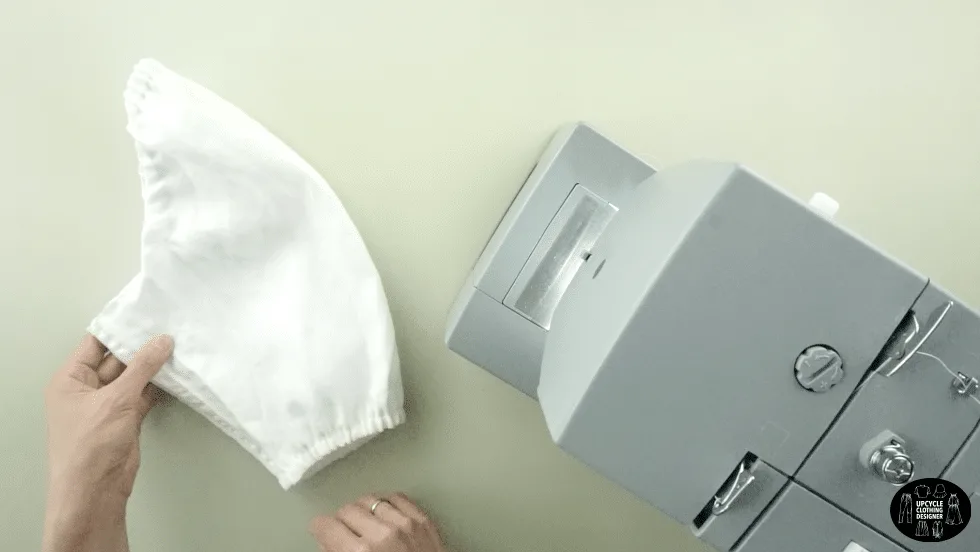
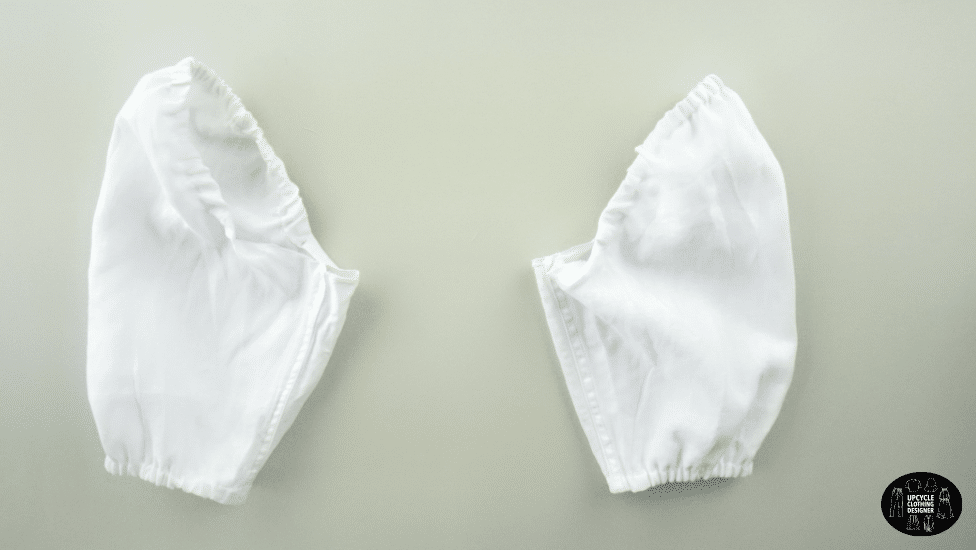
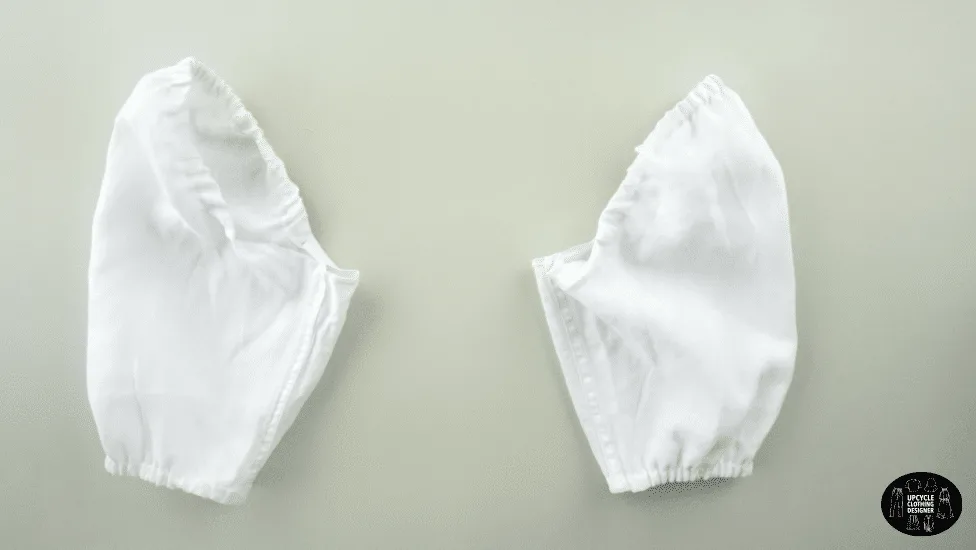
Use the sleeves from the original men’s shirt to make the puff sleeves.
Make a casing for the elastic band around the top of the armhole and also the sleeve opening.
Use a safety pin to slide the elastic band through the casing and sew both ends of the elastic band.
Sew along the underarm seam to join the sleeves to the bodice.
¼” fold to hem the bottom opening.
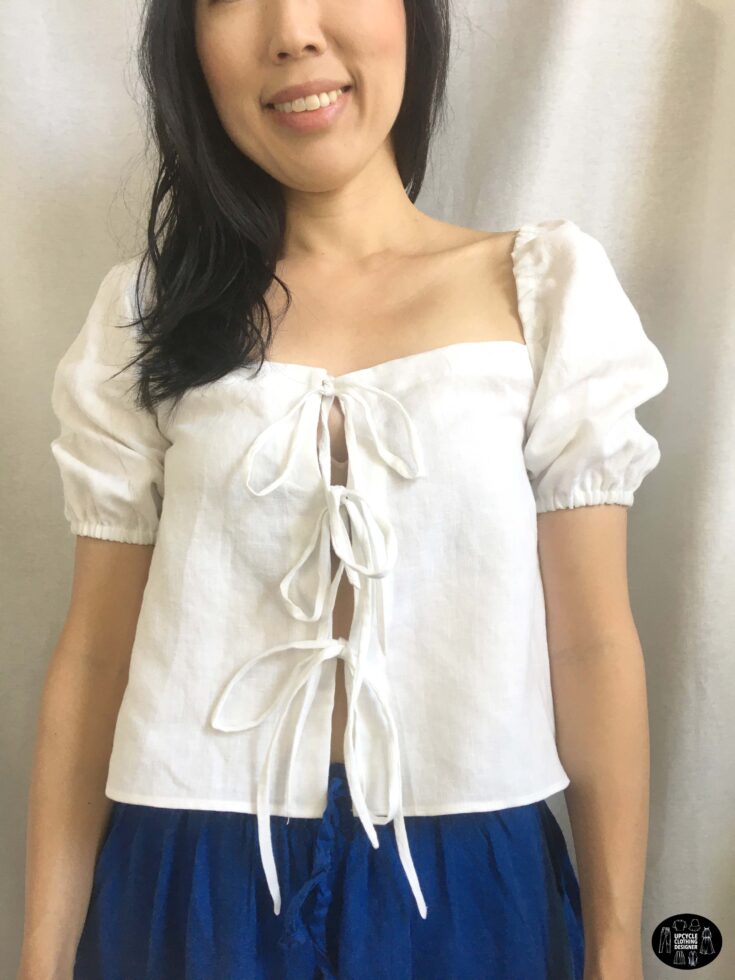
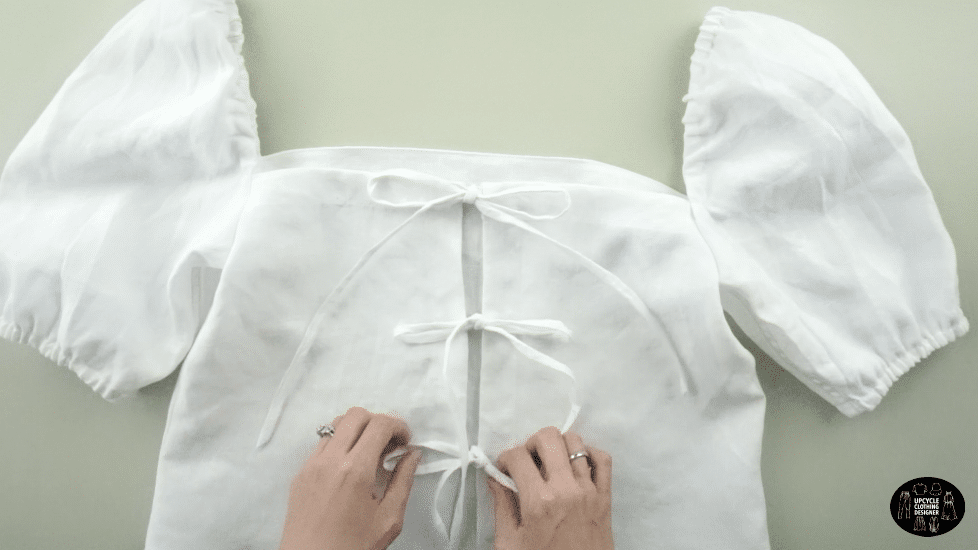
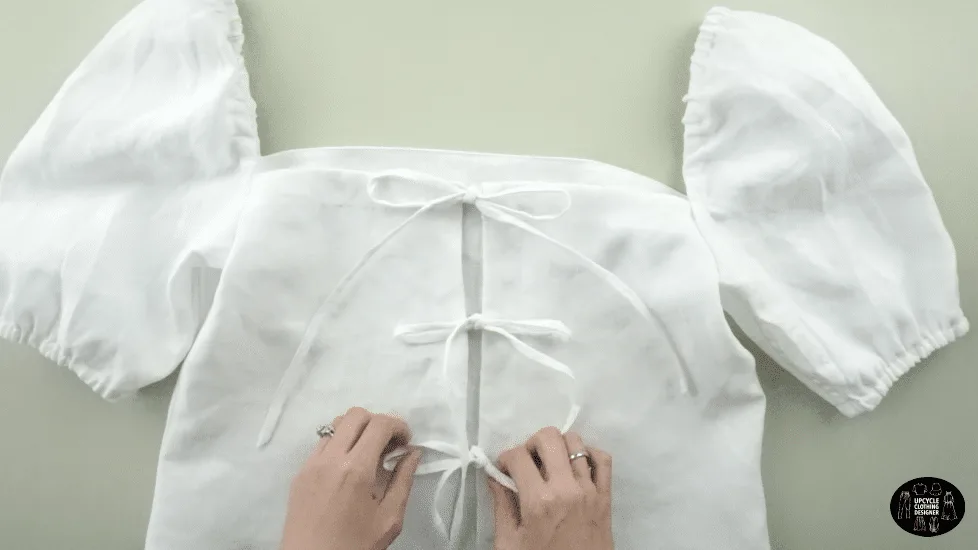
To complete this Cult Gaia inspired blouse from men’s shirt, tie cute bows with the tie front straps.


DIY Square Neck Tie Front Blouse Sewing Tips
Whether you are new to sewing or have tried sewing before and looking to step up to the next level, it’s important to recognize that working with linen is a different animal compared to knits or poplin material.
Here is puckering-proof hacks and sewing tips that you need to know while customizing this Cult Gaia inspired blouse:
- Sewing tips: Linen is an enjoyable material to sew because it does not slip and there is no need to hand baste. Also, it guides easily over the feed dogs and doesn’t require delicate handling. Simply remember to reduce friction and do not forcefully pull the fabric underneath the sewing needle.
- Stitches: For this tutorial, I sewed the facing with straight stitch for the neckline and center front opening. Double fold and topstitch for the hemming, then zigzag stitch the inside of the side seams to finish.
- Needle & Thread: Remember using the correct sewing machine needle is important when sewing linen. It should be between size 10 and size 14 depending on the weight of fabric. Furthermore, a lightweight or all purpose sewing thread should be used.
- Facing: I sandwiched the tie straps in between the bodice and self facing to create a clean cut. First, sew the facing along the center front and then attached the neckline facing after. you the going the corner or fold and topstitch to finish. If you are working with thin linen, add interfacing to the facing is also a great option to give more rigidity to the final structure.
- Loop Turner: Using the loop turner to make the spaghetti straps for this blouse was a little challenging. Make sure to trim any excess seam allowance. I cut off the ends and made a ⅛” seam allowance so that it was easy to flip inside out.
More blouses to make from men’s dress projects for your next DIY fashion:
- Off The Shoulder Top From Men’s Shirt
- Puff Sleeve Blouse From Men’s Dress Shirt
- Pintuck Poplin Top From Men’s Shirt
- Peplum Blouse From Men’s Dress Shirt

How To Make Square Neck Tie Front Blouse From Men’s Dress Shirt
Make a Cult Gaia inspired square neck tie front blouse from men’s dress shirt. Apply new stitching details and sewing techniques so you can make new clothes from old clothes.
Materials
- Men’s Dress Shirt
- ¼” Elastic Band
Tools
- Sewing Machine
- Fabric Chalk
- Loop Turner
- Measuring Tape
- Ruler
- Straight Pins
- Scissors
Instructions
- For this Cult Gaia inspired blouse from men’s shirt tutorial, start by deconstructing the dress shirt.

- Use scissors to detach the collar and neckband;
also cut along the arm seam to detach both sleeves.
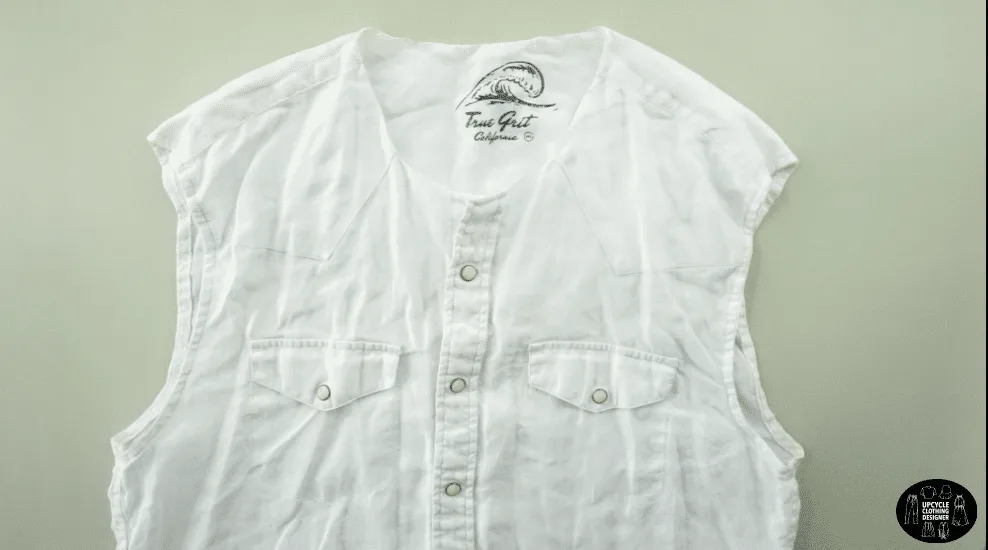
- Cut off the button and buttonhole placket;
cut both shoulder seams and across the back yoke;
also cut both side seams to detach the front piece from the back piece of the dress shirt.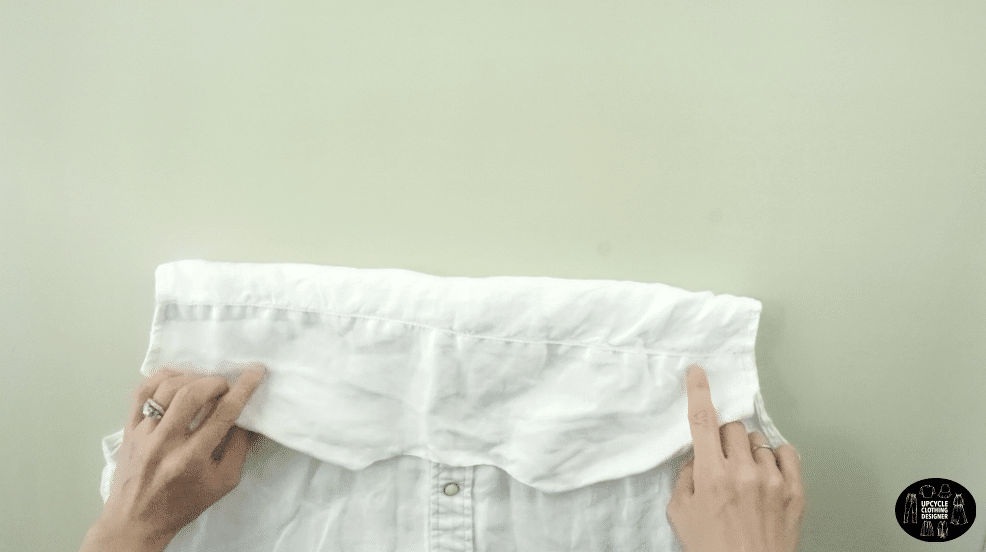

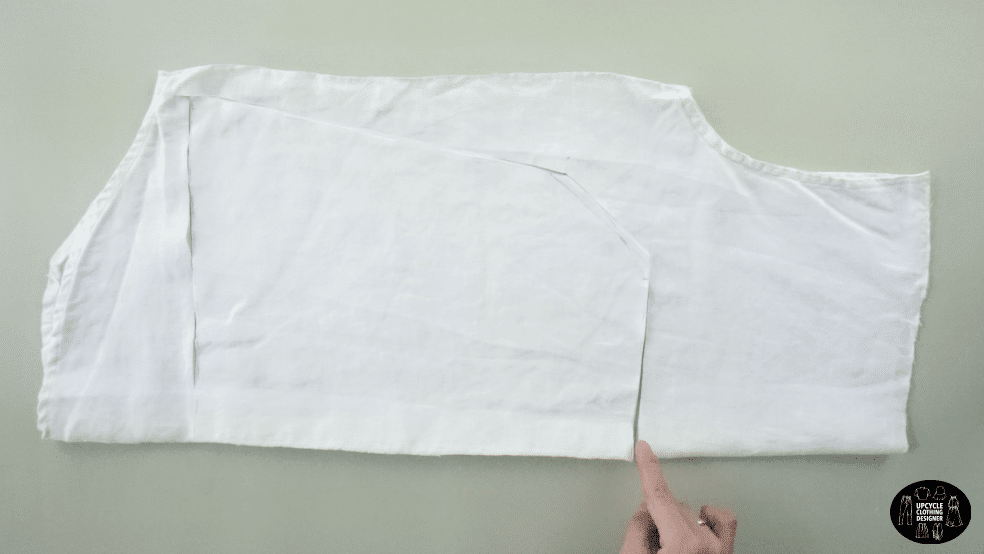
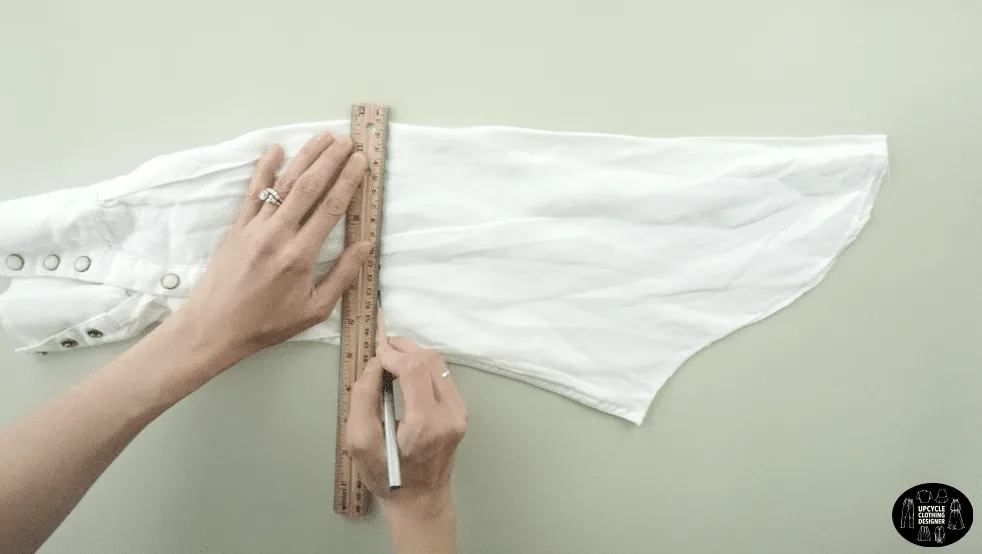
- To make the square neck blouse pattern, use the front piece of the original men’s shirt.
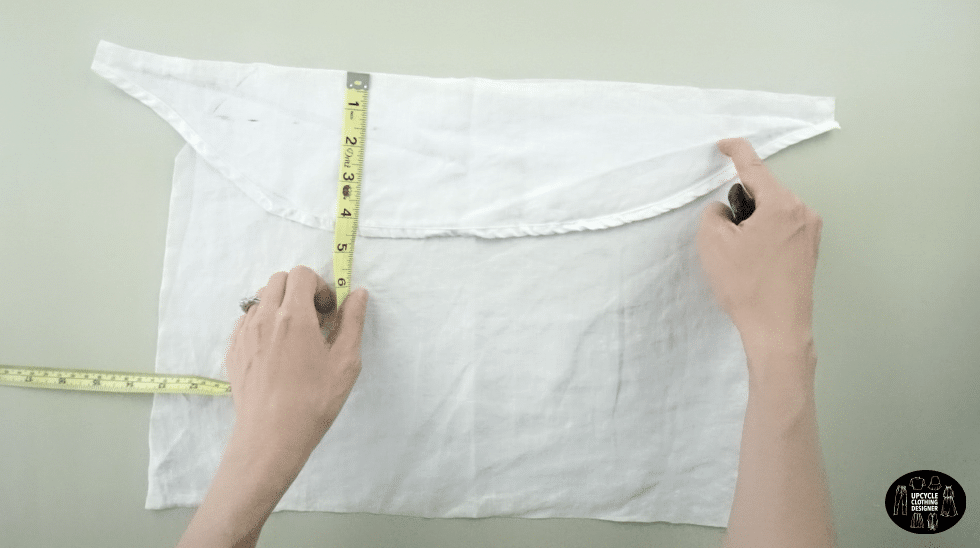
Measure a 10” line across the bottom.
Measure 13” up from the bottom line.
Draw a straight line across to guide the top opening.
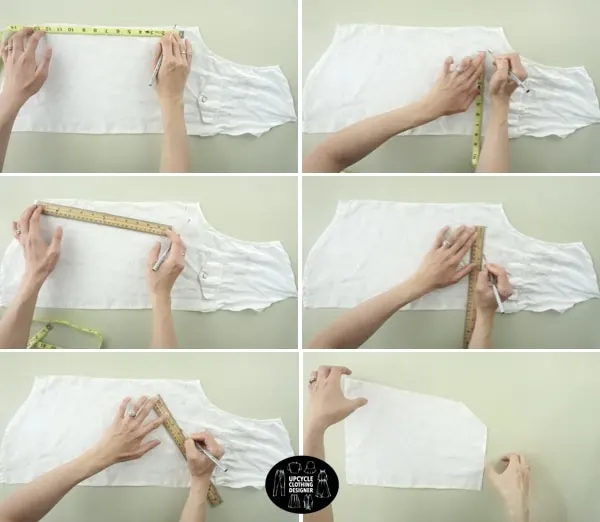
- To make the armhole, measure 8” away from the center line.
Draw a diagonal line to the bottom corner to mark the side seam.
Measure 5½” away from the center opening, and draw a line that intersects the side seam.
Cut along the line to make the front piece of the square neck top.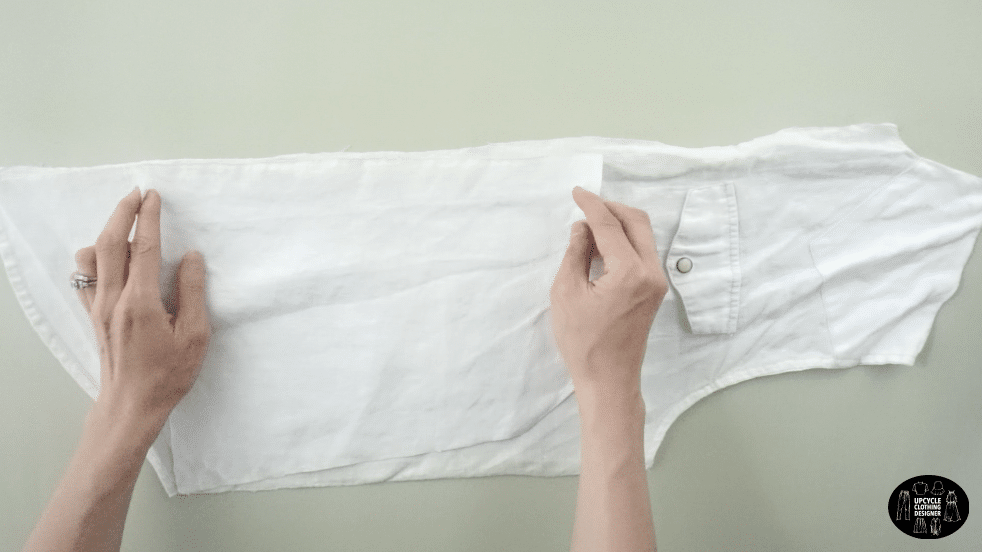
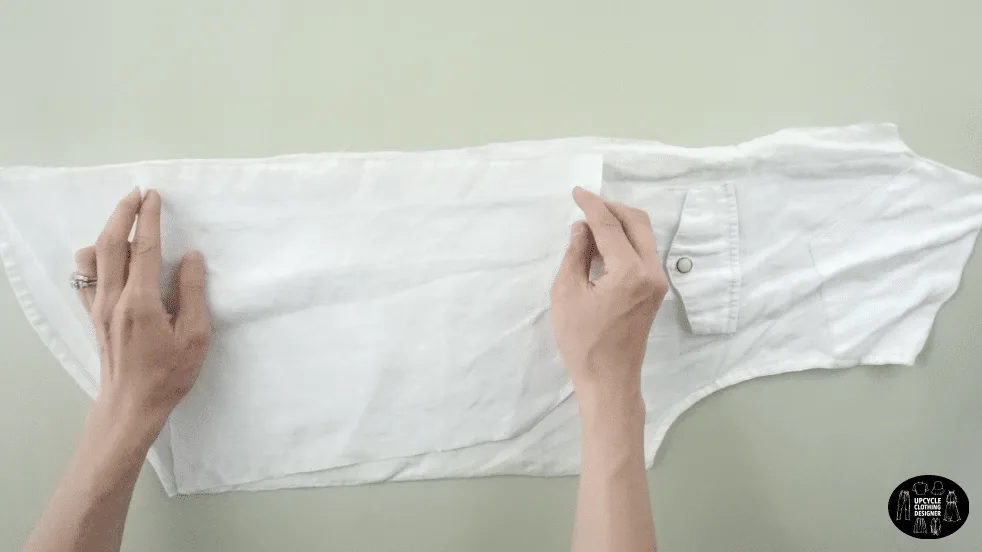
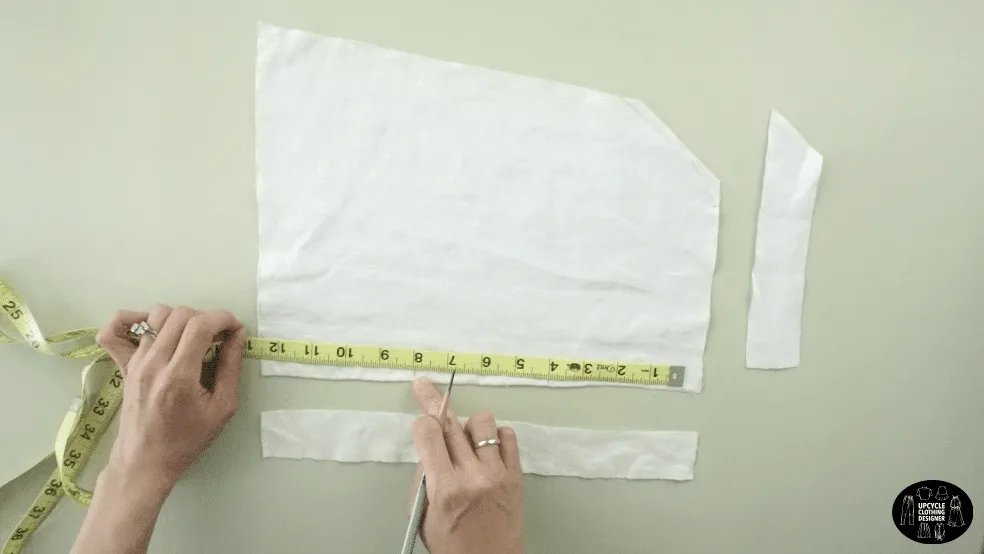
- To make a matching piece for the front of the blouse, copy the square neck pattern onto the other front piece of the original men’s shirt.

- To make the back piece of the square neck blouse, fold the back piece of the men’s shirt in half lengthwise.
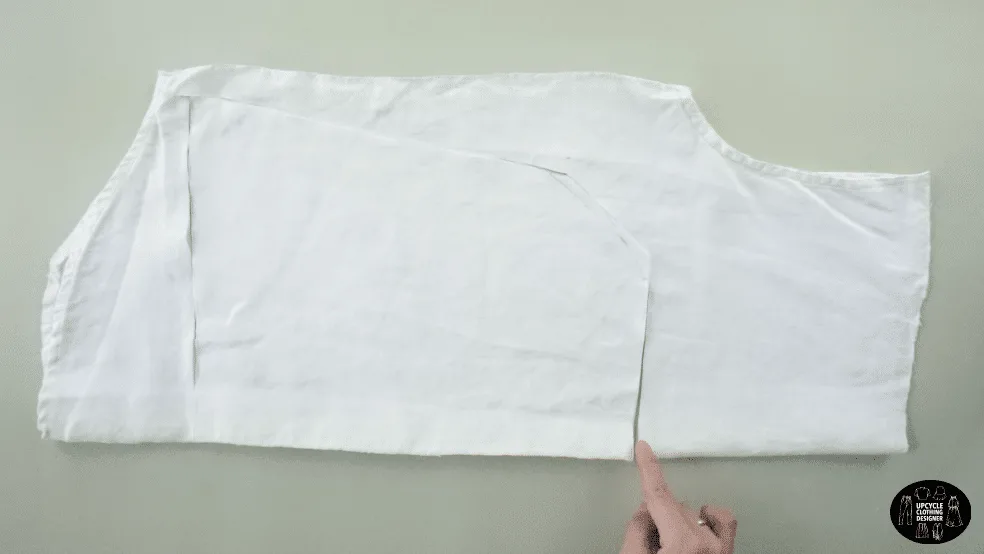
Copy the square neck pattern.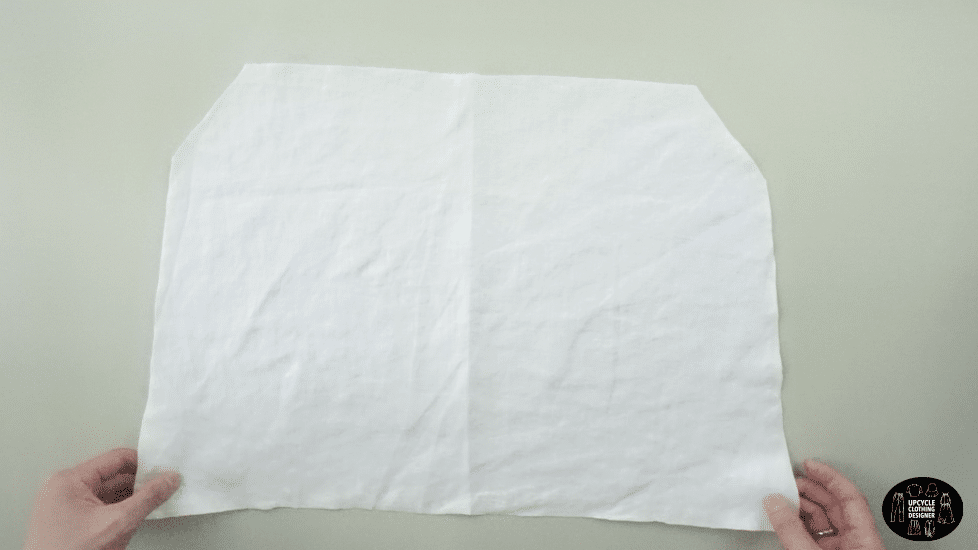
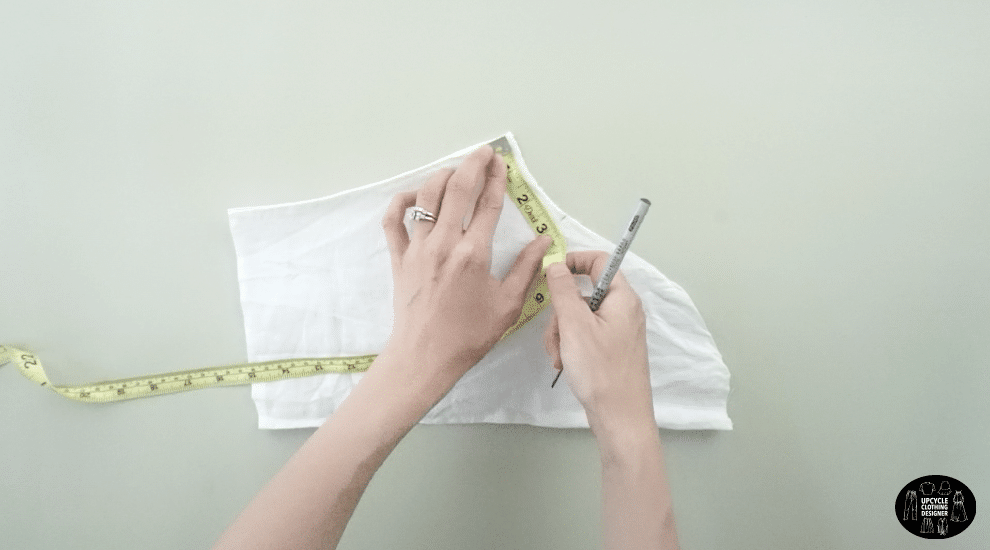
- To make the facing for the back neckline, use the yoke from the original men’s shirt.

Measure a 1½” wide piece of fabric that matches the top back opening.
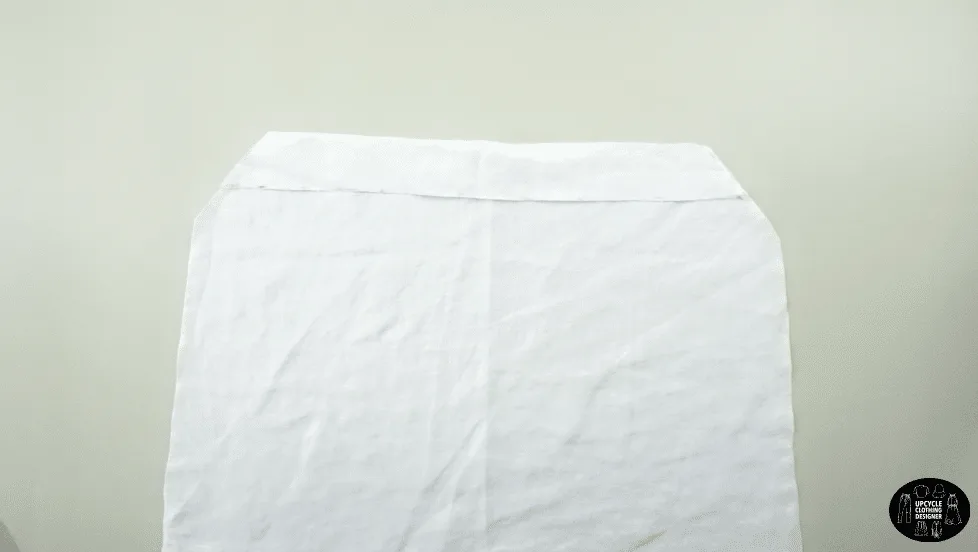
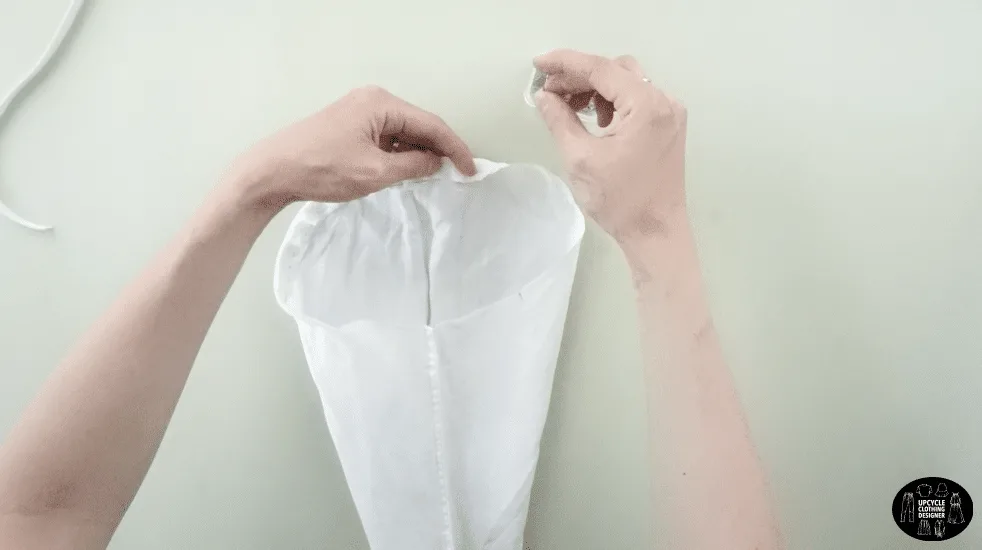
- To complete the back piece of the square neck blouse, attach the facing to the back neckline with the right sides together.

Flip the facing over to the other side and ⅛” fold the edge.

Pro tip: I use an iron to set the fabric and make it easier to sew.
Topstitch along the folded edge. - To make the tie front straps, use excess fabric to make six straps that are 1” x 16”.

Fold each strap in half and sew along the edge.
Use a loop turner to flip each strap inside out.
- To make the facing for the front of the blouse, use excess fabric.
Measure two separate 1½” wide pieces of fabric that match the top front opening, and two pieces for the center chest opening.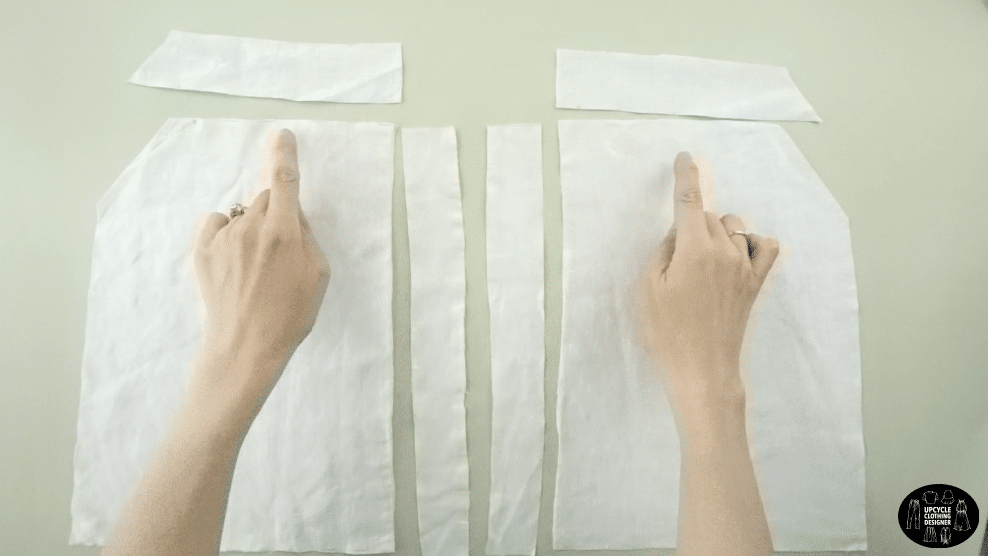
- To attach the tie front to the center chest opening, mark a point 1” down from the square neckline.
Also, mark 4” and 8” down from the top opening.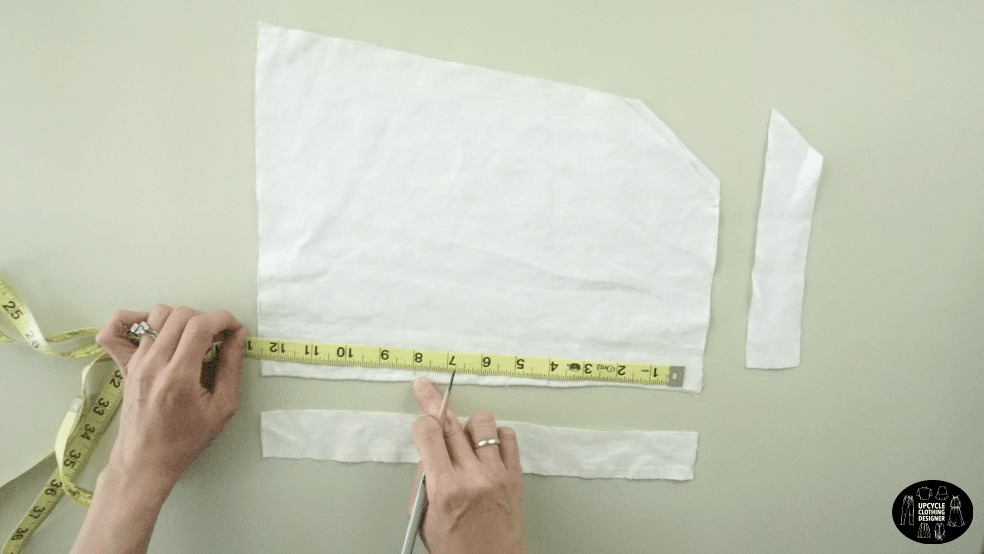
Pin a tie front strap to the right side of each marking along the center chest opening.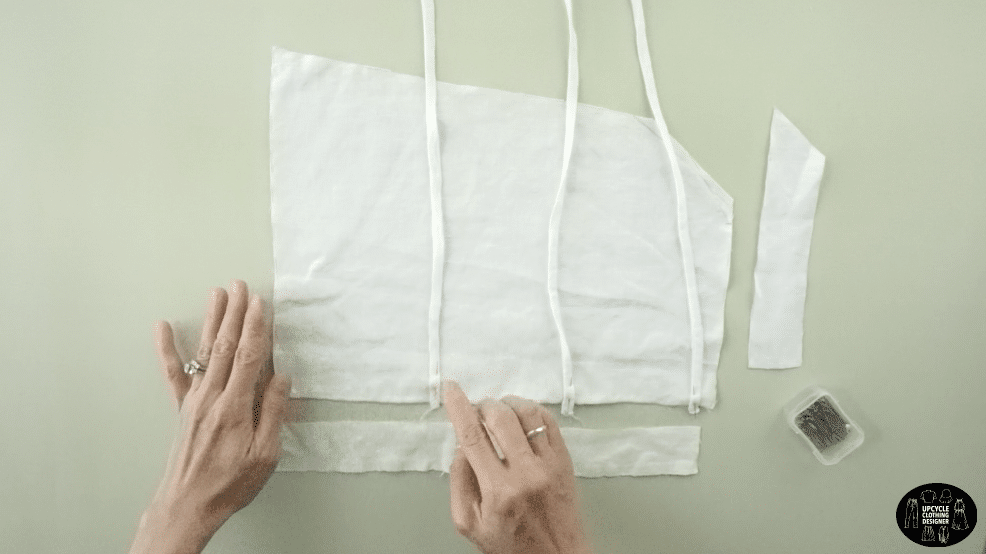
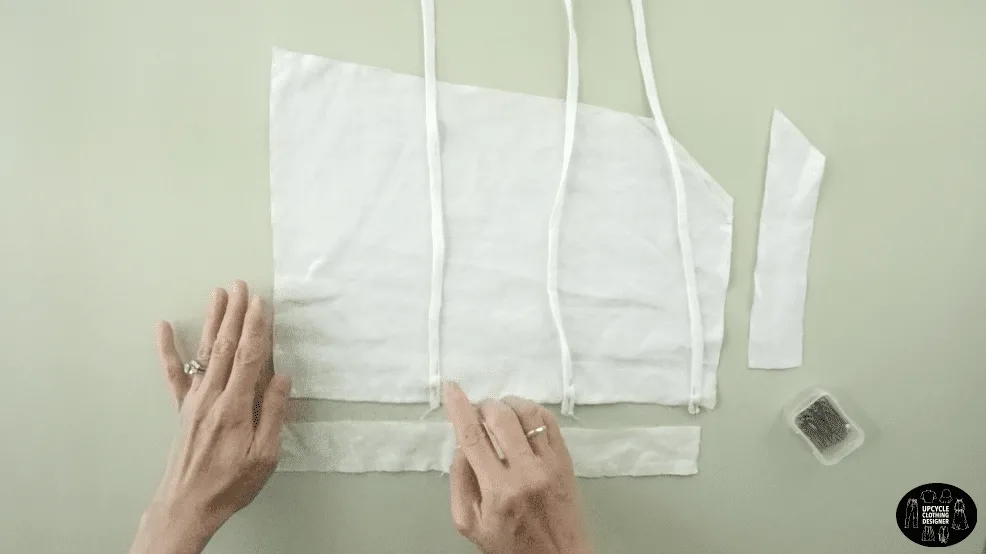
Pin the right side of the facing to the center chest opening on top of the tie straps.
Join the pieces together by stitching along the edge.
- To complete the square neckline, attach the facing to the top opening with the right sides together.
Flip the facing over to the other side and ⅛” fold the edge.
Pro tip: I use an iron to set the fabric and make it easier to sew.
Topstitch along the folded edge.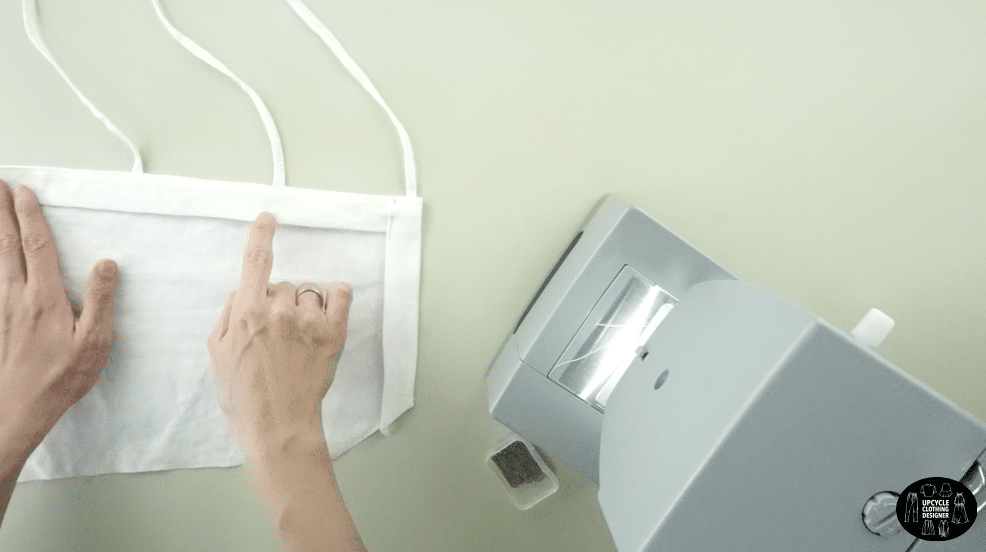

- To attach the front to the back of the blouse, lay the pieces on top of each other with the right sides facing together.
Pin to secure and sew along the side seams.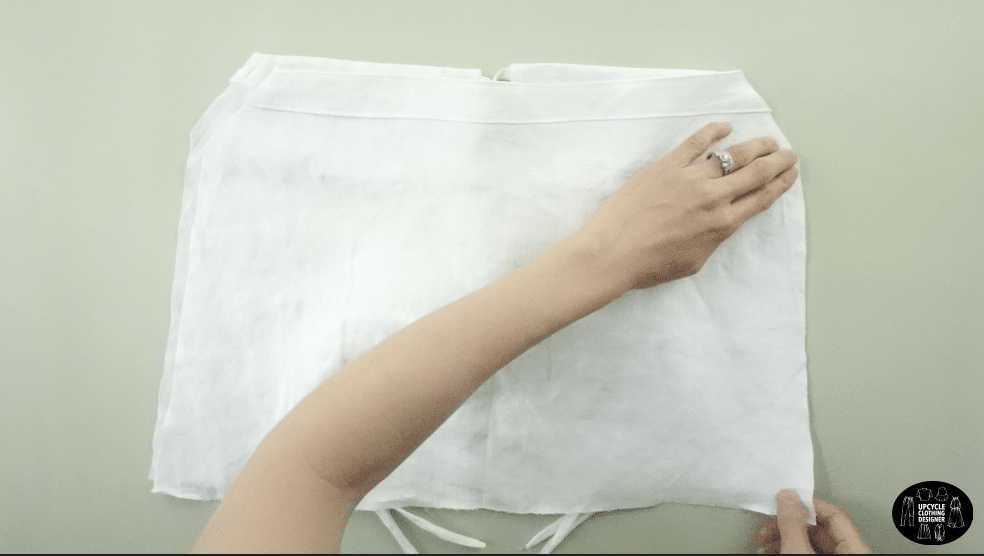

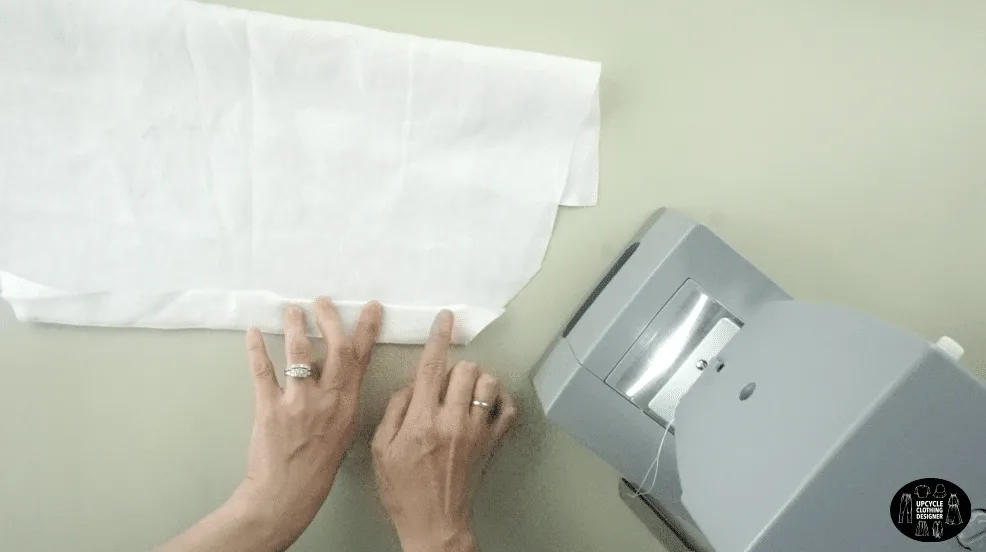
- To make the puff sleeves, use the sleeves from the original men’s shirt.
Measure 14” away from the armhole.
Draw a line across and cut.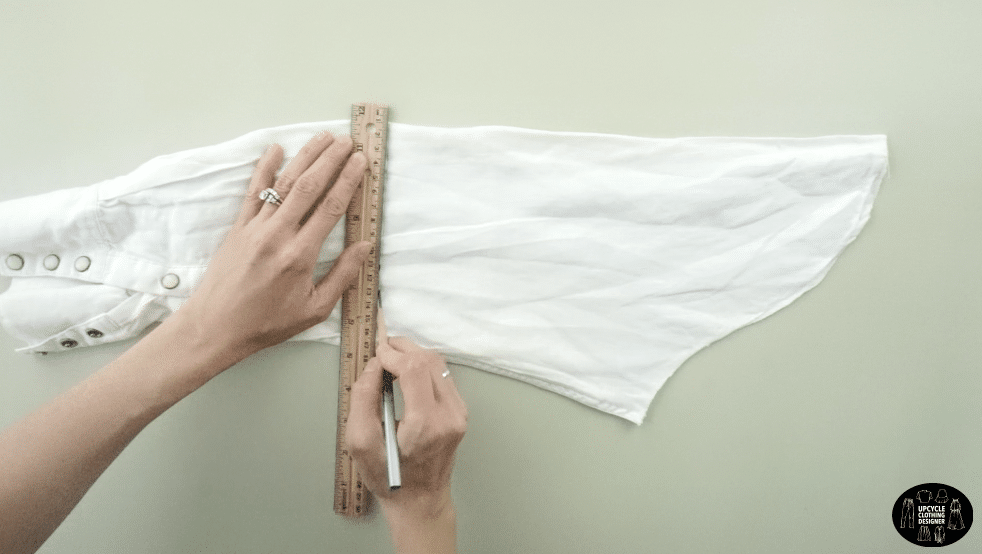
- To match the armhole of the blouse, measure 3” up from the bottom armhole.

Start at the mark and ½” fold around the top of the armhole.
Pin to secure and stitch to make a tunnel.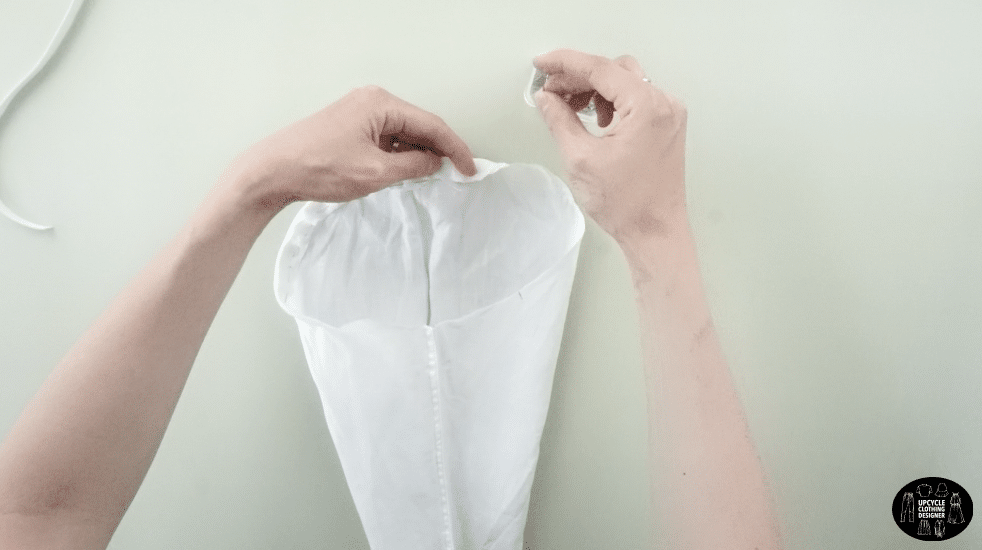
Then, ½” fold around the sleeve opening.
Pin to secure and stitch to make a tunnel.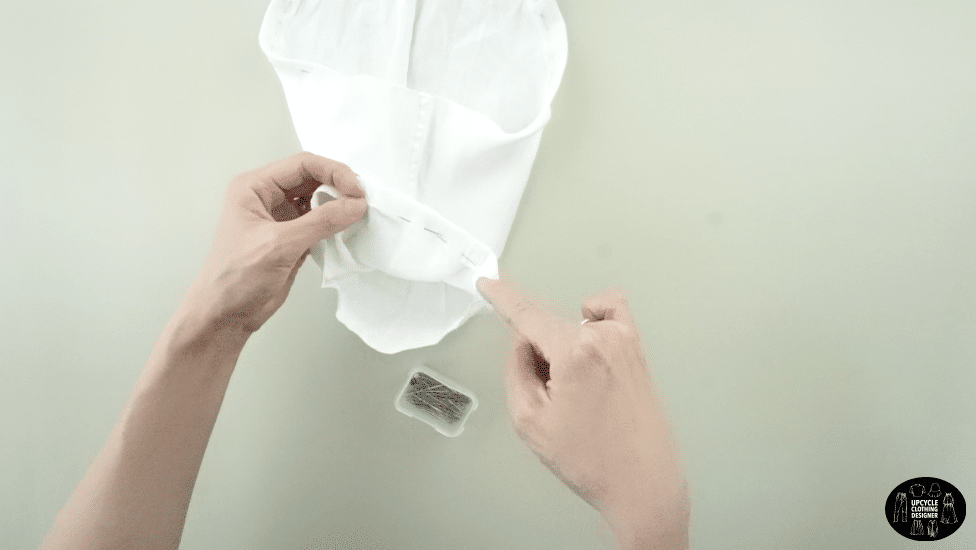
- Cut two pieces of ¼” wide elastic band that are 13½” long, and also two pieces that are 9½” long.

- To attach the elastic to the sleeve opening, use a safety pin to slide the elastic band through the tunnel.
Sew both ends of the elastic band together.
- To attach the elastic to the armhole opening, use a safety pin to slide the elastic band through the tunnel.

Pin to secure, and stretch the elastic while sewing along the top of the armhole.
- To finish the square neck tie front blouse, attach the sleeves to the bodice by sewing along the underarm seam.

- Lastly, ¼” fold and hem the bottom opening.

- Tie cute bows with the tie front straps to complete this Cult Gaia inspired blouse from men’s shirt.
Recommended Products
As an Amazon Associate and member of other affiliate programs, I earn from qualifying purchases.


Trendy, Affordable Sewing Patterns for All Sizes


Tie Shoulder Jumpsuit Pattern


Palazzo Pants Sewing Pattern


Pocket Overall Romper Pattern


Wrap Maxi Skirt Sewing Pattern


Tie Back Top Sewing Pattern