
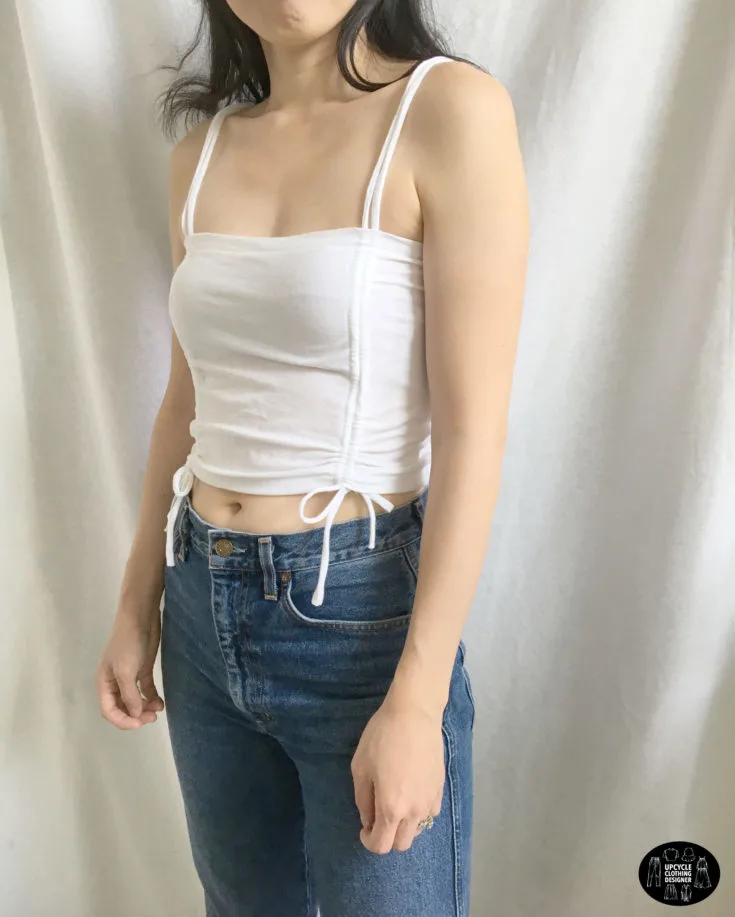
Adjust the length and shirring amount to create different look every time you wear this versatile top. This side ruched crop top from old t-shirt is a quick and easy sewing hack that can make a huge difference.
In this tutorial, I’ll show you how to convert a boring t-shirt into a crop top. From beginner to intermediate levels, you are going to enjoy the DIY projects and you will feel satisfied to complete each one.
Before you get started, I guarantee you’ll also enjoy taking a look at these upcycle t-shirt projects. Save them for later to transform old tees into current trends and fun wearable styles.
If you are looking to make a cute crop top to wear this summer, then here is the perfect solution for you. Recycle old t-shirts into new clothes by starting with this side ruched crop top.
Not only does upcycled clothing create brand new pieces that you can get excited to wear, but you are also doing your part to reduce waste. Take your old clothes to the next level with these current uptrends.
You will love this side ruched crop top from old t-shirt because…
- Learn to make a pair of long drawstrings with knit fabric using a loop turner.
- Takes about 30 minutes to upcycle this top.
- No sewing patterns required.
- All you need is patience to flip the extra long strap inside out.
- The best part is the length of crop top is adjustable.


The functional drawstring makes it easy to lengthen or shorten the top based on which bottom you pair with the style. You can create so many stylish variations once you understand what to do with old t-shirts.
Whether you have plain jersey or ribbed knit t-shirt, this technique is doable on every tee. Textured or plain surface knit t-shirt make no difference, follow the step by step video to accomplish this sewing project.


This ruched top was so popular that I had to make a matching set with a side ruched mini skirt from t-shirt! Give it a try for yourself
How to make side ruched crop top on a t-shirt?

To make a functional side ruched crop top from an old t-shirt, you need a basic sewing kit like a loop turner and home sewing machine. If you’ve ever made a drawstring with woven material before, this won’t be much different at all.
Start by with this guide to take body measurements for clothing. This is very important when making this ruched top because fit is super snug and needs to be accurately measured before beginning.
Follow these knit sewing techniques to prevent snags and puckering in your finished garment.
DIY Side Ruched Crop Top Materials:


- T-shirt
- Fabric chalk
- Loop turner
- Ruler
- Measuring tape
- Scissors
- Straight pins
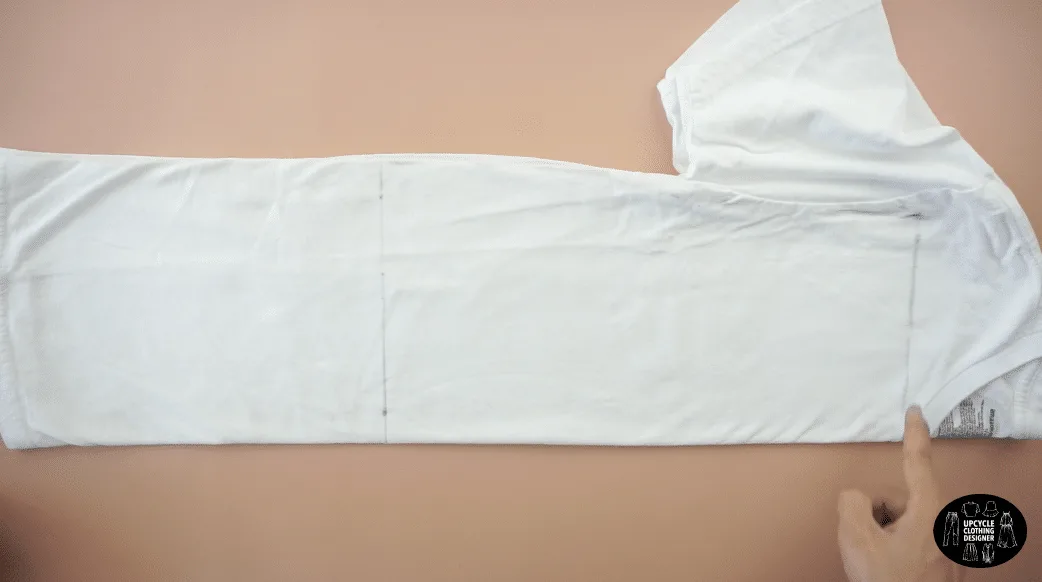
Fold the t-shirt in half lengthwise. Mark 15” down from the shoulder and cut to make a crop top.
Draw a straight line under the neckband and along the arm seam. Cut along the line and trim the edges to make the crop top. Topstitch both side seams and hem the new top and bottom opening.
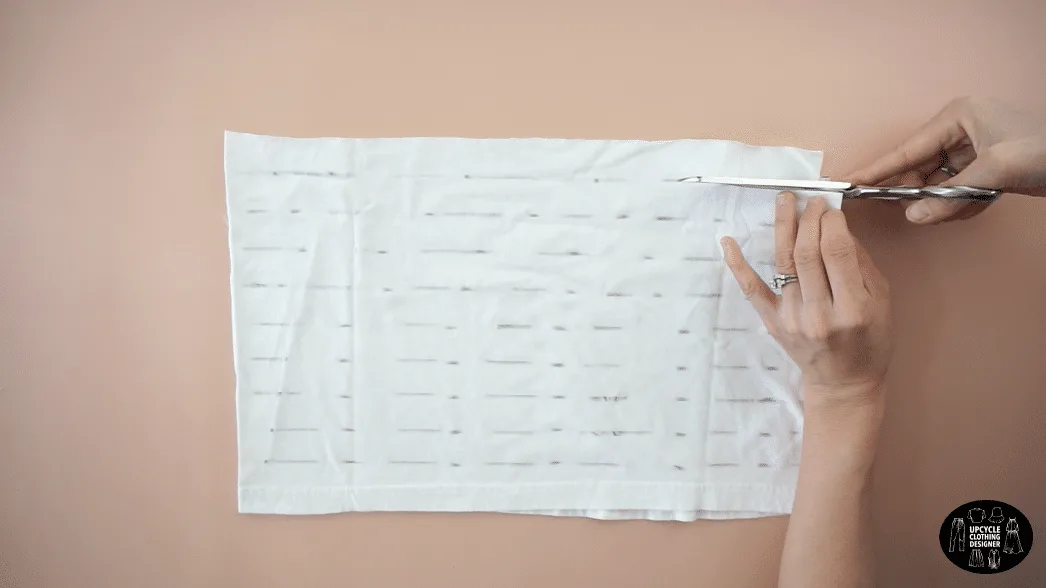
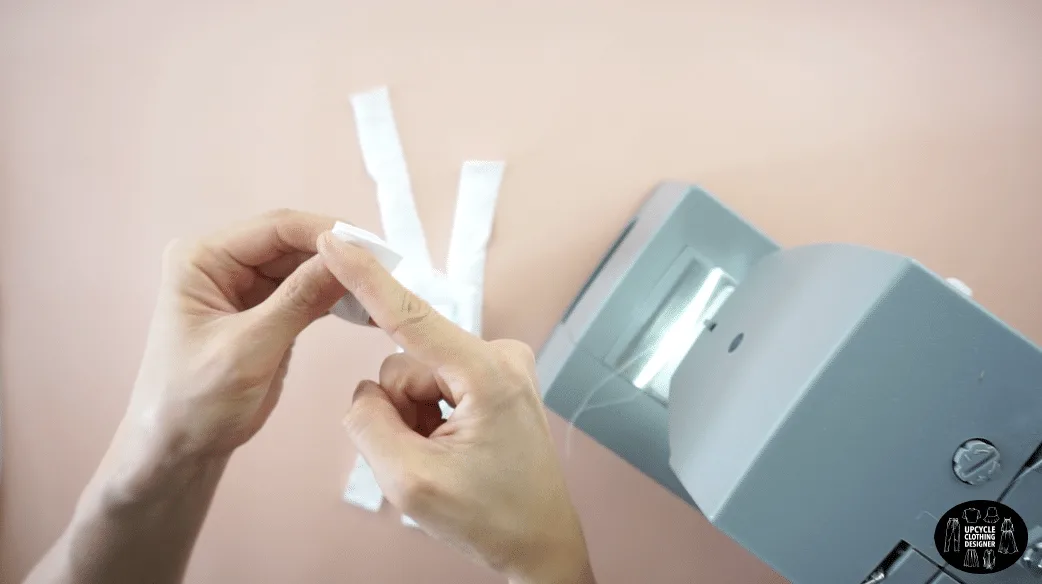
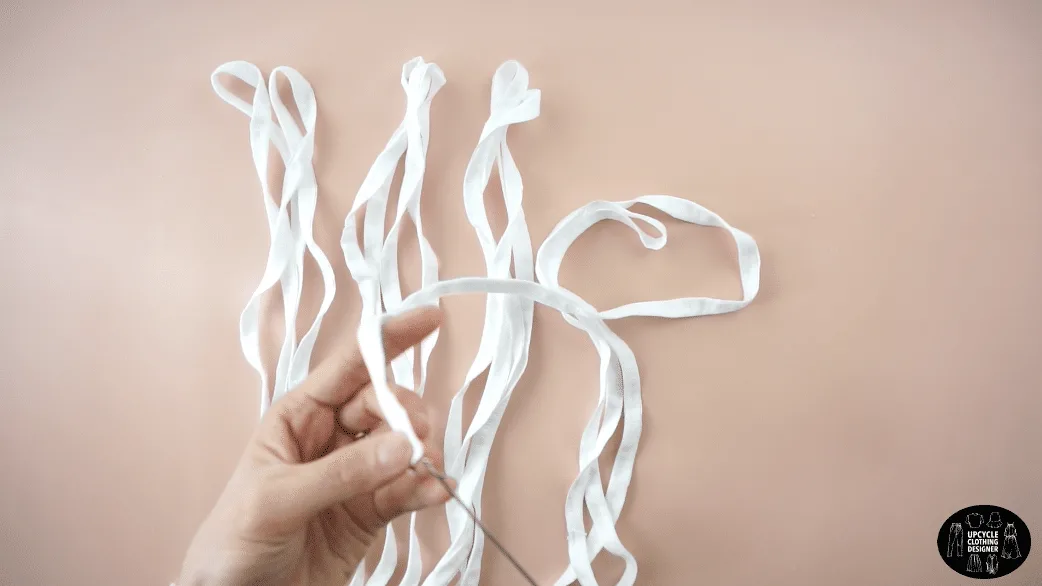
Use the excess fabric to make 8 pieces of 1” wide straps to make the drawstrings. Attach 2 straps together to make 4 extra long straps. Edge topstitch and use a loop turner to flip each strap inside out.
Cut 2 separate 1” wide pieces of fabric from each sleeve to make the ruched pieces.
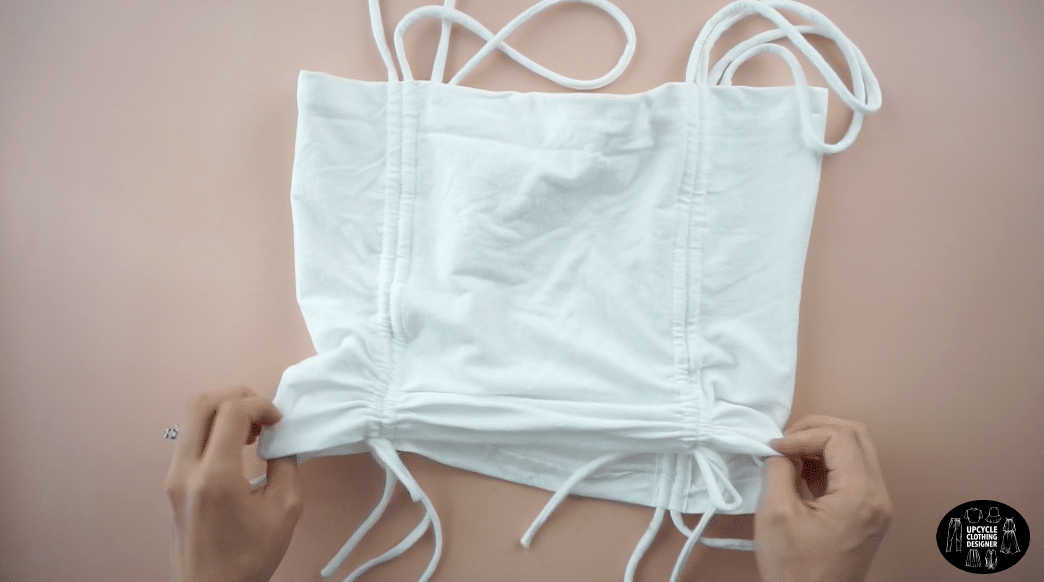
Place 2 ruched pieces on the front of the crop top about 8” apart from each other. Topstitch the center of each strap. Use the same placement on the back of the crop top.
Lay one shoulder strap on each side of the center line of the ruched piece. Topstitch along the side of the panel to lock the shoulder strap in a tunnel. Do the same for the backside of the crop top.
Use the shoulder straps to ruche the fabric. Tie a cute bowtie with the ends to complete this diy side ruched crop top.


DIY Side Ruched Crop Top Sewing Tips:
When adding an adjustable drawstring on both sides of a t-shirt, use these sewing tips to help you complete this one-of-a kind top. I found these tips useful throughout this project and thought they would benefit any beginner or intermediate level sewer.
- Safety Pins: If you don’t have a loop turner, use safety pins to flip the inside of the tube inside out. A loop turner is an inexpensive tool to use, but it is not the easiest method when it comes to narrow drawstrings.
- Needle: Since you are stitching the drawstring and tunnels, you will need ballpoint or stretch sewing needles. If you find that your stitches are skipping, switch to one designed for more stretch.
- Thread: Use polyester thread when sewing knit fabrics. It won’t break easily and cause problem like uneven stitch line.
- Pins: Using the correct pins will go long way. Go with ballpoint pins to secure before sewing, that way they won’t damage the surface of the material.
- Foot: Use a walking foot on the sewing machine when you feel you need more guidance. This helps to create a clean finish and professional stitching quality.
More crop top upcycle projects from your old t-shirt for your next DIY fashion:

How To Make Side Ruched Crop T-Shirt
The side ruching tube top silhouette adds perfect symmetry to the look that you can wear with a mini skirt or denim shorts. Adjust the length if needed and make a cute bow at the ends of the front and back drawstrings to complete the look. The basic tee won’t look casual or boring anymore!
Materials
- T-shirt
Tools
- Sewing machine
- Fabric chalk
- Loop turner
- Measuring tape
- Ruler
- Scissor
- Straight pins
Instructions
- For this side ruched crop top tutorial, start by folding the t-shirt in half lengthwise.
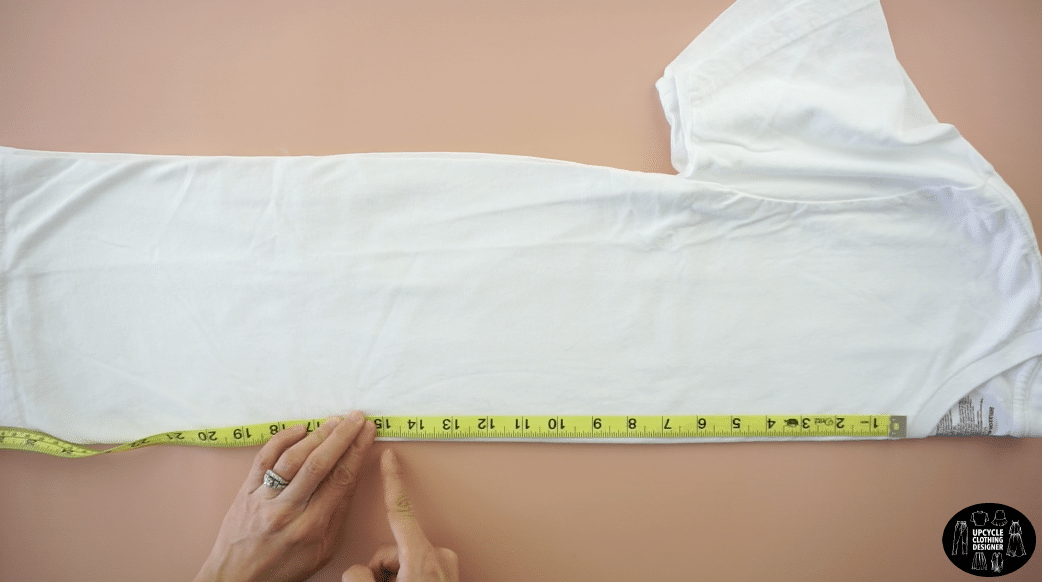
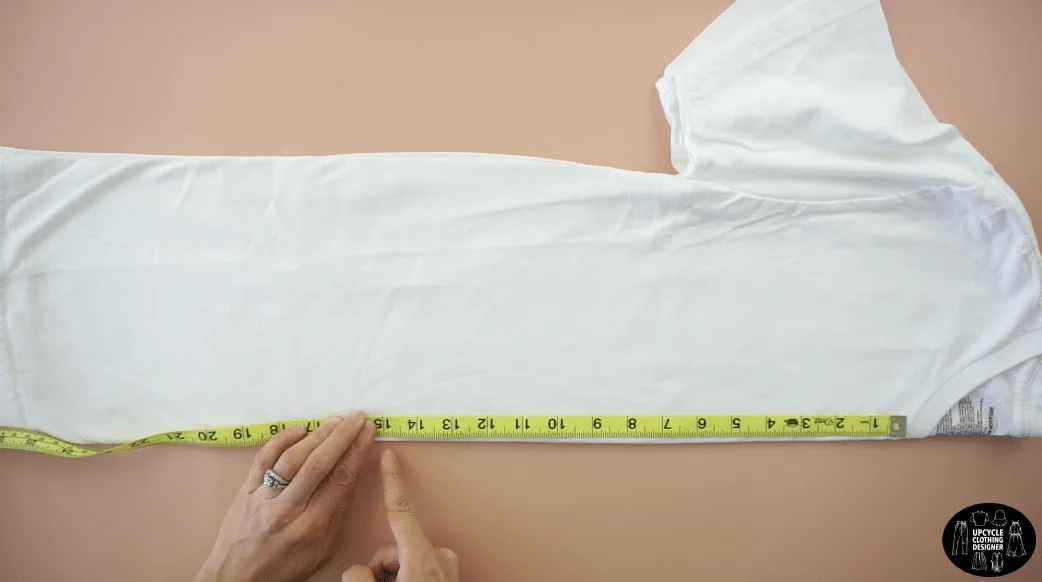
- Mark 15” down from the high point on the shoulder.
Draw a straight line across and cut to make a crop top.
Draw a straight line across underneath the neckband and another line along the arm seam.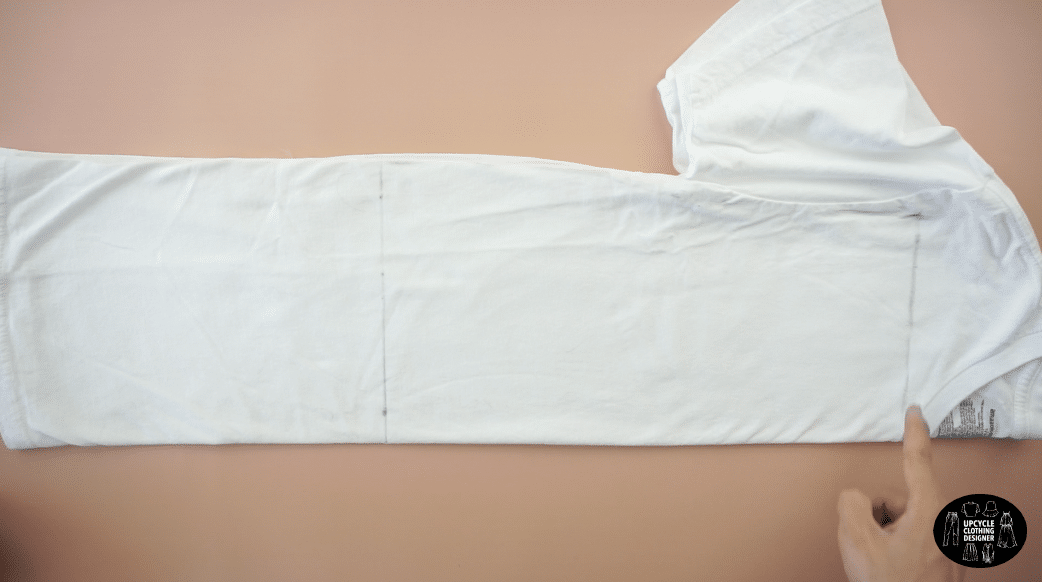
Cut along the line resulting in two large pieces of fabric.
Trim the edges to make the lines straight. - To make the crop top, ¼” topstitch both side seams.
½” hem the new top and bottom opening. - To make the shoulder straps, use the excess fabric to make 8 pieces of 1” wide straps.

Cut one side of each strap.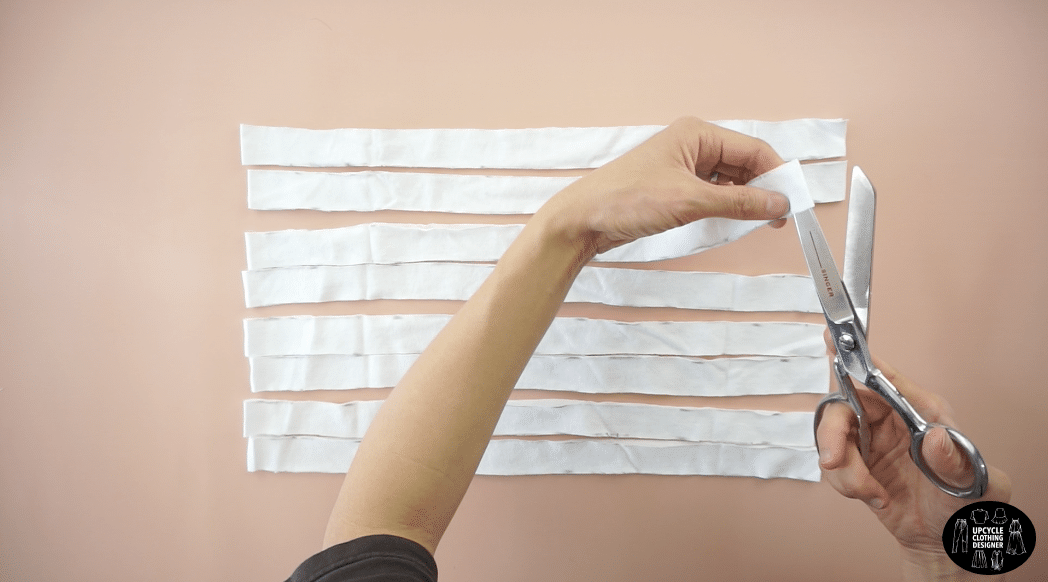

Attach 2 pieces together to make 4 separate extra long straps.
Fold each piece in half lengthwise, and edge topstitch.
Use a loop turner to flip each strap inside out.
- To make the ruched pieces, open the underarm seam of both sleeves.
Cut 2 separate 1” wide pieces of fabric from each sleeve.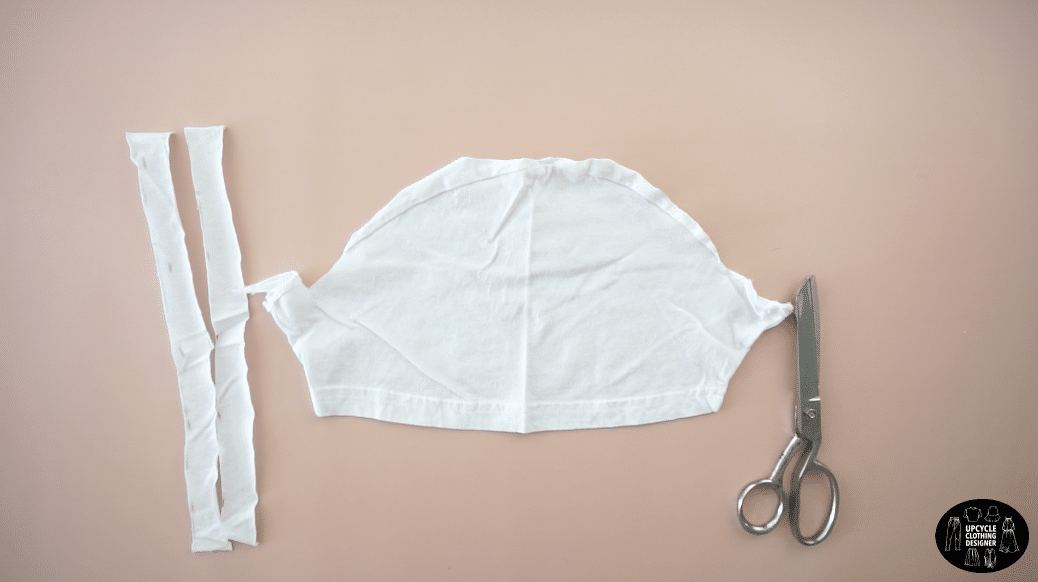
- To finish the ruched pieces, place 2 vertical straps 8” apart from each other on the front of the crop top.
Pin to secure and topstitch along the center of each strap.
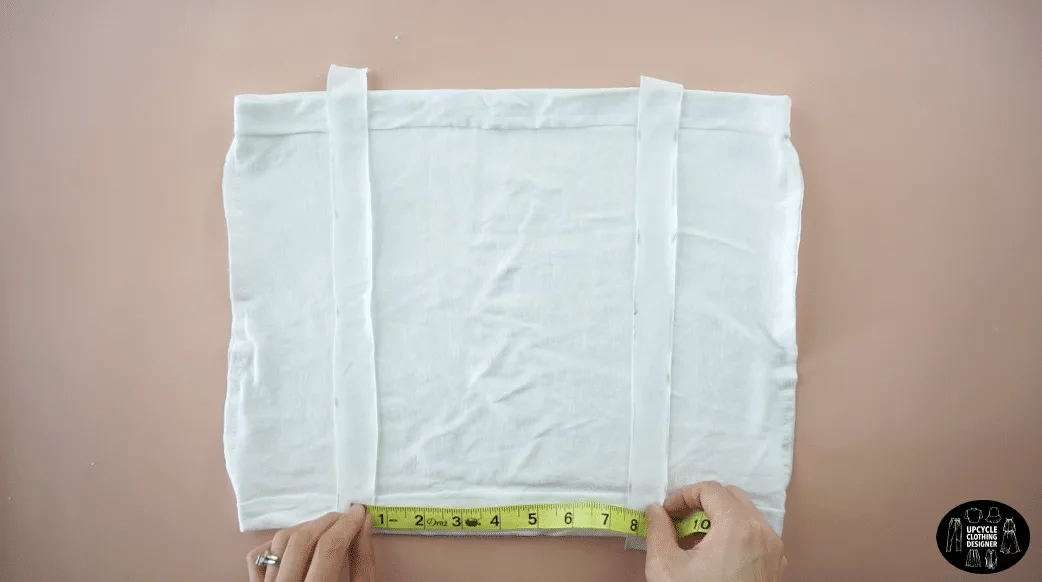
- Do the same on the back of the crop top.
Place 2 vertical straps 8” apart and topstitch along the center of each strap. - To finish the shoulder straps, chalk mark 7” from the folded center of each strap.
Lay one shoulder strap on each side of the center line of the ruched piece.
Line up the chalk mark with the top opening of the crop top.
Use the ruched panel to overlap the shoulder strap.
Pin to secure the panel in place and topstitch along the side of the panel to lock the shoulder strap in a tunnel. - Do the same for the opposite side.
Lay one shoulder strap on each side of the center line of the ruched piece.
Line up the chalk mark with the top opening of the crop top.
Use the ruched panel to overlap the shoulder strap.
Pin to secure the panel in place and topstitch along the side of the panel to lock the shoulder strap in a tunnel. - Ruche the fabric using the shoulder straps and tie a cute bowtie with the ends to complete this diy side ruched crop top.

Recommended Products
As an Amazon Associate and member of other affiliate programs, I earn from qualifying purchases.


Trendy, Affordable Sewing Patterns for All Sizes


Tie Shoulder Jumpsuit Pattern


Palazzo Pants Sewing Pattern


Pocket Overall Romper Pattern


Wrap Maxi Skirt Sewing Pattern


Tie Back Top Sewing Pattern
Donna v.a Ford
Wednesday 14th of July 2021
hi i would like new ideas for t shirts and how to make punk skirt and tops thanks let me know
Soonjoo
Thursday 15th of July 2021
Hello Donna, thank you for the inspiration. Did you check out my t-shirt to mini skirt tutorials or the no sew yoga tops I made with graphic tees? There might be a few fun ideas for you to incorporate. Kindly, SoonJoo