
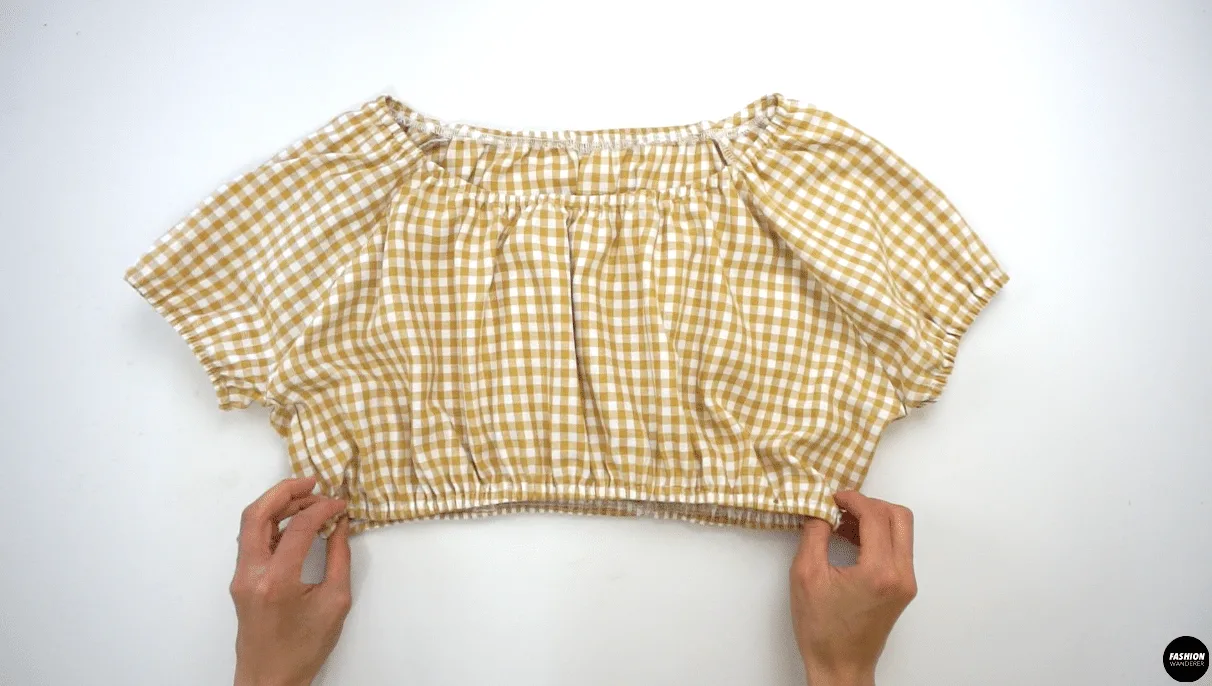
Are you looking for crop top and skirt two pieces sewing pattern set? This Cora matching set features elastic gathered top around the neckline, sleeve, and waistline that cuts just under the bust line and can be worn off the shoulder.
Followed by the skirt featuring a midi length with ruffled hem that creates a beautiful a-line silhouette. The figure flattering high waistline with cropped length top goes well together as a cute summer outfit.
How to make crop top and skirt matching set? Pre-treat your gingham fabric according to the washing instruction, and iron prior to cutting and sewing.
Fold the fabric in half and lay the pattern pieces parallel to the selvage. Review and follow the sewing tutorial to assemble the puff sleeve crop top and ruffled hem midi skirt properly by applying elastic, zipper, and gathering to complete the outfit.
If you are intimidated to sew elastic or zipper using sewing machine, this sewing pattern and instructions make a great starter project. It will help you easily achieve summer outfit to add to your DIY wardrobe.
Every Fashion Wanderer sewing pattern includes step by step video and picture instructions, followed by sewing tips and techniques for specific fabric so you avoid unnecessary mistakes.
The how-to tutorials are detailed and easy to follow for any beginner level. However, if you are lost or stuck in any of the steps, or simply have a question regarding the style, don’t hesitate to reach out on any platform, I’m here to help!


DIY Crop Top Midi Skirt Matching Set Sewing Pattern


You will love this DIY crop top midi skirt matching set because…
- The Cora matching set sewing pattern comes in sizes ranging from US 2 to 12 and UK 6 to 16 for you to choose from.
- Every sewing pattern piece already includes ⅜” width seam allowance to make any adjustments on the fitting.
- Learn to sew elastic on the garment, and the proper way to join elastic with a sewing machine.
- Sewing invisible zipper on the side seam instead of center back to give a clean look.
- Master sewing darts on the skirt and press in the correct direction.
- Perfect beginner sewing project to learn basic sewing skills to accomplish whole outfit in one sitting.
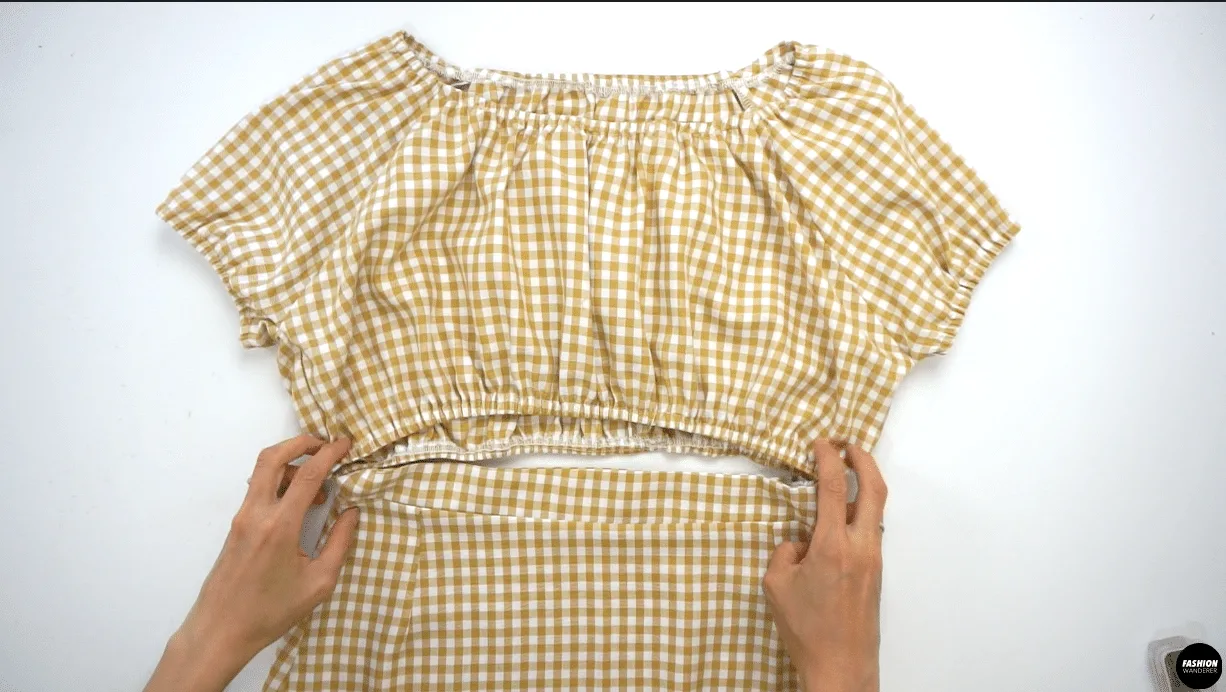
This adorable matching set includes front and back top bodice with puff raglan sleeves. In addition, front and back skirt, waistband, and ruffled hem skirt part for your size to accomplish professional finished summer outfit.
Pair with sandal and cute purse to complete beautiful outfit.
Use this DIY crop top midi skirt sewing pattern and tutorial to make into lengthy top or mini skirt silhouette of your choice.


How to make crop top and midi skirt from scratch
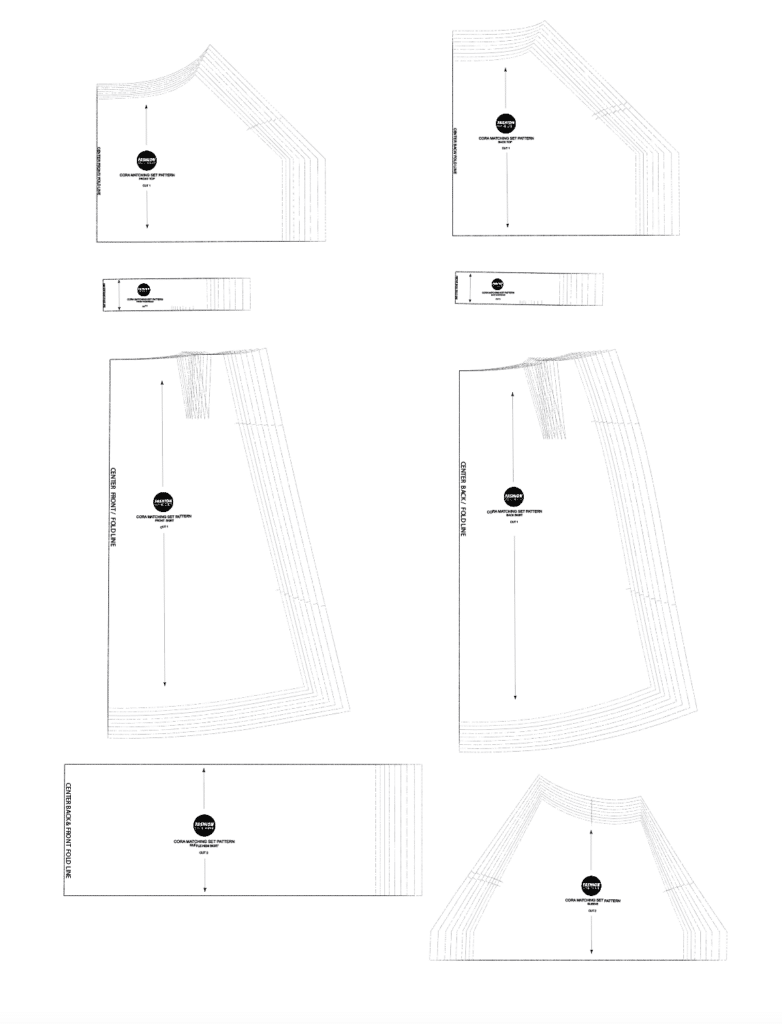
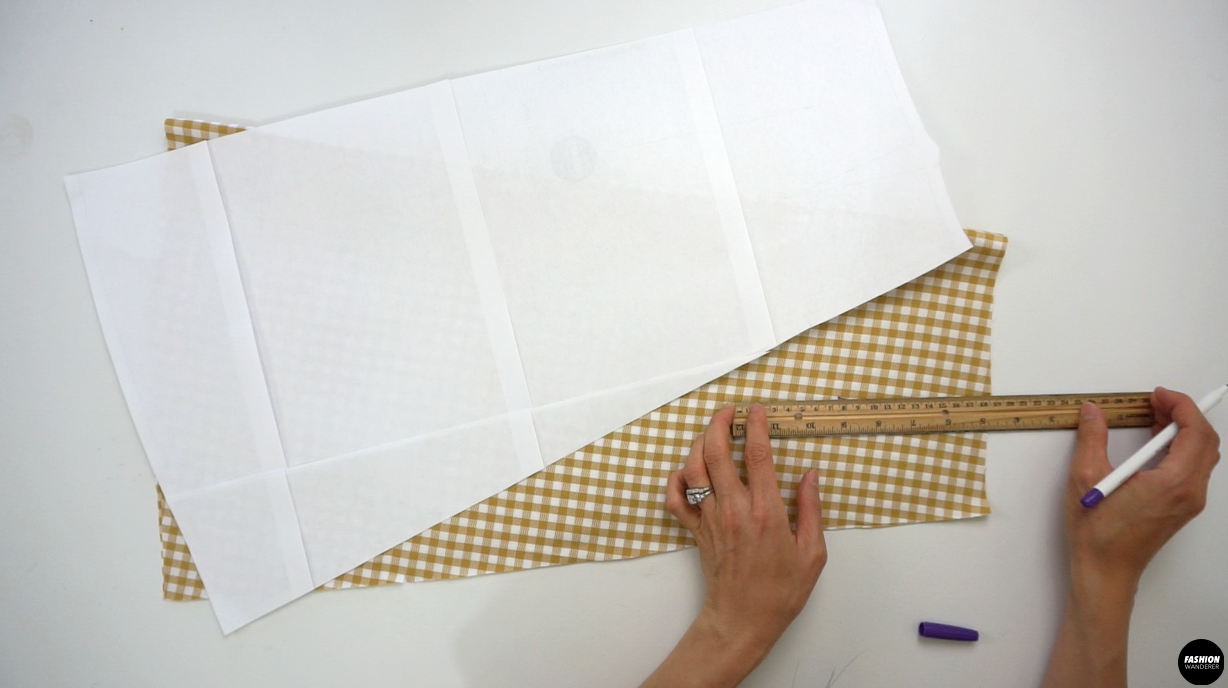
After downloading the Cora matching set, begin the process by assembling the pdf sewing pattern correctly. Each page uses a diamond shape motif that links the pages together to complete the whole pattern.
Always check your body measurement and match with Fashion Wanderer size guide to select the correct top and skirt size to sew.
Avoid ignoring these simple steps to accurately find your size and prevent fit issues after completing the garment. Each size will have special doted lines for you to follow to cut out the correct pieces.
Generally, gingham fabrics are made in polyester or cotton, which is perfect for beginner and this sewing pattern as well. So, understand the fabric you are using for this sewing pattern and utilize the characteristics of washing and sewing to your advantage.
If you are using non-stretch woven gingham fabric, ensure to use all-purpose thread and needle to apply. Always check to make sure the machine is threaded correctly by referring to the manual.
Proper setup will help you to avoid skipping stitches while sewing straight on all seams and hems.
Furthermore, testing gingham fabric is also great idea to find the right stitch length and tension to sew seams to join fabric or sewing elastic.
When sewing elastic or making gathering on ruffles, thread a bobbin in full with regular thread to avoid from mistakes or breaking the thread when sewing. This also help for any beginner to sew straight stitches comfortably without any assistance.
Get familiar with your sewing machine and always have the manual handy to get the best results.
DIY Crop Top Midi Skirt Matching Set Tutorial Material:
- Cora Matching Set Sewing Pattern
- Gingham Fabric 1¾ yard for 60” width or 2½ yard for 45” width
- 5/16” Width Elastic
- 9” Long Invisible Zipper
- Zipper Foot
- Measuring tape
- Water Erasable Pen
- Straight Pins
- Fabric Ruler
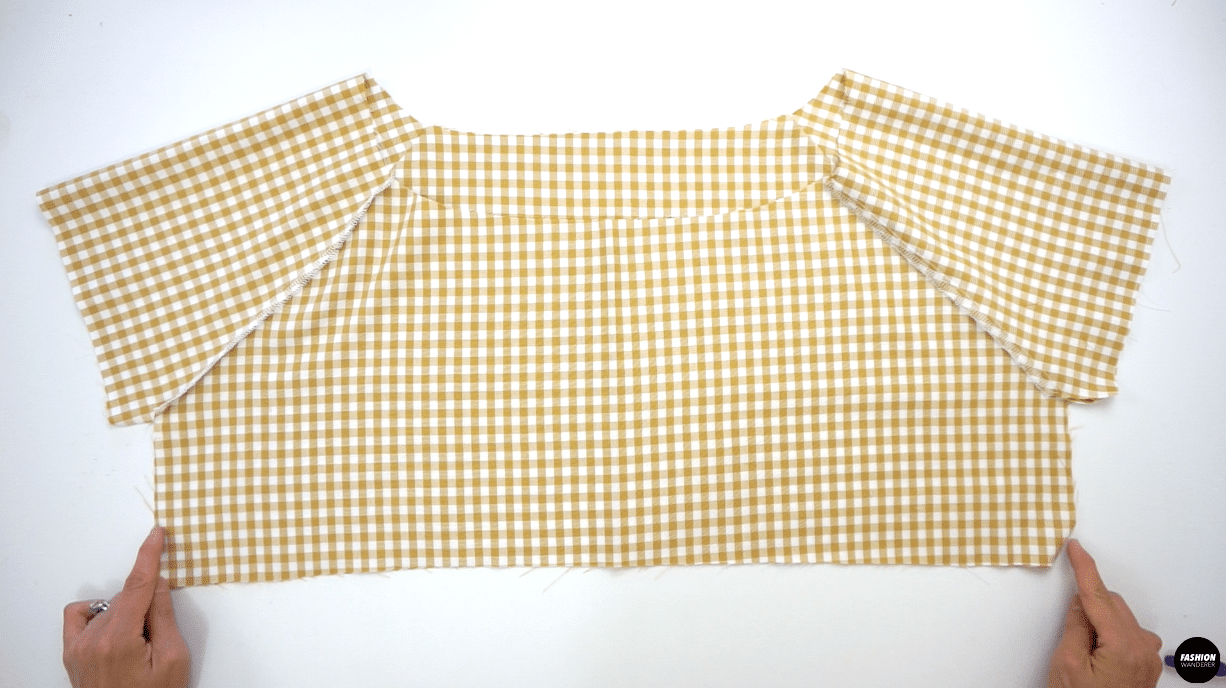
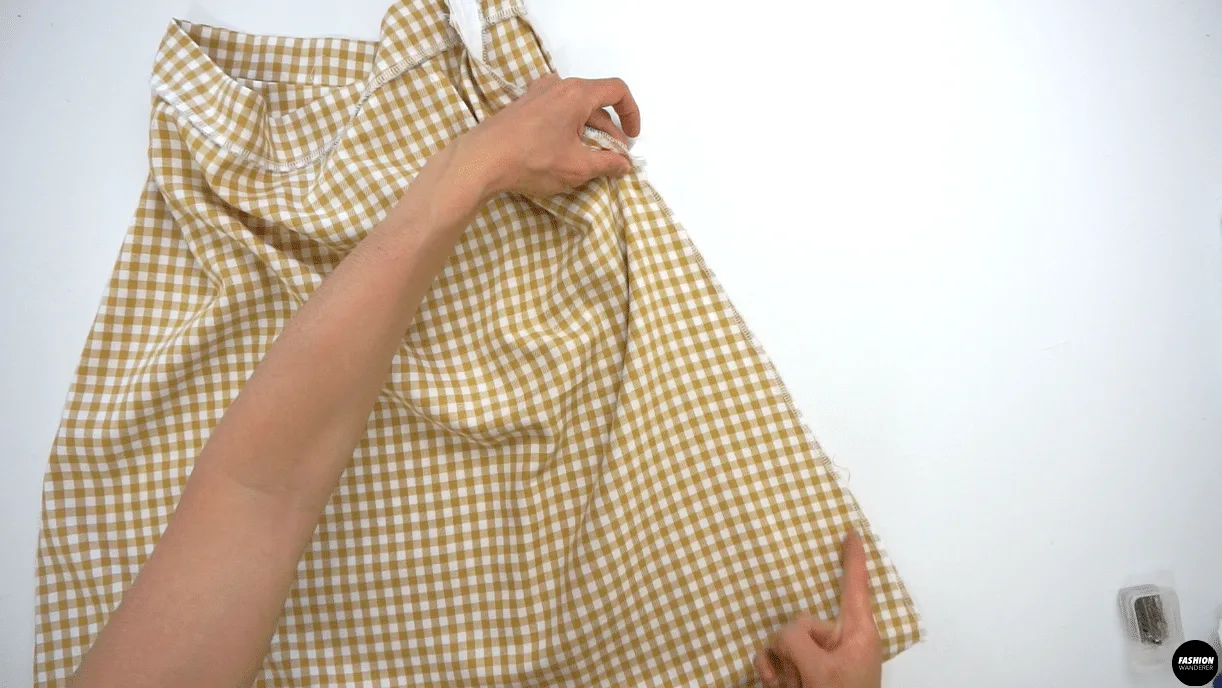
Assemble the sleeve pattern to the right side of the Front Top facing together, then sew along seam allowance and finish with overlock stitch. Also, join the Back Top piece to the remaining side of the back sleeve pattern. Press the seams toward the bodice before proceeding to the next step.


Fold the Top right side facing each other and close the underarm and side seam with straight and overlock stitch. Press the seam allowance toward the back piece.
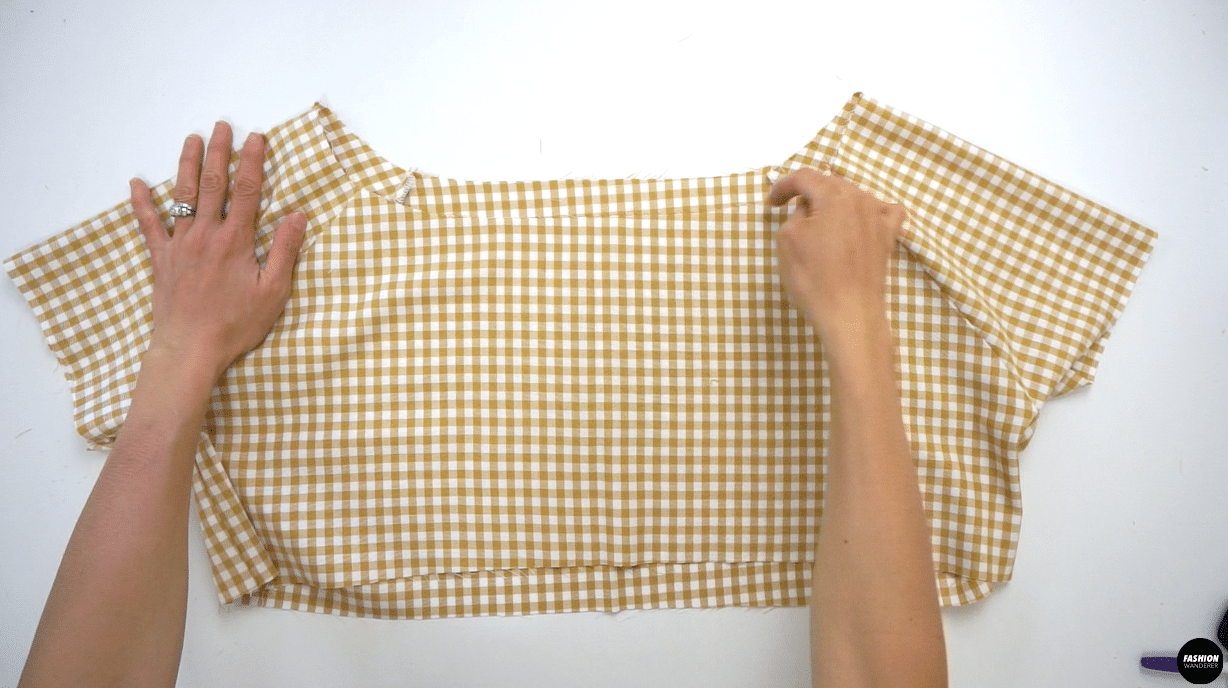
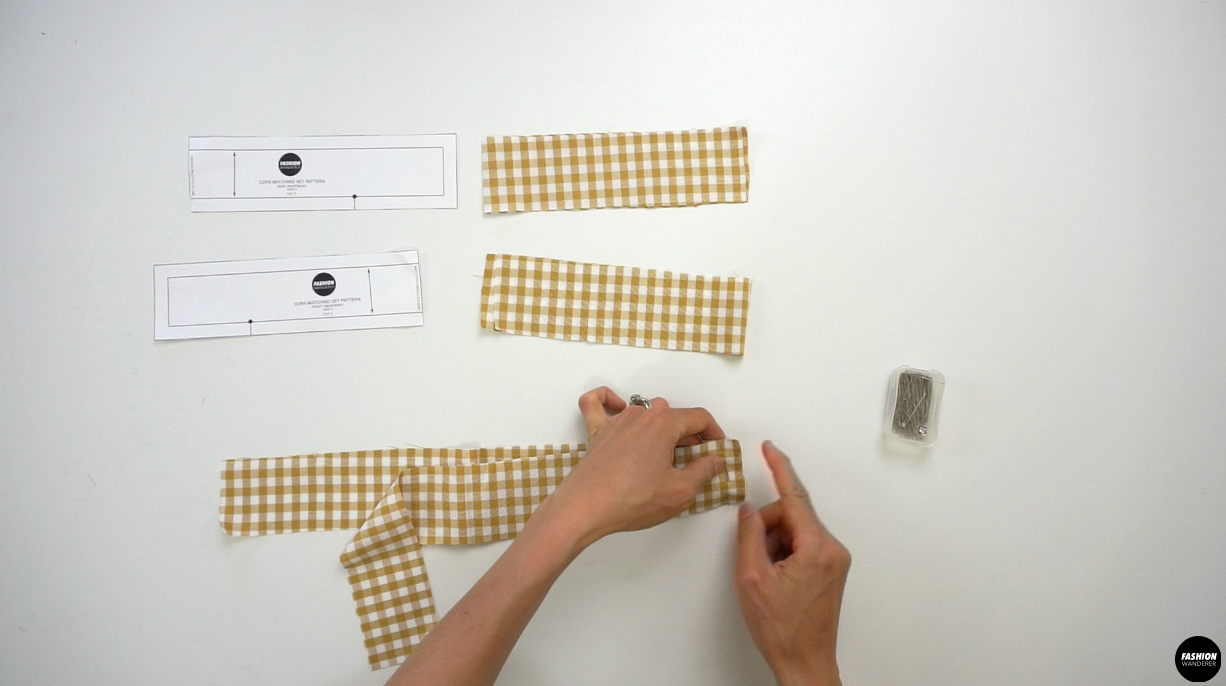
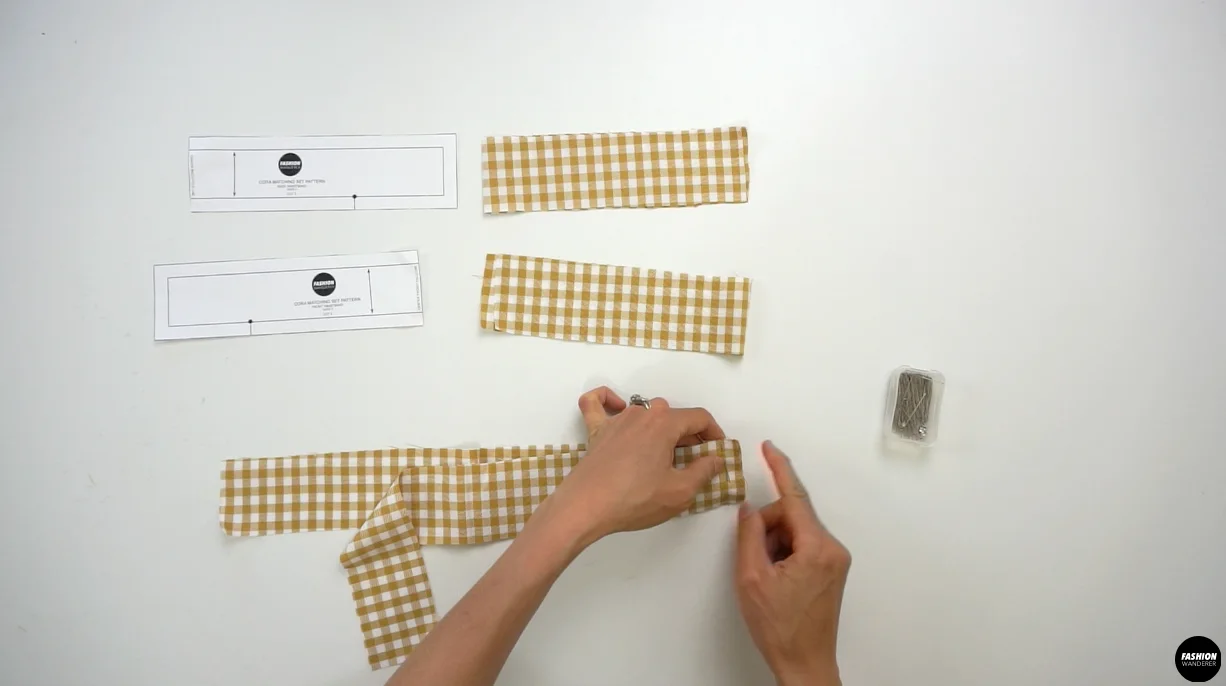
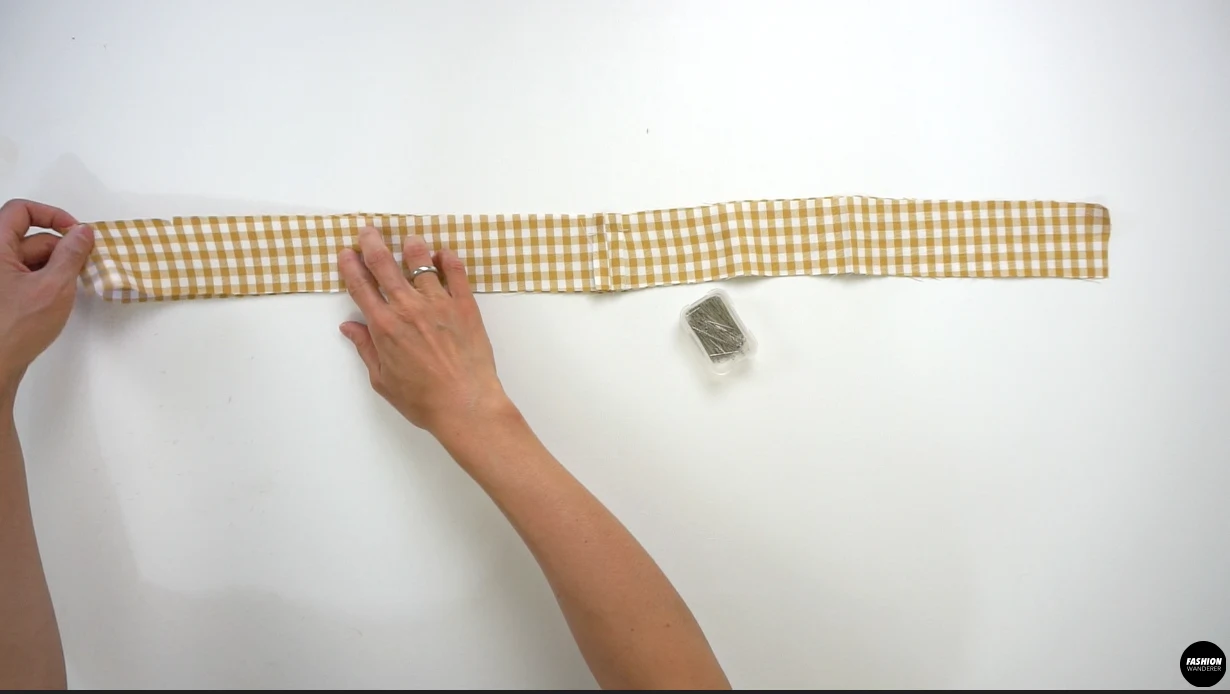
Overlock the cut edges along the neckline, armhole, and hemline of the top. Prepare the 3 pieces of elastic for neckline, sleeve and waist opening based on your size.
Join the elastic with preferred method and mark the mid point to slide through to the garment. Stretch as you sew to attach elastic band to the garment and fold over to sew a cover over the elastic.


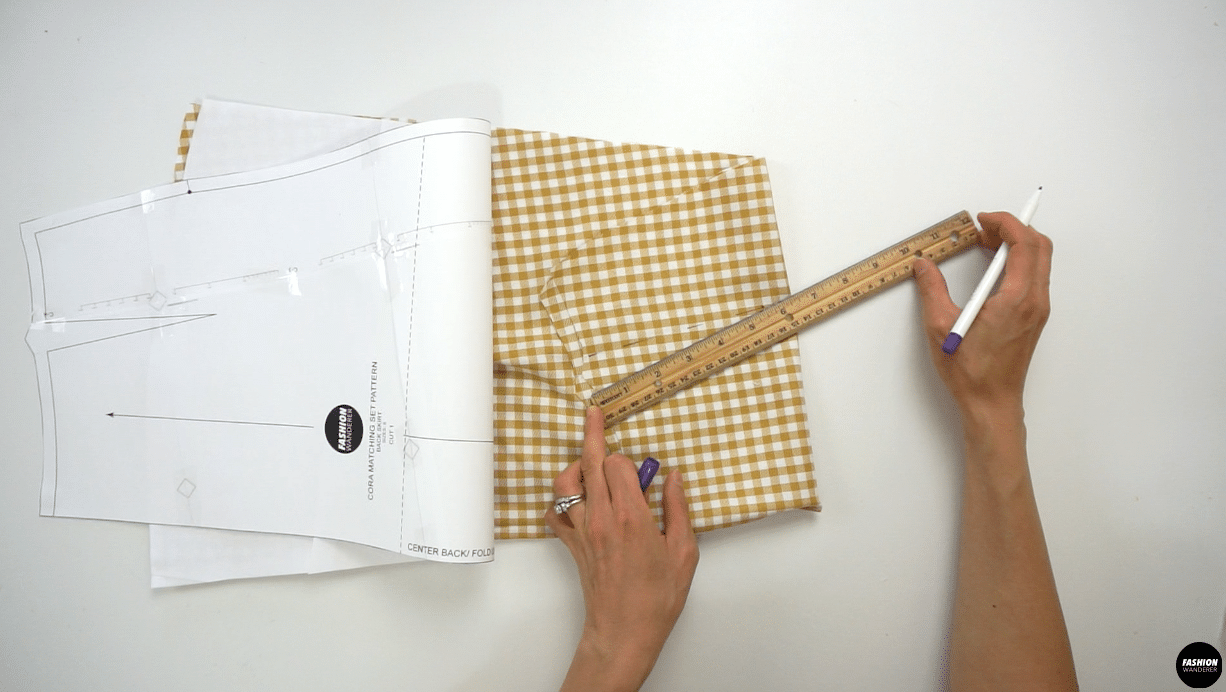
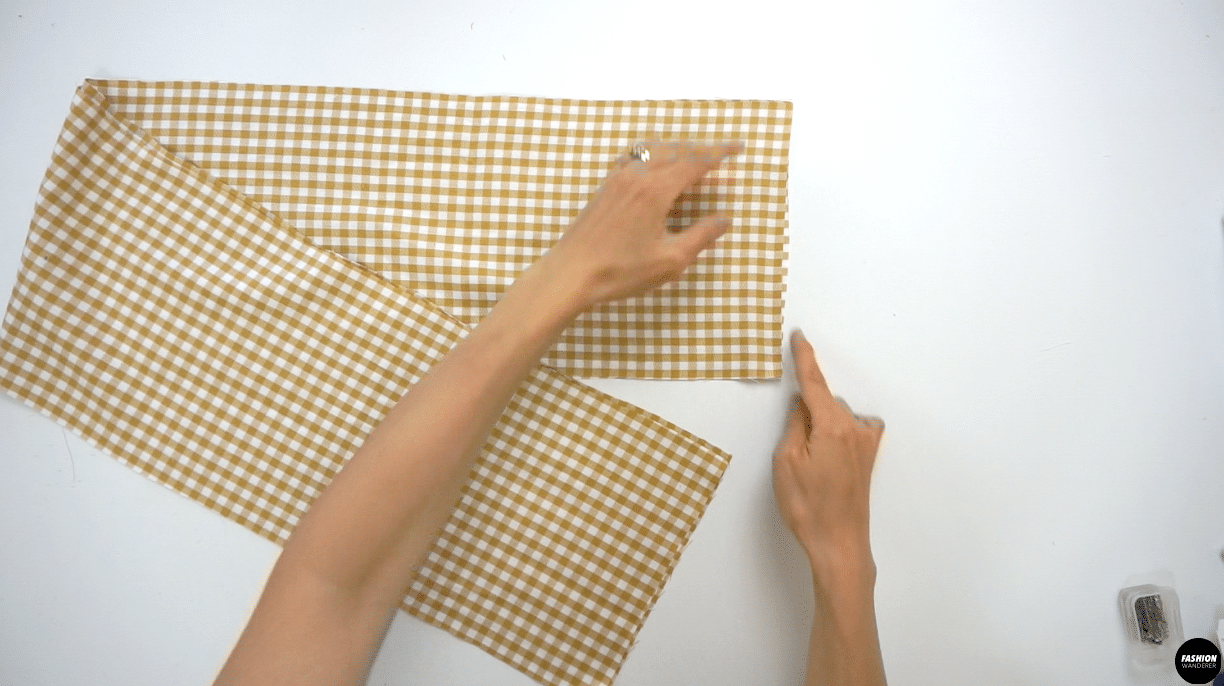
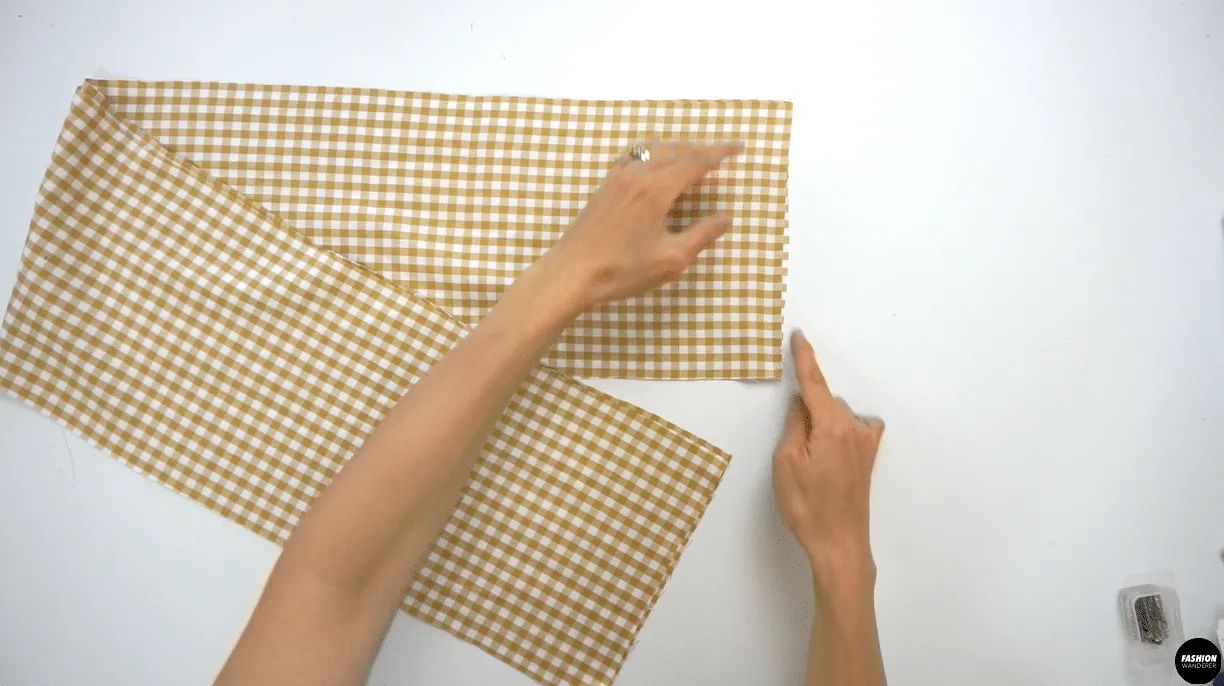
Transfer the dart point and dart leg to the Front and Back Skirt, then sew the marked dart line. Instead of backstitch, tie a double knot to secure the stitch on the dart. Press the dart towards both sides and away from center back or center front.
Place the Front and Back Skirt facing each other and sew one side seam together. For the left side, you’ll need to overlock or zigzag stitch to prevent the raw edges from unravelling.
Join the waistband pieces together on the right side and press seam open. Next, place right sides of the waistband pieces together and sew lengthwise. Press with iron to shape the waistband.
Match the Left side seam of the skirt and waistband to pin, sew along the waistline and finish with overlock stitch. Press the seam allowance facing down before attaching the zipper.
Use zipper foot and insert the invisible zipper on the skirt and sew on both side with ⅜” width seam allowance. Close the side seam from hemline to where the zipper starts. Press the seam open.
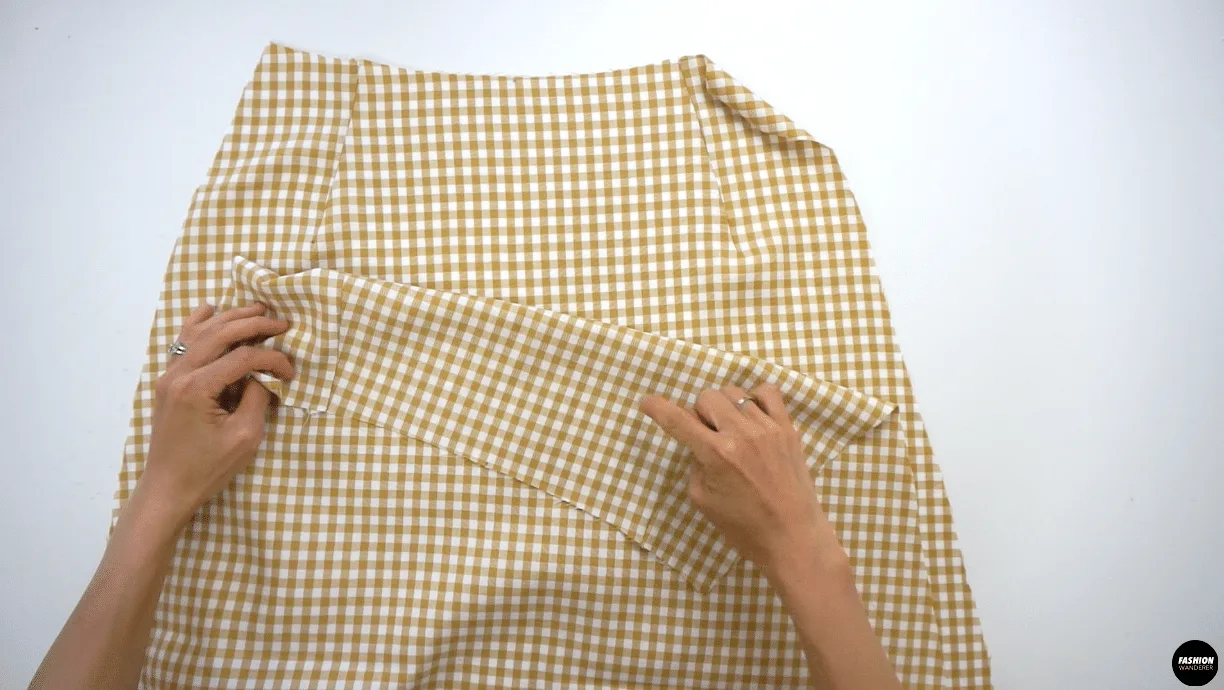
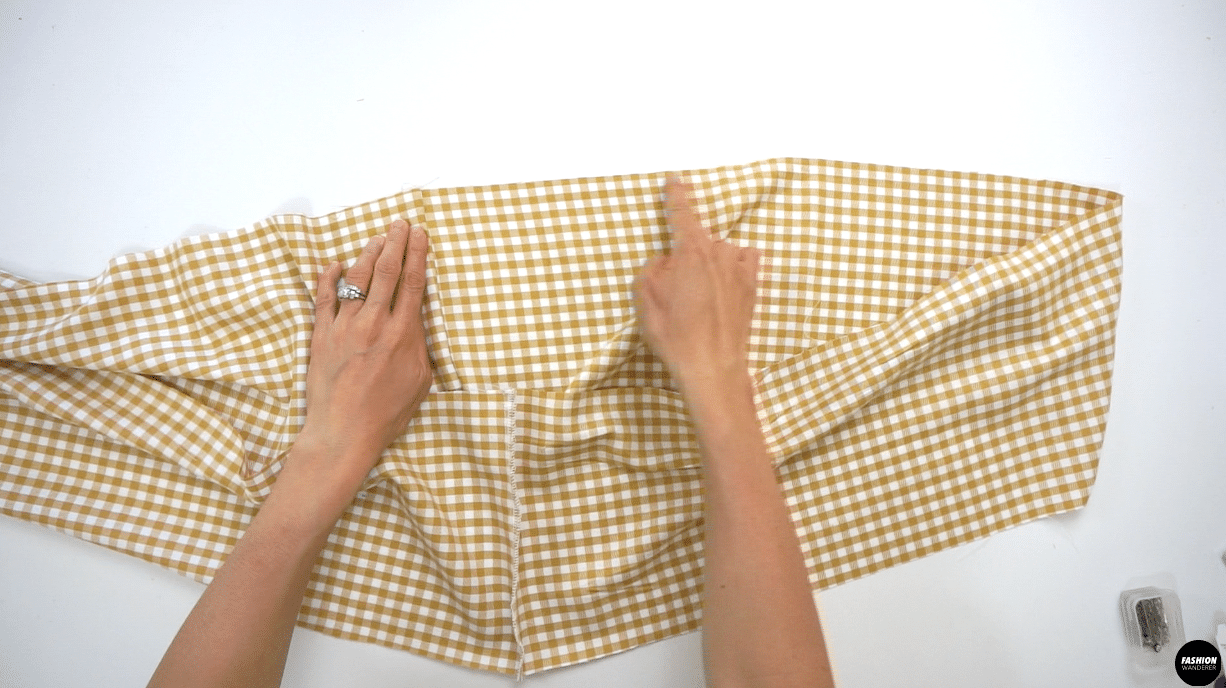
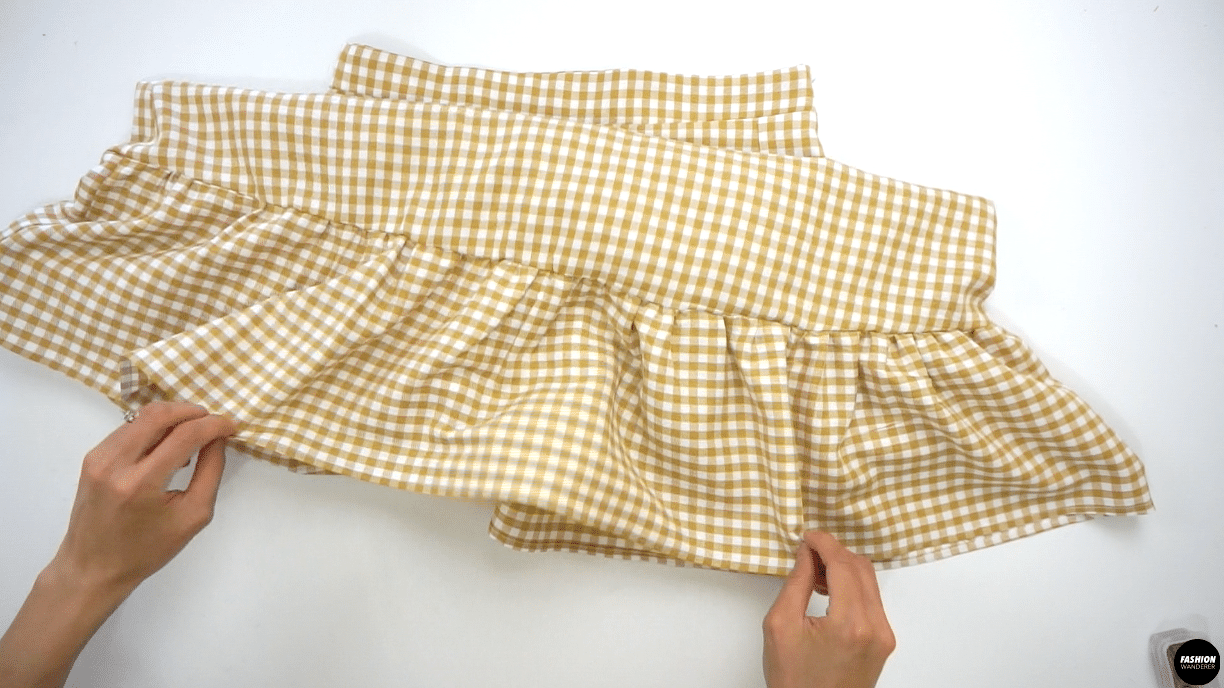
Place the Ruffle Hem Skirt pieces facing each other and sew straight stitch. Press the seam in one direction. Add double 3.5 stitch length along the lengthwise side of the piece.
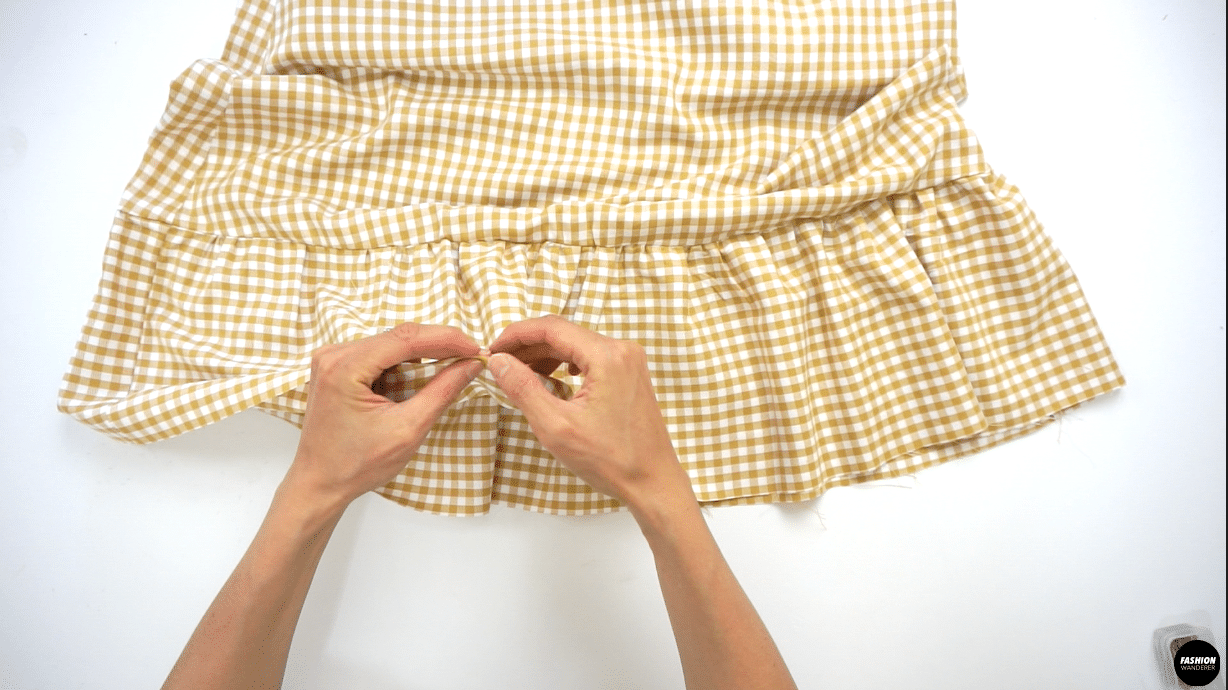
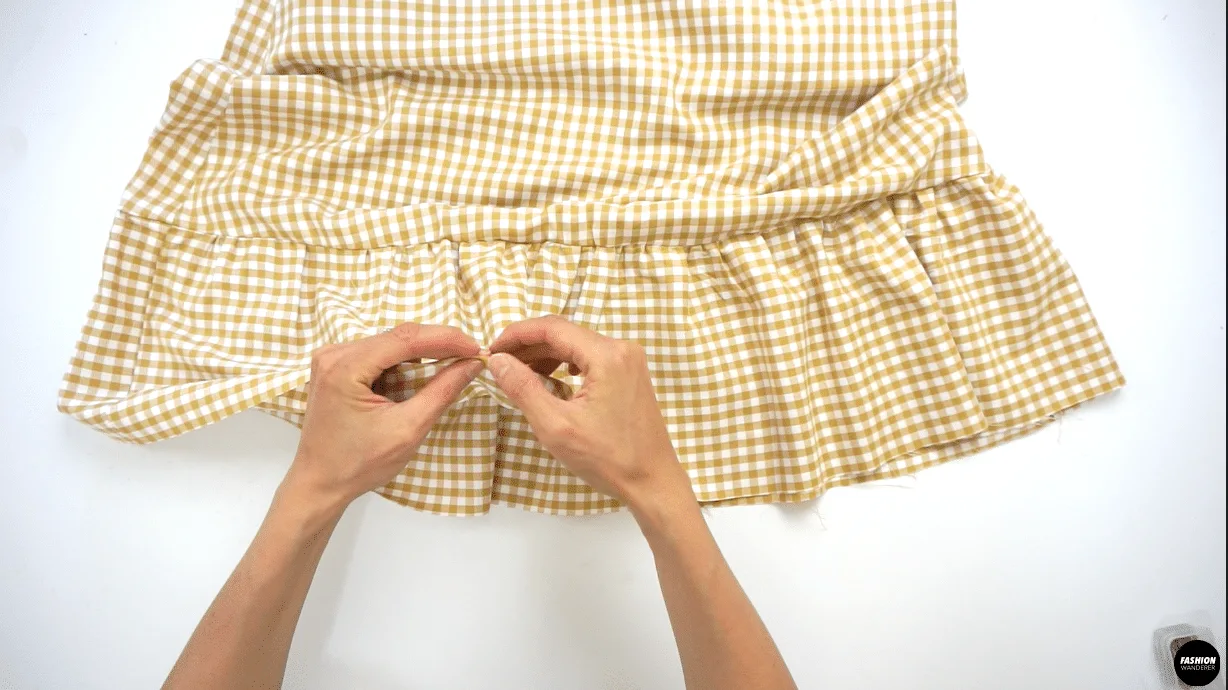
Mark the half point of the pieces on front and back. Pin the mark of the skirt and ruffle pattern, and start slowly pulling the back thread to evenly create gathering.
Attach the ruffle to the skirt with ⅜” width seam allowance and finish with overlock stitch. Press the seam allowance facing towards the ruffle. Finish the skirt with double fold hemming to create clean and professional result on Cora top and skirt matching set.


DIY Crop Top Midi Skirt Matching Set Sewing Tips


Sewing a top and skirt using elastic, zipper, and different finishing on seam looks intimidating for any beginner. However, this step by step tutorial guides you to sew hem, invisible zipper, and manual gathering to sew ruffles for hem of the skirt.
In this tutorial, all inner seam allowances are finished with Serger using overlock stitch to give store-bought quality finishes. However, if you do not own Serger, you can easily adjust your sewing machine to create zigzag stitch or add additional seam allowance to the sewing pattern to create French seam for alternate way to easily finish a seam.
Before jumping into the sewing project, review these sewing tips to easily understand the process and help you to avoid any mistakes while sewing.
- Sewing Needle: When sewing cotton, linen or polyester gingham fabric, you may keep using universal sewing needle size 80/12. These needles are most commonly used sewing machine needle and can be used with any woven synthetic fabrics. For lighter fabric, go with needle size 70/10 and for slightly heavier weight fabric, use size 90/14 to get the best results.
- Thread: The 100% polyester thread or all-purpose thread is recommended for this project. If you select other content of fabric, make sure the weight is 50 wt which is identical to all-purpose thread. Gutermann has great 100% polyester thread that are great for sewing garments.
- Stitches: For any straight stitch to join the seams or hemming, adjust the stitch length to 2.5mm and the standard tension is 4. This set up is good starting point for any medium weight fabrics. If you are working with lightweight fabric, adjust the stitch length to shorter between 1.8 or 2.5mm. For gathering manually, always change the stitch length to 3.5 to pull the thread smoothly.
- Elastic: Sew elastic using zigzag stitch or longer straight stitch so it allows stretch. When sewing elastic to the garment, always finish the hem of the garment first, and pin the evenly distributed mark for gathering. Elastic is stretched between 3-8%, 8% makes the garment hug the body. Generally, when sewing staying within 5% stretch is ideal.
- Zipper: Always press the zipper tape before attaching to the garment. It will help you to sew cleanly and sew double stitching to get close to the seam. Using invisible zipper foot is suggested instead of regular sewing foot since the zipper coil will slide through easily to sew on the tape.
Gingham fabric is commonly made with either polyester or cotton fabric, which are the best options for beginner. It is not stretchy and gives a rigid seam line when sewn that does not pucker without adjusting the tension. The fabric used in this project is medium weight, so it does not require lining on the skirt nor interfacing for the waistband.
Always check the condition of sewing needle to make sure if they are dull or bent before starting sewing project. Knowing when to replace sewing needle on the sewing machine is very important step for every sewer!
Use these sewing tips and hacks to complete the Cora crop top and midi skirt easily without mistakes anymore.


DIY Cora Top Skirt Matching Set
Do you have cute crop top with high waisted midi skirt that goes together? If it is your first time sewing elastic and invisible zipper, this matching set including step by step instructions is so easy to follow.
The Cora matching set features convertible off shoulder or regular boat neckline with comfortable elasticized sleeve and waist to hug the body. Also, the high waisted midi skirt with ruffled hemline gives a feminine touch to the outfit that makes it a beautiful and fun summer piece to add to your DIY wardrobe.
From elastic on the top to side seam zipper on the skirt, the two piece garment consists of simple and functional design elements. Following the sewing pattern and complete tutorial will help you to achieve these details with a professional result.
Materials
- Cora Matching Set Sewing Pattern
- Gingham Fabric 1¾ yard for 60” width or 2½ yard for 45” width
- 5/16” Width Elastic
- 9” Long Invisible Zipper
Tools
- Sewing Machine
- Serger
- Zipper Foot
- Straight Pins
- Fabric Scissors
- Measuring Tape
- Water Erasable Pen
- Fabric Ruler
- Thread
Instructions
For this Cora top skirt matching set tutorial, start by assembling the pattern pieces:
1 piece of Front Top
1 piece of Back Top
2 pieces of Sleeve
1 piece of Front Skirt
1 piece of Back Skirt
2 pieces of Front Waistband
2 pieces of Back Waistband
2 pieces of Ruffle Hem Skirt
How to Make Puff Sleeve Crop Top
- Place right side of the Sleeve pattern to the right side of the Front Top facing each other, match the single notch in the middle and pin along the cut edge. Sew ⅜” seam allowance and finish with overlock stitch. Press the seam allowance toward the bodice.
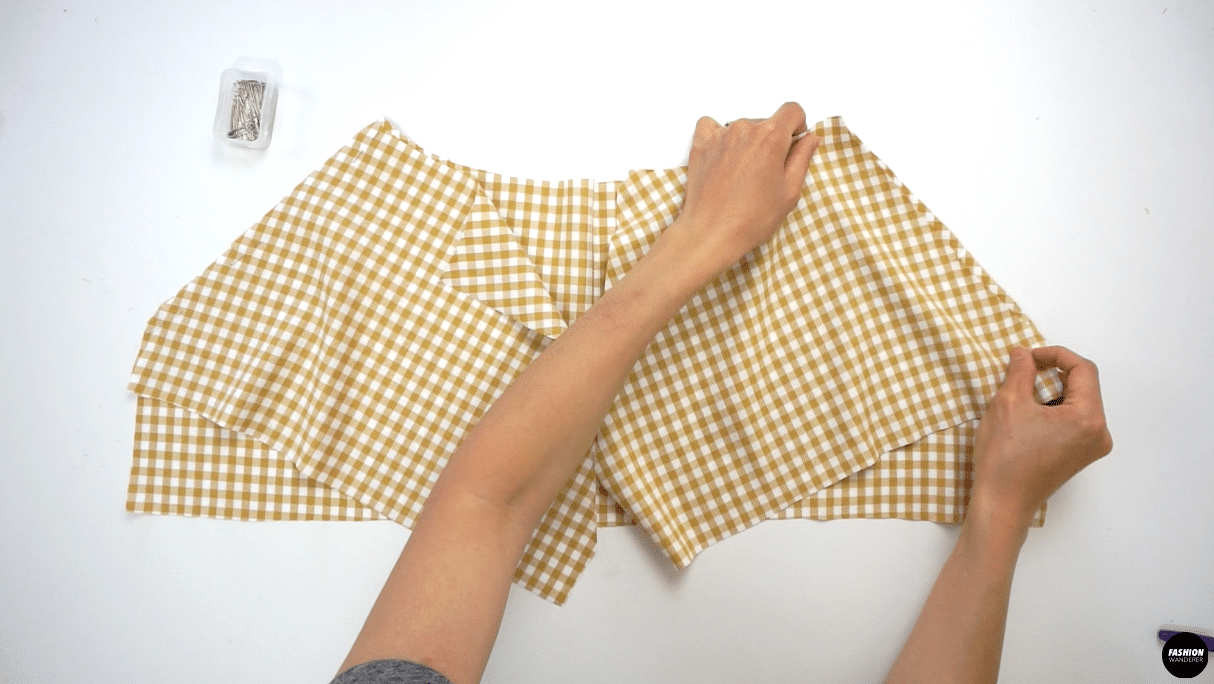

- Next, place the back side of the Sleeve facing the right side of the Back Top pattern, match the double notch in the middle and pin along the edge. Sew ⅜” seam allowance and finish with overlock stitch. Press the seam allowance toward the bodice.
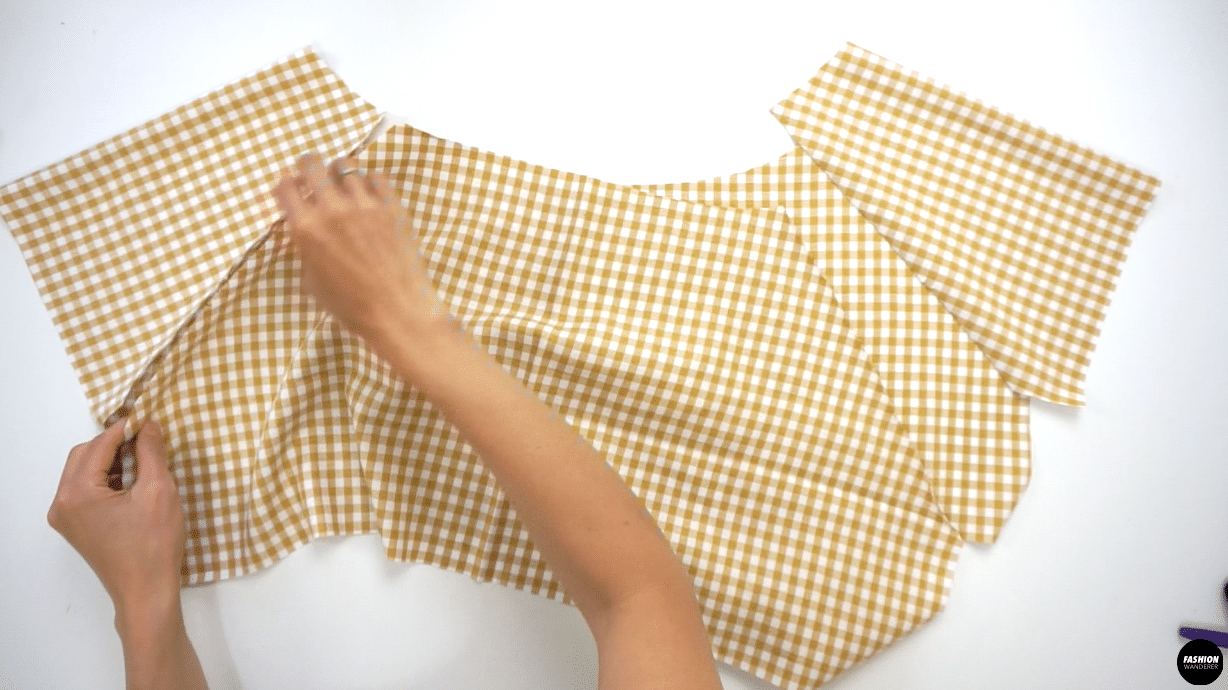

- Flip the top inside out and close the underarm of the Sleeve, and side seam of the Top and Back bodice with ⅜” straight stitch and finish with overlock stitch. Press the seam allowance toward the Back Top.

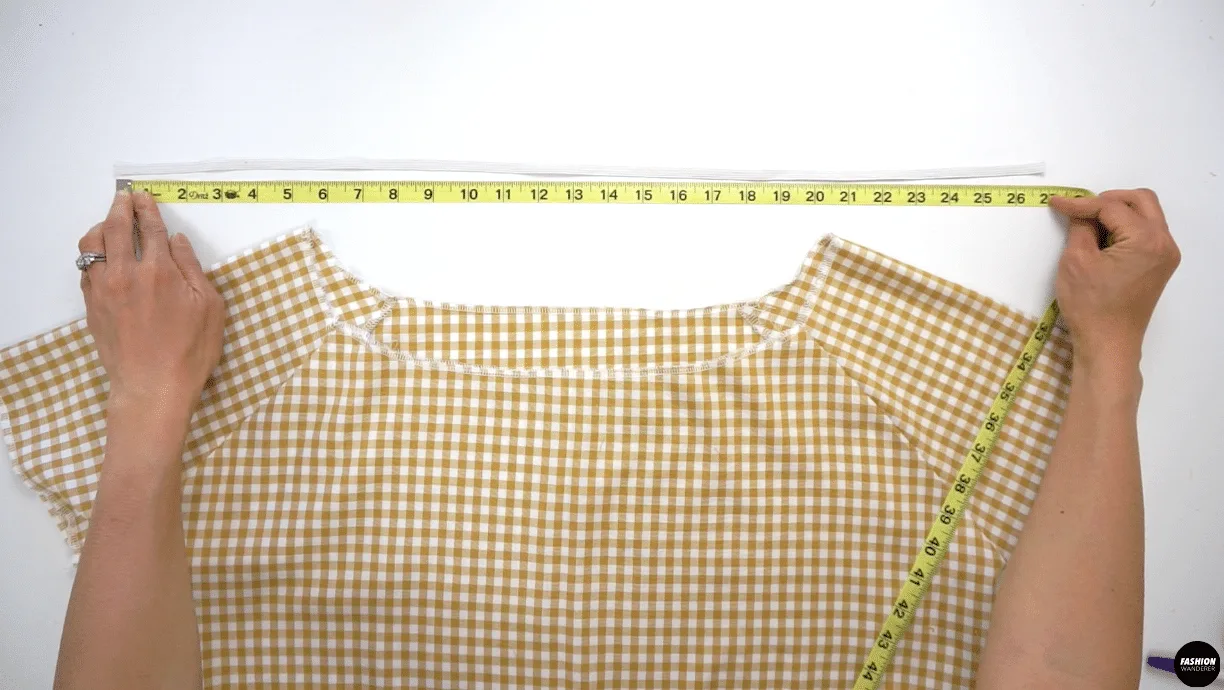
- Use overlock stitch to sew around the front and back neckline and hemline of the top.

- For Sleeve, prepare 2 pieces of 10½” long 5/16” width elastic for size 6 sewing pattern. For size 4 the measurement is 10”, size 2 is 9½”, size 8 is 11”, size 10 is 11½” and size 12 is 12” long.
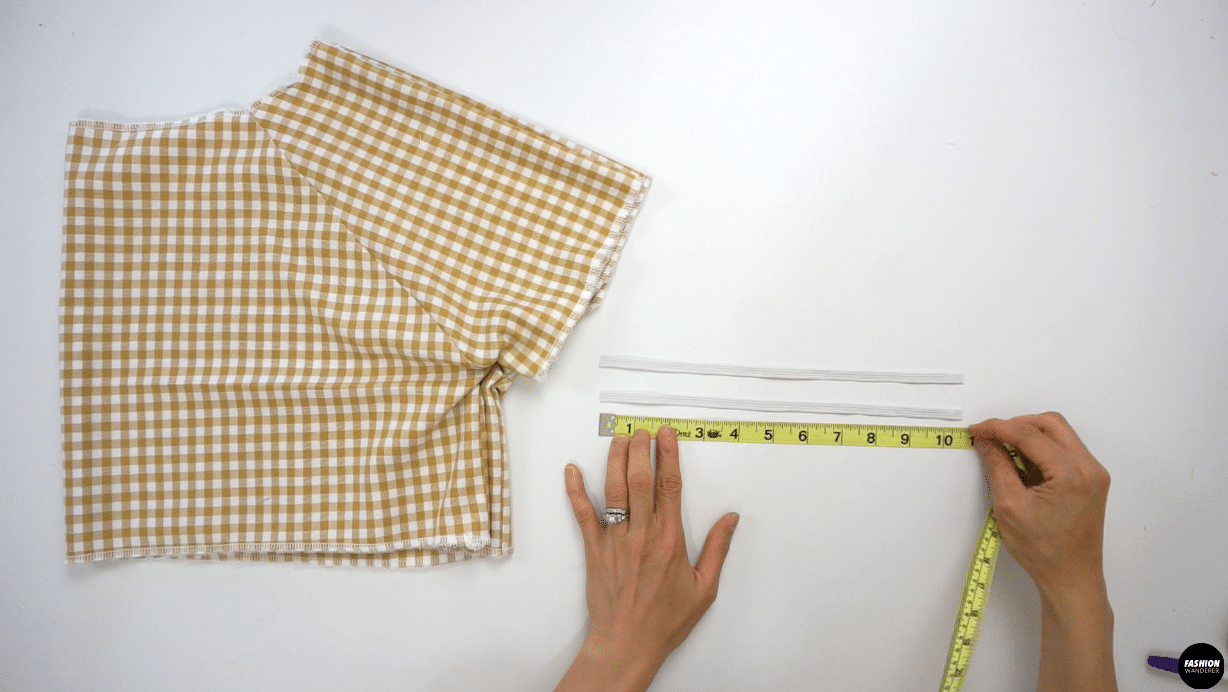

- For Neckline, prepare 1 piece of 26½” long 5/16” width elastic for size 6 sewing pattern. For size 4 the measurement is 26”, size 2 is 25½”, size 8 is 27”, size 10 is 27½” and size 12 is 28” long.

- For Hemline, prepare 1 piece of 30” long 5/16” width elastic for size 6 sewing pattern. For size 4 the measurement is 29”, size 2 is 27”, size 8 is 31”, size 10 is 32” and for size 12 is 34” long.


- Join the ends of elastic by overlapping ¼” and use back and forth straight stitch or zigzag stitch to secure the ends. Mark the elastic rounds by dividing into 4 points and slide the joined elastic through the wrong side of the garment. Match the marks with notches and pin around to evenly distribute the gathering. Stretch as you sew straight stitch. Lastly, fold over the elastic to the wrong side of the garment and edge topstitch around. Therefore, you won’t see the elastic on the finished garment.

How to Sew High Waisted Ruffled Midi Skirt
- Flip the sewing pattern of the Front Skirt and transfer the dart pin on the wrong side of the fabric with water erasable pen. Also, draw the dart leg using a ruler so it is easy to sew straight.

- Repeat the dart transfer on the wrong side of both Back Skirt pieces. Sew straight along the pen mark. Instead of backstitching, tie a double knot on the dart point to secure the ends. Press the dart away from Center Front and Center Back.

- Lay the right side of the Front Skirt and right side of Back Skirt facing each other. Sew the side seam on both sides with ⅜” straight stitch and finish with overlock stitch.

- Next, place the right side of the Front Waistband and Back Waistband facing each other, and close one side seam of the band with ⅜” straight stitch and press the seam open.
- Lay the right side of the Waistband facing each other and sew the top edge of the band lengthwise with ⅜” width seam allowance. Trim the corner on both pointy ends and flip the waistband inside out. Press with iron to shape the waistband.

- Match the Left side seam of the skirt and waistband. Pin along the front and back to sew ⅜” width seam allowance and finish with overlock stitch. Also, overlock stitch Left Front and Back Skirt pieces separately to prepare for the zipper. Press the seam allowance facing down or toward the skirt.


- Press the zipper tape and open the invisible zipper to place the right side of the zipper tape on the right side of the Front Skirt and sew ⅜” straight stitch with zipper foot. Next, place the left side of the zipper tape on the left side of the Back Skirt and sew ⅜” straight stitch.

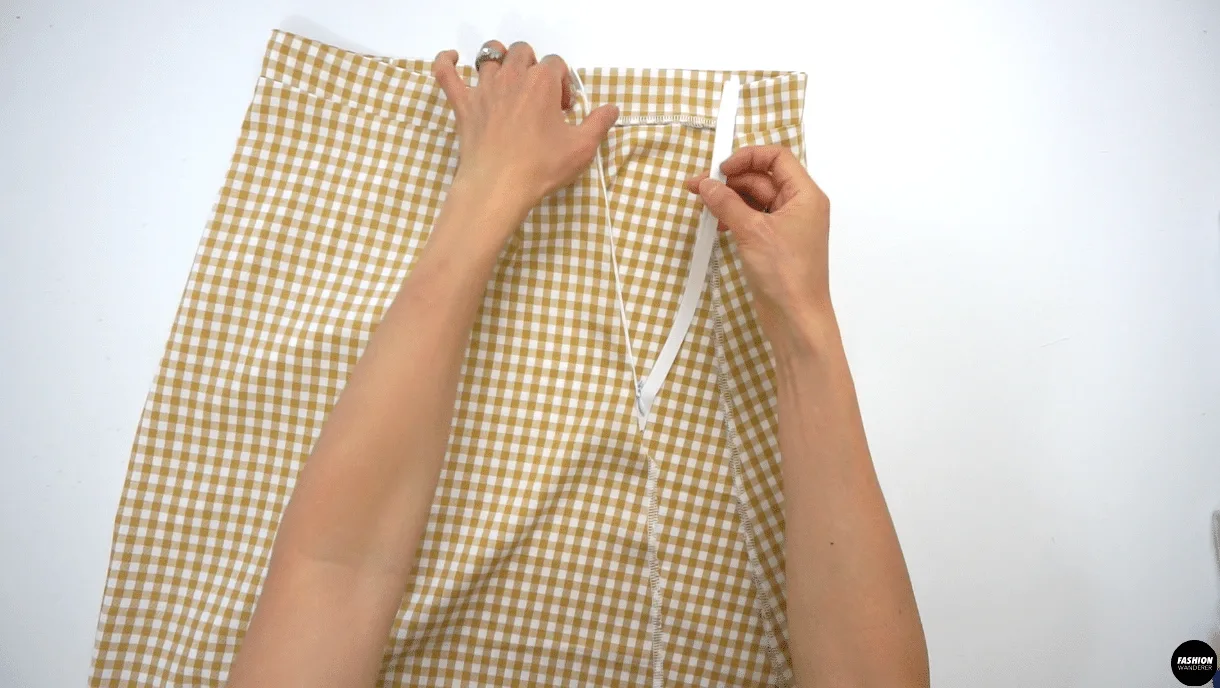
- Lastly, close the Left side seam with ⅜” seam allowance from the end of zipper to the hemline. Press the seam open.

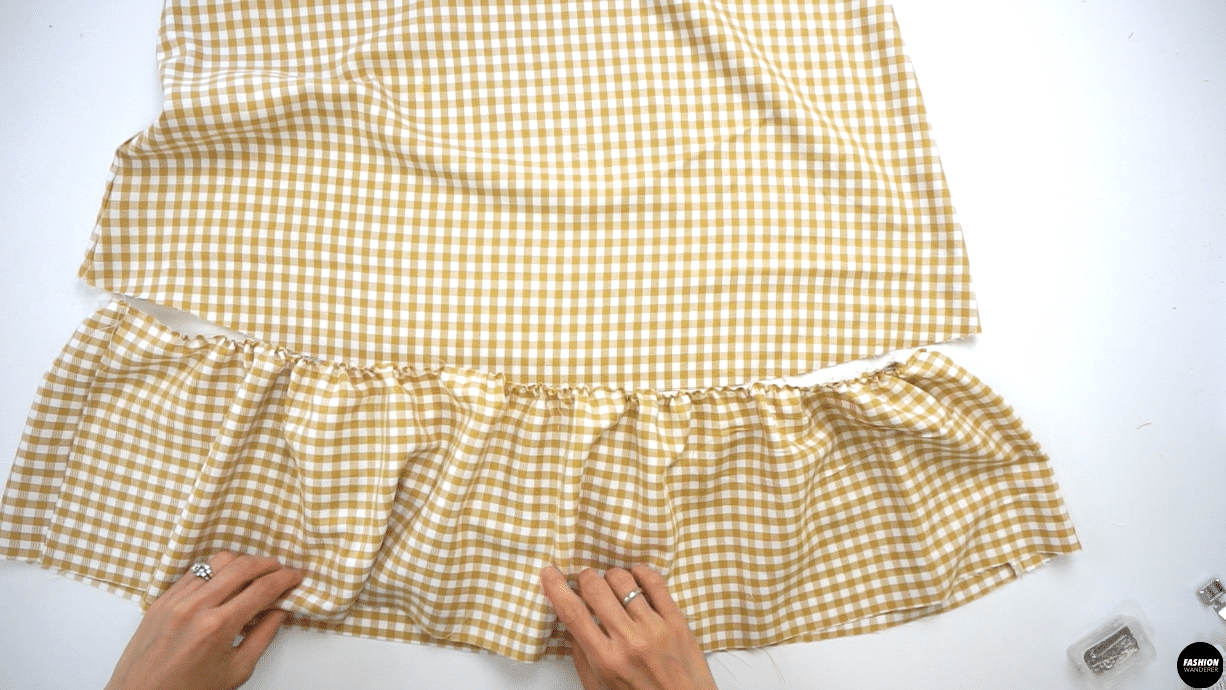
- Place the right sides of the Ruffle Hem Skirt towards each other and sew ⅜” width straight stitch and finish with overlock stitch. Press the seam on one side.
- Adjust the stitch length to 3.5 and double straight stitch lengthwise with ⅛” in between around the Ruffle Hem Skirt piece.

- Mark the center of the Front and Back Ruffle Hem Skirt piece and gently pull the back thread to start the gathering process. Match the notch and marked point, then pin each marked point and evenly distribute the gathering. Straight stitch ⅜” width and finish with overlock stitch. Lightly press on the gathering to make sure the seam allowance is facing down or toward the ruffle.

- Double fold the Ruffle Hem Skirt with ¼” width and straight stitch. Or you can use narrow hemming foot to make this finish even quicker.
- There you have it! You’ve sewn the Cora crop top and matching ruffled midi skirt set. Before you try them on, gently press the elastic openings with steam to give a finishing touch and make sure it is not crinkled on the skirt. Enjoy your new outfit with a cute pair of sandals and your favorite purse!


Recommended Products
As an Amazon Associate and member of other affiliate programs, I earn from qualifying purchases.


Trendy, Affordable Sewing Patterns for All Sizes


Tie Shoulder Jumpsuit Pattern


Palazzo Pants Sewing Pattern


Pocket Overall Romper Pattern


Wrap Maxi Skirt Sewing Pattern


Tie Back Top Sewing Pattern